
Fender Switchboard Quickstart Guide
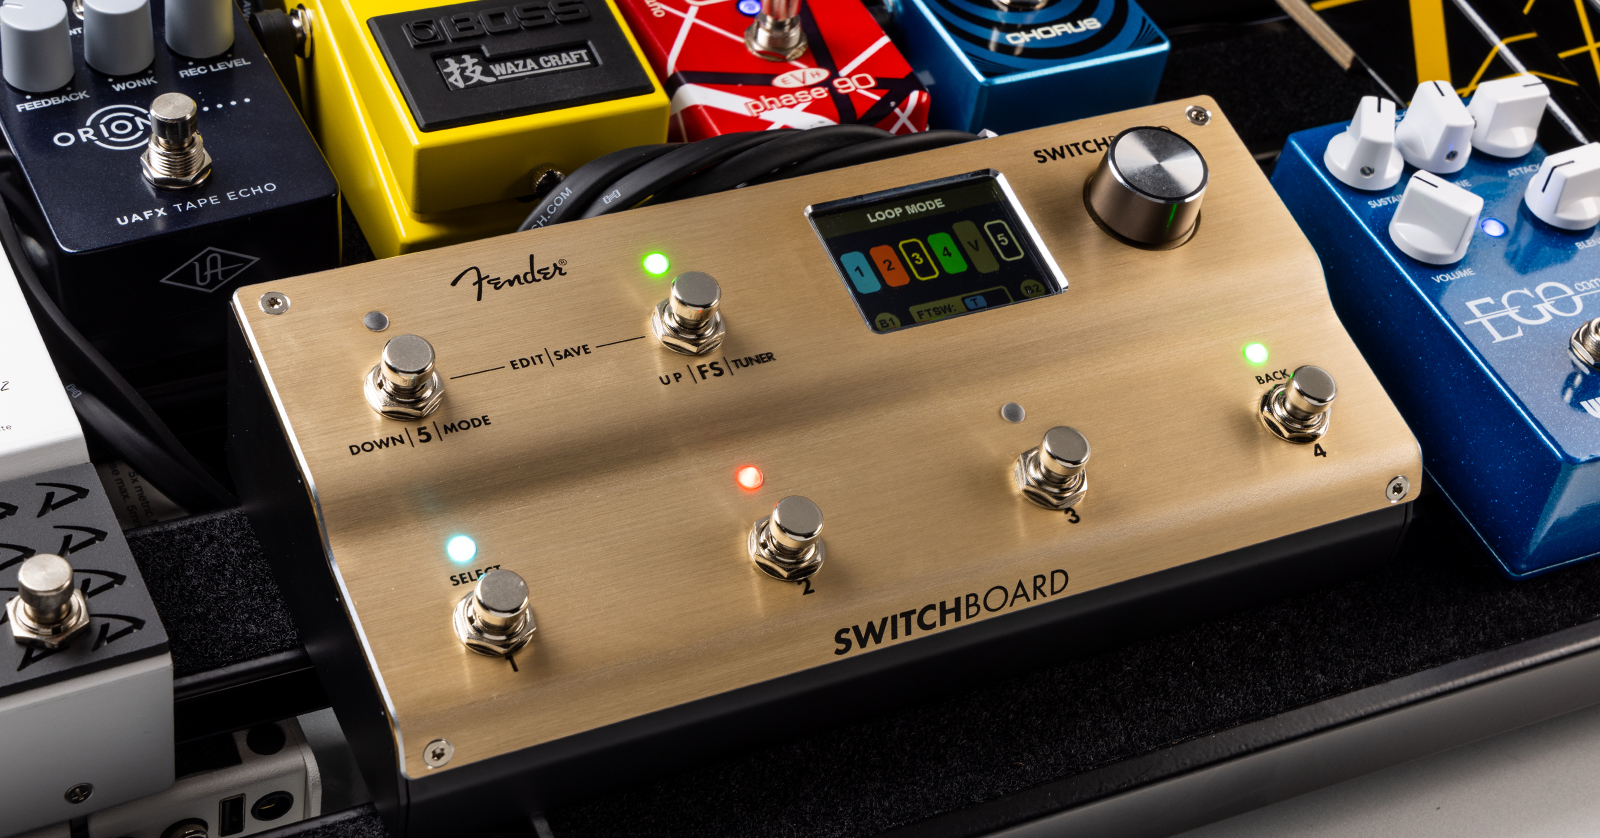
The Fender Switchboard Effects Operator lets you set up hundreds of signal-routing combinations for your own pedalboard, all recallable with a tap of a footswitch. You can also use it to control your amps with footswitch connections and MIDI. Let’s get started.
Register Your Purchase with Fender
Go to Fender.com and click on the person icon in the upper-right corner of the screen. Log in to your account or create a new one.
On your Account page, in the pane on the left and under Product Registration, click Add Products.
Enter your unit’s serial number and follow the prompts. Your unit will appear in the My Gear section.
Download the Owner’s Manual
To learn about all the Switchboard’s capabilities and to configure everything you need in each preset, you will need to download the owner’s manual for reference.
Go to the Fender Switchboard product page. Scroll down and click the Downloads tab. Download the owner’s manual.
Update the Firmware
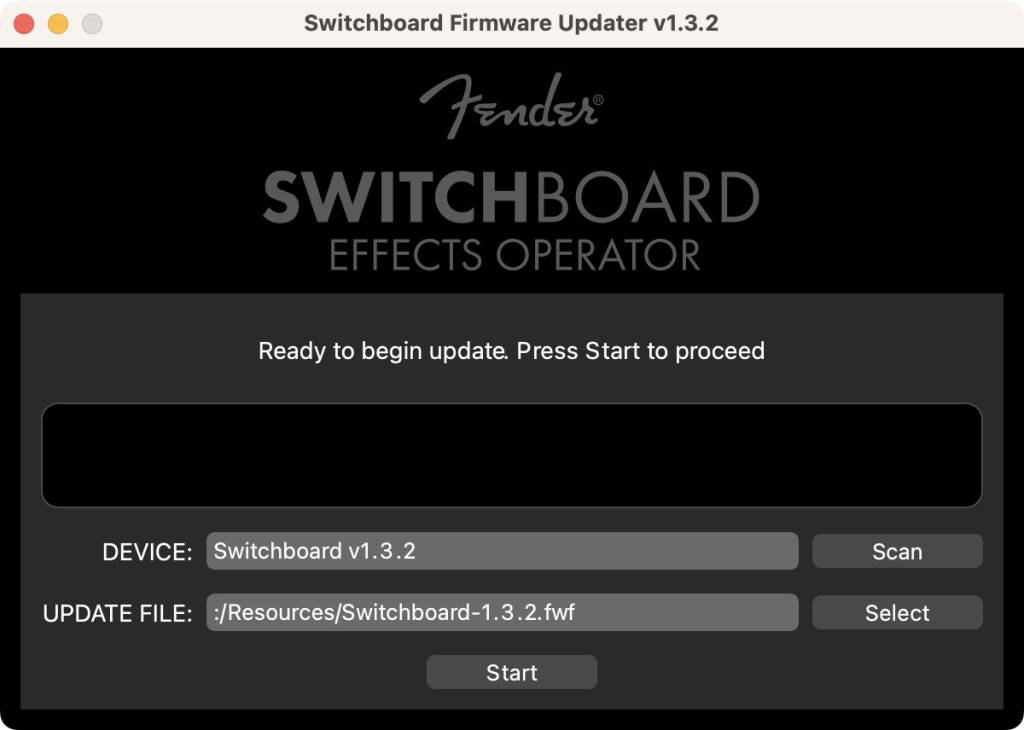
The Fender Switchboard firmware-update app on macOS
From time to time, Fender may release firmware updates to fix bugs and add additional features. To update your Switchboard, connect it to your Mac or your Windows PC with a USB-C cable, then run Fender’s update app.
- On your computer, go to the Fender Support Switchboard firmware update page.
- Download the newest version of the updater app for Mac or PC.
- Open the app.
- Connect the Switchboard using a USB-C data cable.
- Power on the Switchboard using a 9VDC power supply.
- In the app, click the Scan button.
Under Device, the app will detect your Switchboard and display the firmware version number already installed. Take note of this number.
Under Update File, you can see the version number of the newest firmware.
If the number is higher than the version already installed on your Switchboard, you need to perform the update. If not, you can quit the app and disconnect the USB cable.
To perform the update:
- Click Start.
- The app will display a progress bar during the update. At the end, the Switchboard will reboot.
- The app will display, “Update complete!”
IMPORTANT: During the firmware update, do not touch any controls on the Switchboard. Do not disconnect the USB cable or disconnect the power to the Switchboard. Do not quit the app on your computer or shut your computer down. Wait until the app displays, “Update complete!”
Fender releases a new version of the updater app for each new firmware. An old version of the app will not tell you if there is a newer version available. In the future, if you want to check to see if there is a newer version, go back to the Fender Switchboard firmware-update page on the website and download it.
Fender Switchboard Connections and Controls
TIP: Make sure the unit is powered down before you connect inputs and outputs.
Back Panel Connections
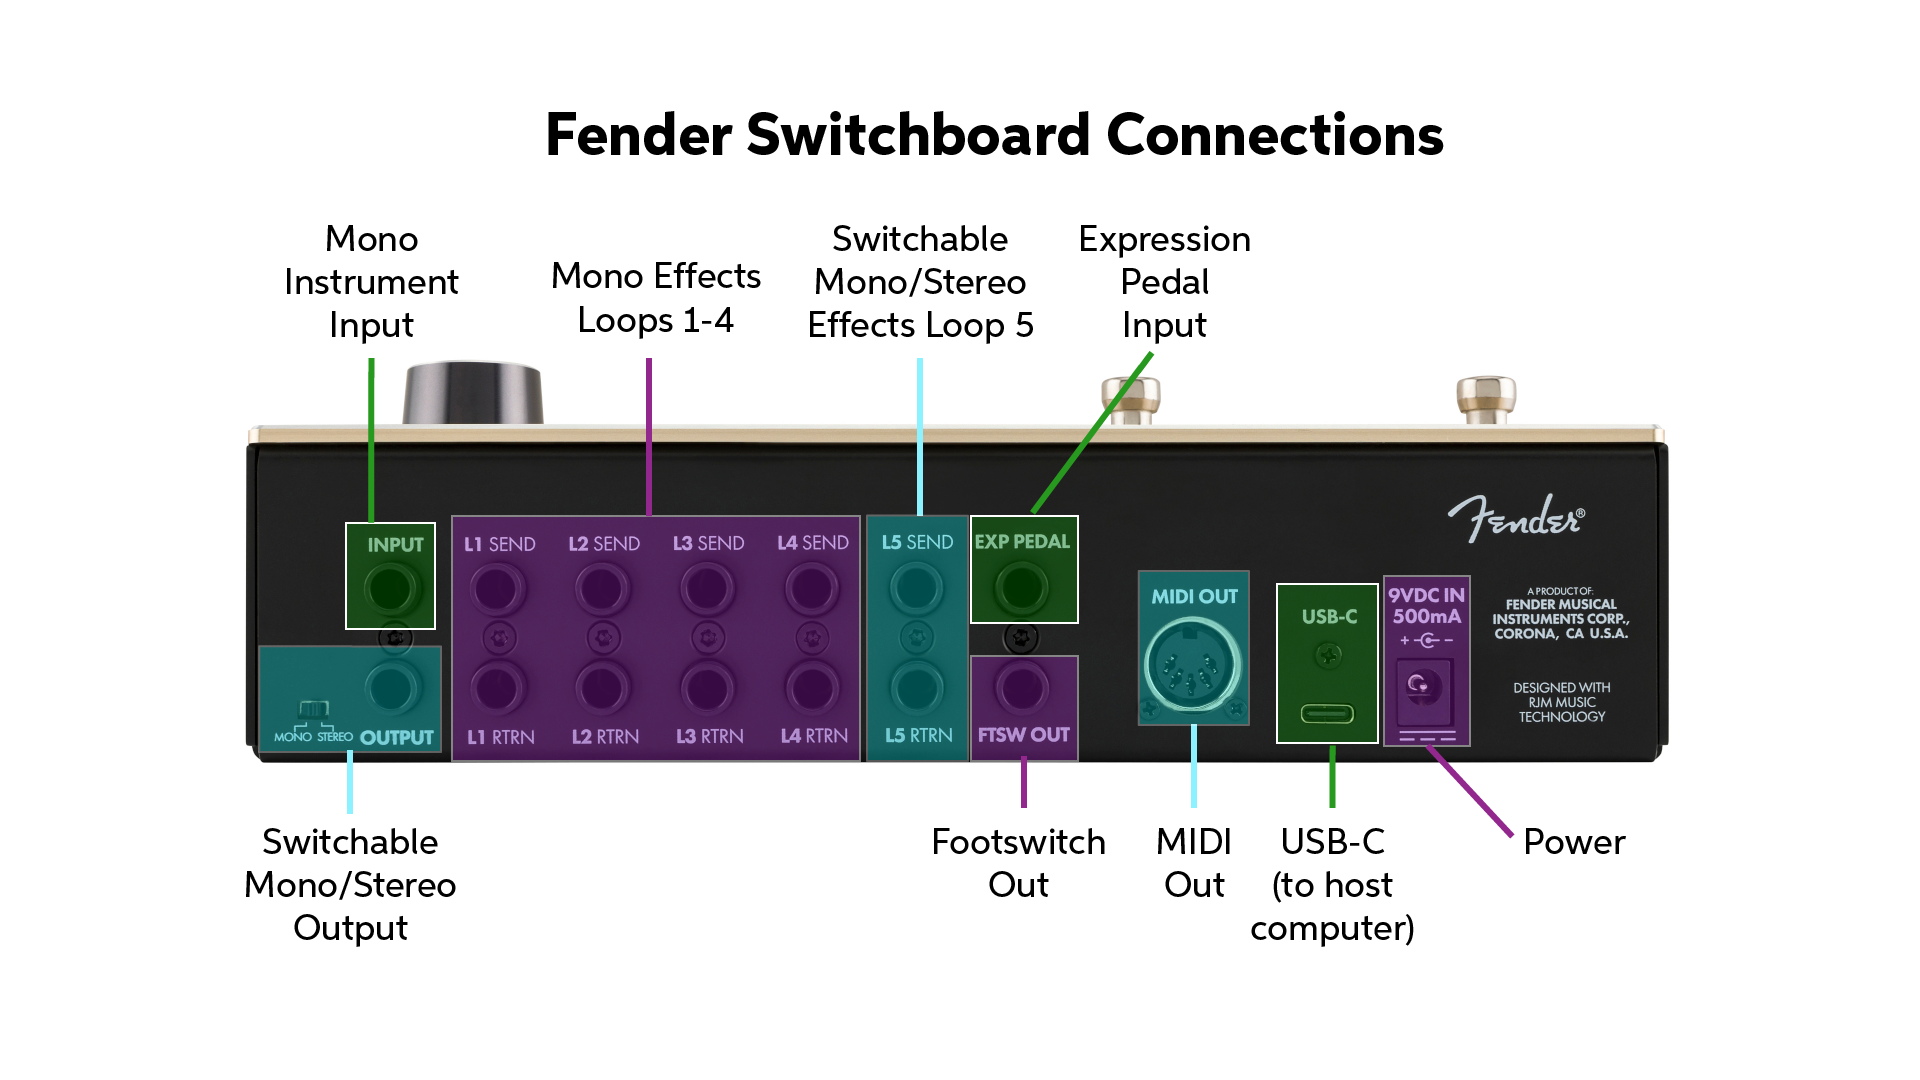
Fender Switchboard connections
Power
Power the Switchboard with a 9V 500mA pedalboard power supply (not included).
Mono Instrument Input
Connect your guitar or your signal chain with a 1/4-inch instrument cable.
Mono Effects Loops 1–4
Use 1/4-inch TS patch cables to connect an effects pedal or a group of pedals.
Switchable Mono/Stereo Effects Loop 5
This effects loop can be used as a mono send and return like Loops 1–4, or, using 1/4-inch TRS connectors, it can be configured for a stereo effect.
Switchable Mono/Stereo Output
The Output is where you connect the Switchboard to the next pedal in your signal path or to your amplifier. In Mono mode, use a regular TS instrument cable.
Move the switch from Mono to Stereo, and Effects Loop 5 is configured for TRS stereo send and return, and Output is configured for TRS stereo output.
Expression Pedal Input
Connect a 1/4-inch TRS cable from an external expression pedal (not included) for use as a volume pedal. By default, this is in the fifth position of the signal path, but you can change its position using Loop Mode Editor. To configure your expression pedal to work correctly with the Switchboard, you must calibrate its range in the Global Settings menu. Learn more in the Fender Switchboard Owner’s Manual > Loop Mode > Internal Volume Pedal.
Footswitch Out
You can use the Switchboard in place of a separate footswitch for your amplifier or for many effects pedals that have a footswitch input. Examples would be for channel switching, engaging reverb, or tap tempo. Connect a 1/4-inch TRS cable from this output directly to the footswitch input on your effect or amp. Learn more in the Fender Switchboard Owner’s Manual > Basics and Setup.
MIDI Out
You can use the Switchboard to send MIDI commands to pedals and amplifiers that accept MIDI control. You can configure each preset to send different MIDI messages.
Connect a 5-pin DIN MIDI cable to use the Switchboard to send a MIDI PM (Program Change) command to outboard gear when you load a new preset. You can also configure the Switchboard’s external expression pedal to send CC (Continuous Controller) commands to external gear. Learn more in the Fender Switchboard Owner’s Manual > Preset Editor > MIDI Edit Menu.
USB-C
This port is used to update the Switchboard’s firmware, as we explained above.
Front Panel Controls
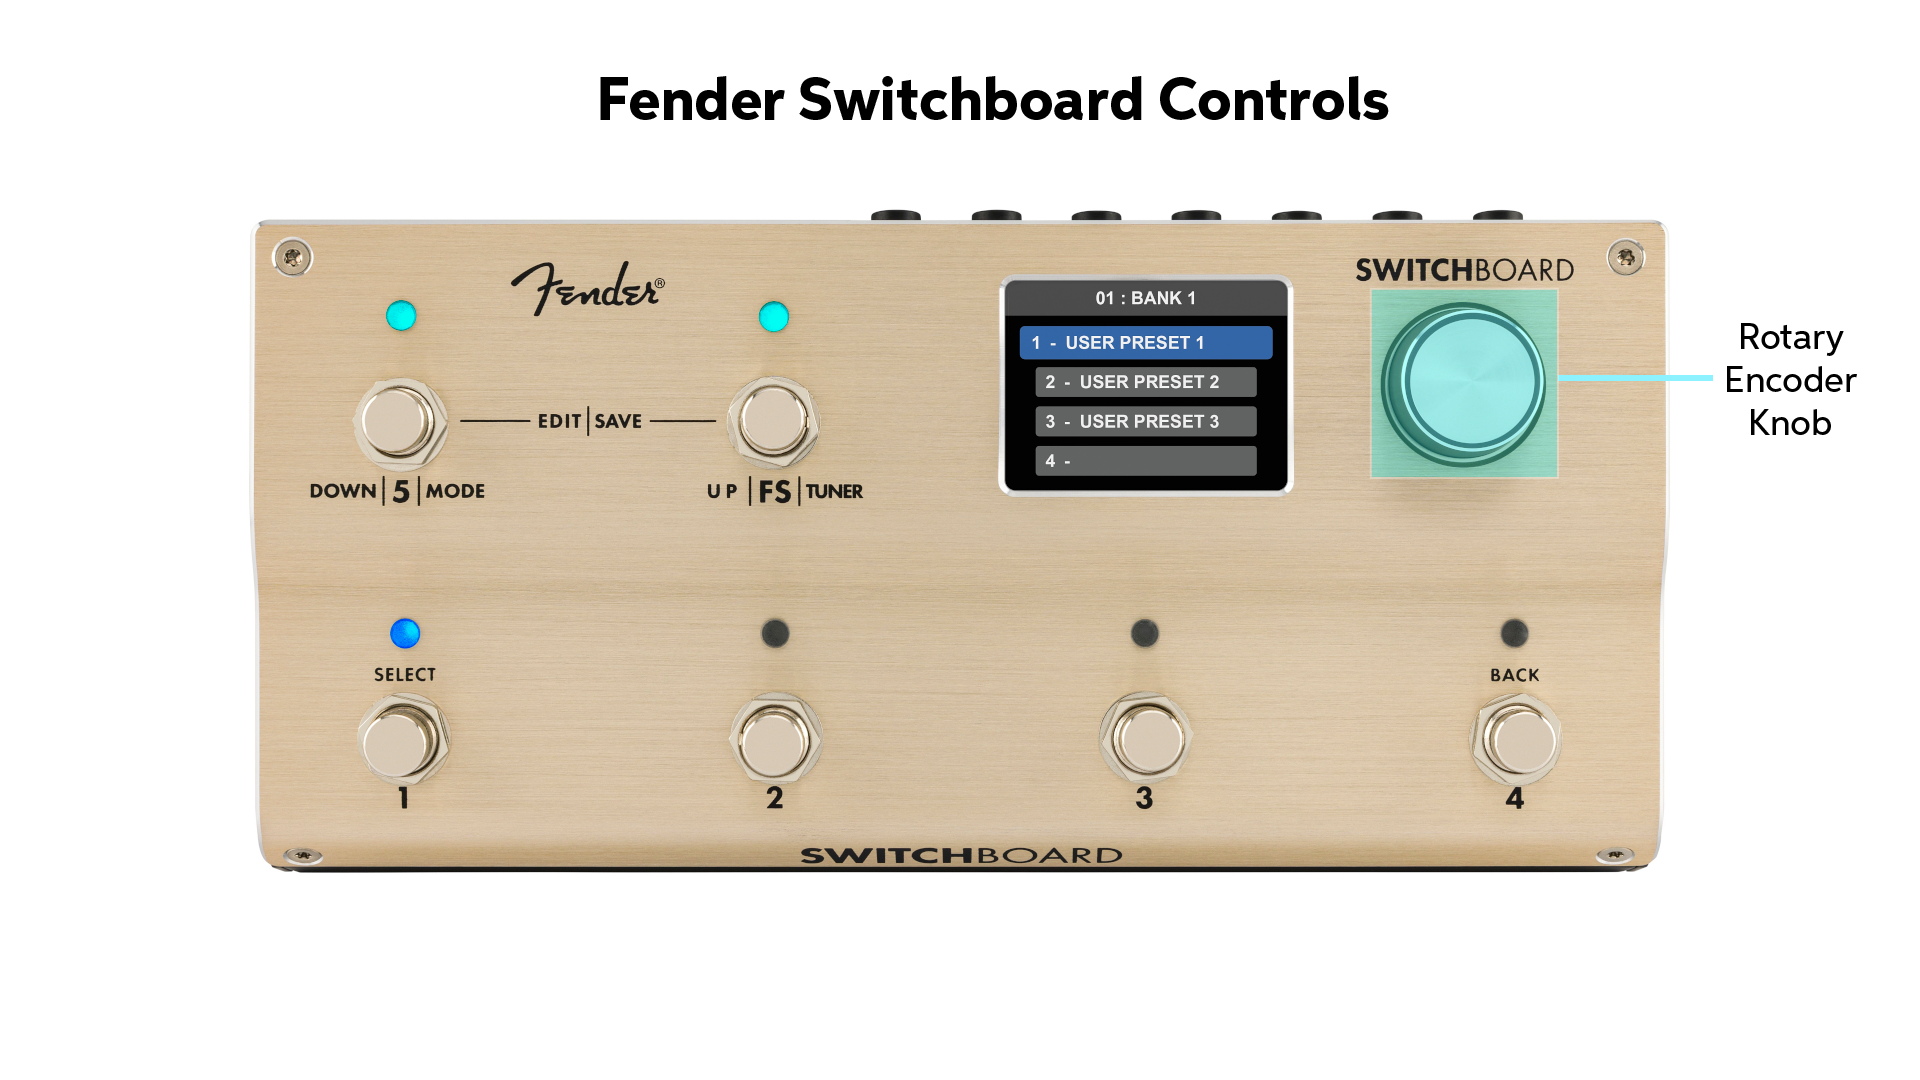
Fender Switchboard controls
Rotary Encoder Knob
Press the knob down to enter Edit Mode. Turn the knob to scroll through menus on the display.
Display Screen
Shows whether you are in Loop Mode or Bank Mode and shows preset- and bank selections.
Footswitches
Footswitches 1–4 act as latching footswitches when tapped. These are used to toggle a feature on and off. Hold down a footswitch, and it becomes a momentary footswitch, which only engages a feature while the switch is held down.
You can configure each of the five loops to have its own color, which is shown on the LED above each footswitch.
Footswitch 1
Turn Loop 1 on and off, engage preset 1, or select the current highlighted menu on the display screen.
Footswitch 2
Turn Loop 2 on and off or engage preset 2.
Footswitch 3
Turn Loop 3 on and off or engage preset 3.
Footswitch 4
Turn Loop 4 on and off, engage preset 4, or return to the previous menu.
Footswitch 5
Turn Loop 5 on and off, change from Loop Mode to Bank Mode, or move down in the current menu.
Footswitch FS
Use this to activate the tuner, toggle the Footswitch Output, and move up in the current menu.
Basic Operation
With the Switchboard, you can devise your own custom signal chains — hundreds of them — with the effects on your pedalboard. You can create your own combinations of effects and experiment with different pedal orders without having to move your pedals around or swap cables. When you find the combinations that work, you can save them in the Switchboard’s memory as presets. You can then construct Banks of four presets each and edit the order of Banks so that you can step through them in your live set.
Modes
The Switchboard has two Modes. Change between them by holding down Footswitch 5.
Loop Mode
Rearrange and control pedals in real time using Loop Mode. The display shows you the order of your signal chain and which loops are on or bypassed.
Engage the Loop Mode Editor by holding down Footswitch 5 and Footswitch FS together. You can change the loop order, move the location of the volume pedal, toggle the input and output buffers on and off, and configure the function of the Footswitch Out.
To save a preset, press and hold the Encoder knob to access the Save menu, choose the location to save it, and give it a name.
Press Footswitch 5 and Footswitch FS simultaneously to exit the Editor and return to Loop Mode.
Learn more in the Fender Switchboard Owner’s Manual > Loop Mode Editor.
Bank Mode
Save and recall presets using Bank Mode.
Each preset saves a set of parameters. In each preset you can:
- Set the order of the loops and the signal path
- Set which loops are on or bypassed
- Set the position of the volume pedal in the signal chain
- Configure the status of the Footswitch Output, MIDI output, and MIDI expression pedal
- Set the configuration of the input and output buffers (to accommodate certain effects that are sensitive to impedance settings)
Presets are organized into Banks. Each Bank holds four presets. There are 100 Banks. You can give a name to each Bank and rearrange their orders.
Use the rotary encoder knob or the footswitches to move from Bank to Bank and preset to preset.
The Preset Editor provides a different organizational layout compared to the Loop Mode Editor. In Bank Mode, enter the Preset Editor by holding down Footswitch 5 and Footswitch FS together. You can use this mode to take control of the loops within a preset during a live performance and do manual overrides on the fly. The Preset Editor provides additional functions:
- Locking the volume pedal to a specific level (for example, to create a quieter preset for rhythm playing, or preset the gain for an overdrive pedal)
- Configuring which MIDI messages are saved to a preset
- Entering a name for the preset using the Encoder Knob
Learn more in the Fender Switchboard Owner’s Manual > Preset Editor.
Creating a New Preset
- Select an empty preset slot within a Bank.
- Enter the Preset Editor.
- Use the encoder and switches to rearrange the order of the loops and designate which ones are turned on or bypassed.
- Press Footswitch 5 and Footswitch FS together to save the preset.
- Select Save, then choose to overwrite the current slot with your new preset. This will take you back to Bank Mode, where your new preset is active.
Learn more in the Fender Switchboard Owner’s Manual > Bank Mode: Creating Presets.
Favorites
Aside from the 100 Banks with four presets each, the Switchboard has 100 Favorite slots which provide quick access to your favorites. This makes it easy to select a favorite preset and load it into a Bank.
Learn more in the Fender Switchboard Owner’s Manual > Favorites.
Here’s Fender’s Switchboard walk-through video:
Exploring the Switchboard Effects Operator | Fender
Related Articles
When you need help, Sweetwater has the answers!
Our knowledge base contains over 28,000 expertly written tech articles that will give you answers and help you get the most out of your gear. Our pro musicians and gear experts update content daily to keep you informed and on your way. Best of all, it’s totally FREE, and it’s just another reason that you get more at Sweetwater.com.


Offer applies only to single-receipt qualifying purchases. Select manufacturers may require that only the manufacturer’s products qualify towards the minimum purchase amount needed to be eligible for promotional financing. Otherwise, an invoice that meets the minimum purchase amount and contains at least one qualifying manufacturer product is eligible for promotional financing. No interest will be charged on promo purchase balance, and equal monthly payments are required on promo purchase until it is paid in full. The payments equal the amount financed divided by the number of months in the promo period, rounded up to the next whole dollar. These payments may be higher than the payments that would be required if this purchase was a non-promo purchase. During the last month(s) of the promo period the required monthly payment may be reduced due to the prior months’ rounding. Regular account terms apply to non-promo purchases. New Accounts as of 07/31/2025: Purchase APR is 34.99%. Penalty APR is 39.99%. Min Interest Charge is $2. Existing cardholders: See your credit card agreement terms. Subject to credit approval.
Offer applies only to single-receipt qualifying purchases. No interest will be charged on the promo balance if you pay it off, in full, within the promo period. If you do not, interest will be charged on the promo balance from the purchase date. The required minimum monthly payments may or may not pay off the promo balance before the end of the promo period, depending on purchase amount, promo length and payment allocation. Regular account terms apply to non-promo purchases and, after promo period ends, to the promo balance. New Accounts as of 07/31/2025: Purchase APR is 34.99%. Penalty APR is 39.99%. Min Interest Charge is $2. Existing cardholders: See your credit card agreement terms. Subject to credit approval.
The estimated required monthly payment shown which excludes taxes and delivery equals the amount financed divided by the number of months in the promo period, rounded up to the next cent. During the last month(s) of the promo period the required monthly payment may be reduced due to this rounding. These payments apply only with the financing offer shown. If you make these payments by the due date each month, you should pay off this amount financed within the promo period, if it is the only balance you are paying off. If you have other balances on your account, this payment will be added to any other minimum monthly payments.
Applies only to select items from this manufacturer. Ask your Sweetwater Sales Engineer for more details.