
BOSS RC-505 Setup Guide

The BOSS RC-505 is an excellent looper pedal to have in your studio and live rig, so we will show you how to register, set up, and connect the pedal for the first time. Follow the sections below to get started.
Register the RC-505
Before you start setting up, the first thing you’ll need to do is register your BOSS RC-505 using the BOSS serial number. After registering the RC-505, you’ll gain access to BOSS product support, an extended warranty, training videos, and clinic information. Follow the steps below to register the loop station, and then continue below to Setup and connections.
- Log in to your Roland Backstage account. If you don’t have one yet, you can create one here.
- On your account home page, click My Gear, and select Register a Product.
- Fill out the required information, including the serial number, and then click Register.
- Keep your Sweetwater invoice handy, as you will need to enter the purchase date, method, and dealer (Sweetwater).
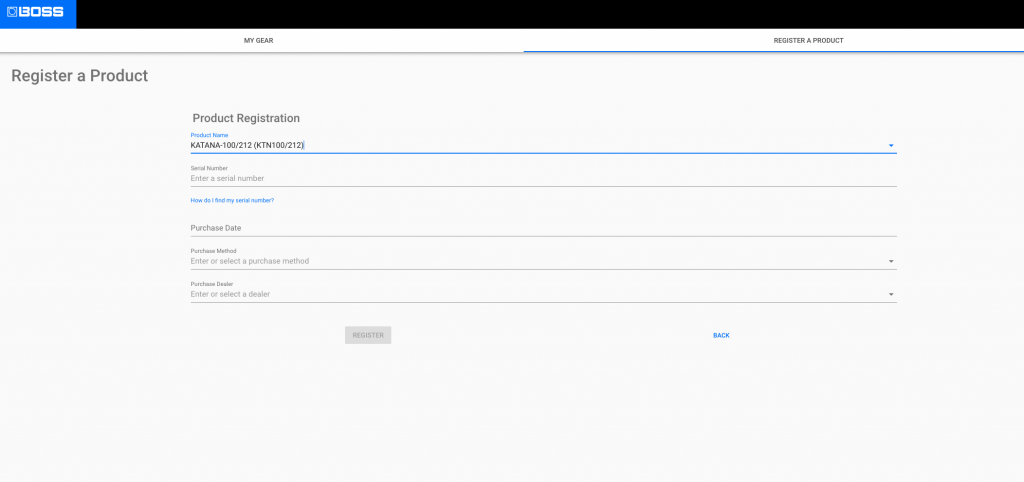
Click the image to log in and register your BOSS RC-505
Setup and connections
Once registered, it’s time to get everything connected. It’s pretty straightforward, but here are a few things to note:
- Use instrument (TS) cables when connecting your device to the inputs.
- Connect a smart device or audio player to the AUX jack to record external audio.
- If connecting a condenser microphone, you must connect the microphone and turn on phantom power first. To do so, press the System button, then use the right cursor button to navigate to Phantom Power. Use the Memory/Value knob to turn it on, and then press EXIT.
- Make sure to connect the microphone before you turn on phantom power!
- Connect an EV-5, FS-5U, or FS-6 to the CTL jacks for expression or control.
- Use the USB jack to send WAV files to and from your RC-505.
- When connecting to a speaker, turn on the power to your RC-505 first. When powering down, turn off the power to your RC-505 last.
How to create a loop
Creating loops on an RC-505 is easy. With the amount of flexibility it has, the possibilities are endless! You can either record audio to individual tracks or record and overdub on a single track. Depending on what you want to do, you may choose one over the other, but the process is the same.
TIP: You can change the overdub type by pressing the MEMORY button several times. Setting it to Overdub means it will automatically record and layer over the existing loop. Setting it to Replace will overwrite the existing recording.
- With your input device(s) connected, start playing at the level you’re going to perform at and turn the gain up until you start clipping.
- Once you begin clipping, turn it down a little bit to make sure you have enough headroom.
- (Optional) Use the INPUT FX to record a track with effects on it. This is particularly useful when using the octave (Guitar to Bass) effect.
- Press the PLAY/RECORD button on the track you want to record on to begin recording. Once finished, press it again to stop recording. The track will then play back automatically.
- If you want to stop playback on the track altogether, press the STOP button.
- Use the TRACK FX to add non-destructive effects to the track, which means the effects are only temporary.
- For a complete list of both input and track effects, check out page 20 of the RC-505 manual.
TWO COLUMN VIDEO:
How to Create a Basic Loop
How to Create an Advanced Loop
Import and use pre-recorded audio
IMPORTANT: Do not use your computer to format the RC-505. Doing so may make your device permanently unusable, and it will need to be sent in for non-warranty repair.
One great thing about the BOSS RC-505 is that you can import and use pre-recorded WAV files on your tracks. Before you can import the audio, you’ll first need to download and install the driver software and also update a few of the RC-505’s USB settings.
- Press the SYSTEM button, then use the left and right arrows to navigate to USB Modeand make sure the setting is set to STORAGE.
- Go to the RC-505 download page, then download and install the latest driver version for your OS.
- Connect the RC-505 to your computer. The RC-505 should appear as a storage device.
- Transfer the WAV file to one of the subfolders within the main ROLAND–WAVE folder.
- The WAV files must be 16-bit at 44.1kHz sample rate.
- Don’t import more than one WAV file into each folder.
- DO NOT delete any of the subfolders.
- Press the EXIT button, then safely eject the RC-505 from the USB port.
How to – Basic Setup
When you need help, Sweetwater has the answers!
Our knowledge base contains over 28,000 expertly written tech articles that will give you answers and help you get the most out of your gear. Our pro musicians and gear experts update content daily to keep you informed and on your way. Best of all, it’s totally FREE, and it’s just another reason that you get more at Sweetwater.com.

