
An Introduction to USB Microphones
USB Microphones are a great introduction into the world of digital audio recording. They are portable, simple to set up, inexpensive, and they sound great.
When USB microphones first hit the market, they were input-only devices. Now, many USB microphones have the ability to output audio as well so that you can easily monitor yourself and listen to any takes you’ve recorded.
Setting up your USB Microphone
Setting up your USB microphone couldn’t be easier. Most USB mics are class-compliant, meaning you do not need to install additional software for them to communicate with your computer. Simply plug it in!
Once you have your USB microphone plugged in, you’ll need to open up a recording application. Some examples of recording applications commonly used with USB Microphones are GarageBand (Mac only), Audacity (free for Mac and PC), and Sonar LE (only available as bundled software), but you can use your USB mic with any recording application. Once you’ve opened your recording application, you’ll need to make sure your microphone is set up properly within the application itself. To do so, follow these steps:
GarageBand
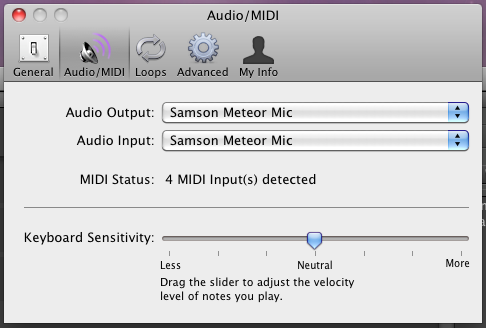
Once GarageBand is open, click on GarageBand from the menu bar and select Preferences. At the top of that window, select the Audio/MIDI tab and set your USB microphone as the input and output. When you’re done, close out of the preferences.
If you haven’t already created a track, click on Track from the menu bar and select New Track. From there, you can select Real Instrument. When you’re ready to record, push the record button located at the bottom of GarageBand. If you need more help using GarageBand, refer to the help menu in the application.
Audacity
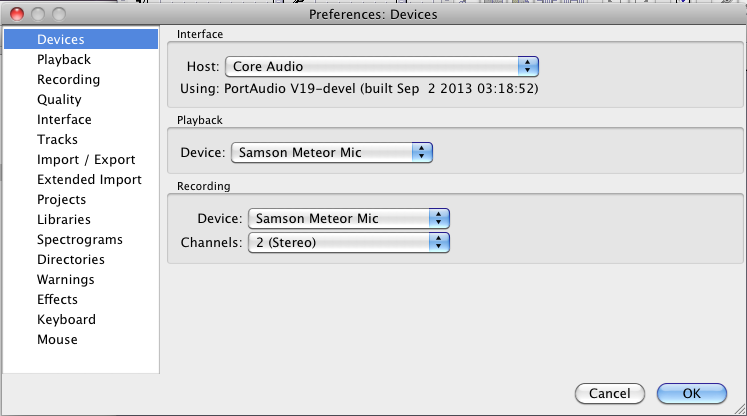
Open up the Audacity preferences and choose Devices on the left hand side. Here you can select your input and output device.
Once you’ve set up your microphone, you can create a new track from the Tracks Menu, then set the input and output for that track via the drop down menus above the timeline. If you need more help using Audacity, refer to the Help menu in the application.
For other recording applications, including Sonar, check out these guides below outlining out how to get started with some of the popular major DAWs:
- Getting Started with Pro Tools
- Getting Started with Cubase 7
- Getting Started with PreSonus Studio One
- Getting Started with Sonar X2
In the event that your USB microphone does not have output capabilities, you’ll need to select your computer’s output as the audio output in your recording software. If your software does not have the ability to select different sources for input and output, you’ll need to set up an aggregate device (Mac only). To do so, check out our guide on making an aggregate device on Mac. Windows does not support aggregate devices.
When you need help, Sweetwater has the answers!
Our knowledge base contains over 28,000 expertly written tech articles that will give you answers and help you get the most out of your gear. Our pro musicians and gear experts update content daily to keep you informed and on your way. Best of all, it’s totally FREE, and it’s just another reason that you get more at Sweetwater.com.

