
Alesis Strike Setup Guide
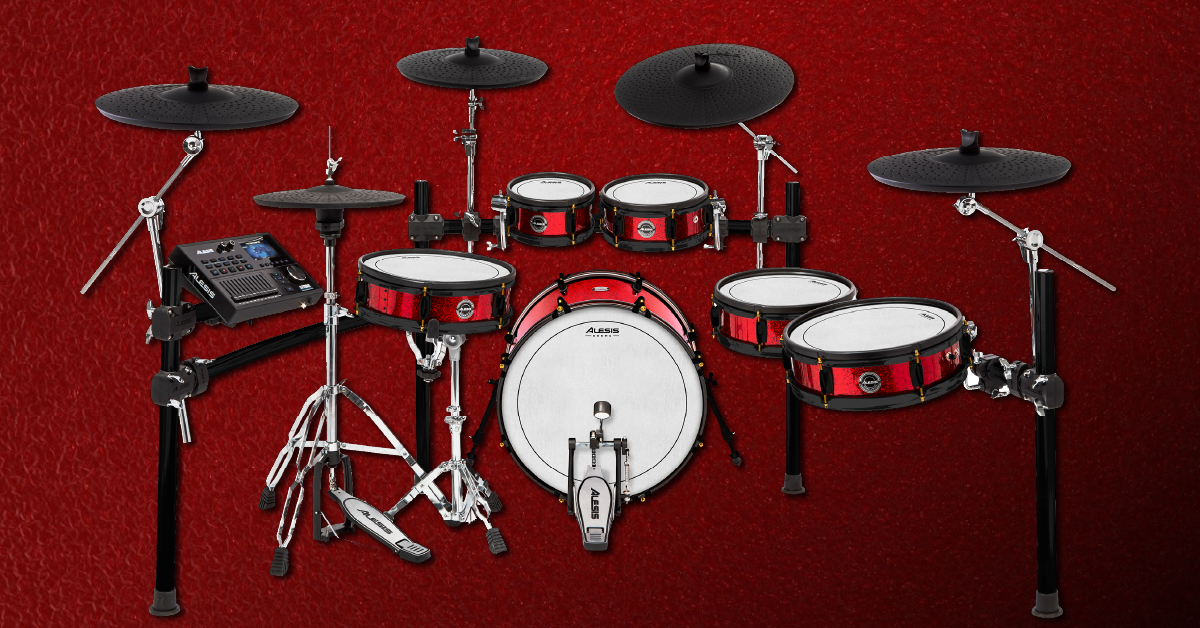
In this guide we will show you how to set up your Alesis Strike for the first time. You’ll learn how to register the hardware and also the different ways to set up and connect your kit. Follow the sections below to get started.
Register the module
Before we get started, the first thing you will need to do is register the Strike kit with Alesis. When you register the device, you’ll gain access to software downloads and a coupon code for 40 free drum lessons from Melodics. Keep your Sweetwater invoice handy, as you will need to enter the purchase date. Follow the steps below and then continue to the Strike setup and connections.
- Log in to your Alesis account. If you don’t have one yet, you can create one here.
- Navigate to the registration page, select your version of the Strike kit, enter the serial number (located on the module packing box, underneath the module, and on the front page of the manual), and then click Register My Product.
- Go to the Melodics homepage and download the free app for your OS. Once downloaded, go to your Downloads folder, run the installer, and then launch the app.
- When prompted to enter your promo code, go to the My Products section of your Alesis account, copy the code listed.

Click the image to register your Alesis Strike kit
Click the image to download your free copy of Melodics.
Strike setup and connections
There are plenty of connections available on the Strike module. The individual outputs let you send different drums to separate channels on a mixer or your audio interface. It also has MIDI and USB connectivity for recording in your DAW, and an aux input so you can play along to your favorite tracks on a mobile device.
Drum pads and cymbals
There are 13 TRS inputs available on the Strike module. You can expand your kit even further if you use a TRS to TS Y-cable. Dual-zone pads require the use of TRS cables, so if using a splitter cable, you will lose one zone. It’ll typically be the second zone, which is typically the rim on a drum pad or choke on a cymbal pad.
- Turn the knobs on the snare and tom pads to adjust what’s called sensitivity focus. The position of the knob determines whether the center of the head or the rim becomes more sensitive when hitting the pad.
- Connect the hi-hat pad to the HH input and the hi-hat module to the HH Control input.
- When assembling the kit, make sure that the Alesis logo on the cymbal pads is facing you. The choke and edge zones do not go around the entire pad.
- Use a plastic or wood beater on the kick drum pad. Felt beaters cause more friction and will wear out the mesh head prematurely.
Alesis Strike Setup and Trigger Settings
Audio
There are two Main outputs, seven individual (Direct Audio) mono outputs, and one headphone output available. You can also connect a mobile device using a ⅛” TRS cable via the Aux In jack. The main outs require TRS cables, while the individual outputs can accept either TS or TRS.
SD cards
You can import, record, and export custom samples and songs using an SD card up to 64GB of storage. The Strike comes with an 8GB SD card already inserted. If you want to use your a separate SD card, Alesis recommends using 40 MB/s Class 10 SDHC cards formatted to FAT32. If your computer doesn’t have an SD card reader, you will need an external card reader.
- The Direct Audio output levels are fixed at 0dB, and effects will not be applied. This means that the on-board mixer will not control the level of the Direct Audio outputs.
- You can route the metronome to the Mains, headphones, or both. To do this, press Utility, select METRO, navigate to OUTPUT and use the knob to choose HPH (headphones), Main+HPH, or Main.
Computer
The Alesis Strike MIDI notes can be recorded into your DAW via USB. The module is class-compliant, meaning no additional driver software is necessary. Just connect a USB cable to a computer, and you’re ready to go. You will also need to connect the Strike to your computer when using the Strike Editor software and to perform firmware updates.
MIDI
Another way to record the Strike kit is via 5-pin MIDI cables. You can also use MIDI to trigger sounds or control external drum machines or synthesizers. For the Strike to control the external gear, connect a MIDI cable from the MIDI OUT port on the module to the MIDI IN port on the external device.
Helpful links
Related content
When you need help, Sweetwater has the answers!
Our knowledge base contains over 28,000 expertly written tech articles that will give you answers and help you get the most out of your gear. Our pro musicians and gear experts update content daily to keep you informed and on your way. Best of all, it’s totally FREE, and it’s just another reason that you get more at Sweetwater.com.

