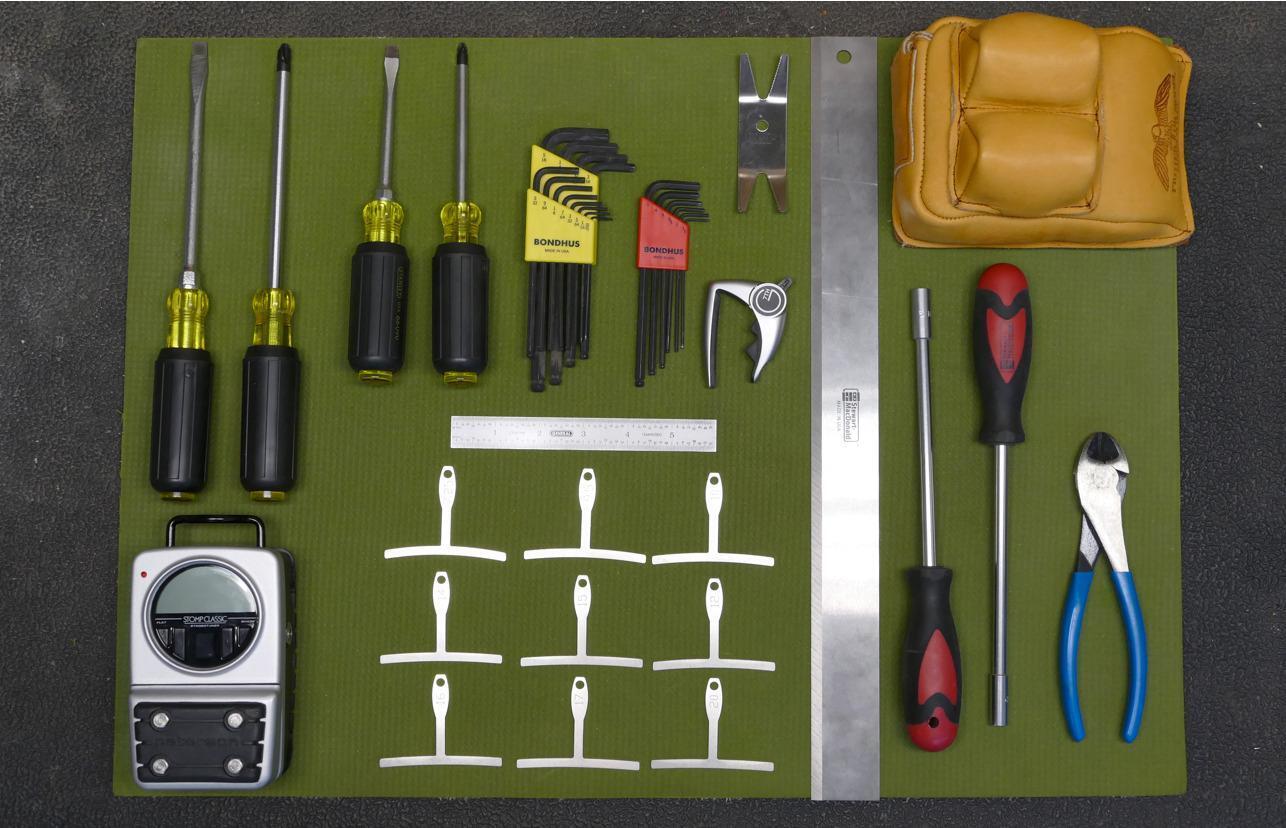
To set up your bass guitar, you have to think big: big sound, big tone, big volume. This also means big sound waves and big string vibrations. With this in mind, you have to approach your setup in a way that compensates for all of this and your playing style. Are you a jazz player with a light touch and lightning-fast licks, or do you jackhammer funk riffs with thumb slaps and finger pops? Here are a few tips and tricks that should get you in the right direction to dialing in the perfect bass guitar setup. But before we get started, here’s a list of the tools you should have.
Adjusting the Truss Rod
The first steps to dialing in your bass guitar’s setup are tuning your bass to pitch and setting your neck to the proper relief. Neck relief refers to how far the neck bows away from the strings. Know that if your strings are old, are not staying in tune, or have lost their mojo, then we suggest that you install a new set first. (We understand that bass players have to shell out more money for strings than the other guys in the band, but dig deep in your pockets and get it out of the way now.)
Step 1: Checking Your Neck Relief
- Install a capo on the first fret. (If you don’t have a capo, then your finger will work just fine.)
- Fret the lowest string (in pitch) where the neck joins the body.
What you’ve done is create a perfectly straight line across the length of the fretboard. Take a look at the gap between the top of the seventh fret and the bottom of the string. If you have a feeler gauge, then you’ll want to measure that and make a note of it. It’s actually a good thing to have a slight gap there because a perfectly straight neck will cause a lot of buzzing issues. Your strings must have enough clearance to vibrate freely. Imagine dropping a pebble into a pond. Wait . . . this is a bass. Picture yourself dropping a boulder into a pond. Those waves that emanate from the splash are what your bass strings are doing when you play, and you have to get the frets out of the way. Some target relief measurements are anywhere from 0.008 inches to 0.014 inches.

Step 2: Adjusting Your Neck Relief
If you have no relief or the neck is bowed toward the strings (backbow), then you’ll want to turn your truss rod counterclockwise. You’ll recognize this right away because the straight line you created in Step 1 above will cause the bottom of the string to rest against the top of the seventh fret. This will cause excess fret buzz on open strings and in the middle of the fretboard. If you have too much relief, then you’ll want to tighten your truss rod by turning it clockwise. Too much bow away from the strings will cause unnecessarily high action, intonation problems, and buzzing toward the end of the fretboard.
Pro tips:
- Only adjust the truss rod about a quarter turn at a time.
- Always tune your bass back to pitch before checking any measurements.
- Do not overtighten your truss rod or make any adjustments you aren’t comfortable with.
- If your truss rod reaches the end of its travel before the proper adjustment is made, then take your bass to a reputable luthier or technician.
Setting the Action
Once the truss rod is properly set, you’ll want to raise or lower the distance your string has to travel to the frets. This is called the action. Do you remember the boulder that we tossed into the pond? Well, that boulder is your finger, pick, thumb, or whatever you’re using to pluck your strings. Proper bass guitar action is completely subjective and will depend mostly on your playing style. Remember: “Every action has an equal and opposite reaction.” (Wasn’t it John “Newton” Entwistle that said that?) If you play a lot of slap bass or have a really strong pick attack, then you’ll want to compensate for that by raising your action and allowing the string enough room to vibrate.
If you are more laid-back in your approach to the bottom end or have a lighter touch with your fingers, then you can likely get away with lower action that’s going to result in easier playability. A good bass setup is all about compromise, and you always have to find the best balance between playability and the most amount of fret buzz that you’re willing to tolerate. Some common action measurements on a bass guitar are around 5/64 inches up to about 7/64 inches.
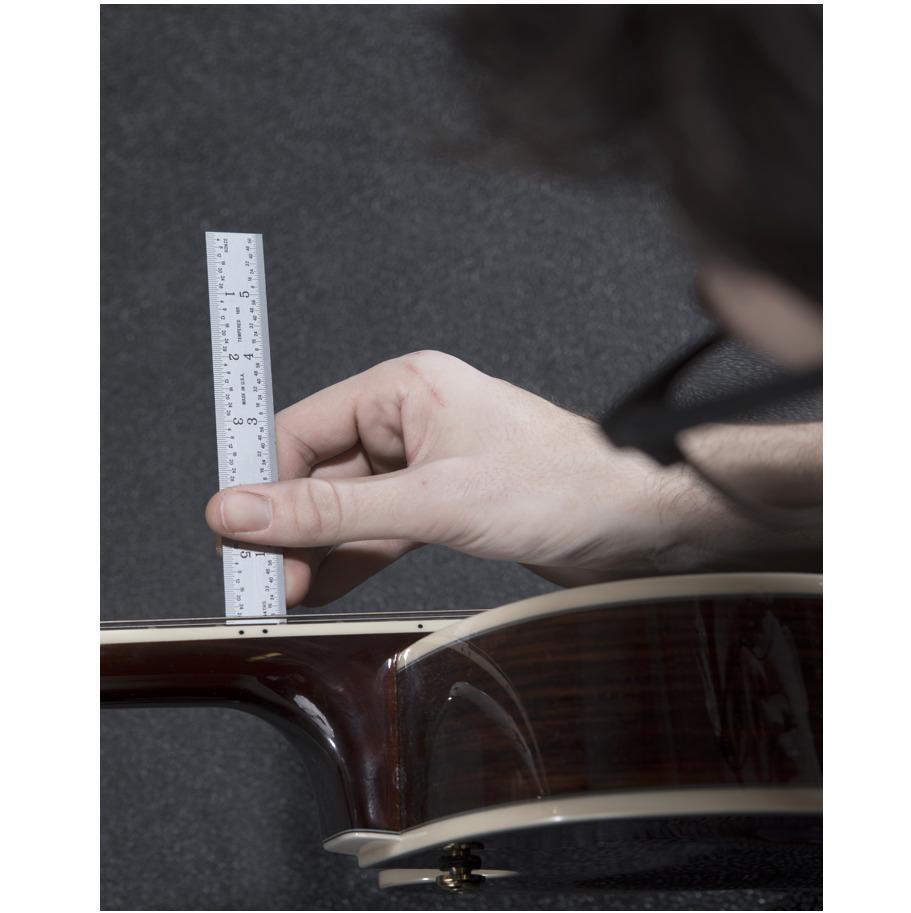
Step 1: Measuring Your Action
- Some luthiers prefer to install a capo at the first fret to take nut height out of the equation. If you don’t have one, then don’t let that stop you.
- With your ruler, measure the distance from the top of the 12th fret to the bottom of your lowest string. Guitar techs typically use small increments in order to be as accurate as possible. A ruler that’s graduated in 64ths of an inch is a great tool to keep in your gig bag or case.
You’ll want to play the bass and determine what action adjustments need to be made. If it feels and sounds great, then don’t mess with a good thing. If you find that your bass is clunky to play and your fingers feel like they’ve been run over by a truck at the end of a gig, then you’ll probably want to lower the action.
Fret buzz and loss of sustain typically are symptoms of an action that is too low. If your bass just isn’t handling the beating you’re dishing out or you feel a loss of clarity in your notes, then raising the action is probably going to be your next course of action.
Step 2: Raising & Lowering Your Action
- Raise or lower your saddle or the bass side of the bridge about a quarter of a turn.
- Retune the bass to pitch, and take another measurement to get an idea of how much farther up or down you’ll need to go.
- Make more adjustments if you need to, and always remember to retune the instrument before you take any measurements.
You’ll want to repeat these action-setting steps for the rest of your strings and the treble side of the bridge. A good rule of thumb is that you can get away with action about 1/64 of an inch lower on the highest-pitched string than what you’ve set for your lowest-pitched string. This is because the smaller the string gauge, the tighter the vibrational pattern. (Keep this in mind the next time your guitar player whines about how high their action is. Then, calmly and rationally explain why they have it so much easier than bass players.)
Pro tips:
- The lower your action, the more likely it is that your bass will buzz.
- Fret buzz will often not translate through an amplifier. If fret buzz is a deal-breaker for you, then check to see if it’s coming through your bass rig.
- Don’t set up your bass without getting a good idea of what it’s going to sound like when it’s plugged in.
- Your ruler is your best friend. A good guitar technician will measure action all over the fretboard to take the big picture into account. After all, bass players don’t just play in one spot.
- Measure your action at the thirdand 17th frets, as well.
Your fretboard has a radius, and you’ll want your string height to follow that radius. If you have a 2-post bridge, then you shouldn’t have to worry about it because your saddles will be pre-slotted. If you are adjusting individual saddles, then you’ll need to maintain that radius by cascading down your measurements from the lowest-pitched string to the highest or making the proper adjustments against a radius gauge.
Now You’re All Set!
These are the basics of a bass guitar setup. A good setup is not all about measurements. It’s about the way your instrument sounds and plays, and it’s a very personal thing that varies from one player to the next. But these are some good references to get you on the right track to dialing in the perfect bass setup for you.
Now that you’ve mastered adjusting your bass guitar’s truss rod and action, you’ll want to make sure that you dial in your intonation so that your instrument is playing in tune. If you need to set up the intonation on your electric guitar, then check out our “How to Set Your Electric Guitar’s Intonation” article.
We hope this has helped you learn a little more about setting up your bass. As always, feel free to reach out to our SweetCare team for specific questions you may have, or visit our Knowledge Base, which has over 28,000 articles that will help you resolve an issue quickly!