
Being handy and resourceful are great (and almost necessary) skills to have as a drummer. In other articles, we’ve covered ways to reuse old drumheads, but there are some problems that used drumheads can’t solve. While it’s absolutely critical to have a drummer’s survival kit, like the Zildjian ZSK Drummer’s Survival Kit, sometimes you realize you don’t have replacement parts lying around when you need them most. So, in this article, Sweetwater’s own Eric Askew and Andrew Malloy will cover ways you can utilize your local hardware store to help solve your troubles.
Toolbox or Tackle Box
Apart from having a drummer’s survival kit, a toolbox is one thing every drummer should own. There’s nothing worse than losing a drum key or not having spare parts on hand when you need them, so knowing you have everything stored in one place gives you peace of mind. The great thing is that the toolbox doesn’t need to be a large one either. You can use a fishing tackle box for more portability as most are smaller and have multiple compartments to help with organization.
Solve Threading Issues
Drums, pedals, and hardware all naturally vibrate from all of the use (abuse) they endure. Sometimes, those vibrations can cause lugs and screws to loosen, which could cause a problem at the most inopportune time. Fortunately, there are things that can help address this issue.
Threadlocker
Threadlocker is available at most hardware stores, home centers, and even some auto-parts stores. It maintains the ability to flow like a gel but stays in place when force is applied. It also has a high resistance to vibrations, making it perfect for drums. Threadlocker is fantastic for hardware mounting screws, like wingnuts on cymbal stands, that can come loose often. Also, if you don’t have any Lug Locks use it to keep tension rods from backing out. Just apply a small amount to the end of the screw or tension rod and tighten them down to distribute it evenly.
Use the blue formula!
One note of caution with threadlocker is that it is available in several strengths. High-strength formulations, particularly the red formulation, can make the threads nearly impossible to remove. We strongly advise using the blue color-coded formulation. If you need to remove the threadlocker, then use rubbing alcohol or heat from a hair dryer with a cleaning cloth.
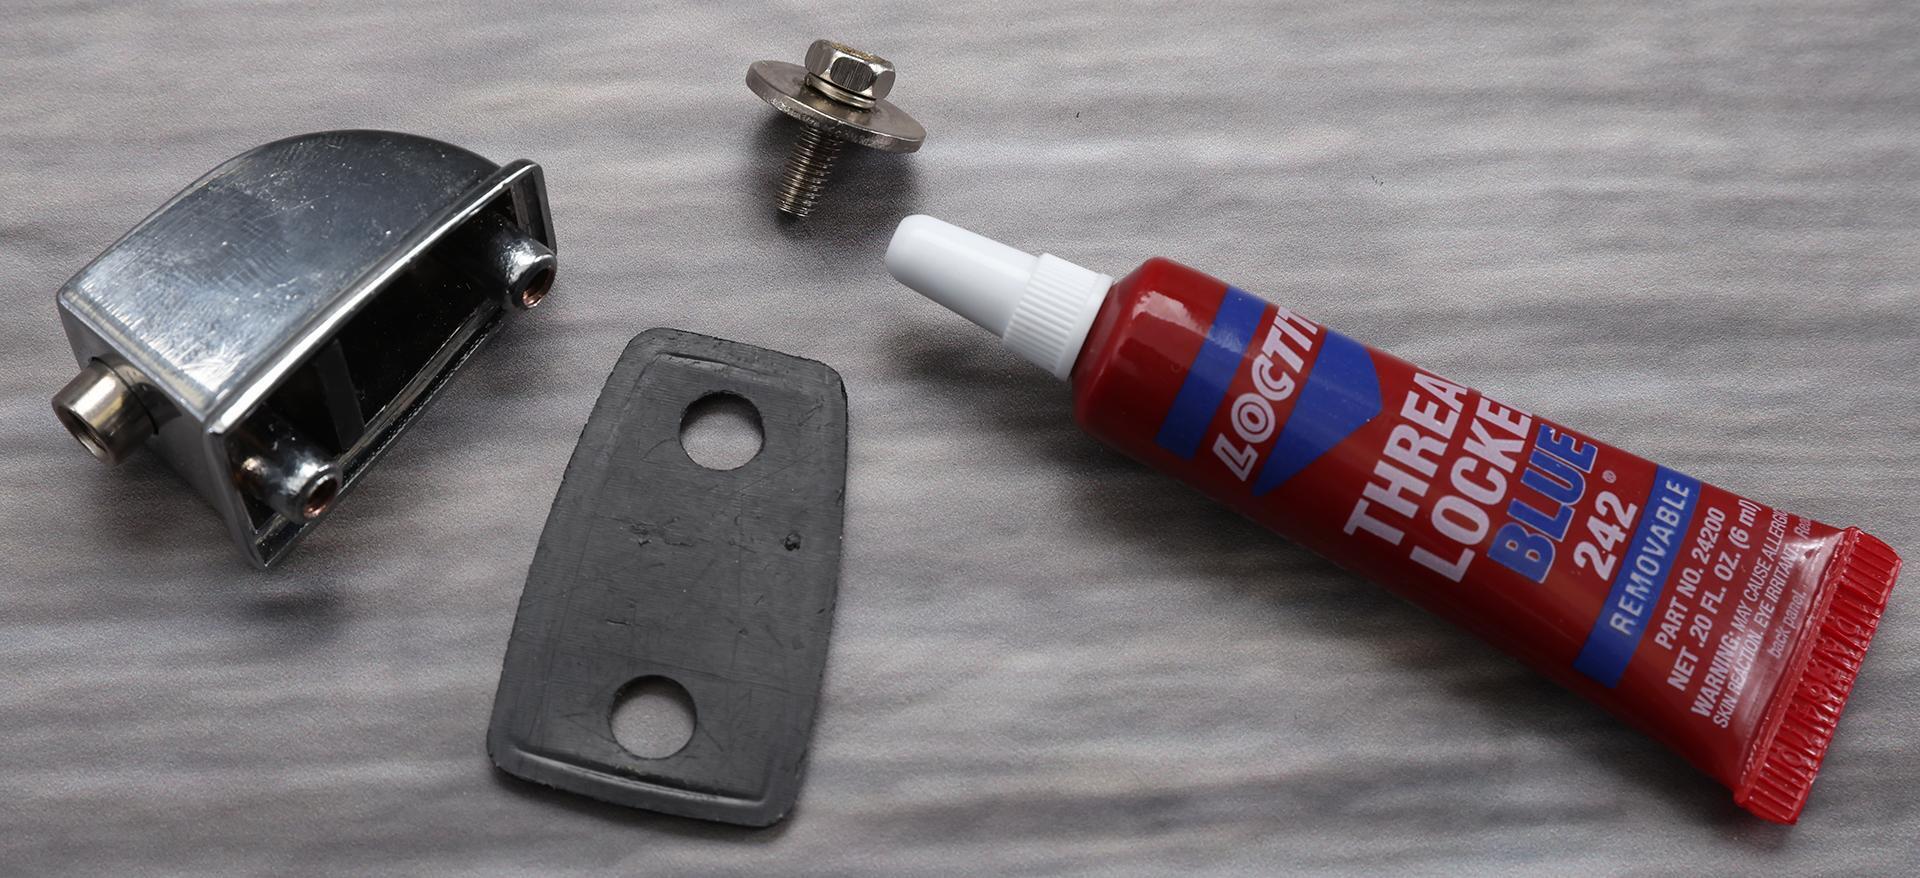
Use a small amount of Threadlocker on a lug casing screw to keep it from becoming loose.
Thread Tape
Thread tape, also referred to as Teflon or PTFE tape, is found in most plumbing departments and can solve many of the same problems as threadlocker. Thread tape is also often used for making heads on timpani drums slip over the bearing edge for rapid and precise tuning. It can help with bearing edges on a drum set that grab the head and make it hard to tune.
Drum Dampening Fixes
NOTE: If you’re applying the foam directly to the head, then you should consider using a few drops of liquid cement or superglue as the self-adhesive backing may not be strong enough. If applying the foam to the shell, then do not use liquid cement or superglue as you may need to scrape off residue that might be left behind. Instead, strengthen the hold by using some gaffer tape.
If you need to dampen your drums and don’t have anything on hand, then there are a few products you can find at hardware stores to help get rid of that annoying ring that drives your band and sound engineer crazy.
Weatherstripping Foam
Weatherstripping foam found its way into the drum world years ago to control overtones and decay on marching bass drums. It’s inexpensive and easily found in most hardware stores, and it has a self-adhesive backing.
There are two ways to use weatherstripping. Applying it directly to the perimeter of the head can dramatically cut down on decay and overtones. Alternatively, applying it to the inside of the shell that makes contact with the head creates more subtle muting and repeatable results with head changes. Some bass drum heads come with a foam ring you can insert, like Evans EMAD batter heads, but if yours doesn’t and you need to cut down on overtones, then weatherstripping foam is a great alternative.

Cut a piece of weatherstripping foam to cut down on overtones.
Gel Window Clings
More subtle than weatherstripping, gel window clings are a decorative way to control overtones, particularly for your snare and toms. These are found in arts and crafts stores and the seasonal section of most stores, including your local supermarkets. Window clings stick on drumheads just like RTOM Moongels. In addition to being a great way to dial in a drum sound, they can add a seasonal flair!
Paracord
It’s no secret how versatile paracord is. High-strength strands of nylon or polyester are the core, and a woven nylon sheath bundles it together. Remove the sheath to reveal smaller cords to fix smaller problems like a broken snare strap. Our drummers here have been bailed out with paracord to replace a broken snare-wire strap or even to tie their bass drum to their drum throne to anchor it in place when they left their drum rug at home.
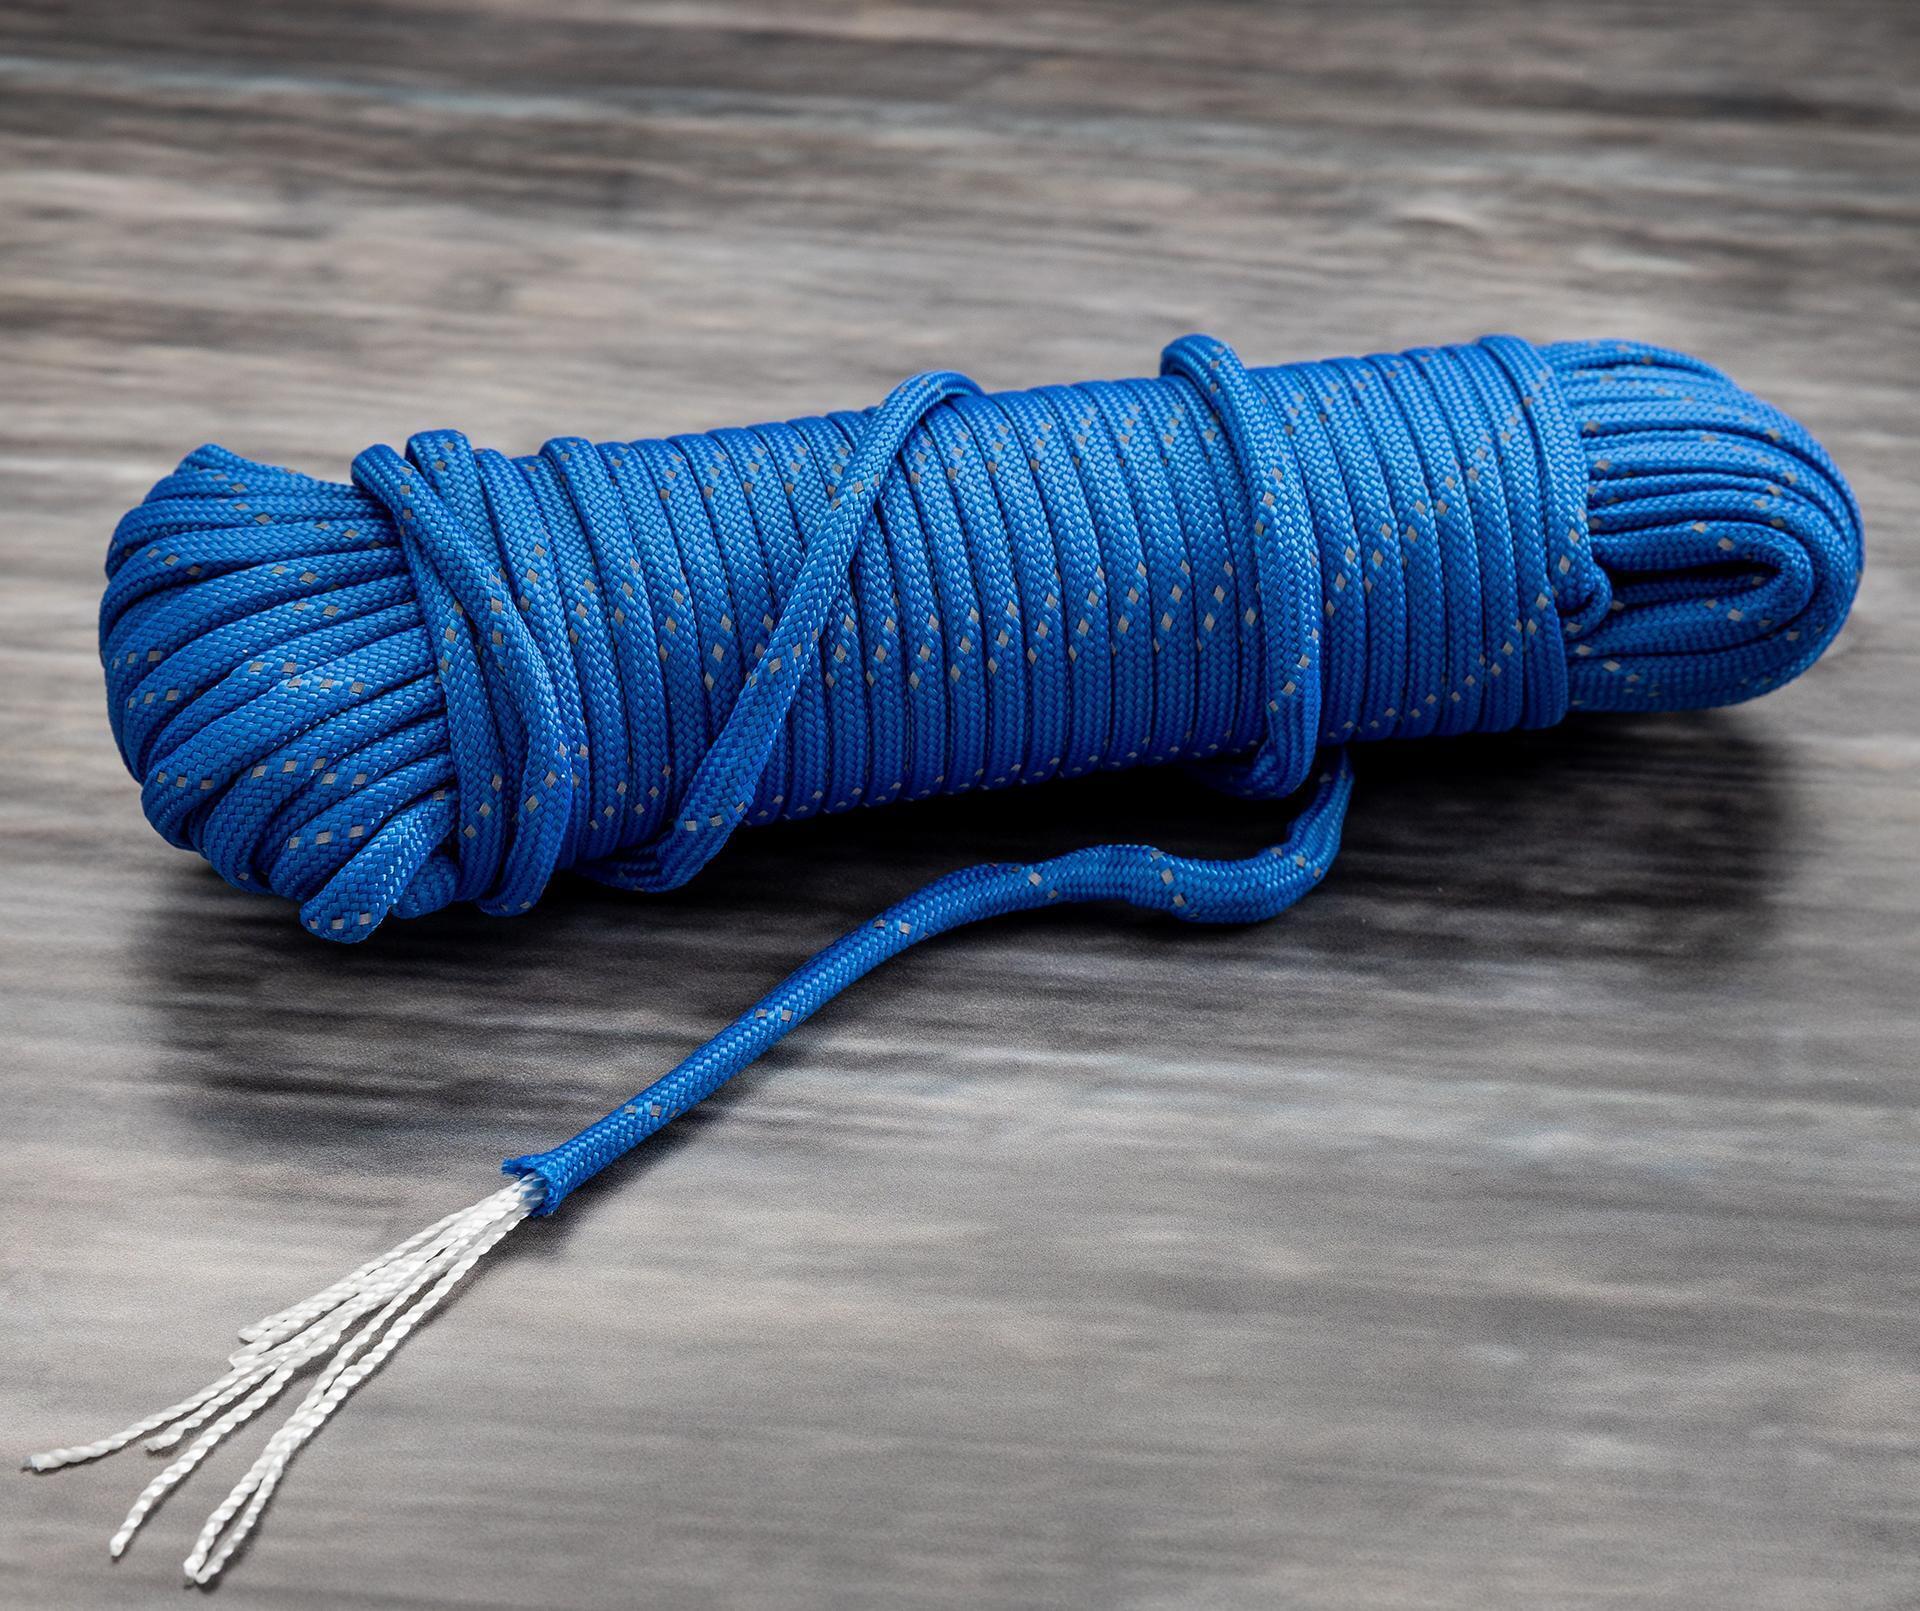
Remove the sheath and cut the smaller strands to fix minor issues or wrap the full cord to anchor your drum throne and bass drum.
Tape
Tape is something you should always consider having in your toolbox. Not only can tape address “mission critical” issues like a torn bass-drum head, but it’s also great to have around for labeling cases, marking spots on your drum rug, and dampening.
Duct Tape
They say duct tape can fix anything. If NASA can repair spaceships and a lunar rover with it, then drummers can certainly use it, too! If you tear a hole in your bass drum and have an old drumhead lying around, then cut a piece of that and use duct tape to cover the tear. You can even use it to hold a troublesome wingnut temporarily so your stands don’t keep slipping.
Duct tape is also useful for marking on your drum rug. When you’re setting up and tearing down frequently, it can get frustrating to find the “sweet spot” where your drums and hardware are positioned. Simply place pieces of tape wherever a piece of hardware or a pedal is located on your rug. This will make it easy to repeatedly put your drums and hardware in the same places every time you set up your kit.
Last, if you lost a cymbal sleeve for your stand, then take some strips of duct tape and wrap them around. Metal-on-metal contact with your cymbal can lead to keyholing and spiderweb cracks, so having the duct tape to act as padding between your cymbal and the stand will help temporarily alleviate the problem. It may not look pretty, but it will get the job done.
DON’T HAVE ANY DUCT TAPE? If you lost a cymbal sleeve and don’t have any tape to fix it, then you can split a pen cap and place it on the stand.
Gaffer Tape
Similar to the weatherstripping foam and window gel clings, you can use gaffer tape to reduce volume and overtones on drums. You can place it on the underside of cymbals, too! Unlike duct tape, which is rubber based, gaffer tape is made of fine woven cloth and won’t leave any gunky residue behind, especially under the lights. If you don’t have any on hand, then ask the sound engineers; they’ll likely have it since it’s also used to secure cables to the floor so people won’t trip over them.
Should I have both?
While it may sound like one tape is more useful than another, it’s good to have both duct tape and gaffer tape in your toolbox. Duct tape is much more adhesive, meaning it’s meant to take a beating, which makes it the optimal solution when patching tears. On the other hand, gaffer tape is still very adhesive, but it’s much easier to tear off and won’t damage your drumheads.
Electrical Tape
In the world of drumming, you can use electrical tape in a few ways. You’ll often see drumlines tape the top half of their drumsticks since it acts as a sort of “padding” to reduce the amount of chipping caused by heavier hitting.
If you’re a kit or concert player and have sweaty palms, then wrapping your drumsticks in electrical tape can provide a better grip. While not waterproof, it gives an amount of resistance to help lessen the chance of the sticks slipping out because of moisture. Some drummers will even tape parts of their fingers to help reduce friction that can cause blisters.
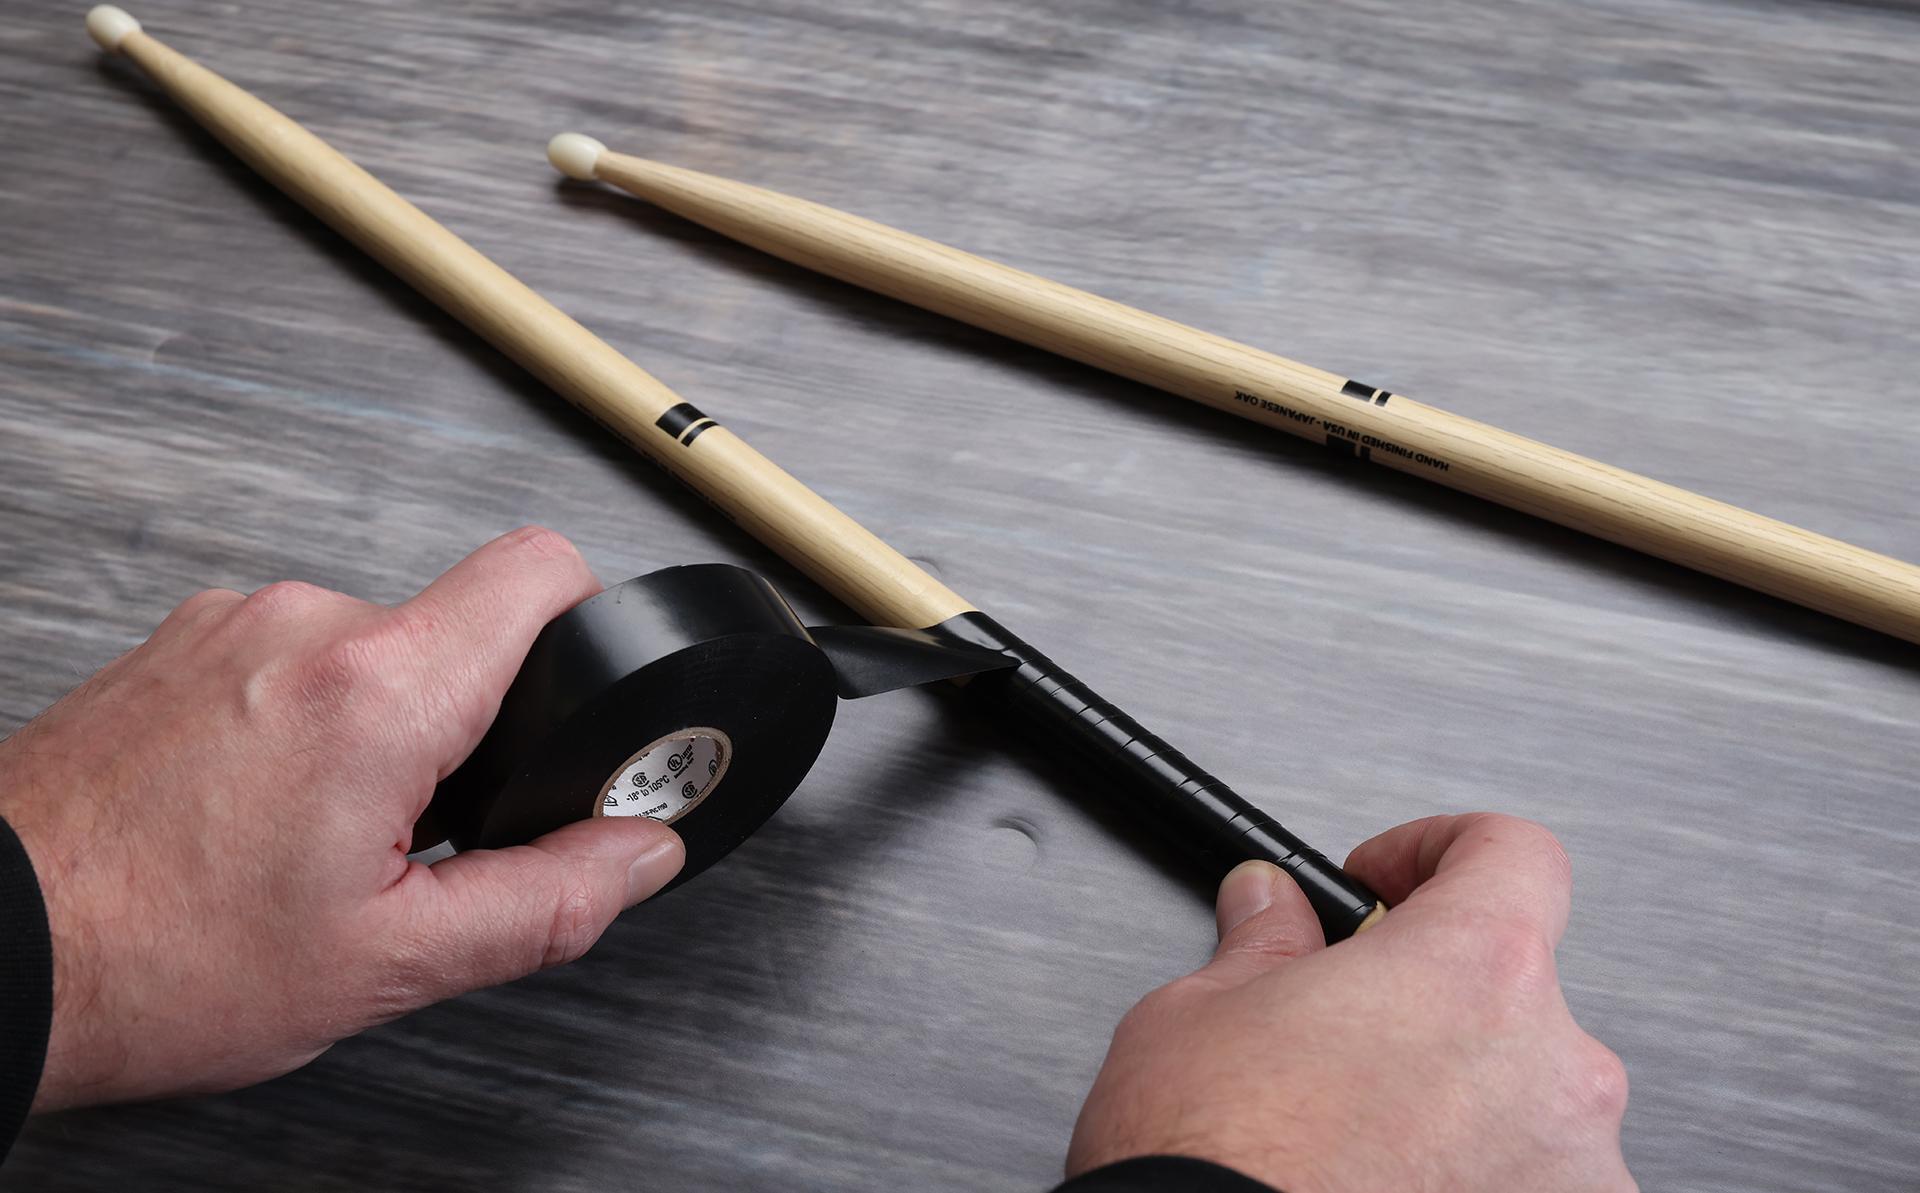
Wrap your sticks with electrical tape for some better grip.
Addressing Hardware Issues
Drum hardware is the backbone of every kit, from tension-rod washers to cymbal stands, so you may get stuck in no man’s land when something goes wrong. While the following parts aren’t in the front of your mind, they play a significant role, and you should always have spares on hand.
Washers
WHAT SIZE SHOULD I GET? There’s an overwhelming number of washer and o-ring sizes available, so you may ask yourself what size you should get. After experimenting, we found 7/16″ rubber o-rings (located in the plumber’s aisle) and #10 washers are the perfect sizes for tension rods.
Washers are vital in a variety of ways. Small washers help the tension rod stay in place. Without a washer between the lug and the tension rod, you may experience rattling and loosening tension rods. While metal washers will work in a pinch, we recommend getting rubber or nylon as they’ll provide more grip. If, by any chance, you can’t find any rubber washers, then O-rings can also work. You should also have larger washers on hand just in case you lose the ones for the base of your cymbal or hi-hat stands.
Furniture Felts
Every drummer has lost a cymbal felt at one point at one time or another, and felts are important as they protect and support the cymbal. Furniture felts, which are often used to place underneath heavy pieces of furniture on hardwood floors, are a perfect workaround. These can be found pretty much anywhere from any hardware store or supermarket.
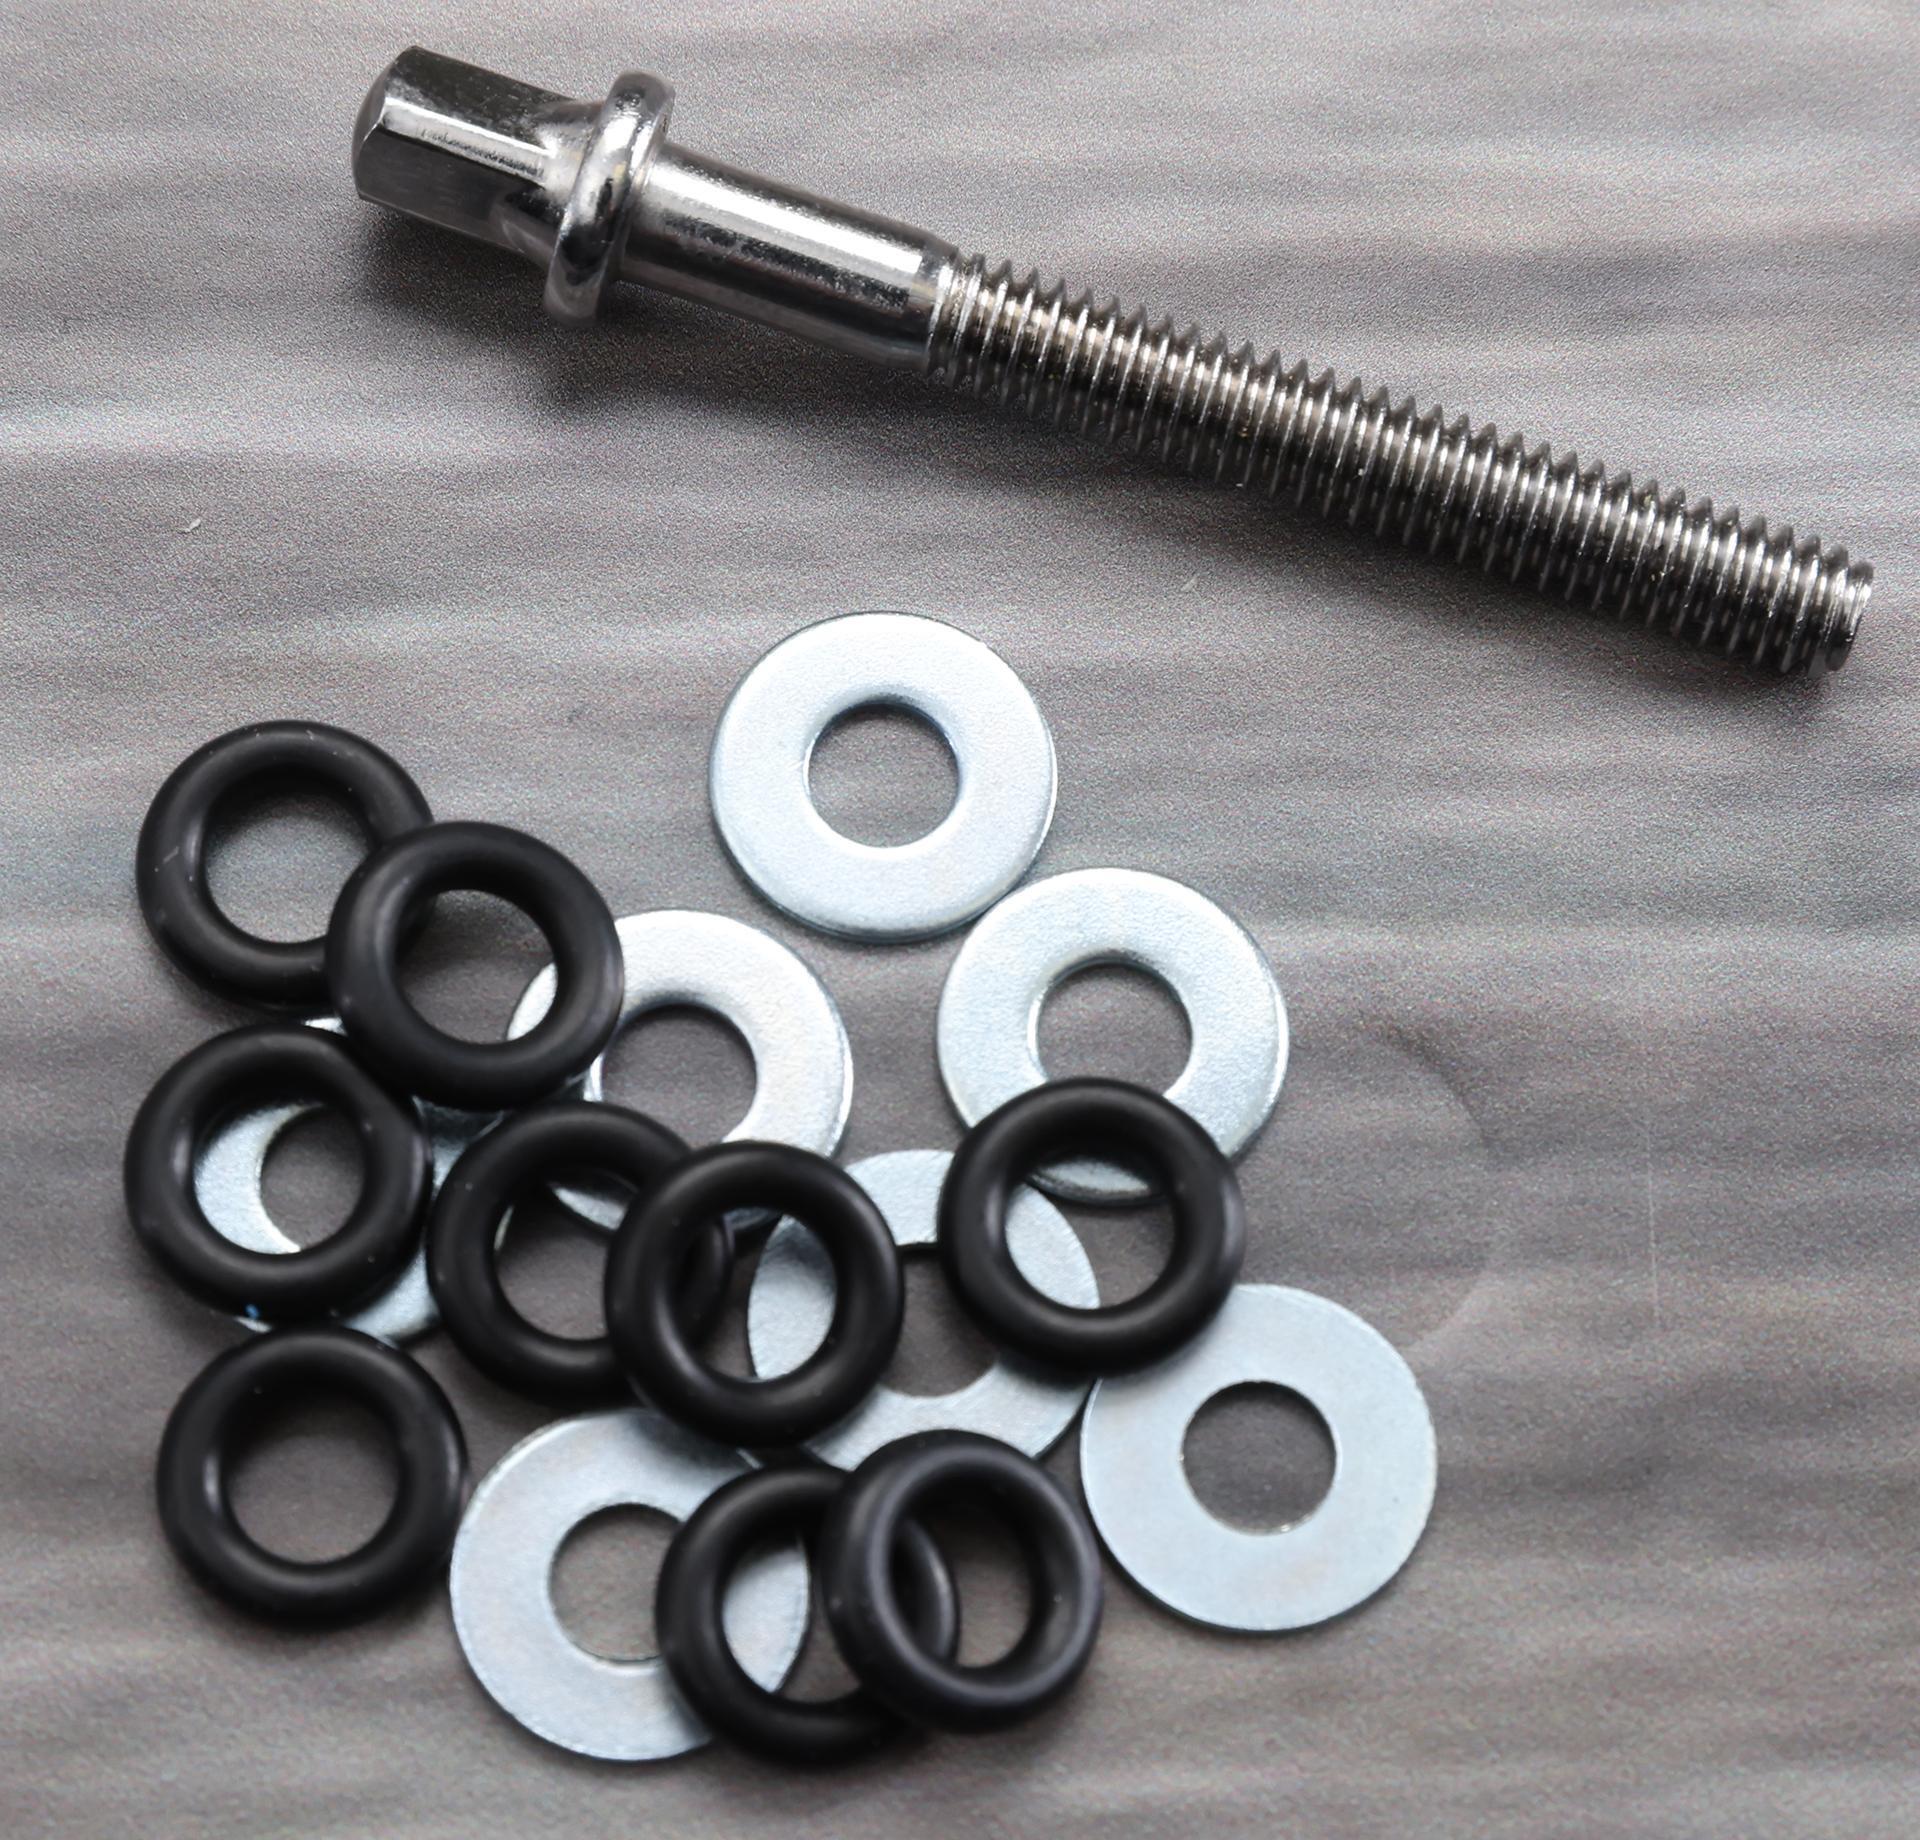
Use washers or rubber o-rings to lessen the chance of rattling or loosening.
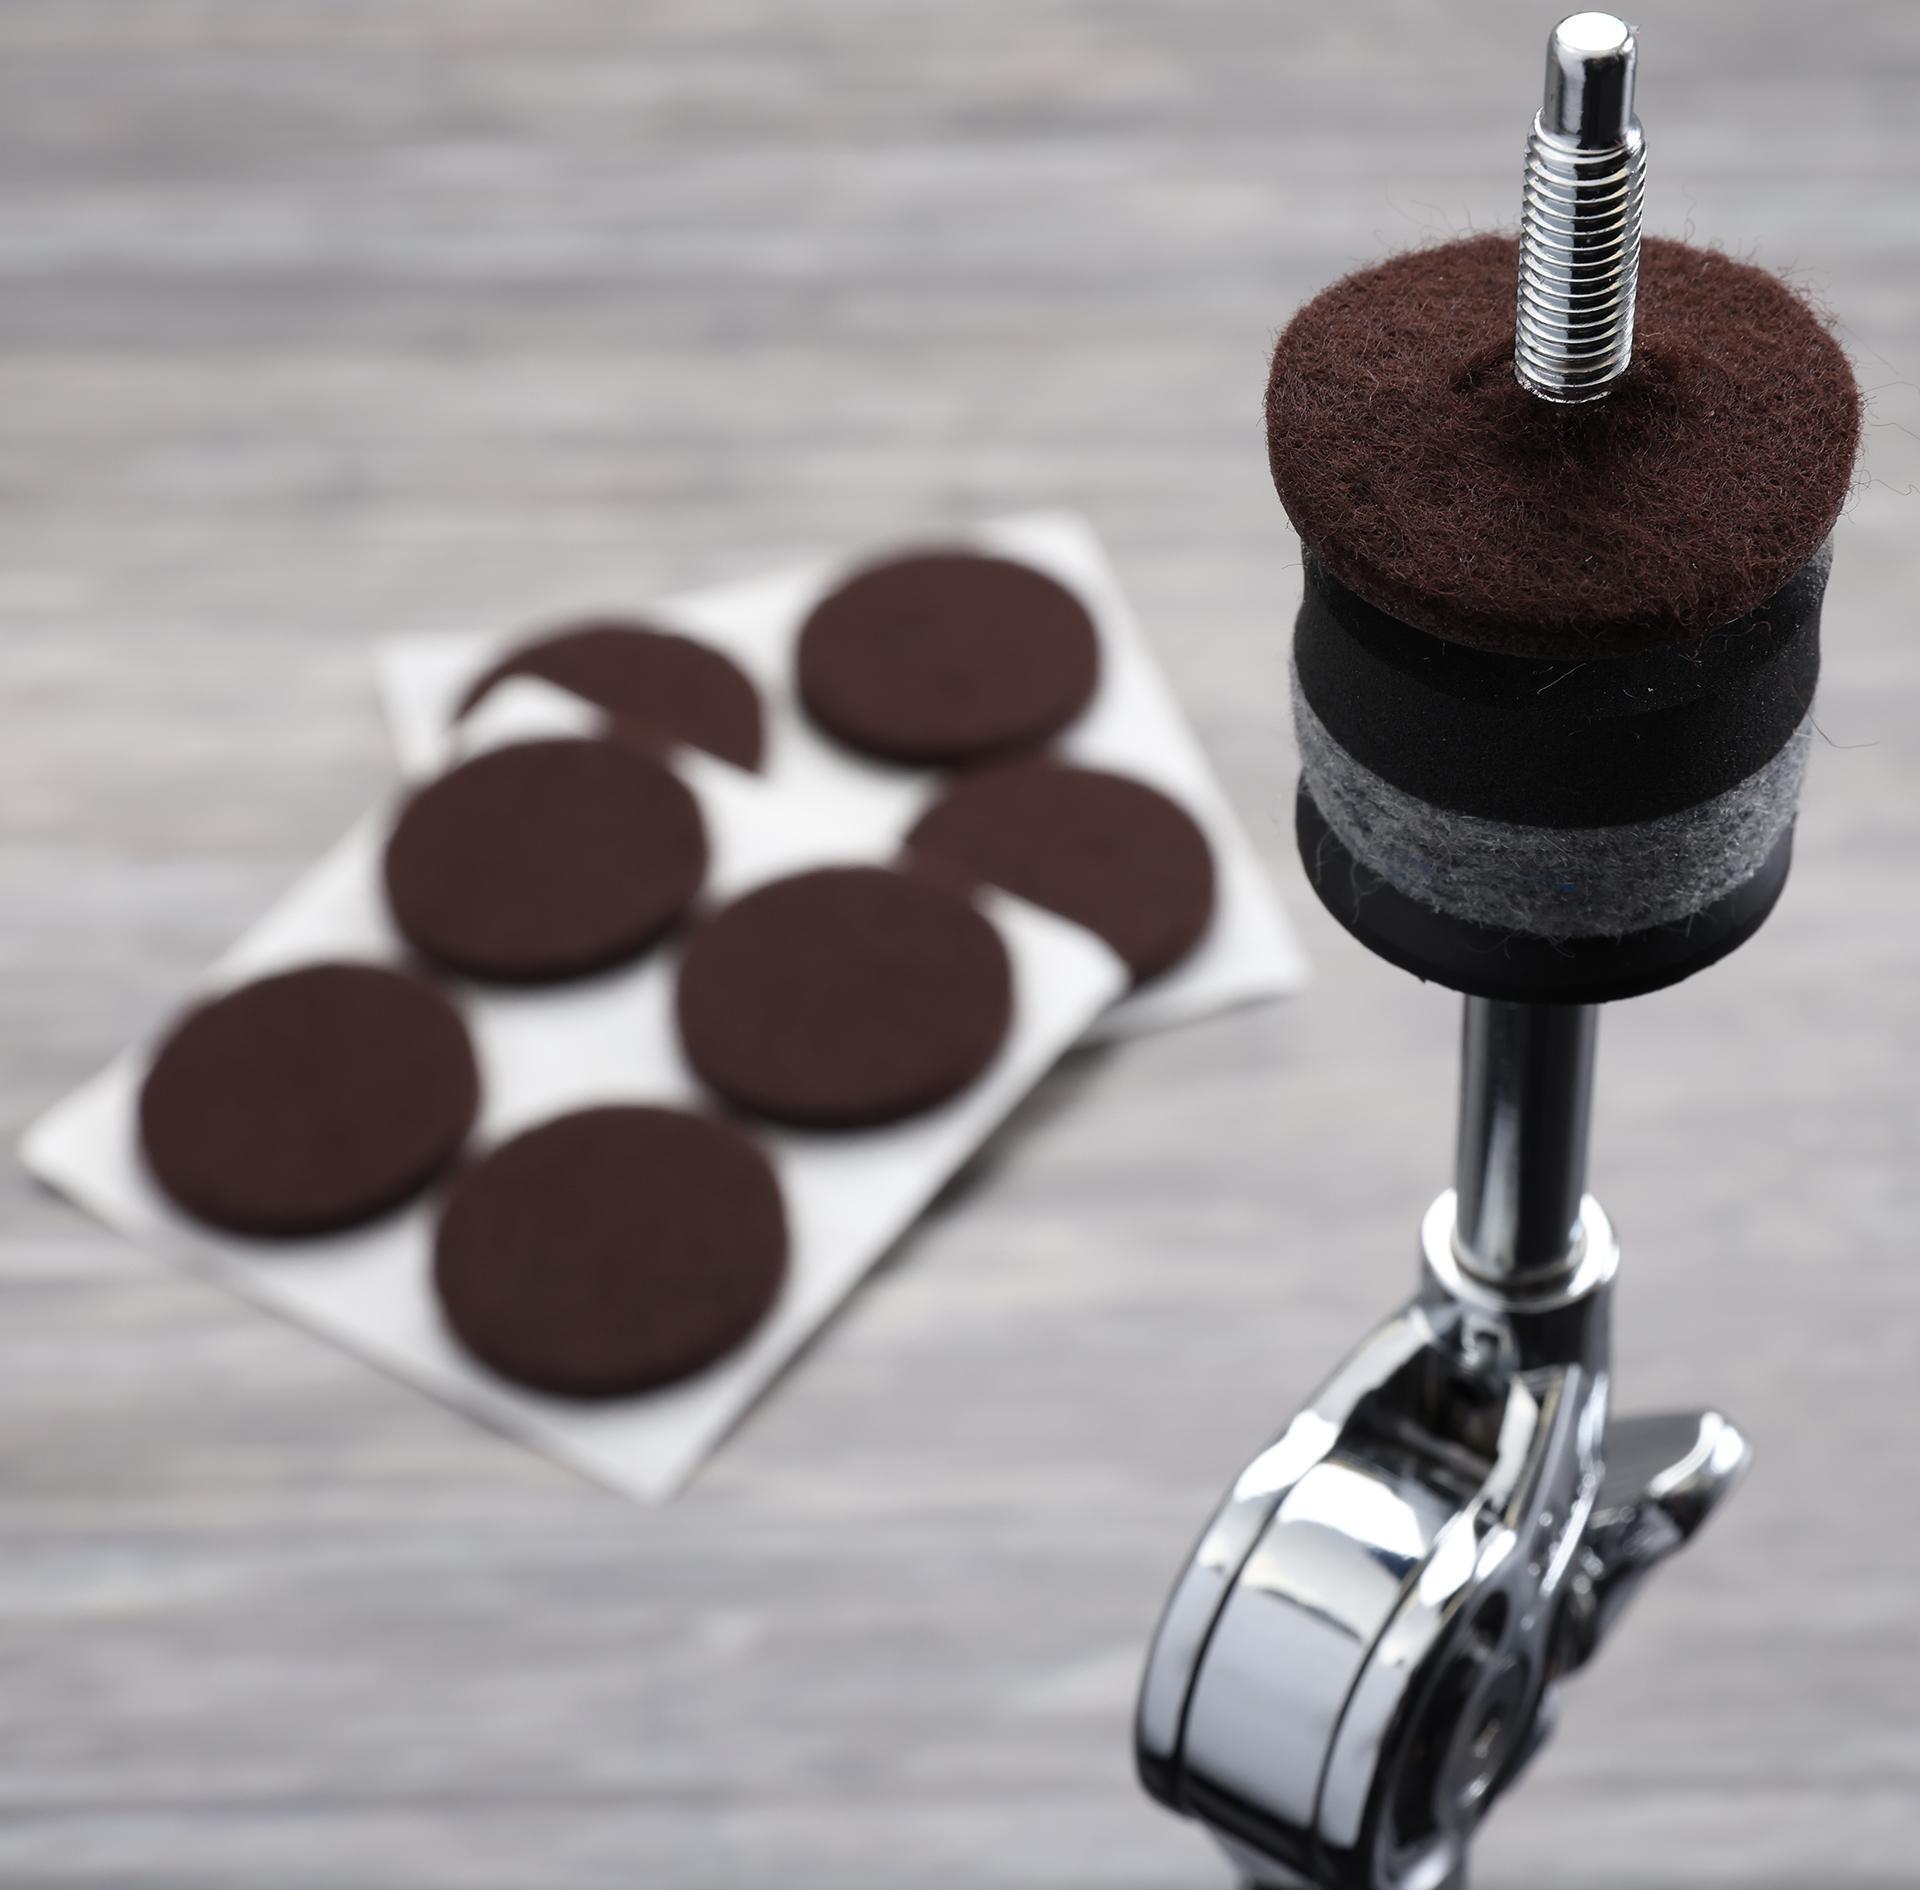
Cut a hole in the center of a furniture felt and place it on a cymbal stand.
Basic Care and Maintenance
The things we mentioned above are a bit more “specialized,” but the following items, as mentioned in our “Drum Care and Maintenance Guide,” are staples that every drummer should have in their toolbox.
Cleaning Cloths
It goes without saying, but there’s nothing nicer than a shiny drum kit and cymbals under the lights, so it’s always great to have some extra microfiber cloths handy. Plus, you’ll also need something to wipe down the inevitable drink that is spilled. You can find these pretty much anywhere from the cleaning section of your supermarket to your auto and hardware stores. For more information, be sure to check out our guides on how to clean your cymbals and drum care and maintenance to learn more about cleaning and polishing your drums and cymbals.
3-in-1 Oil
When caring for and maintaining your drums, lubricant oil is important. Applying just a drop or two on any moving part of your kit — like wingnuts, springs, and tension rods — will keep everything moving smoothly. It can also help prevent threads from stripping. If you can’t find 3-in-1 oil, then you can also use sewing-machine oil; and, if you’re in a pinch, a dab of Vaseline (petroleum jelly) will work. Remember, a little bit goes a very long way! Too much, and things can get a bit messy.
Various Tools
The last thing you should have in your toolbox is, well, tools. Every drummer should already have a multi-tool, like Pearl’s PTT13 Drummer’s TechTool, but, if you don’t or if someone permanently “borrowed” yours, here are some tools you should keep in your drummer’s toolbox.
- A small adjustable wrench for when you run into a stuck wingnut while you’re tearing down. Remember to place a cloth around the wingnut beforehand so you don’t chew up the metal!
- While you can place the wingnut between two sticks and try to loosen it that way, you may not have a good enough grip to loosen it.
- A set of Allen keys.
- A Phillips-head screwdriver. More often than not, snare drum straps are tightened to the butt plate with Phillips-head screws. So, if your strap broke or if you need to replace your snare wires, then you’ll want one on hand. Other parts such as lug casings also use Phillips-head screws.
- Having a screwdriver with interchangeable tips is even better as some parts may use flat-head screws.
- A 4-point socket with a ratchet or drill. If you lose a drum key, then you can use this instead. GrooveTech makes one that can be used with ratchets, and companies like Ahead and Evans make ones specifically for drills.
- Take it slow when putting the tension rods back on! Overtightening can cause long-term damage to your drums.
- A permanent marker. While it’s not necessarily a tool, it’s good to have one on hand. If you don’t have memory locks on your stands, then use it to mark the angle and height of your hardware. You can also use it to label your cases, to make notes on set lists, and even to sign autographs!
We hope this set of guidelines has helped you in knowing how to fix common issues with common resources. If you need any other drumming paraphernalia (or drums), then be sure to give your Sweetwater Sales Engineer a call at (800) 222-4700.