
Working with Samples on the Strike Multipad
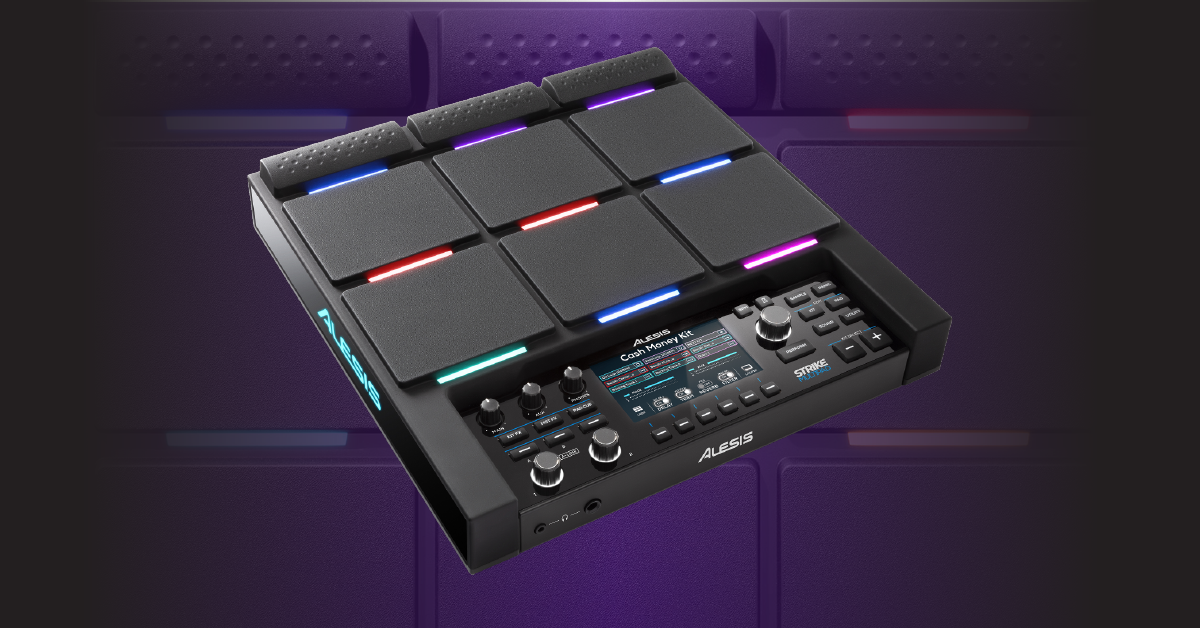
Getting started
You can incorporate samples in many different ways with the Strike Multipad, so in this guide, we will show you how to work with and assign samples and effects to get the most unique sounds possible. Follow the sections below to get started.
Recording and importing samples on the Strike Multipad
The Strike Multipad has 32GB of internal storage and also supports to 32GB of external memory with the use of a USB thumb drive formatted to FAT32 so the number of custom samples you can play with are endless.
External audio
TIP: Before recording external audio, adjust the input volume so it doesn’t clip. Navigate to the Utility menu, press the F2 (Audio) button, and use the Main Encoder to adjust the Rec In Vol to the desired level.
You can record samples from an external source such as a mixer, phone, or tablet and assign them to a pad by connecting ¼” TS instrument cables to the REC IN jacks on the back of the device.
- Press the Sample button and strike the pad you wish to put the sample on.
- Use the Main Encoder and set the Source to Rec In, and press F5 (Arm to Record).
- Press the F5 (Start Recording) button to begin and end recording the external audio, and then press it again to save.
- To preview the recorded sample before saving, press the F4 (Play/Stop) button.
Import samples from a USB thumb drive
Connecting a USB thumb drive to the USB Memory port allows you to import audio samples. For the thumb drive to work correctly, it must be formatted to FAT32. All audio samples must be in .WAV format and located in the root directory. This means they cannot be placed in any folder or sub-folder.
- Press the Sound button, and then hit the pad where you wish to load the sample to.
- Press the F3 (Import) button to access the USB thumb drive and use the main encoder to select the sample.
- Press the F4 (Play/Stop) button to preview the audio.
- Press the F5 (Single) button to import the individual sample. If importing multiple samples, press the F6 (Multi) button.
- To access User Samples, press the F2 (Browse) button in Sound mode, select the User library and the New Samples category.
How to Import Samples via USB
Recording with a DAW
One very unique feature of the Strike Multipad is the ability to record audio both to and from your DAW directly via USB. Since audio is being streamed through the USB cable, no additional hardware connections to your audio interface are necessary. Before you can begin recording, however, update your DAW settings and set the Strike Multipad as your recording and playback device.
Record Strike Multipad audio into a DAW
- Create an audio track in your DAW and set the input of the Strike Multipad.
- Channel 1 or Channel 2 for Mono
- Channel ½ for Stereo
- Press record in the DAW and start performing.
Record DAW audio into the Strike Multipad
- While in Perform mode, press the F6 (View) button to enter Looper mode, and then press F5 (Settings) to select the After Rec option.
- Overdub will loop and overwrite the recording.
- Playback will stop the recording but continue to loop the audio.
- Press the F4 (Measure) button to set the number of measures you wish to record onto the device.
- Press the F3 (Record) button to arm the device, and then press it again to begin.
- A one measure pre-count will occur before the device begins recording.
- Once you’re finished, press the F4 (Save) button.
- To preview the sample before saving, press the F2 (Play) button.
Editing samples
IMPORTANT: If you wish to edit a factory sample, you must copy it to the User Library first. To do this, select the factory sample, press F6 (Edit), and then select Copy To User. Once it’s copied, it will be placed in the User library.
Once you’ve imported or recorded samples onto the module, you can then edit them via the Sample Edit menu. To get to the Edit menu, press the Sound menu button, and use the Main Encoder knob to select the User library and New Sample category. Select the sample and then press the F6 (Edit) button.
- In the Edit menu, select Edit Start/End.
- Use the Left A-Link knob to trim the beginning, the Right A-Link knob to trim the end, and the Main Encoder to move both the start and end points.
- Use the A, B, and C buttons to set how coarse or fine the trim adjustment will be.
- Press F1 (Play) to preview the newly trimmed sample, and then press F5 (Save).
When you need help, Sweetwater has the answers!
Our knowledge base contains over 28,000 expertly written tech articles that will give you answers and help you get the most out of your gear. Our pro musicians and gear experts update content daily to keep you informed and on your way. Best of all, it’s totally FREE, and it’s just another reason that you get more at Sweetwater.com.


Offer applies only to single-receipt qualifying purchases. Select manufacturers may require that only the manufacturer’s products qualify towards the minimum purchase amount needed to be eligible for promotional financing. Otherwise, an invoice that meets the minimum purchase amount and contains at least one qualifying manufacturer product is eligible for promotional financing. No interest will be charged on promo purchase balance, and equal monthly payments are required on promo purchase until it is paid in full. The payments equal the amount financed divided by the number of months in the promo period, rounded up to the next whole dollar. These payments may be higher than the payments that would be required if this purchase was a non-promo purchase. During the last month(s) of the promo period the required monthly payment may be reduced due to the prior months’ rounding. Regular account terms apply to non-promo purchases. New Accounts as of 07/31/2025: Purchase APR is 34.99%. Penalty APR is 39.99%. Min Interest Charge is $2. Existing cardholders: See your credit card agreement terms. Subject to credit approval.
Offer applies only to single-receipt qualifying purchases. No interest will be charged on the promo balance if you pay it off, in full, within the promo period. If you do not, interest will be charged on the promo balance from the purchase date. The required minimum monthly payments may or may not pay off the promo balance before the end of the promo period, depending on purchase amount, promo length and payment allocation. Regular account terms apply to non-promo purchases and, after promo period ends, to the promo balance. New Accounts as of 07/31/2025: Purchase APR is 34.99%. Penalty APR is 39.99%. Min Interest Charge is $2. Existing cardholders: See your credit card agreement terms. Subject to credit approval.
The estimated required monthly payment shown which excludes taxes and delivery equals the amount financed divided by the number of months in the promo period, rounded up to the next cent. During the last month(s) of the promo period the required monthly payment may be reduced due to this rounding. These payments apply only with the financing offer shown. If you make these payments by the due date each month, you should pay off this amount financed within the promo period, if it is the only balance you are paying off. If you have other balances on your account, this payment will be added to any other minimum monthly payments.
Applies only to select items from this manufacturer. Ask your Sweetwater Sales Engineer for more details.