
Trumpet Quickstart Guide
The greats like Miles Davis, Dizzy Gillespie, and Louis Armstrong were all masters of their craft, and they all have one thing in common: they needed to learn the fundamentals of the trumpet. In this guide, we will show you the parts of a trumpet and proper playing technique while providing some tips and tricks along the way! Follow the sections below to get started.
IMPORTANT: In all things regarding your new trumpet, ask your band director or private teacher to show you how it’s done before you try it at home. As they show you how to play the instrument, they will be able to answer your questions.
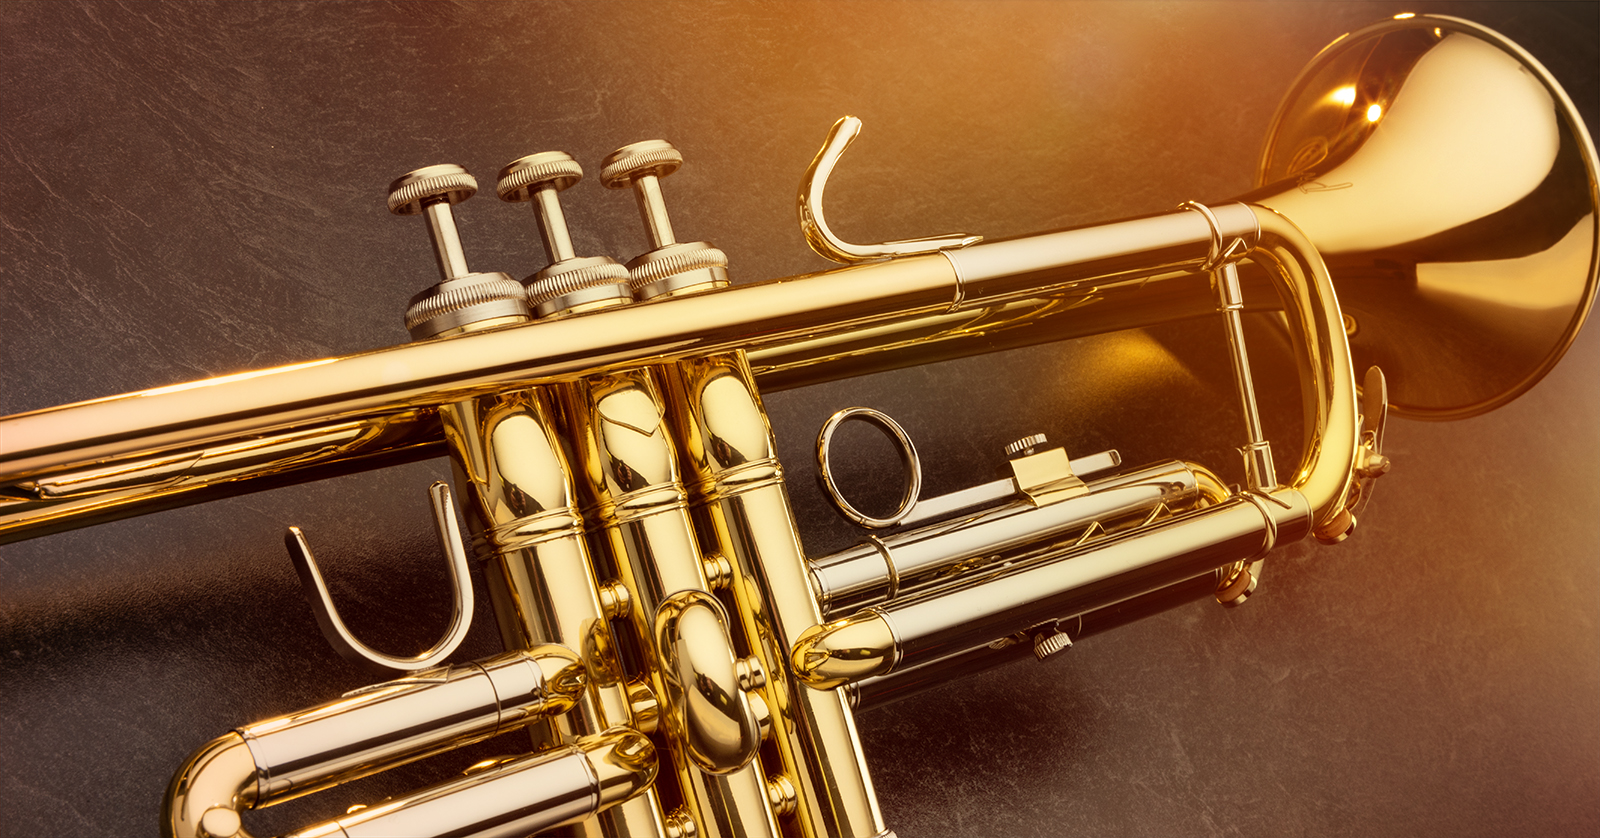
Parts of a Trumpet
There are many different types of trumpets, but they can all be broken down into two primary parts: valves and tuning slides. While there are the mouthpiece, bell, and finger rings that assist with holding the trumpet correctly, we’ll cover how to hold a trumpet.
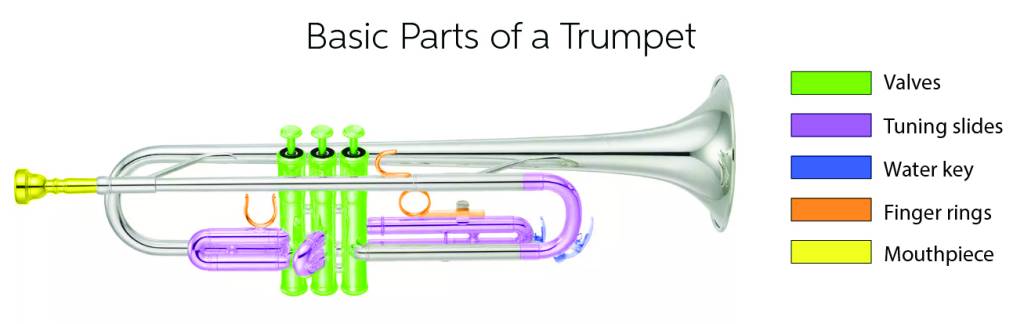
Parts of a trumpet
Mouthpiece
Trumpet mouthpieces are just like guitar strings in that, while they all serve the same purpose, material, dimensions, and quality play a significant role in the trumpet’s overall tone. Not all trumpet players are the same, so what mouthpiece works for one may not work for another.
- The cup depth and diameter play a significant role in your overall tone. Deep cupped mouthpieces will produce a dark tone, whereas shallow cupped will have a bright tone. Check out our brass mouthpiece buying guide to learn more!
- 7C mouthpieces are the most common, as they are shipped with almost all trumpets and are widely regarded as the best size for beginners.
- Don’t smack the mouthpiece when you’re inserting it into your trumpet! You run the risk of it getting stuck. If this happens, you’ll need to take it to your local repair shop to get it removed.
- Spritz some mouthpiece cleaner or dish detergent in warm water and wipe it down with a microfiber cloth before you put your trumpet away. Not only will this keep it clean, but it will also help sanitize it!
- Use a brass mouthpiece brush every week. This helps clear any deposits and buildup which can affect the airflow.
Tuning slides
Here are a few tips for working with a trumpet’s tuning slides. While tuning apps are available, we highly recommend investing in a quality clip-on tuner, like the Snark ST-2, as they are very accurate and don’t take up real estate on your music stand!
- Grease the tuning slides weekly.
- When tuning your trumpet, use the Main slide, which has the most significant impact. The first and second valve tuning slides aren’t used often, but if you have tuning issues, adjust these to see if that fixes the problem.
- The third valve tuning slide is primarily used on low notes, specifically C# and D, as they are often on the sharp side.
- Temperature will affect the tuning! Colder temperatures play flat, and warmer temperatures play sharp. Take that into account when you’re tuning!
- Fatigue also affects tuning, so make sure to adjust your tuning as necessary!
Water key
Moisture eventually builds up and will come to a point where your trumpet develops a gurgling sound. When this happens, you’ll need to open the main slide’s water key, place your mouth over the mouthpiece, and blow puffs through the mouthpiece (don’t buzz!) to force the moisture out.
- If you still hear a gurgling sound when you press the first or second valve, hold the valve in question down, open the main tuning slide’s water key, and blow air through the mouthpiece.
- If there’s a gurgling sound when you press down the third valve, hold it down, and open the third valve tuning slide’s water key to empty it.
- Before you place your trumpet back in its case, it’s good practice also to pull out the first and second valve tuning slides and shake any moisture out.
Water key etiquette
Removing moisture from your trumpet is crucial as it affects the tone, but there are some unwritten rules about this!
- Empty moisture before and after you play, and only when necessary.
- NEVER empty your water key during a quiet part of the song or while someone is talking. There’s nothing more embarrassing than a loud honking sound!
- If you have to empty it at that time, open the water key and shake your trumpet. You won’t be able to get rid of all the moisture, but it’ll remove enough to get you by.
- Place a small rag or a small plastic container with a sponge on the floor to catch any moisture you’ve emptied.
Valves
Although some trumpets out there use rotary valves, most trumpets use piston valves and work in an on/off fashion, which changes the pitch.
- Make sure the valves are well-oiled at all times! Sticky valves will lead to inconsistent playing.
- If you hear a valve click, check to make sure that everything associated with that valve is fully secured.
- Occasionally, the valve spring may make a noise when you press the valve down. If this happens, remove the valve, place a drop or two of valve oil on the top and bottom of the spring, then re-install the valve. Once re-installed, press the valve down rapidly a few times to work the oil through.
How to Hold a Trumpet
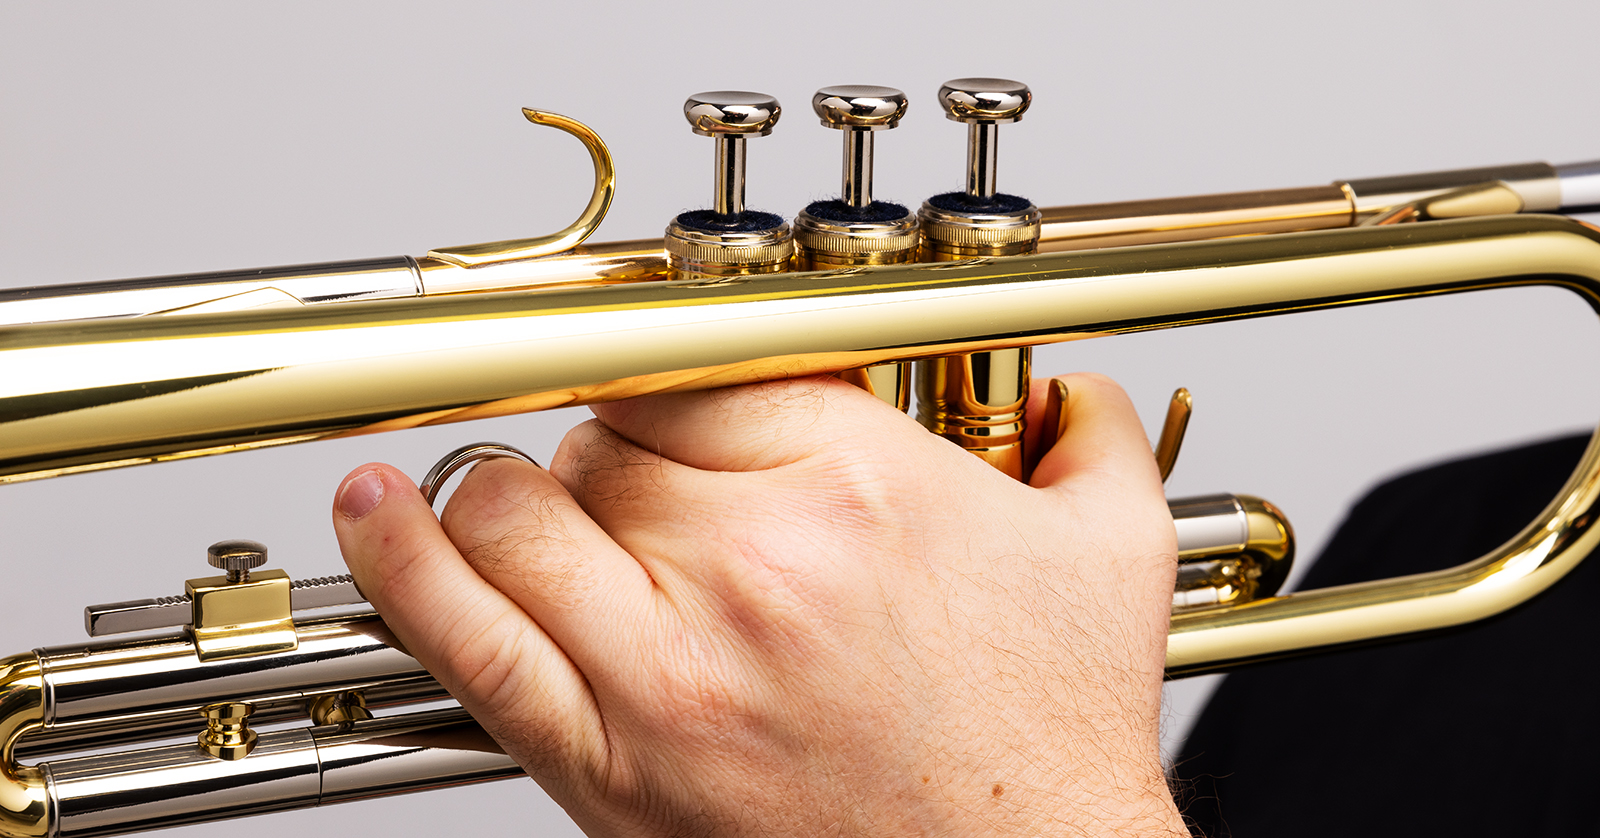
Now that you know the parts of a trumpet, let’s show you how to hold it correctly.
- Wrap your left hand around the trumpet, resting your thumb in the first valve tuning saddle. Make sure you use a firm yet comfortable grip.
- Insert your left ring finger in the third valve tuning slide ring.
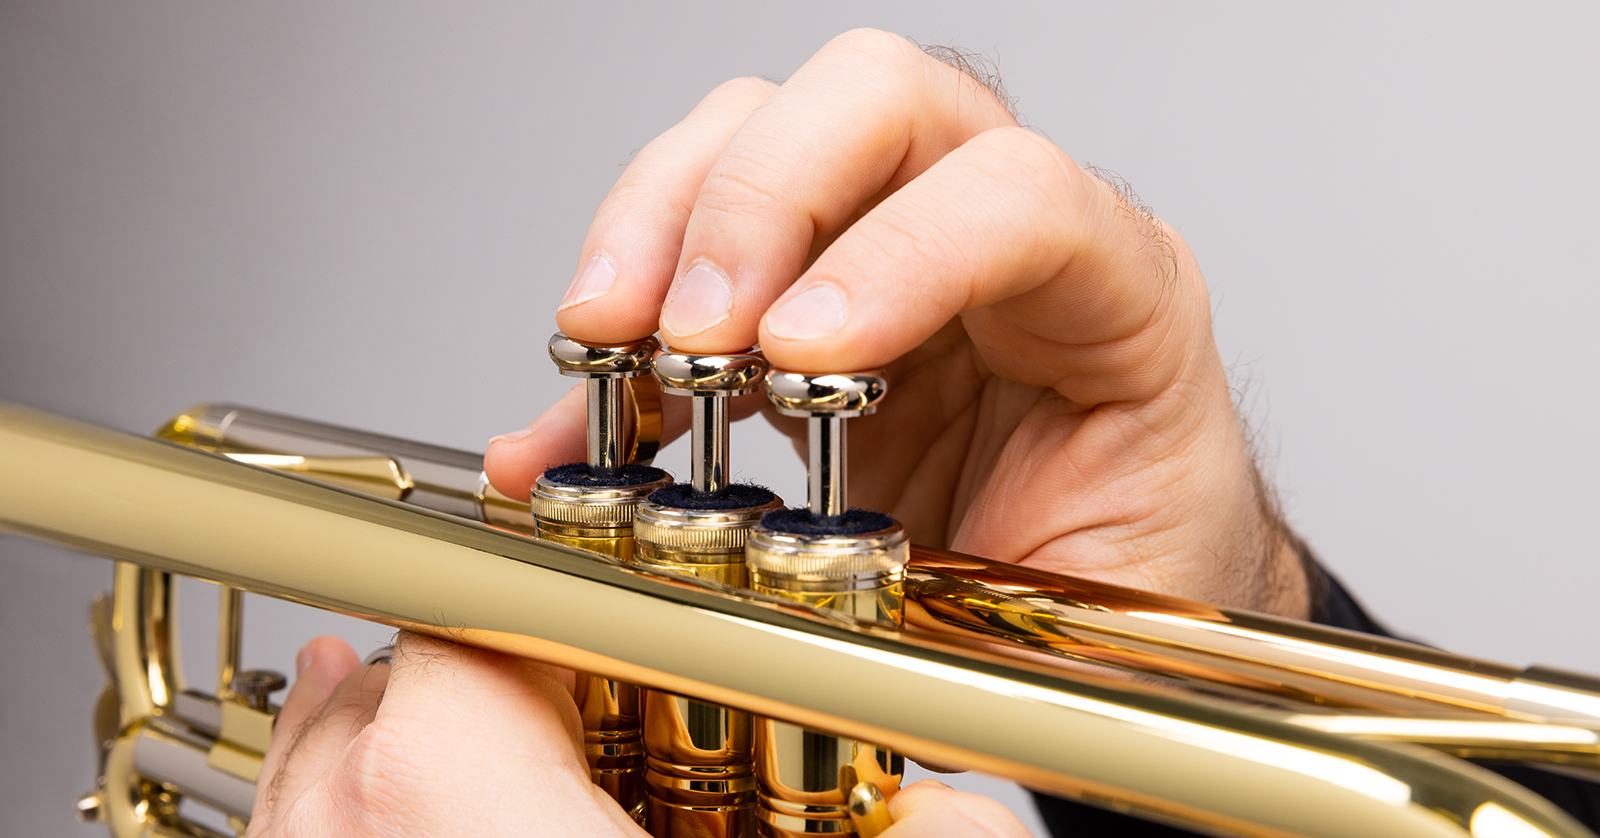
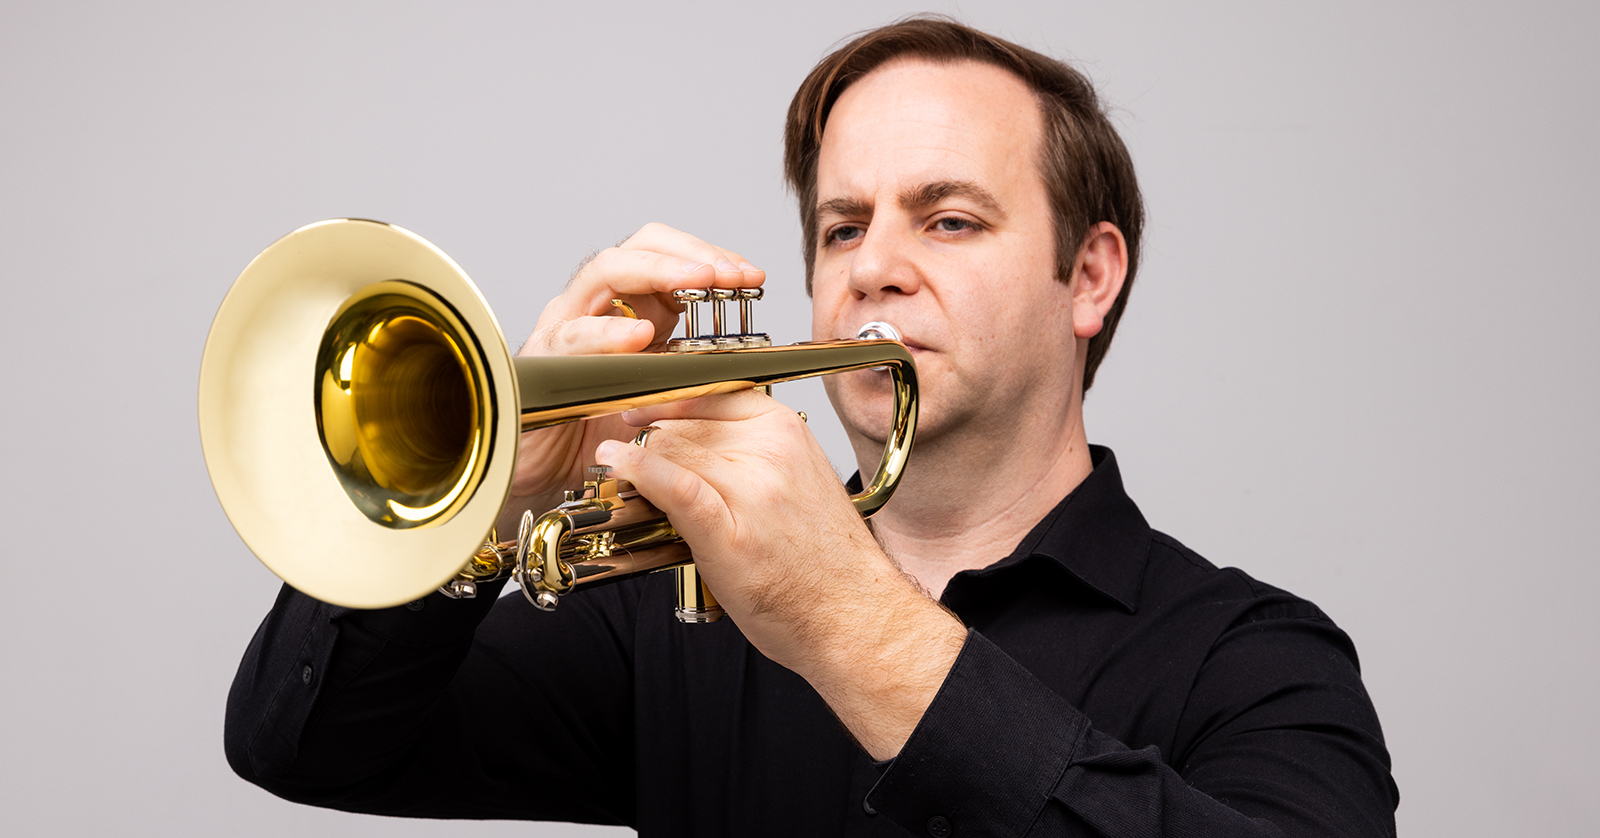
- With your right hand, place your first three fingers on the valves.
- While playing, curl your first three fingers so the contact is between the tip of your finger and the valve key, almost like you’re using a computer keyboard.
- This ensures not just speed but helps agility and endurance as well. More importantly, there will be much less tension than there would be if you played flat-fingered.
- Rest your thumb underneath the lead pipe between the first and second valves. Don’t bend the thumb, though!
- In the end, both your hands should end up forming a C shape.
Proper Playing Technique
There’s nothing better than playing the trumpet, but just like any other instrument, you need proper technique. Poor technique can affect the tone, restrict your movement, and cause bad habits that will be hard to break.
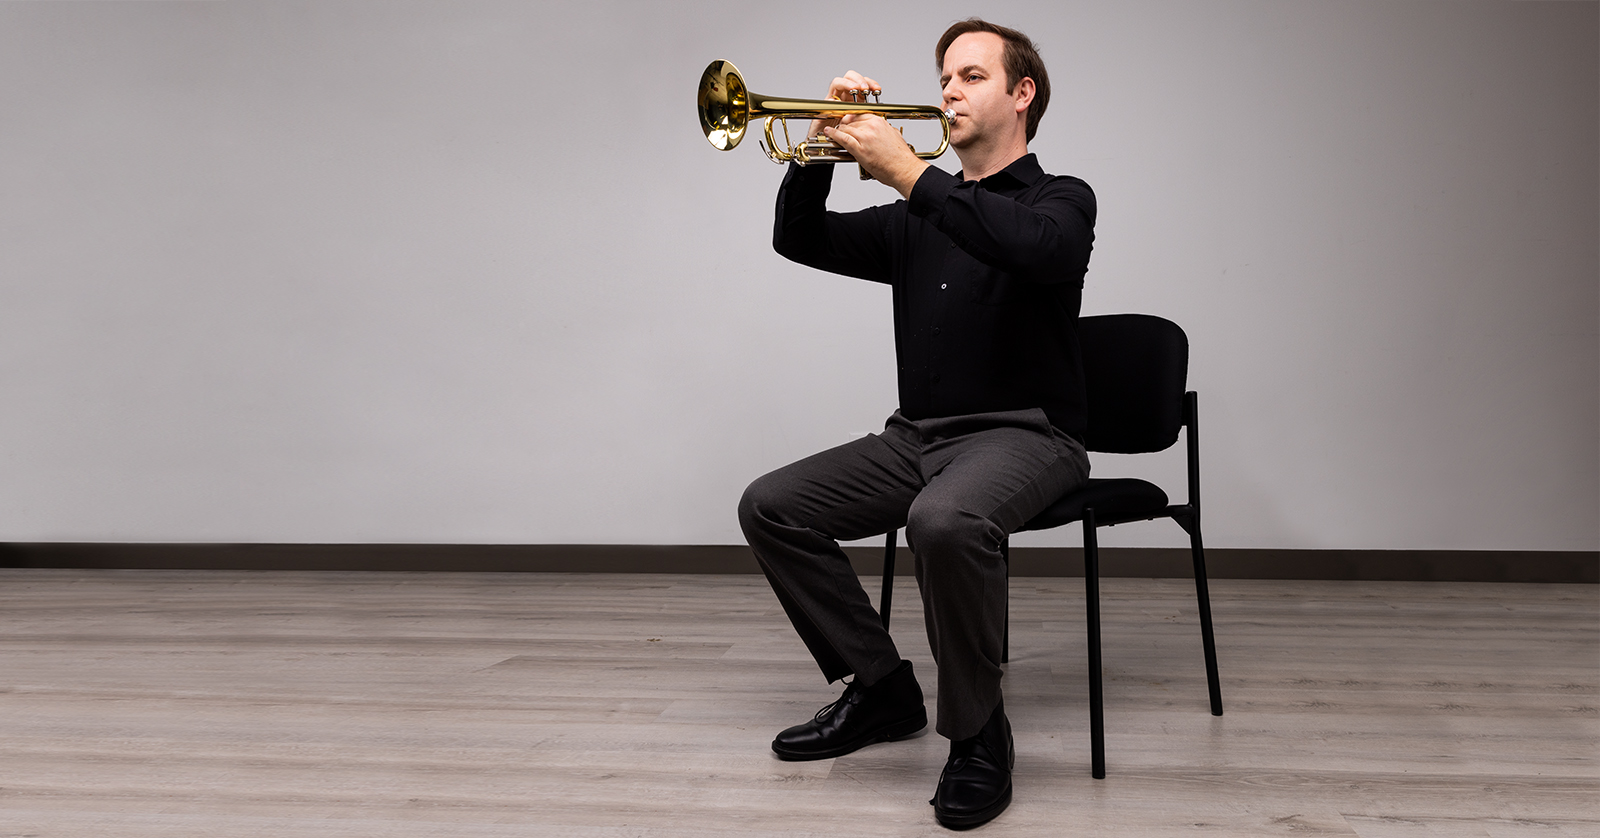
- Sit or stand straight! If you’re hunched over, the sound won’t project as well since you’re playing to the floor and not the audience. Even worse, it will constrict airflow, meaning you won’t be able to sustain extended notes.
- Make sure your trumpet is pointing straight out and perfectly horizontal. If your horn is pointed down constantly, it can affect the tone and pitch, but even worse, it can put unnecessary stress on your wrists, which, if not corrected, can potentially lead to carpal tunnel down the road.
- Play loose! Just by relaxing your shoulders, you’ll have less neck and back tension and an easier time taking a deep breath.
- PRACTICE, PRACTICE, PRACTICE!
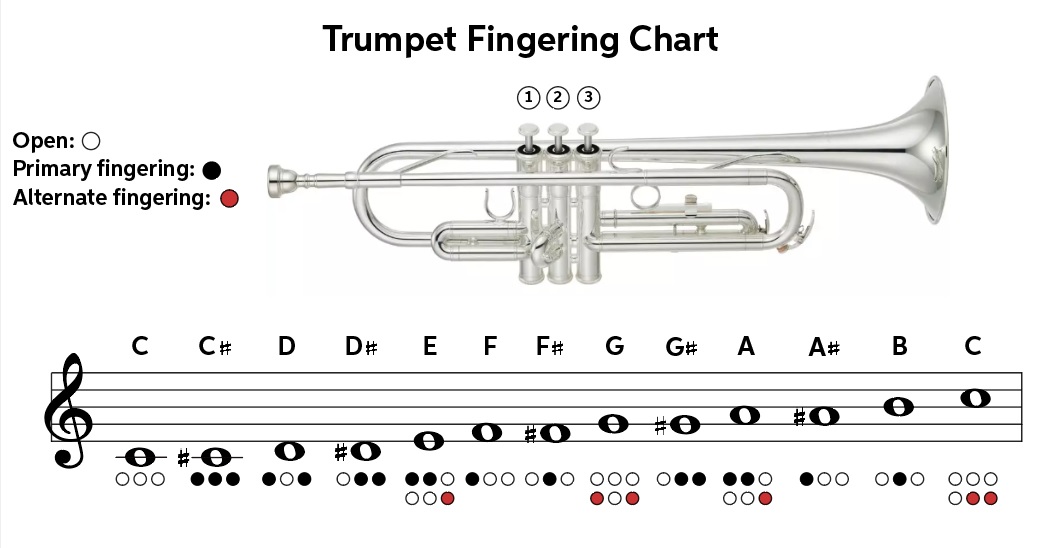
Trumpet Fingering Chart
When you press a valve down, it will affect the airflow, which changes the length of the tubing and the note. We have created a trumpet fingering chart to follow while practicing.
- The valve number corresponds to the fingers on your right hand.
- First valve: right index finger
- Second valve: right middle finger
- Third valve: right ring finger
- Using the alternate fingerings (indicated by the red dots) can affect the timbre and tuning of the note, so consider that while playing.
When you need help, Sweetwater has the answers!
Our knowledge base contains over 28,000 expertly written tech articles that will give you answers and help you get the most out of your gear. Our pro musicians and gear experts update content daily to keep you informed and on your way. Best of all, it’s totally FREE, and it’s just another reason that you get more at Sweetwater.com.


Offer applies only to single-receipt qualifying purchases. Select manufacturers may require that only the manufacturer’s products qualify towards the minimum purchase amount needed to be eligible for promotional financing. Otherwise, an invoice that meets the minimum purchase amount and contains at least one qualifying manufacturer product is eligible for promotional financing. No interest will be charged on promo purchase balance, and equal monthly payments are required on promo purchase until it is paid in full. The payments equal the amount financed divided by the number of months in the promo period, rounded up to the next whole dollar. These payments may be higher than the payments that would be required if this purchase was a non-promo purchase. During the last month(s) of the promo period the required monthly payment may be reduced due to the prior months’ rounding. Regular account terms apply to non-promo purchases. New Accounts as of 07/31/2025: Purchase APR is 34.99%. Penalty APR is 39.99%. Min Interest Charge is $2. Existing cardholders: See your credit card agreement terms. Subject to credit approval.
Offer applies only to single-receipt qualifying purchases. No interest will be charged on the promo balance if you pay it off, in full, within the promo period. If you do not, interest will be charged on the promo balance from the purchase date. The required minimum monthly payments may or may not pay off the promo balance before the end of the promo period, depending on purchase amount, promo length and payment allocation. Regular account terms apply to non-promo purchases and, after promo period ends, to the promo balance. New Accounts as of 07/31/2025: Purchase APR is 34.99%. Penalty APR is 39.99%. Min Interest Charge is $2. Existing cardholders: See your credit card agreement terms. Subject to credit approval.
The estimated required monthly payment shown which excludes taxes and delivery equals the amount financed divided by the number of months in the promo period, rounded up to the next cent. During the last month(s) of the promo period the required monthly payment may be reduced due to this rounding. These payments apply only with the financing offer shown. If you make these payments by the due date each month, you should pay off this amount financed within the promo period, if it is the only balance you are paying off. If you have other balances on your account, this payment will be added to any other minimum monthly payments.
Applies only to select items from this manufacturer. Ask your Sweetwater Sales Engineer for more details.