
Postive Grid Spark GO Quickstart Guide
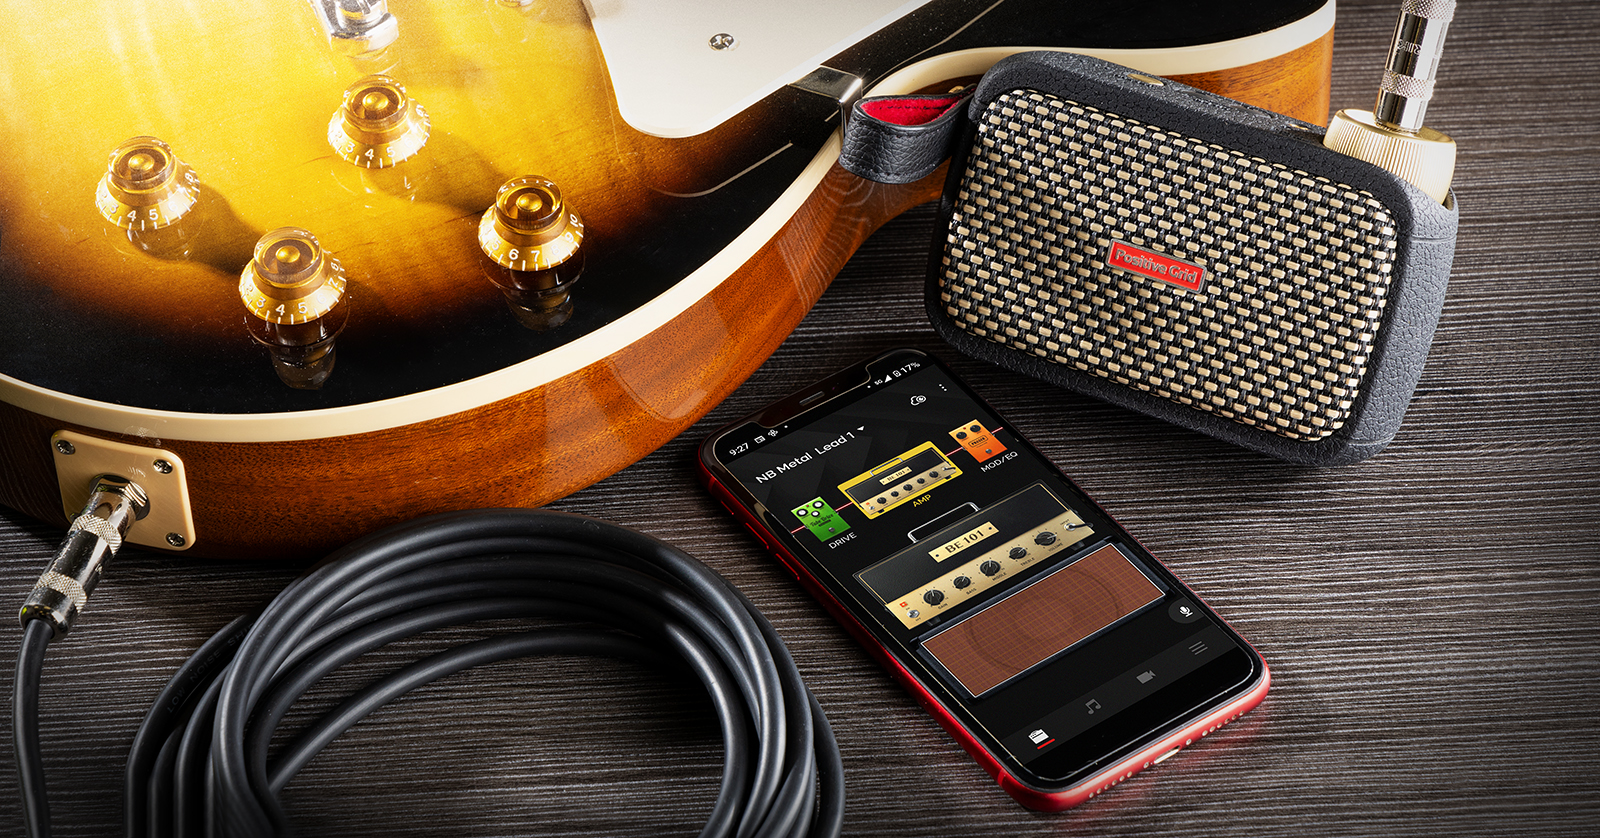
The Positive Grid Spark GO is a solution for practicing and playing anywhere. Plug in your guitar, select one of its four amplifier and effects presets, and play.
Use Bluetooth to connect it to the free Spark app for iOS, iPadOS, and Android, and you open endless possibilities for effects and amp modeling, generating practice tracks with drums and bass accompaniment, jamming along to tracks on your Apple Music or Spotify playlists, and more.
Connect a USB cable to your computer and the Spark GO becomes an audio interface to your DAW.
Let’s get started in your discovery of all that this half-pint-sized powerhouse can do.
- Unboxing the Spark GO
- Spark GO Controls and Connections
- Installing the Spark App on your iOS or Android device
- Updating the Spark GO firmware
- Using the Spark App
- Using the Spark GO as an Audio Interface and Recording to Your DAW
- Time to play
- Sweetwater Spark Go Demo Video
Unboxing the Spark GO
When you open the box, find the folded Spark GO Quick Start Guide. Hang on to it.
In the box are two carrying straps and the alternate black grill. Consult the Spark GO Quick Start Guide under Grille & Strap Swapping, and you can customize the unit by attaching one of the straps and swapping out the alternate grille if you like.
Included is a USB-C to USB-A cable. The Spark GO documentation refers to this as a “Charging Cable,” but it is, in fact, a data cable. You can use it not only to charge the Spark GO’s battery but also to connect to your computer or device to use the Spark GO as an audio interface to connect to your DAW and record your guitar.
The Spark GO Help Center Page and User Manual
The Spark GO and its app are easy to use, but to take advantage of all the features, visit the Positive Grid Spark GO Help Center page. Download the newest version of the Spark GO User Manual for reference.
Spark GO Controls and Connections
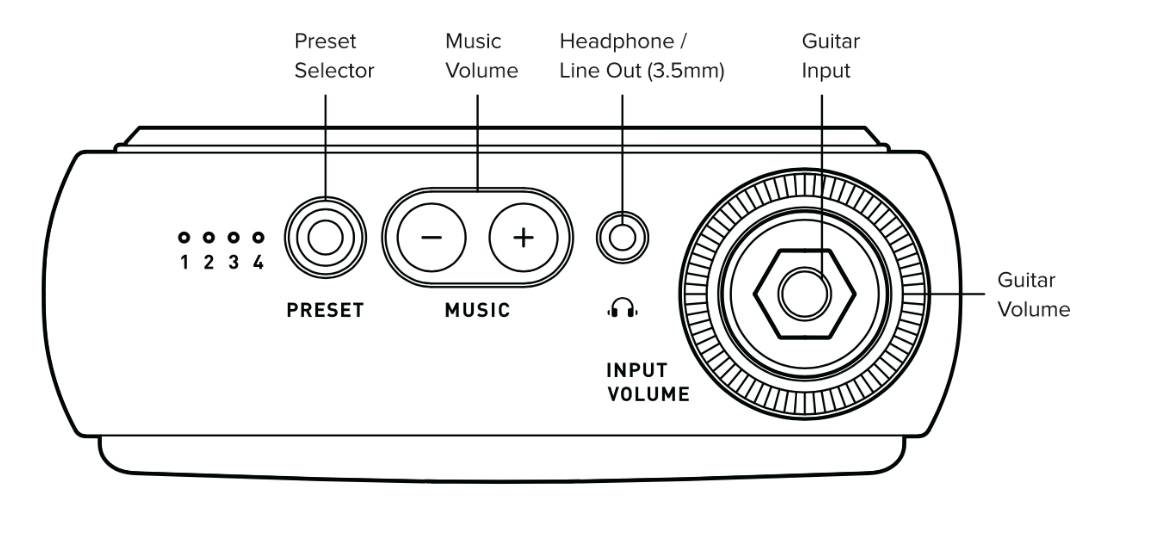
Spark GO Top Panel Controls and Connections
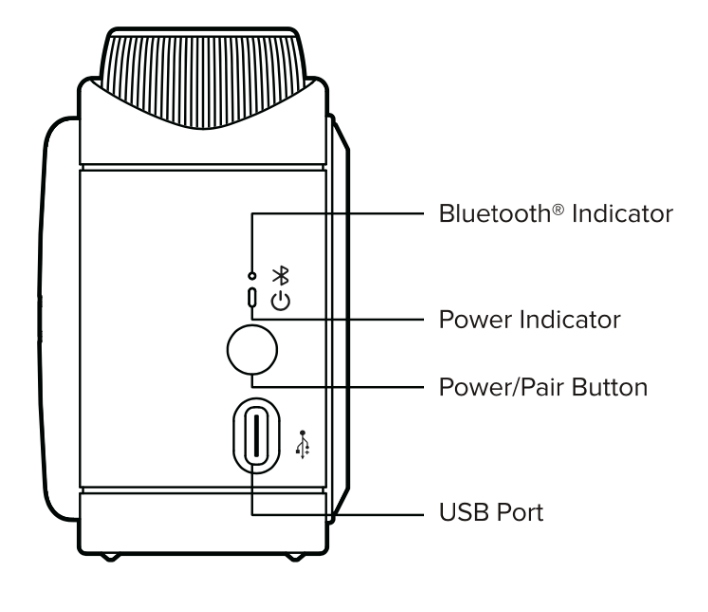
Spark GO Side Panel Controls and Connections
- Guitar Input. Plug in a 1/4-inch TS instrument cable connected to your guitar. This will make things top-heavy. You may wish to use a cable with a right-angle plug, or set the Spark GO onto its back.
- Guitar Volume. The knurled gold knob is a rotary encoder. It does not have an “all the way down” or “all the way up” position. Adjusting it will affect the overall volume of your guitar through the speaker or the headphones.
TIP: The Spark GO will make a brief two-note “chugging” sound to alert you when you turn the Guitar Volume knob to its maximum value.
- Music Volume Buttons. Press and hold the rubber — and + buttons to adjust the volume of a track played back through Bluetooth audio. This way, you can set the backing track’s audio level independently of the guitar’s volume level.
- Headphone/Line Out. Connect a 1/8-inch TRS cable to your headphones, or run a line-out to a mixer or external speakers. When you plug in a cable, the internal speaker is muted. Learn more about line-out cable connections in the Spark GO User Manual > Headphone/Line Out Port on page 6. Output settings for Stereo and Mono on the Spark GO are made using the Spark app, explained in the Spark GO User Manual > Device Card Adjustments on page 28.
- Preset Selector and LED lights. Tapping the Preset button steps through the preset amp and effects patches in the Spark GO’s memory. The four LEDs indicate which preset is chosen. You can load different presets into the Spark GO from the Spark app on your phone.
- Onboard Tuner. Press and hold the Preset button, and the four LED lights will indicate whether each pitch you play on a string is sharp, flat, or in tune. Learn more in the Spark GO User Manual > Tuner Mode on page 7.
TIP: The Spark App on your phone also has a tuner function with a more detailed display.
- USB Port. Charge the Spark GO battery by connecting the included USB-C to USB-A cable to a 5V 2a wall charger (not included), a powered USB hub, or your computer. Connect the USB-C cable to your computer to use the Spark GO as an audio interface for your DAW.
- Power/Pair Button. Hold the button briefly to turn on the power. Tap the button to enter Bluetooth pairing mode.
- Power Indicator.
- Flashing Red/Green: Charging
- Solid green: Fully charged
- Solid Red: Low battery
- Bluetooth Indicator.
- Flashing Blue: Pairing
- Solid Blue: Connected to Bluetooth
Installing the Spark App on your iOS or Android device
Download the Spark App on your device
The Positive Grid Spark app
On the last fold of the Spark GO Quick Start Guide is a QR code for App Download. Use your device to scan the code, or use these links:
Spark App for iOS in the Apple App Store
Spark App for Android in the Google Play Store
Bluetooth Pairing with the Spark GO
To use the Spark GO, you pair with two Bluetooth connections, one for audio and one for app control.
If you need to know how to enable Bluetooth on iOS and Android, here are Sweetwater’s guides:
- Enable Bluetooth on your device.
- Turn on the Spark GO by holding the Power/Pair button until the Bluetooth Indicator illuminates.
- On your device’s Bluetooth settings, you should see Spark GO Audio. Tap this to connect. If you don’t see Spark GO Audio, tap the Pairing button on your Spark GO and try again.
- Open the Spark app on your device. Select the Spark GO as your device.
- Tap Connect, and the Spark app will search for the Spark GO. Select it in the app, and it will pair your device with the Spark GO BLE Bluetooth connection.
Now you can use all the functions of the Spark app, including playing backing tracks from within the app. You can also play backing tracks from any other app on your device to use the Spark GO as a wireless Bluetooth speaker.
Updating the Spark GO firmware
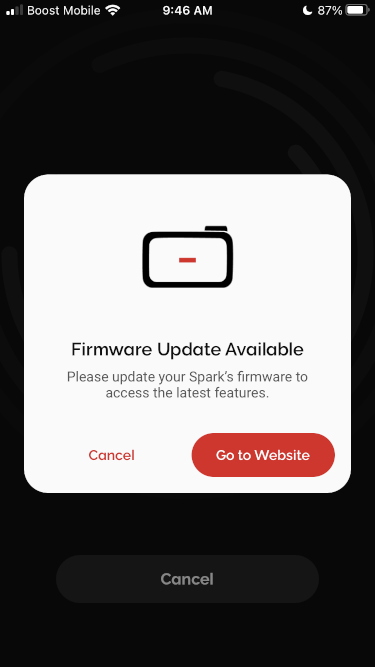
The Spark app indicates that there is a firmware update available.
On first use, the Spark app may indicate that your Spark GO needs a firmware update. If you see this message, you need to install the update to access the newest features, to fix bugs, and to work correctly with the Spark app.
Installing the firmware update is not done on the Spark app on your device. To update the firmware, connect your Spark GO to your computer via the USB-C cable and run the updater app on your computer.
Head over to Sweetwater’s Spark GO Firmware Update Guide, complete the procedure, and return here.
Using the Spark App
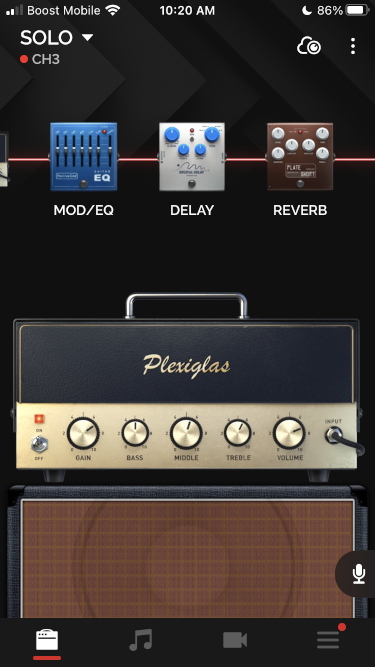
The Amp page in the Spark app
In the Spark App, under the Amp icon on the bottom, you can access different amp models, turn effects on and off, and adjust their parameters.
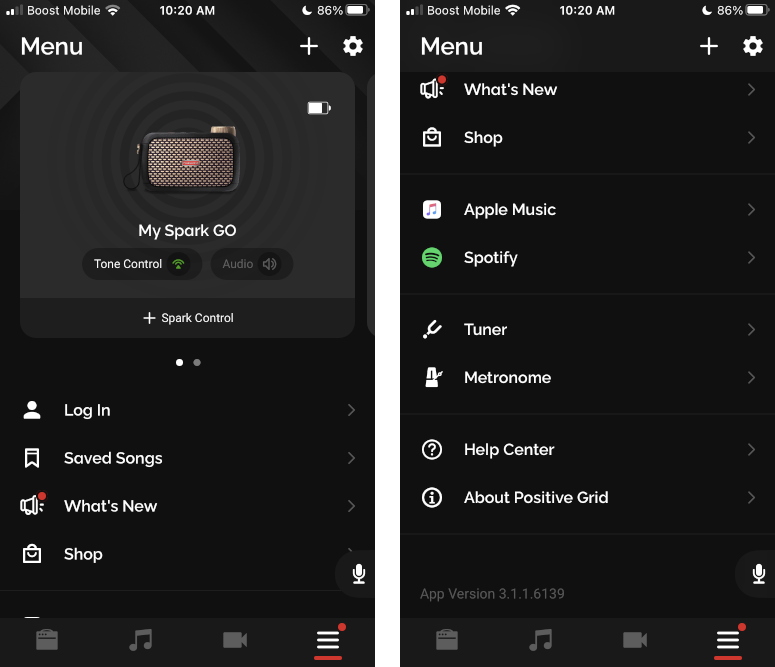
The Menu page in the Spark app
Tap on the Menu icon in the lower right corner.
Tap Log In to create an account with Positive Grid, or log in to your existing account. This will enable access to many of the Spark GO’s features.
Tap on the Amp icon again. Tap the down arrow at the top left of the screen, and you can select from hundreds of patches with different amps and effects, organized into styles: Pop, Blues, Rock, Metal, Alternative, Bass, and Acoustic.
Tap on the cloud icon at the top right of the Amp page. This enables you to search through Positive Grid’s ToneCloud online library of patches created by Positive Grid and fellow Spark users.
You can pull these patches up on the Spark App, edit them, and upload four patches at a time to the memory of your Spark GO for access from the Preset Selector button.
Tap the Menu icon again, and scroll down on the Menu page. If you log in to your Apple Music or Spotify account, you can access all your playlists and load a song into the app for audio playback through the Spark GO. The Spark app will attempt to analyze the audio track and transcribe the chord progression. It will display a chord chart for you to follow during playback. If the app is not able to analyze the progression, it won’t display a chart, but it will play the track back anyway. The Spark app will also go to YouTube and play the music video for the song you selected while the track plays.
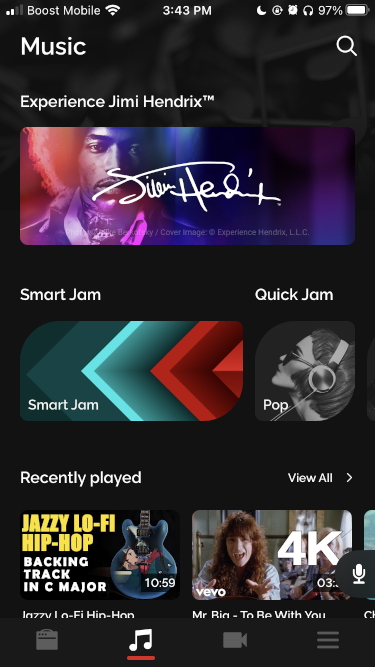
The Music page in the Spark app
Tap the Music icon at the bottom.
From this page, you can access the Smart Jam and Quick Jam functions, which generate custom practice tracks with a chord progression, bass and drum accompaniment for you to play along to. You can also access playlists of hit songs with an accompanying chord chart; some also have tablature. Playlists of practice backing tracks are available in many genres.
Tap on the Video icon. Grant the app access to your device’s camera. Here you can load a backing track and play along to it through the Spark GO while the Spark app records a video of your performance. You can save the video to your device and upload it to social media.
Here’s a brief overview of using the Spark App with the Spark GO.
Positive Grid: Getting Started with Spark GO
This video walks you through the Spark app with the original Spark amp. The same features apply to the Spark GO.
Positive Grid: Getting Started with the Spark App
Learn more about all these functions in the Spark GO User Manual. The Spark App User Guide begins on page 10.
Using the Spark GO as an Audio Interface and Recording to Your DAW
Connect the USB-C cable to the Spark GO and the other end to your computer. If you are on macOS, no driver is required.
If you are on Windows, go to the Positive Grid Help Center Spark GO page. Click on Installing Windows Driver for Spark GO. Follow the instructions on the page to download and install the Windows driver for Spark GO.
In your Mac or Windows PC system preferences, select Spark GO USB Audio as the recording/playback device.
Consult the owner’s manual for your DAW to configure Spark GO USB Audio as your audio interface.
While recording over USB, use the Spark App on your device to select patches and adjust the parameters on the Spark GO’s amp model and effects.
You can play back audio from your computer and your DAW to the Spark GO over USB. Adjust the playback volume with the volume control on your computer within your DAW. The Music Volume buttons on the Spark GO do not control this, as they are dedicated to Bluetooth playback only.
Adjust the volume level of your guitar’s signal using the Guitar Volume knob on the Spark GO. This enables you to monitor your guitar directly.
Time to play
Just like it says, printed on the inside of the box, it’s “Time to play.” Enjoy.
Sweetwater Spark Go Demo Video
Here’s Sweetwater’s Nick Bowcott demonstrating the Spark Go.
When you need help, Sweetwater has the answers!
Our knowledge base contains over 28,000 expertly written tech articles that will give you answers and help you get the most out of your gear. Our pro musicians and gear experts update content daily to keep you informed and on your way. Best of all, it’s totally FREE, and it’s just another reason that you get more at Sweetwater.com.


Offer applies only to single-receipt qualifying purchases. Select manufacturers may require that only the manufacturer’s products qualify towards the minimum purchase amount needed to be eligible for promotional financing. Otherwise, an invoice that meets the minimum purchase amount and contains at least one qualifying manufacturer product is eligible for promotional financing. No interest will be charged on promo purchase balance, and equal monthly payments are required on promo purchase until it is paid in full. The payments equal the amount financed divided by the number of months in the promo period, rounded up to the next whole dollar. These payments may be higher than the payments that would be required if this purchase was a non-promo purchase. During the last month(s) of the promo period the required monthly payment may be reduced due to the prior months’ rounding. Regular account terms apply to non-promo purchases. New Accounts as of 07/31/2025: Purchase APR is 34.99%. Penalty APR is 39.99%. Min Interest Charge is $2. Existing cardholders: See your credit card agreement terms. Subject to credit approval.
Offer applies only to single-receipt qualifying purchases. No interest will be charged on the promo balance if you pay it off, in full, within the promo period. If you do not, interest will be charged on the promo balance from the purchase date. The required minimum monthly payments may or may not pay off the promo balance before the end of the promo period, depending on purchase amount, promo length and payment allocation. Regular account terms apply to non-promo purchases and, after promo period ends, to the promo balance. New Accounts as of 07/31/2025: Purchase APR is 34.99%. Penalty APR is 39.99%. Min Interest Charge is $2. Existing cardholders: See your credit card agreement terms. Subject to credit approval.
The estimated required monthly payment shown which excludes taxes and delivery equals the amount financed divided by the number of months in the promo period, rounded up to the next cent. During the last month(s) of the promo period the required monthly payment may be reduced due to this rounding. These payments apply only with the financing offer shown. If you make these payments by the due date each month, you should pay off this amount financed within the promo period, if it is the only balance you are paying off. If you have other balances on your account, this payment will be added to any other minimum monthly payments.
Applies only to select items from this manufacturer. Ask your Sweetwater Sales Engineer for more details.