
Neural DSP Quad Cortex mini Quickstart Guide

The Neural DSP Quad Cortex mini is the same guitar amp modeling and multi-effects powerhouse as the original Quad Cortex, with no compromises, in a new compact form factor. Here’s how to get started working with this versatile unit.
- Comparing Neural DSP Quad Cortex mini & Quad Cortex
- Powering the Quad Cortex mini
- Quad Cortex mini Firmware Update
- Bookmark the Owner’s Manuals
- Navigating the Quad Cortex mini
- Cortex Control App
- Quad Cortex mini Inputs & Outputs
- Quad Cortex mini Front Panel Controls
- Sweetwater Quad Cortex mini Deep Dive Video
- Further Resources
Comparing Neural DSP Quad Cortex mini & Quad Cortex
The Quad Cortex mini offers the same sound and functions of the original Quad Cortex in a compact form factor with a 50% smaller footprint.
The Quad Cortex mini has the same CorOS operating system and the same sound-processing power, audio quality, and Neural Capture technology as the Quad Cortex. They have the same 7-inch touchscreen for navigation and most of the same inputs and outputs, although they are laid out differently on the Quad Cortex mini due to its compact size.
The Quad Cortex mini has a different layout of controls, with 4 rotary encoder footswitches rather than the 11 rotary encoder footswitches and one control knob on the Quad Cortex. Navigating the Quad Cortex mini with its fewer encoders is somewhat different, relying more on the touchscreen interface.
Powering the Quad Cortex mini
The Quad Cortex mini comes with a locking barrel connector for its 12V power supply.
The barrel has two small tabs that you must carefully align with the slots on the chassis. Fully insert the barrel through the slots then rotate the barrel clockwise to the locked position. If you find that your unit shuts off, seemingly at random, then you have probably not locked the barrel correctly.
If you have another 12V power supply on your pedalboard, then you can connect it to the Quad Cortex mini using the small non-locking barrel adapter that’s included in the box.
Quad Cortex mini Firmware Update
Registering your Quad Cortex mini and updating the firmware is done by connecting your unit to Wi-Fi and logging into your Neural DSP account.
By connecting your unit to your Neural DSP account, you can also make cloud backups, share and download presets and amp-model captures from other users, and install compatible Neural DSP plug-ins for which you have purchased licenses.
Connect to Wi-Fi
- Power up the Quad Cortex mini.
- Click the three dots in the top-right corner of any Preset screen.
- In the pop-up menu, use your finger to scroll down to Settings.
- Select “Connection” from the navigation bar. Connect to a 2.4GHz Wi-Fi network by entering the passcode.
- Verify that there’s a check mark next to the network to confirm your connection.
Log into Your Quad Cortex Account
- Navigate to System > Account.
- Tap “Login.” Enter your Neural DSP account email and password or create a new account.
- Tap the blue button to link to your account. It may take several minutes to connect.
Update the Firmware
IMPORTANT: Do not shut down your Quad Cortex mini or interrupt the Wi-Fi connection during the firmware update. The entire process may take as long as 35 minutes. If you interrupt the process, issues may arise and you will have to start over.
The Quad Cortex mini firmware is called CorOS. When you first use the unit, check for a firmware update. Make sure you are in a location with a strong, stable Wi-Fi connection.
- Go to Settings > System > Updates.
- Tap “Check for Updates.”
- You should see a notification that the new version of CorOS is ready to install. Accept the update.
- A message that says, “Downloading Latest Update,” and a progress bar should appear.
Wait patiently as the unit may reboot more than once.
Going forward, whenever you are notified of a new version of CorOS, you should back up your data, captures, and presets to the Cortex Cloud before you perform the firmware update. For a complete overview, check out our SweetCare guide, “Neural DSP Quad Cortex CorOS 4.0.0 Firmware Update.”
Bookmark the Owner’s Manuals
Neural DSP provides updated owner’s manuals — to match the features of the newest CorOS — in HTML format. Bookmark these for reference.
- Quad Cortex mini Quick Start Guide
- Quad Cortex mini User Manual
- Quad Cortex mini Device List
- Cortex Control App User Manual
Navigating the Quad Cortex mini
Exploring Sounds on the Quad Cortex mini
Here’s Neural DSP’s video, where John Connearn walks you through setting up, plugging in, cranking up, and exploring the sounds.
Neural DSP: Unboxing your brand NEW Quad Cortex mini
Edit Presets on the Quad Cortex mini
Here’s how to create, edit, and save presets.
Neural DSP: Building Presets on Quad Cortex mini (Full CorOS 4.0.0 Walkthrough)
Cortex Control App
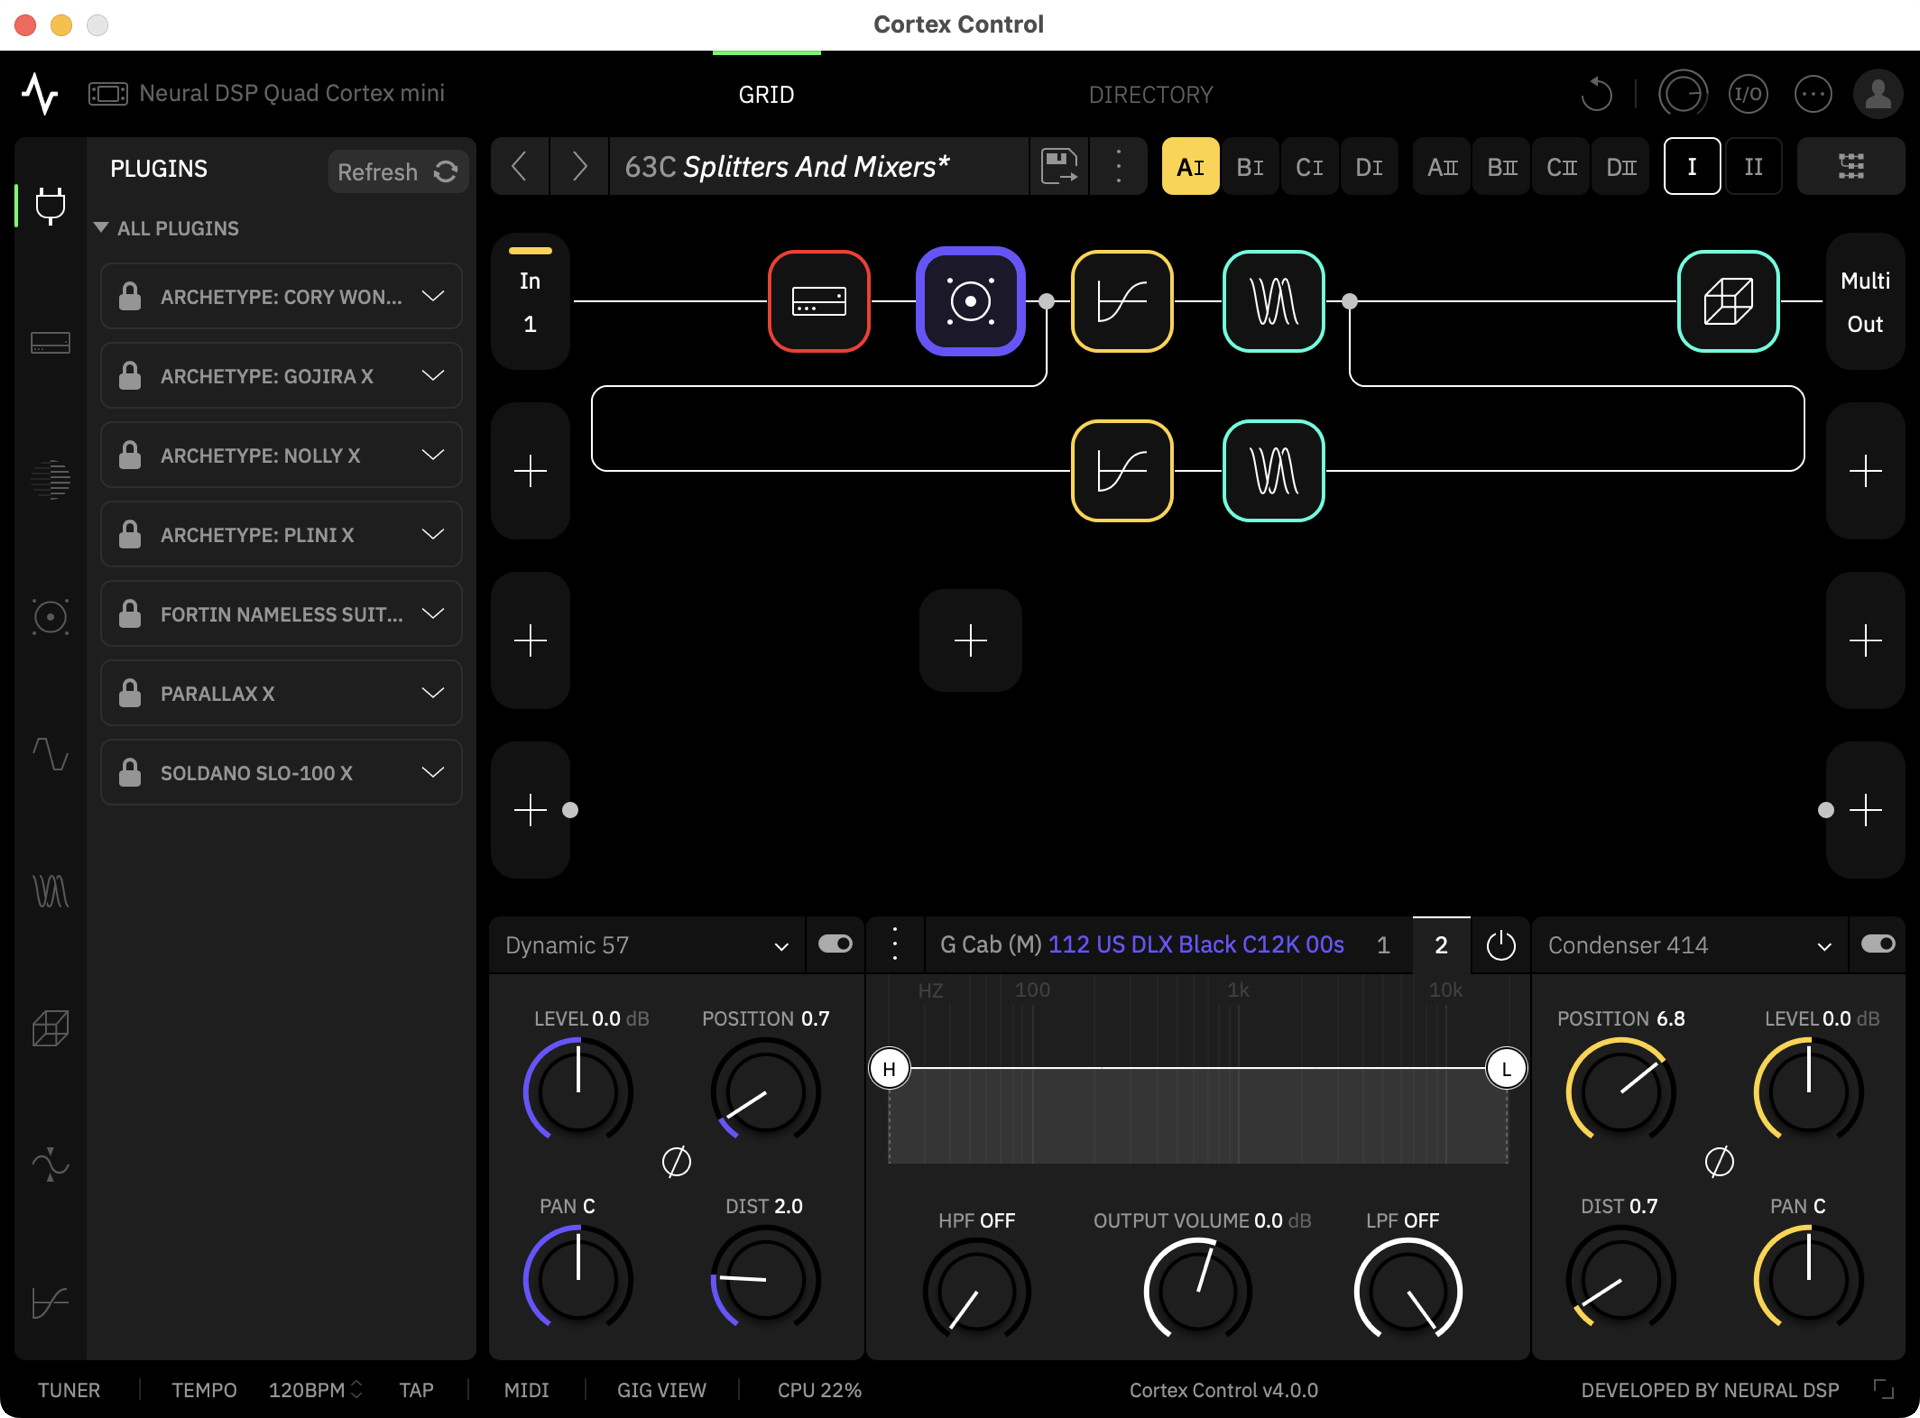
The Cortex Control app
While you can set up everything on the Quad Cortex mini’s display screen, Neural DSP also provides the free Cortex Control app for macOS and Windows. The app makes it even easier to access all the Quad Cortex parameters, download and manage amp Captures and speaker cabinet impulse response files (IRs), and dial in your sounds.
Download and install the newest version of the Cortex Control app for macOS or Windows from the Neural DSP Downloads page.
If you are on Windows, then you must also install the newest Windows driver, downloadable from the same page.
Here’s Neural DSP’s guide to using the app.
Neural DSP: Cortex Control Deep Dive
Learn more in the Quad Cortex mini User Manual > Cortex Control App.
Quad Cortex mini Inputs & Outputs
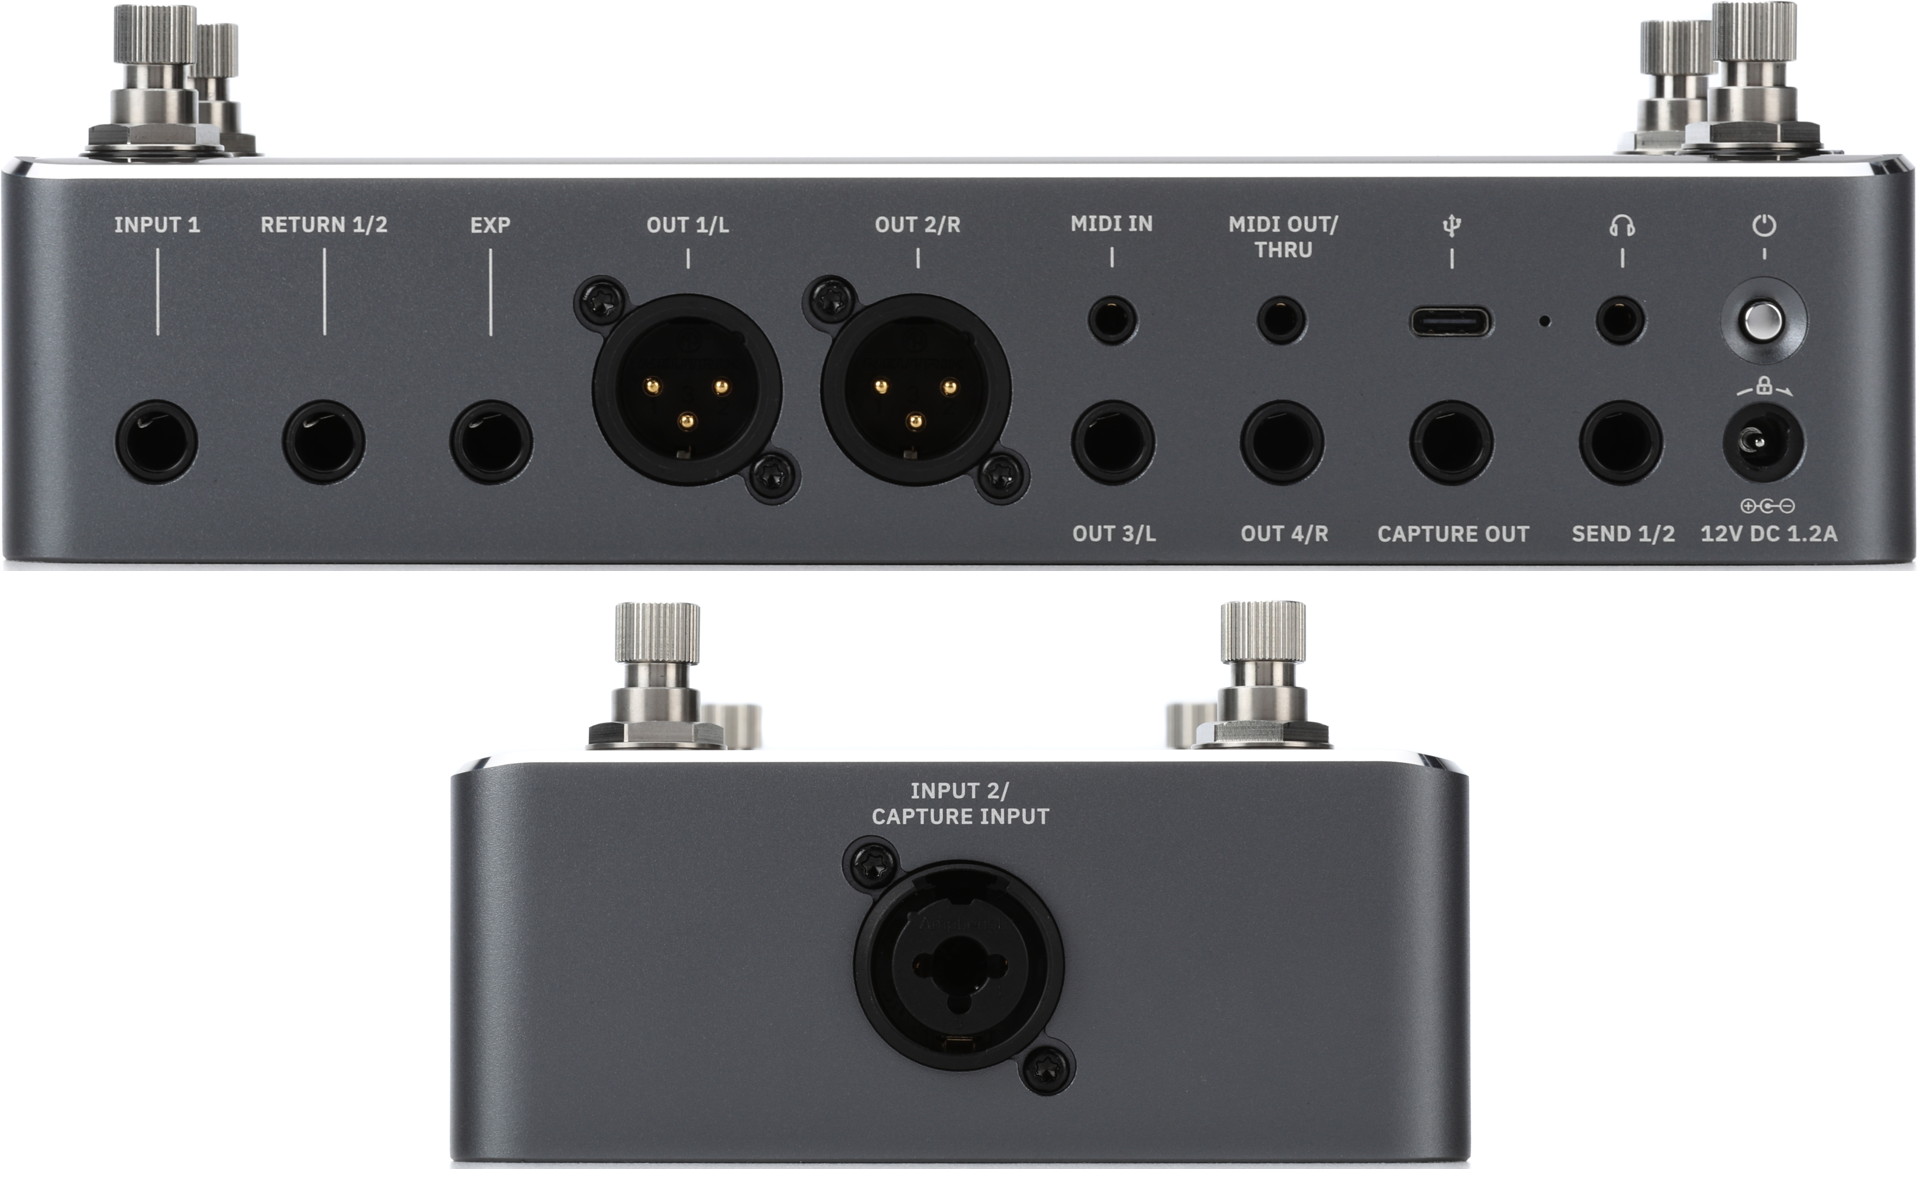
Quad Cortex mini connections
The master output volume control is the metal flange on the left side of the top panel. Hold down the minus sign to turn down the volume completely before connecting any cables.
Power Switch
Turn on the power by tapping the switch. When the unit is running, tapping the switch causes the screen to display power and locking options, including muting all outputs, locking the touchscreen, rebooting, and shutting down.
Input 1
Connect your guitar or bass with a 1/4-inch TS instrument cable.
Input 2/Capture Input
With this combo jack on the right side of the unit, you can connect a second guitar, bass, or other instrument with a 1/4-inch TS instrument cable or a balanced TRS cable or connect a microphone with an XLR cable. This is also used for making a Neural Capture of an amp.
XLR Outs
Connect studio monitors, FRFR (full-rage, flat response) powered speakers, a PA system, etc., using balanced XLR cables.
1/4-inch Outs
Connect 1/4-inch TS cables for additional outputs.
Send & Return
The Send 1/2 jack and the Return 1/2 jack can be used for effects loops. Use 1/4-inch TS cables for Loop 1 or TRS insert cables to use both Loop 1 and Loop 2.
Alternatively, you can configure Return 1/2 as two additional instrument inputs for a total of 4 inputs and signal paths simultaneously, hence the name “Quad Cortex.”
Configure settings for inputs, outputs, sends, and returns in the I/O Settings menu.
Learn more in the Quad Cortex mini User Manual > I/O Settings.
EXP
Connect an external expression pedal (sold separately) with a 1/4-inch TRS cable to control parameters including volume and wah. You can connect a second expression pedal over MIDI.
Learn more in the Quad Cortex mini User Manual > The Grid > Expression Pedals.
Capture Out
This dedicated output is for Neural Captures. Learn more in the Quad Cortex mini User Manual > Neural Capture Version 1.
Headphones
Connect headphones to this 1/8-inch TRS jack.
MIDI
Use 1/8-inch TRS cables for Type A MIDI connections to MIDI devices. Learn more in the Quad Cortex mini User Manual > MIDI Support.
USB-C
Connect a USB-C cable to your computer to use the Quad Cortex as an 8-in/8-out audio interface for recording and re-amping. On Windows, you must install the newest Windows driver.
Learn more in the Quad Cortex mini User Manual > Computer Integration.
Quad Cortex mini Front Panel Controls

Quad Cortex mini front panel
The Neural DSP videos above explain how to use these controls to navigate the user interface.
Touchscreen Display
The 7-inch display is where you access all the parameters.
Rotary Encoder Footswitches
Just like on the original Quad Cortex, the footswitches on the Quad Cortex mini are also rotary encoder knobs. On the desktop, in conjunction with tapping and selecting items on the touchscreen, the knobs are mapped to the most relevant parameters and provide precise control for editing sounds. On the floor, you’ve got four footswitches for performance. You can set up the unit for Preset mode, Scene mode, Stomp mode, and Hybrid mode.
Volume Rocker Switch
The thin metal tab on the left side has a plus sign at one end and a minus sign at the other. In conjunction with the touchscreen, this controls volume for inputs, outputs, sends, and headphones.
Sweetwater Quad Cortex mini Deep Dive Video
Here’s Sweetwater’s Mitch Gallagher and Nick Bowcott introducing the Quad Cortex mini.
Sweetwater Neural DSP Quad Cortex mini Deep Dive
Here’s another video from Mitch Gallagher discussing the Quad Cortex mini’s amp modeling and amp captures.
Sweetwater: What’s the Difference Between Amp Capture and Amp Modeler? ft. Quad Cortex Mini
Further Resources
There are numerous resources online for learning to use the original Quad Cortex. Almost all this information applies equally to the Quad Cortex mini.
Here are some resources from Neural DSP:
Related Articles
When you need help, Sweetwater has the answers!
Our knowledge base contains over 28,000 expertly written tech articles that will give you answers and help you get the most out of your gear. Our pro musicians and gear experts update content daily to keep you informed and on your way. Best of all, it’s totally FREE, and it’s just another reason that you get more at Sweetwater.com.


Offer applies only to single-receipt qualifying purchases. Select manufacturers may require that only the manufacturer’s products qualify towards the minimum purchase amount needed to be eligible for promotional financing. Otherwise, an invoice that meets the minimum purchase amount and contains at least one qualifying manufacturer product is eligible for promotional financing. No interest will be charged on promo purchase balance, and equal monthly payments are required on promo purchase until it is paid in full. The payments equal the amount financed divided by the number of months in the promo period, rounded up to the next whole dollar. These payments may be higher than the payments that would be required if this purchase was a non-promo purchase. During the last month(s) of the promo period the required monthly payment may be reduced due to the prior months’ rounding. Regular account terms apply to non-promo purchases. New Accounts as of 07/31/2025: Purchase APR is 34.99%. Penalty APR is 39.99%. Min Interest Charge is $2. Existing cardholders: See your credit card agreement terms. Subject to credit approval.
Offer applies only to single-receipt qualifying purchases. No interest will be charged on the promo balance if you pay it off, in full, within the promo period. If you do not, interest will be charged on the promo balance from the purchase date. The required minimum monthly payments may or may not pay off the promo balance before the end of the promo period, depending on purchase amount, promo length and payment allocation. Regular account terms apply to non-promo purchases and, after promo period ends, to the promo balance. New Accounts as of 07/31/2025: Purchase APR is 34.99%. Penalty APR is 39.99%. Min Interest Charge is $2. Existing cardholders: See your credit card agreement terms. Subject to credit approval.
The estimated required monthly payment shown which excludes taxes and delivery equals the amount financed divided by the number of months in the promo period, rounded up to the next cent. During the last month(s) of the promo period the required monthly payment may be reduced due to this rounding. These payments apply only with the financing offer shown. If you make these payments by the due date each month, you should pay off this amount financed within the promo period, if it is the only balance you are paying off. If you have other balances on your account, this payment will be added to any other minimum monthly payments.
Applies only to select items from this manufacturer. Ask your Sweetwater Sales Engineer for more details.