
How to Use Shows in Studio One 5

How to use Shows in Studio One 5
In this guide, we will show you how to use Studio One 5’s new features called Shows. You’ll learn what Shows are, how to navigate the screens, and also how to create a Show from scratch. Follow the sections below to get started.
What are Shows in Studio One 5?
Shows are a new feature in Studio One 5. When working with Shows, you can create setlists, making it much easier to run an entire live show on just one computer. It’s like taking your studio on the road! The way it works is that you create a setlist, insert the number of songs for your setlist, add the Players in the band (including backing tracks), and start playing. You can also import current Studio One projects into a show. The amount of control you have in live settings is endless using Shows!
A good example is for solo artists who use Studio One performing at a coffee house. If you have percussion in your recording, but can’t have a live drummer, just connect your interface to your laptop, create a Show, import the drums as a backing track and press play.
Another great reason you might want to use a Show in Studio One is to use the plug-in effects that are available. Each song can have different effect chains (known as Patches), which means that you can change from a clean sound in one song to a distorted sound in the next.
Navigating the Shows window
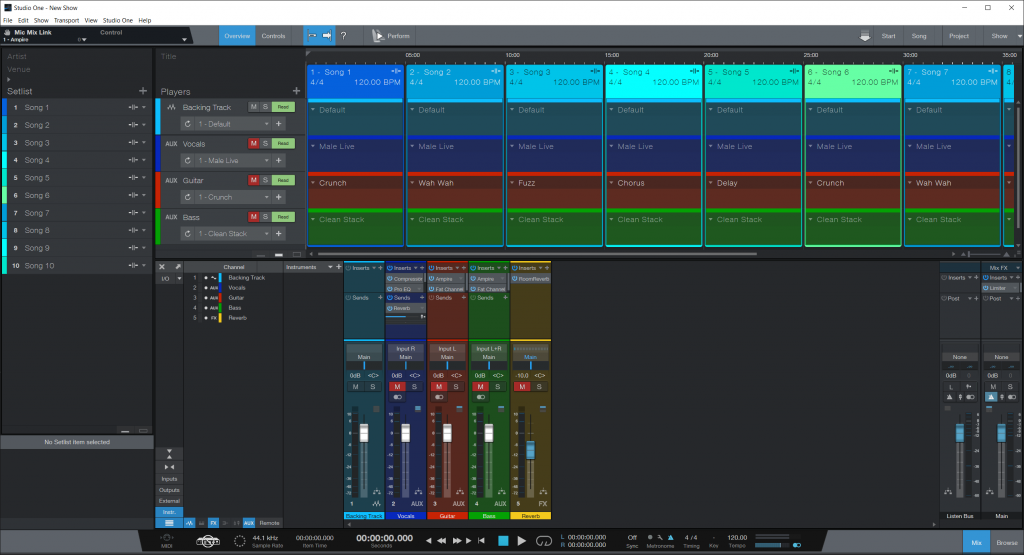
Let’s navigate the Shows window in Studio One to give you a better idea of how everything works. You’ll work with five windows when working with a show: Setlist, Overview, Mixer, Controls, and Perform.
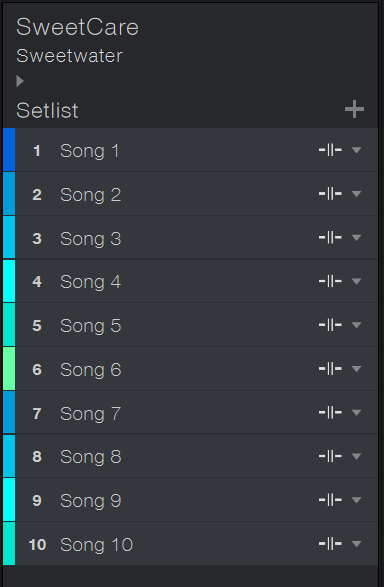
Setlist
The Setlist section on the left of the Shows window is where you’ll build your setlist and update each song’s properties (i.e., tempo, BPM, length of the song). This means you don’t have to write those down on a bar napkin any longer! You can also add the artist’s name, venue, and upload a picture. This is especially useful if you’re playing multiple gigs and want to change up your setlist a little bit.
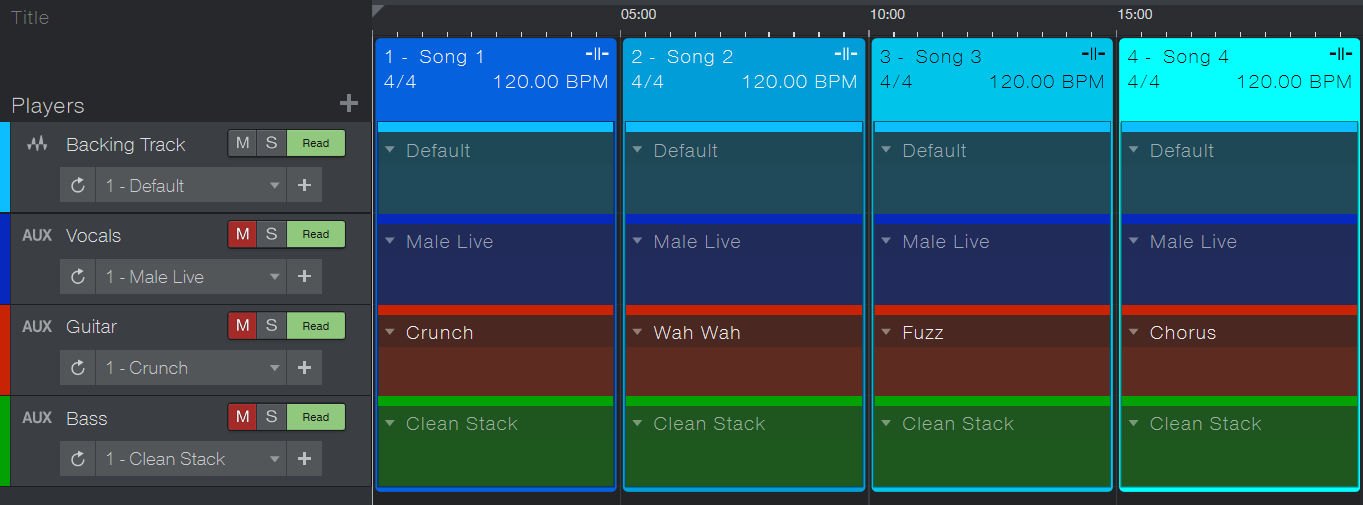
Overview
The Overview is the “timeline” for your show. From here, you can update the name of the setlist, add the Players, recall patches you’ve created, and save patches for tracks you’ve created. You can also rename the setlist and change each color of the Players, which makes it helpful to distinguish which track is which, particularly in lower light settings.
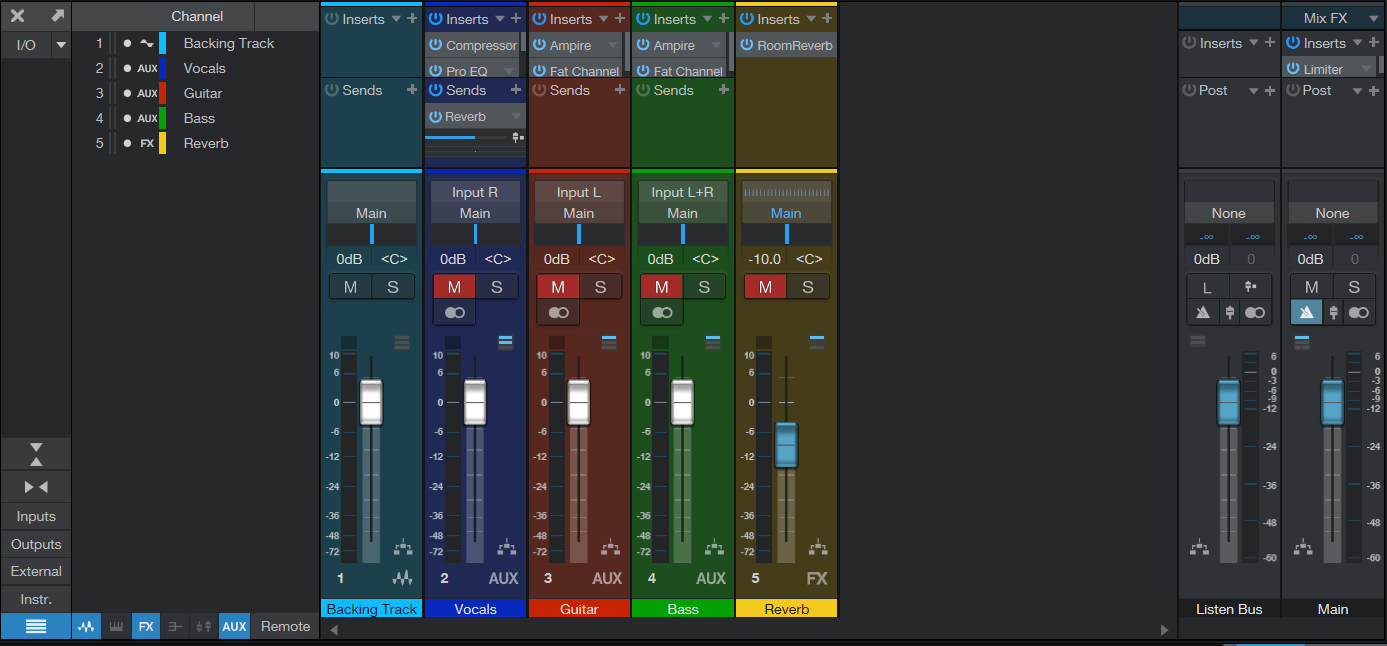
Mixer
When you create a Player in the Overview window, a new channel is created in the Mixer area of the Shows window. The mixer is the same as the one used when you’re recording a song in Studio One. Adding inserts and any routing can be saved as a patch.
Controls
If you have a MIDI controller like a Faderport or ATOM, you can assign them to change different parameters like panning, volume, and even effects! The ways you can control Players essentially turns your laptop into a digital mixer! There are four different Control views available. Depending on the controller you’re using, you may want to choose one over the other, but find the one you prefer, and you’ll be set.
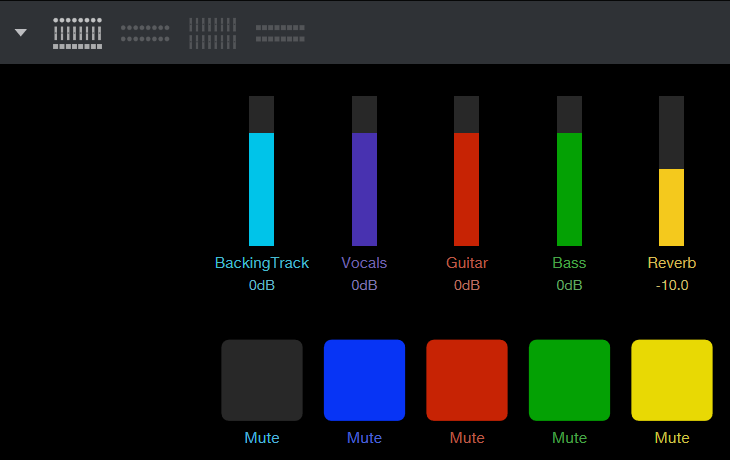
Perform
Once everything is set up the way you want it, you can now go into the Perform window. This gives you a stripped-down version of everything you’ve created, so you don’t have to worry about the clutter like seeing the Browser or Mixer windows. You can select players and change their patches on the fly, view the time, master output level, and have basic transport controls.
How to use Shows in Studio One 5
Now that you know what it is and what each section of the window is used for let’s create a new show from scratch.
TIP: Save your Shows often to make sure you don’t lose any data in case of a computer crash.
Create a Show
You can create a new show in a few different ways. Either via the Studio One Start Page, or if you want to use a Studio One Song you’ve recorded. If you’re using a different interface than the one you did in the recording, you’ll also need to update the I/O settings to reflect the changes.
- Launch Studio One, then click New Show.
- One of the templates available, rename it, update the file location, then click OK.
- Navigate to Show, select Show Setup, click Audio I/O Setup and update the interface routing.
- After everything has been updated, click OK.
Save a Show as a template
If there are Shows that have similar setups (i.e., two guitars, one vocal, bass, drums), you can save it as a template for future Shows. To do this, click File then select Save As Template… The next time you create a Show, that template will appear in the User tab.
Create a Setlist
The next thing you’ll want to do is build the Setlist for your show. To keep things organized, the first thing you’ll want to do is update the Artist and Venue at the top of the screen. You can also upload a photo of the show (like a picture of the stage) by clicking the down arrow then choosing your photo. Once done, follow these steps to create the rest of your Setlist.
- Click the + icon to create a new song.
- Navigate to the bottom of the Setlist section and update the song title from item to the name of the song.
- Update the start time, length, tempo, and time signature of the song.
- Update the Playback Mode to either Continue, Stop at end, or Loop.
- Updating the Key Signature is only for “clerical” purposes and won’t affect the song.
- Updating Pause will add a gap of the amount of seconds you enter between the current and next song.
Add Players and create patches
Now the Setlist is set up, it’s time to add the type and amount of players for your Show, save, load, and change patches, and also fine tune the length of songs.
Add Players
- Click the + icon next to Players, then select the type of player you’d like to add.
- Update the properties of the player, then click OK.
- Update the name and I/O for the player.
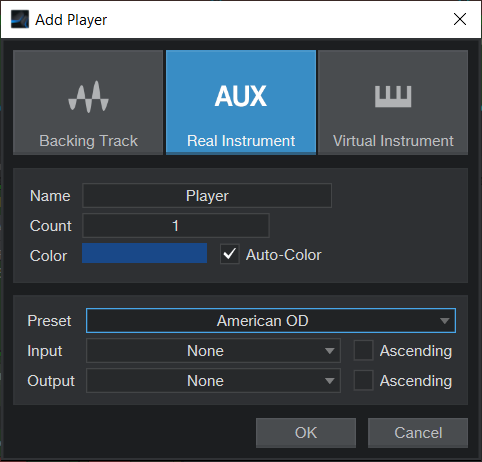
Add Player configuration menu
Create patches
Once the player has been created, a new channel will be added to the Mixer. If the Mixer isn’t displaying, press the F3 key on your keyboard to pull it up.
- Select the track you wish to work on.
- Click the down arrow to select one of many of the Studio One mixer presets, and click the + icon if you want to add additional plug-ins.
- You can also click and drag plug-ins from the Browser window onto the track.
- Click the + icon located next to the Player in the Overview window to save the newly created patch. You can then add it to individual songs by clicking the down arrow on the horizontal lane for that Player’s song.
- If you see Auto Off next to the Solo icon, any patch changes to songs you make will not be applied.
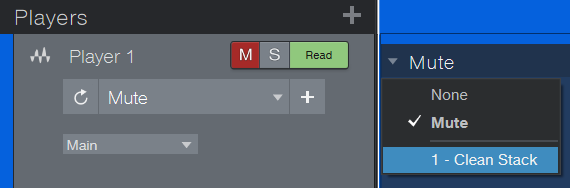
Selecting a patch
Start your performance
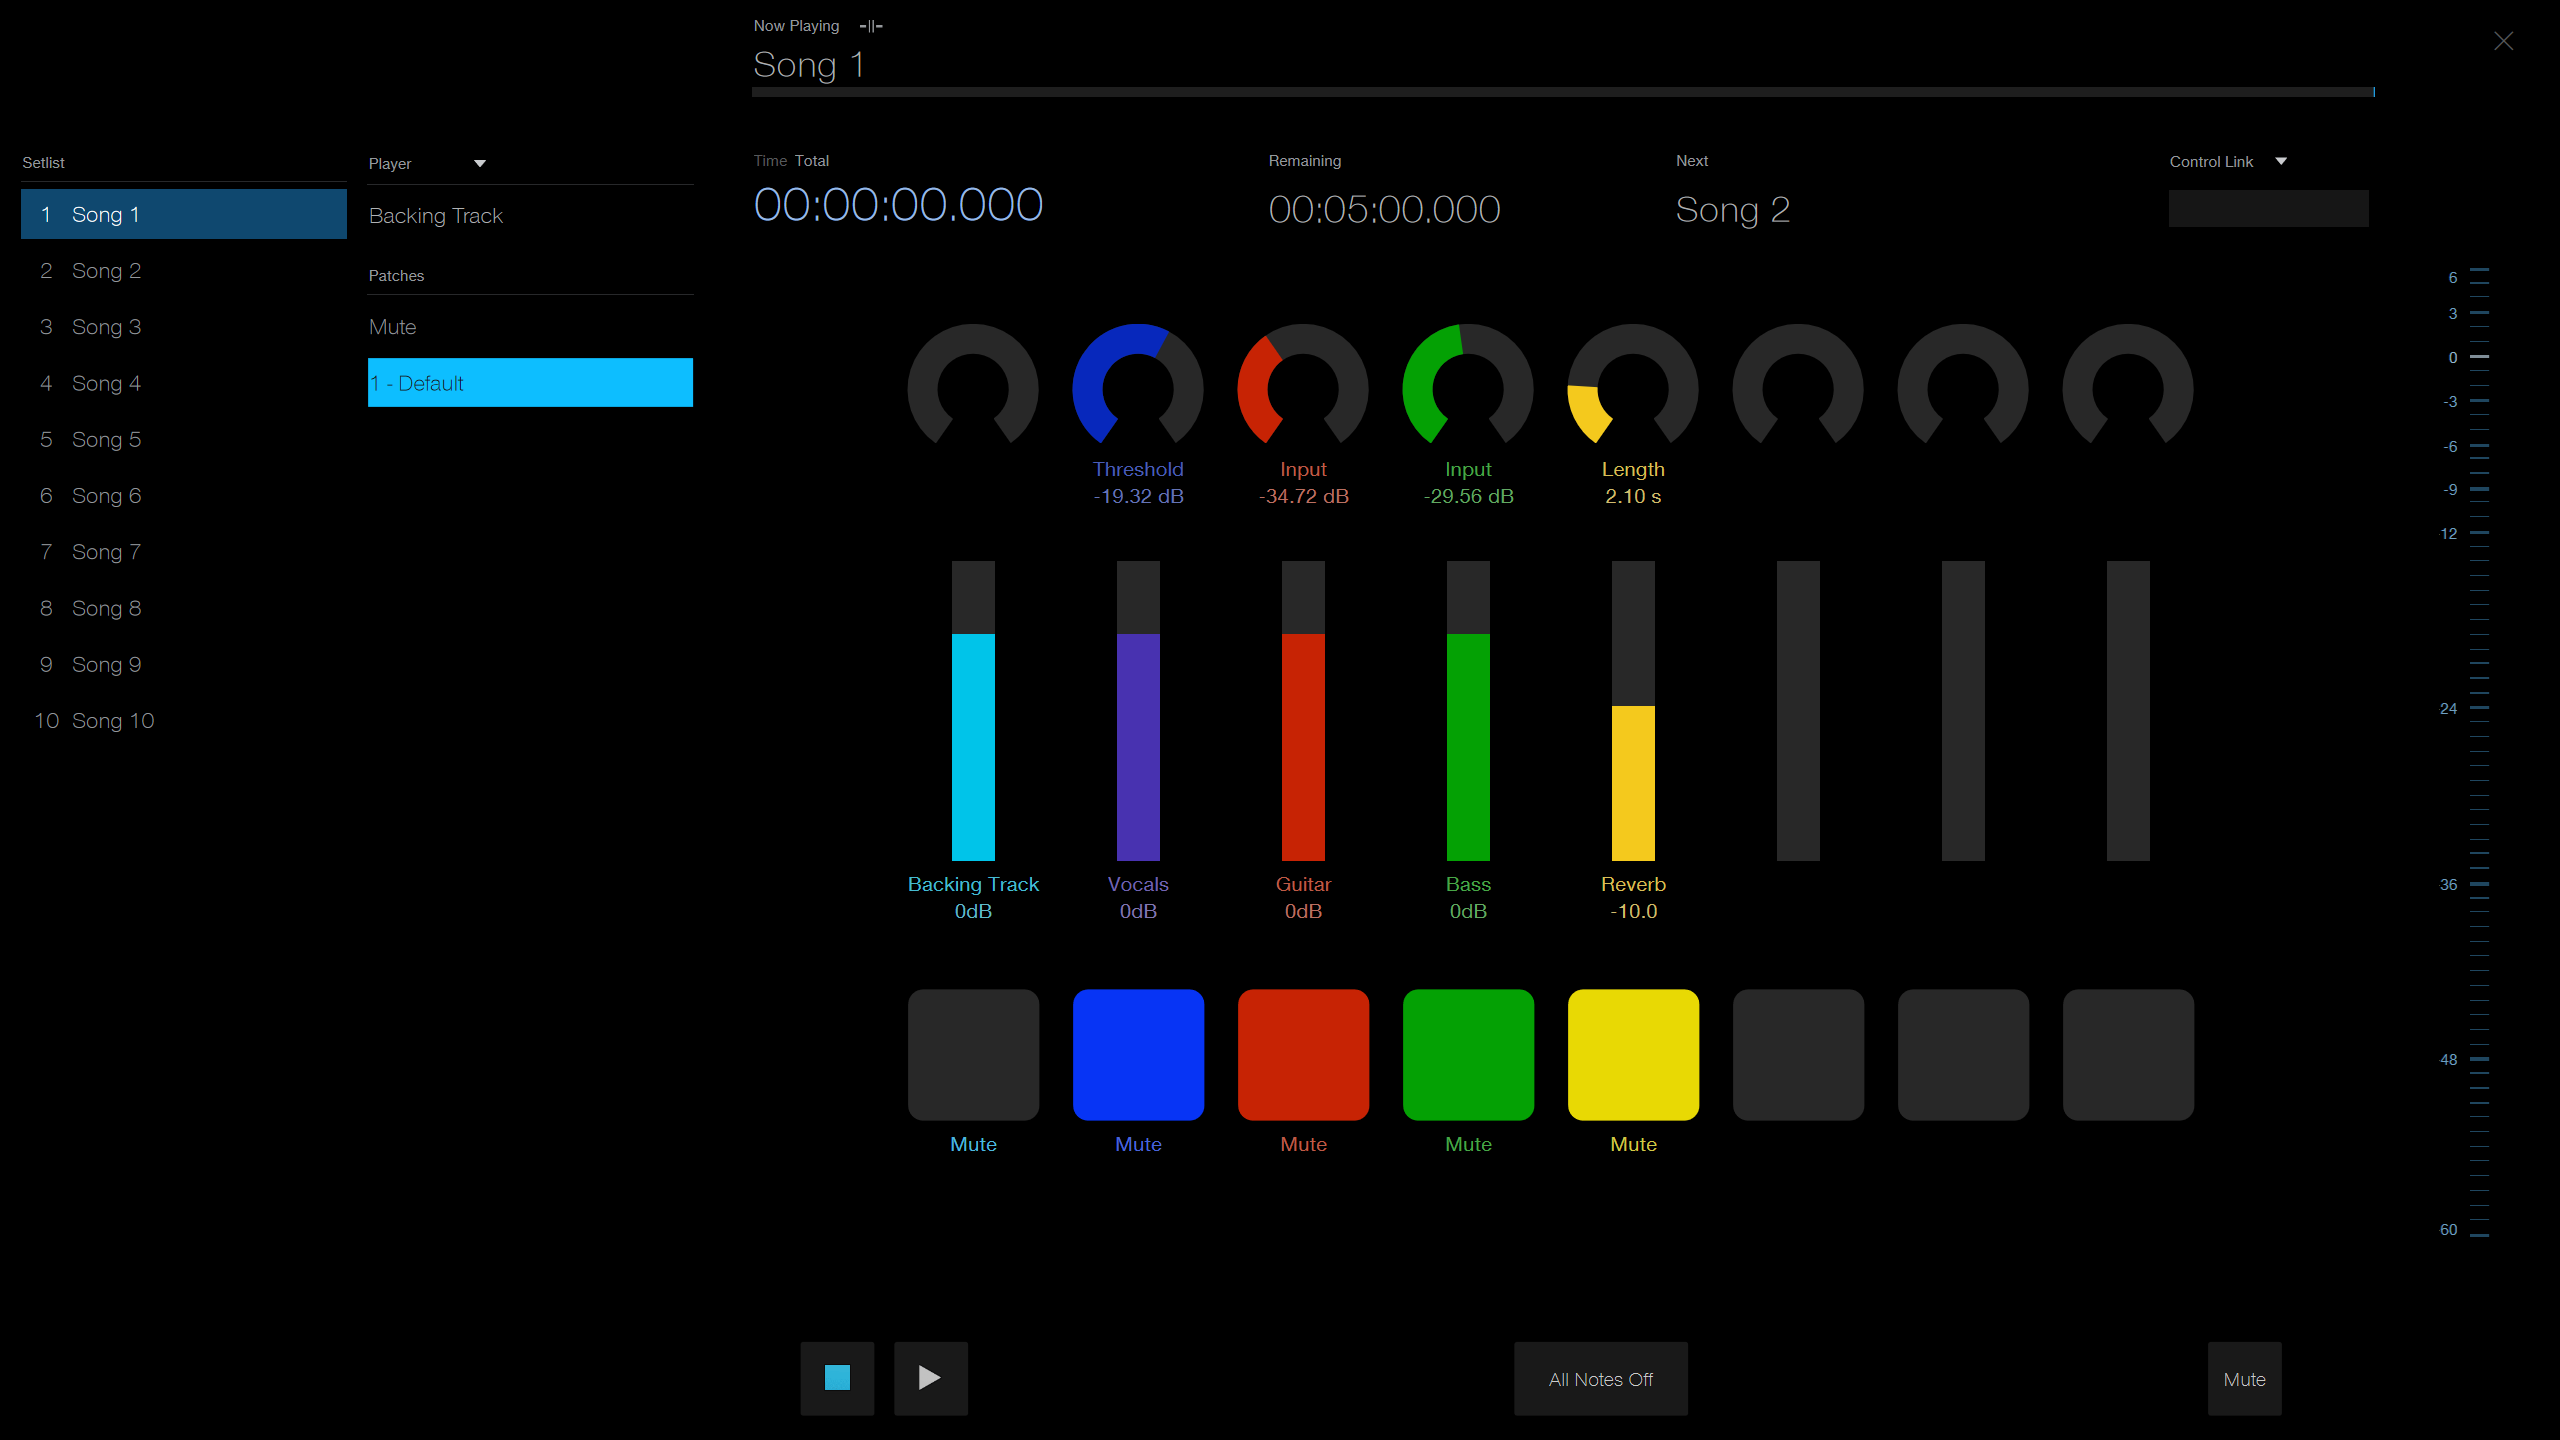
Once your Show is set up and ready to go, it’s that time to get on stage and start performing. All you need to do is click the Perform button. As you’ll notice, it’s a much more straightforward layout so you can focus on your performance and not have windows to distract you. You can quickly start and start and stop the Show using the spacebar on your keyboard, view which song is next, have quick mix controls, and a master out meter.
- Use the Player drop down to select any player in your show so you can change patches on the fly.
- You can always make changes to songs while the song is still playing by pressing the Esc key on the keyboard. For example, if your set needs to be cut short, but you want to play the last song on your Setlist, press Esc, click and drag that song in the Setlist to the spot you need to.
Additional resources
Show Page Overview
Studio One 5: The Show Page
When you need help, Sweetwater has the answers!
Our knowledge base contains over 28,000 expertly written tech articles that will give you answers and help you get the most out of your gear. Our pro musicians and gear experts update content daily to keep you informed and on your way. Best of all, it’s totally FREE, and it’s just another reason that you get more at Sweetwater.com.

