
How do I set up my AKAI MPC Renaissance/Studio for transport control over my DAW?
Follow the instructions below to get MIDI Machine Control (MMC) set up to control your DAW. Before you make changes to the settings in your DAW, you’ll need to set the MPC will need to be set up on your computer. Make sure you have the latest MPC drivers, software, and firmware installed before you proceed.
Windows Setup
Before proceeding, please make sure your DAW is not open.
- To use MMC Controls from the MPC Windows plug-in in your DAW, you must install an additional MMC control utility. If this is not yet installed, open your DAW and load the MPC plug-in. Open the MPC preferences by clicking the Menu and selecting Edit>Preferences.
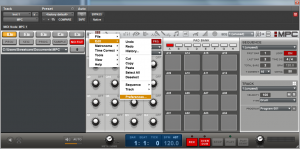
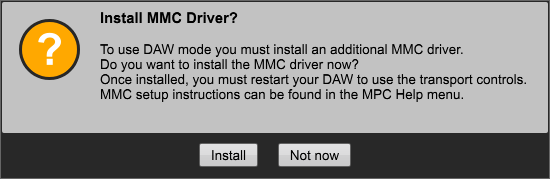
- Next, select the Hardware tab and change the Transport Controls to DAW. Follow the on-screen instructions to launch the installer, then restart your DAW.

- The MPC MMC control utility will appear as a system tray icon. It will start automatically when your computer reboots. This icon has a menu entry that allows you to enable/disable MMC transmission.
- Proceed to the DAW section below to continue.

Mac Setup
Before proceeding, please make sure your DAW is not open.
- Open the Audio MIDI Setup application found in Application>Utilities. Open the MIDI window by clicking the Window menu at the top and choosing Show MIDI Window. The MIDI Studio will now be shown.
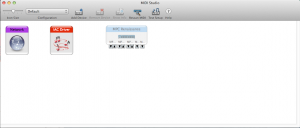
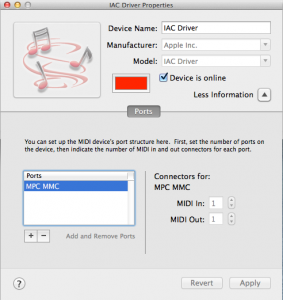
- Double click on the IAC Driver to open its properties. Make sure “Device is online” is checked. If the Ports section is not visible, click on “More information.”
- Click the + button to add a new port. Name is MPC MMC (it is important that you set the name correctly).
- You may quit Audio MIDI Setup. Proceed to the DAW section below to continue.

Now that the MPC is set up on your computer, it’s time to set it up in your DAW. Please note that the MPC plug-in must be inserted somewhere in your project or session in order for MMC to work.
Pro Tools
- With Pro Tools open, insert the MPC plug-in on a track.
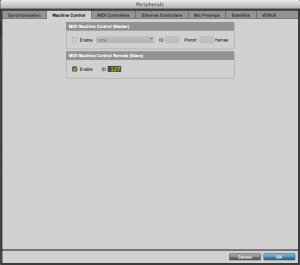
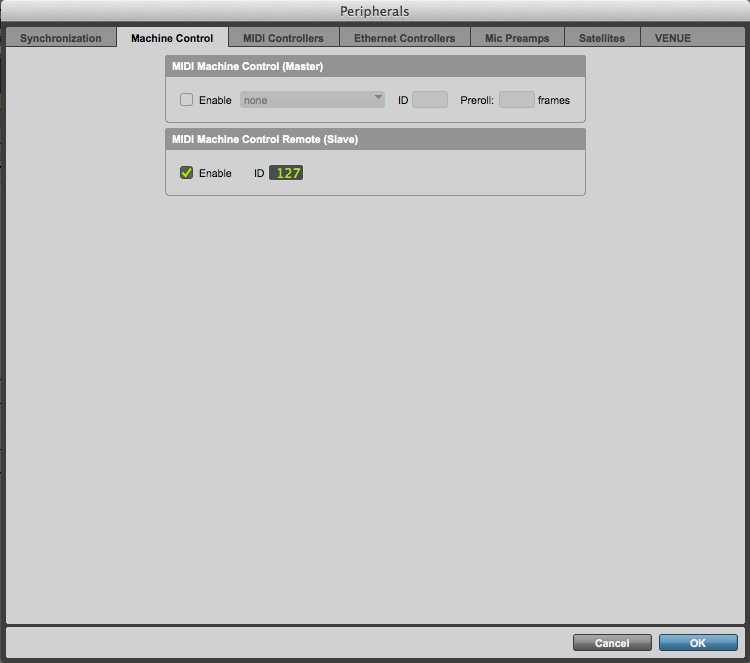
- Next, open the Setup menu at the top of your screen and select Peripherals. On the Machine Control tab, enable MIDI Machine Control Remote (Slave) and make sure the ID is set to 127.
Logic Pro
- With Logic Pro open, insert the MPC plug-in on a track.
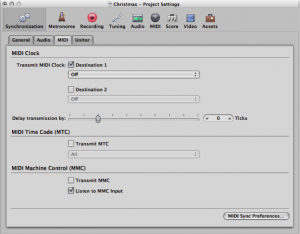
- Open the File menu at the top of your screen and select Project Settings>Synchronization. From the MIDI tab, check the box for “Listen to MMC Input.”

Cubase
- With Cubase open, insert the MPC software on an instrument track.
- Open the Transport menu at the top of your screen and select Project Synchronization Setup.
- Check the box for MMC Slave Active. For MMC input, select the IAC Driver MPC MMC you created earlier (or choose All MIDI Inputs). Ensure the MMC Device ID is set to 127.
Note: Ableton Live can not be set up to listen to MMC control from the MPC Plug-in because Live requires additional MIDI Timecode sync information which cannot be sent from a plug-in.
When you need help, Sweetwater has the answers!
Our knowledge base contains over 28,000 expertly written tech articles that will give you answers and help you get the most out of your gear. Our pro musicians and gear experts update content daily to keep you informed and on your way. Best of all, it’s totally FREE, and it’s just another reason that you get more at Sweetwater.com.

