The variety of levels used in passing signals between audio gear is something that is sometimes hard for a novice to understand. It’s challenging but is also something you can master once you grasp the basics. In this “level primer for the beginner,” I’m not going to dive into definitions of technical jargon like dBu, dBV, dBm, but instead I’ll explain the fundamentals of signal levels. Once you understand the differing voltages it should be clearer which gear connects to what other gear. I’ll apologize right up front though — since this is a technical subject, some degree of “tech” is required. (I actually wrote a bunch of big words and technical specs first and then ended up editing those out for simplicity.)
There are three fundamental levels you’ll encounter in recording or live sound.
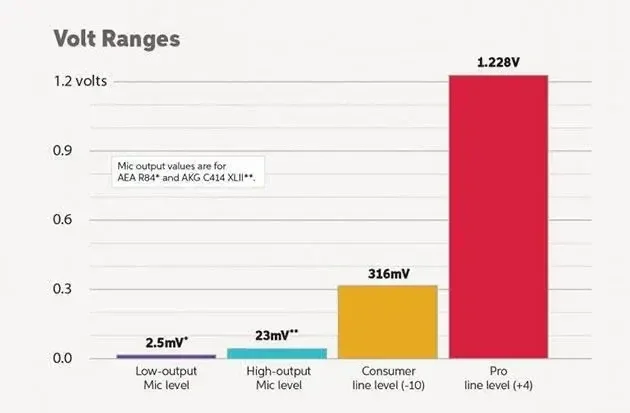
Notice how drastically different the levels are.
Mic Level
Microphones have comparatively small output voltages, on the order of thousandths of a volt (0.001V) ranging up to tenths of a volt (0.1V). Mic outputs can range from very low to very high depending on the mic type and design.
Low-output Mics
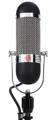
Some mics — particularly dynamic and ribbon mics (if you don’t know the difference, read this article about microphone fundamentals) — have extremely low output levels and need a lot of amplification, commonly called gain, which is the job of the mic preamp. Sometimes these low-output mics require as much as 50dB–70dB of gain, depending on the sound pressure level (SPL) generated by the sound source and the distance from the mic. Clearly a mic placed in front of a quiet singer will require more amplification than the same mic on a loud guitar amp. Examples of mics with low output levels are the AEA R84, Royer R121, or the Shure SM7B.
High-output Mics
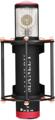
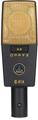
Condenser mics such as the RODE NT1A, the Manley Reference Cardioid, or the AKG C414 XLII will have hotter outputs requiring drastically less amplification (less preamp gain) to achieve suitable signal levels, sometimes as little as 10dB–30dB of gain. The reason for this is that condenser mics have amplifiers built right into the mics (sometimes called head amps) that provide the voltage for the mic’s output.
What This Means to You
If you anticipate using microphones with low output (called low sensitivity) on quiet sources such as fingerpicked acoustic guitar, then you will need a mic preamp with a lot of gain. Preamps that only offer 40dB–50dB of amplification will not provide enough gain to record at optimum levels. Most importantly, mic output levels are too low to connect directly to inputs that expect to see our next level — line level.
Note: If you are trying to interconnect gear and the levels are wacky, then it’s an interface level problem.
Professional Line Level (+4dBu)
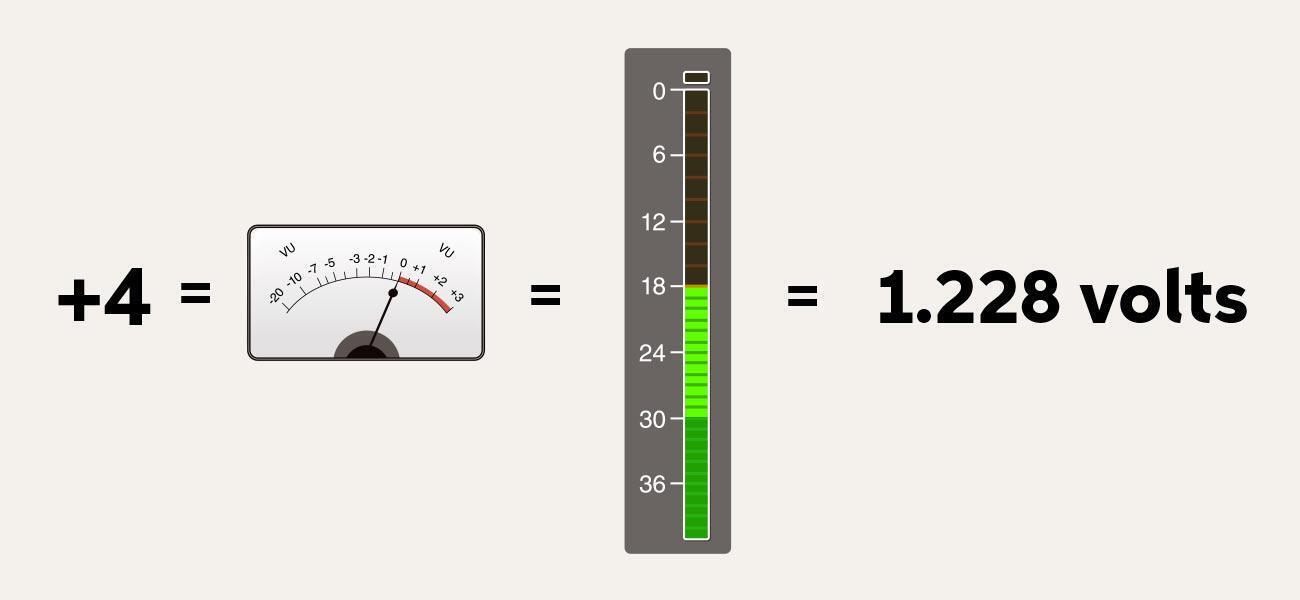
Professional audio equipment adheres to the professional line-level standard that is technically +4dBu (Sorry!), commonly referred to as just +4. Back in the days when we used tape machines and consoles, we aligned all the machines so that an input or output level of +4dBu translated to 0 on the VU meters.
What This Means to You
What +4 means to you is that any piece of gear that is +4 is capable of directly interfacing with any other piece of +4 gear. So if your mic preamp puts out +4, then you can plug it directly into the input of your +4 equalizer or +4 compressor or +4 interface with no level discrepancies at all. Likewise, if your console puts out a +4 level, then it can be plugged directly into your powered speakers that have a +4 input.
Consumer Line Level (-10dBv)
Consumer and semi-pro gear is typically -10dBv. This is the common output level for DVD/CD players and old-fashioned home tape recorders. Historically, these outputs are RCA connectors (commonly called phono plugs) or unbalanced 1/4″ cables. (Phono connectors — whose name is derived from phonograph — are used for both consumer line-level connections AND turntable connections, but turntable connections are drastically lower in level and require RIAA equalization.)
What This Means to You
The difference in level between units operating at -10 and +4 is, you guessed it, 14dB. Well, the actual difference between the +4dBu professional level and the -10dBv consumer level is 11.78dB. That discrepancy is due to the differences between the measurement standards dBu for +4 and dBv for -10. (Sorry — I said I wouldn’t do that.) So if you try to plug a semi-pro DVD player into the +4 input of a console, the level will be ~12dB too low. Alternately, if you plug the output of a +4 unit into a -10 input, it will be ~12dB too hot.
Analog and Digital Levels Are NOT the Same
When we reference “0” in terms of a console output, it typically means an output level of +4, which is completely different than the scaling on a digital recorder/DAW. Metering on a digital recorder references “0” as 0dBFS (Decibels Full Scale), and the values decrease from there, so dBFS values are always negative numbers. There is no +4dBFS. The value 0dBFS is at the very top of the digital meter and is the maximum permitted digital level, above which we run out of recording resolution or bits. When your analog console is putting out a 1kHz tone at 0VU, then the digital meter should be reading between -14dBFS and -18dBFS (there are differing standards that range from -24dBFS to -12dBFS.) If you turn up the level to increase the level on the digital meter, you gain resolution but lose headroom.
Level-matching issues
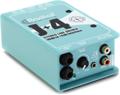
If you are trying to interface gear and the levels are wacky, then it’s an interface level problem. If you need to connect a +4 output to a -10 input (12dB too hot), then you’ll need a pad (a resistor network) to drop the output voltage. An in-line solution such as the Shure A15AS is ideal for this, offering switchable 15dB, 20dB, 25dB attenuation. Inversely, if you need to interface a -10 device to a +4 input (12dB too low), then the Radial J+4 2-channel Signal Level Driver is the perfect solution.
Tech Note
You may have noticed that some gear has a switch allowing operation at -10 or +4. Depending on your setup and other gear, just choose the appropriate option. For most studio situations with professional gear, it is safe to use the +4 setting. Early home studios used the consumer -10 level for inputs/outputs (like TEAC 4-tracks, Portastudios, and cassette decks — remember those?). In the not-too-distant past, there were recording consoles that operated with standard +4 inputs and outputs, but the patchable TRS (Tip-Ring-Sleeve) insert jacks, for patching outboard gear into the signal path, were wired at -10. That’s another reason that some gear comes with +4/-10 switching on the I/O.
Connectors and Signal Levels
The type of connector (XLR, 1/4″, 1/8″, RCA) does NOT indicate the signal level. The standard XLR 3-pin output connector on most mics can carry mic-level signals or line-level signals. The 1/4″ connectors are used for low-level guitar outputs as well as speaker inputs from a power amp, which are drastically different levels. RCA (phono) connectors are used for turntables, which have very low signal levels, and for DJ controller outputs, which have line-level outputs that can connect directly to power amps. For the layperson, this means that just because two units use the same connector does NOT mean they are compatible.
Getting Technical: Microphone Sensitivity
Microphone sensitivity is measured in mV/Pa, which stands for millivolts per pascal, which is a measure of the output voltage of the microphone in mV (millivolts) using an input of 1kHz at 94dB SPL (sound pressure level) or 1 Pa (pascal). It is a useful standard for comparing the output levels of different microphones. A higher sensitivity number means the output of the mic is hotter, offering greater voltage output for an identical input signal. For example, the AEA R84, Royer R-121, or the Shure SM7B are considered low output, having 52dBv/Pa, 50dBv/Pa, and 59dBv/Pa output sensitivity respectively. Those sensitivity values correspond to voltage output of 2.5mV/Pa for the R84, 3.1mV/Pa for the R-121, and 1.12mV/Pa for the SM7B. Sensitivities for condenser mics are higher, such as the RODE NT1-A at 13.7mV/Pa, the Manley Reference Cardioid at 17mV/Pa, or the AKG C414 XLII at 23mV/Pa.
I hope this helped you understand all the different levels we use when moving audio from mic to preamp to console and anything else. If you have any other questions, please call your Sweetwater Sales Engineer at (800) 222-4700.