
Creating your own percussion samples can be a great way to help develop your own signature sound as well as a way to alleviate hours of browsing samples and packs to find the right drum sound for your song. Having the right kick drum or snare drum that sits in your track can speed up your workflow and allow you to move forward creatively without getting bogged down in the engineering side of production.
In this article, we’ll look at a few techniques for creating your own signature kick, snare, and clap samples using synthesis.
Kick Drums
A lot of times, the kick drum is the backbone to your drum groove, holding down the low end and providing that thump that drives the song forward. To create your own kick drum sounds, let’s first look at the mechanics and sound of an acoustic kick drum.
First, a beater hits the beater head of the kick drum. This creates the initial “snap,” or transient, of the drum sound. The transient is very fast, typically only a couple milliseconds. The energy of the hit then begins to resonate the rest of the drum, which trails off over a longer period of time compared to the transient; this can be considered the “tail” of the drum sound. The tail is where the low end in a kick drum really shines, as the high end of the transient is finished quite quickly and the tail decays at a slower rate.
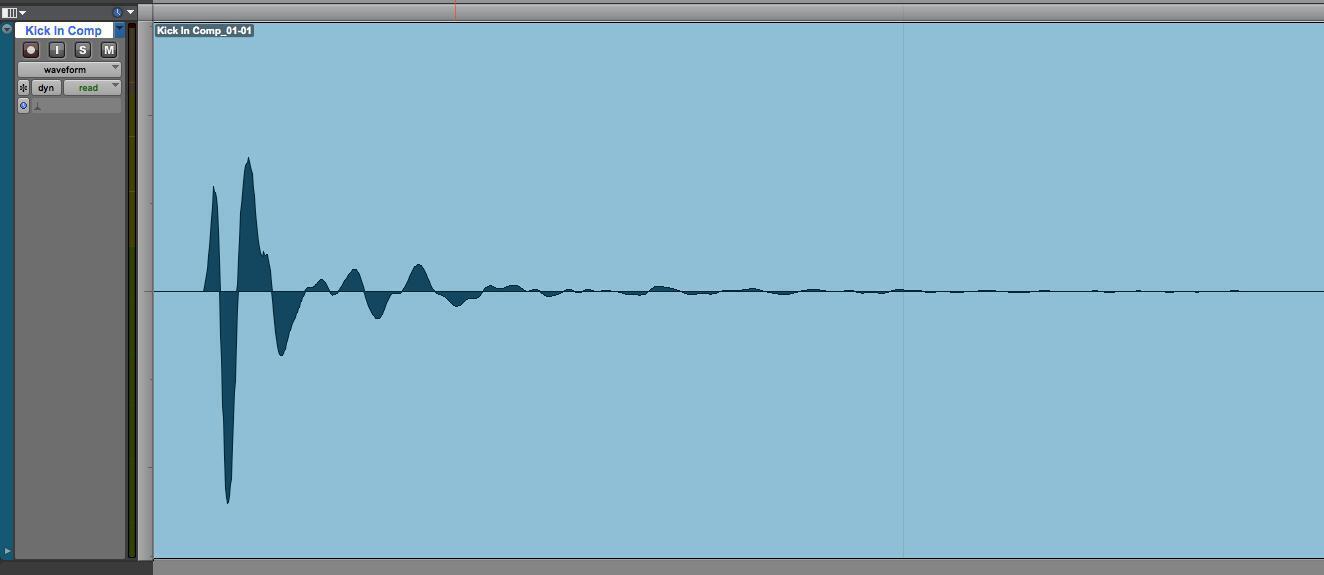
So, how do we go about synthesizing our own kick drum sample? One way is to simply modulate the pitch of a sine wave down from a high frequency to a low frequency, as seen here with Native Instruments FM8.
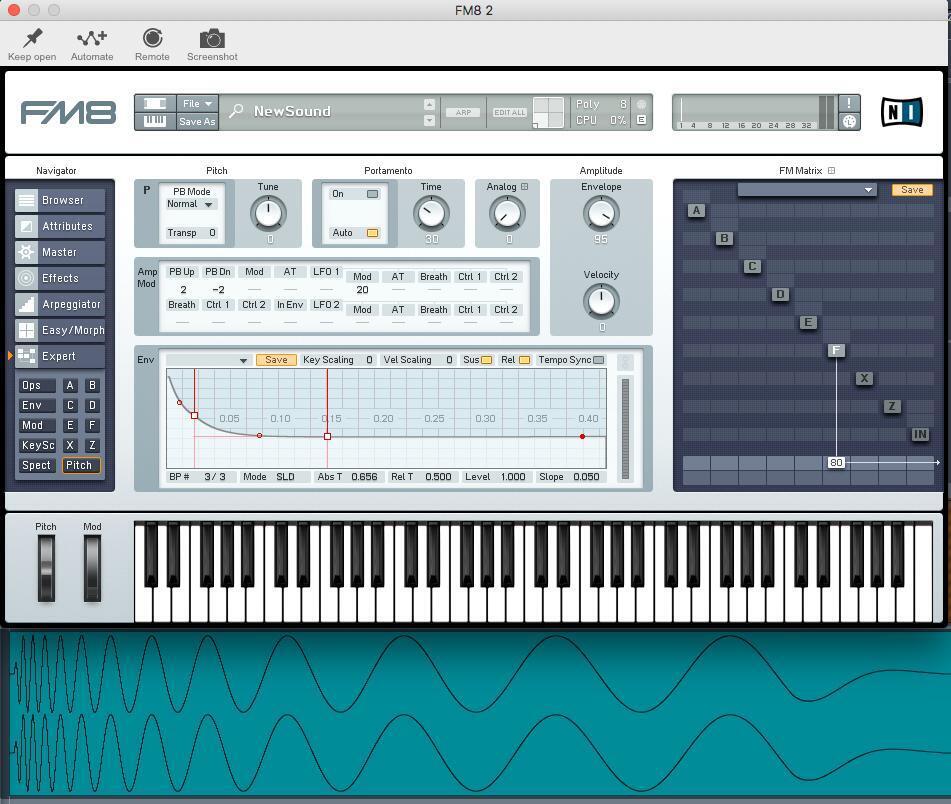
The shift from a high frequency to a low frequency is what creates the initial transient, and holding on to the final low frequency creates the tail. This is synthesizing a kick drum in its most basic form. You can get many different sounds by adjusting the length and shape of the pitch envelope, the waveform of the oscillator, or the length of the tail.
You can also experiment by layering different sounds for different transients, such as a hi-hat or the beginning of a snare drum. When layering, I highly recommend doing some additional bus processing to help glue the layers into one cohesive drum sound.
Take layering a step further by adding a sound with some space in it, such as a stomp sample. Adding samples with space can be great to accent kick drums on a downbeat or when transitioning to a new section.
No discussion about kick-drum synthesis would be complete without talking about what’s now known as an “808” kick or bass sound, which was originally found in hip-hop and EDM and has now made its way into pop productions. This is the low rumbling bass that has a kick sound at the start but trails off over an extended length of time.
To achieve this sound, we can take our simple sine-wave kick in FM8 and extend the sustain of the tail by adjusting the amp envelope to have a long decay and a bit of release.

With this held note as a sine wave, it may not translate well on smaller systems that do not have an extended bass range. Adding some harmonic content through saturation or distortion can do wonders for allowing your bass to translate on different systems. Plug-ins like FabFilter’s Saturn are great for this, as you can focus the harmonics to the mids and highs while leaving your low end clean to maintain the sub energy. Take a listen to these two examples.
NOTE: On a speaker system without extended bass range, such as a phone or laptop, this first clip may be completely inaudible.
808 Clean

808 With Distortion

The top image demonstrates a clean sub, while the lower image has a bit of saturation applied to add more harmonics for better translation on smaller systems.
Snare Drums
Snare drums are a bit more complex in sound and typically require layering and processing of multiple sounds, just based off the mechanics of how an acoustic snare drum functions. A stick hits the top (batter) head of the drum to create the initial transient, which then creates a sympathetic vibration of the lower (resonant) head. Then, there are snare wires that run along the lower drumhead that buzz when excited by the vibration of that lower head. This extra layer opens up a vast range of sonic possibilities.
We can break down a snare drum sample into three main parts: Transient, Body, and Tail. The Transient is the initial hit of the stick against the skin; the Body is the thump and tone of the drum; and the Tail is the decay of the snares.

To synthesize a snare drum, we will be using two oscillators — a sine wave and a noise generator — in Reason Studios’ synthesizer,Europa. In this instance, Engine 1 is a sine wave and Engine 2 is white noise. Envelope 1 is used to control the amplitude of the sine wave; and Envelope 2 is controlling the pitch of the sine wave. Envelope 3 is controlling the amplitude of the noise generator (Engine 2). This has a longer decay time to allow the tail to decay naturally. I’ve also used Envelope 4 to shape the noise tone with a highpass filter and EQ peak. Finally, there is a bit of distortion, compression, and reverb to help glue the sound together.


Here we have a snare drum patch created in Europa with the corresponding waveform shown below. It’s easy to see the Transient, Body, and Tail of the snare drum.
You may also consider exporting the individual elements as their own audio files for additional control and shaping. This allows you to offset samples to create huge changes in tone by moving elements by a few milliseconds. Below, we have the same two elements — a sine layer and a noise layer — but in the lower sample, you can see the sine layer is shifted 5ms later.
Snare – Noise and Sine Same Start
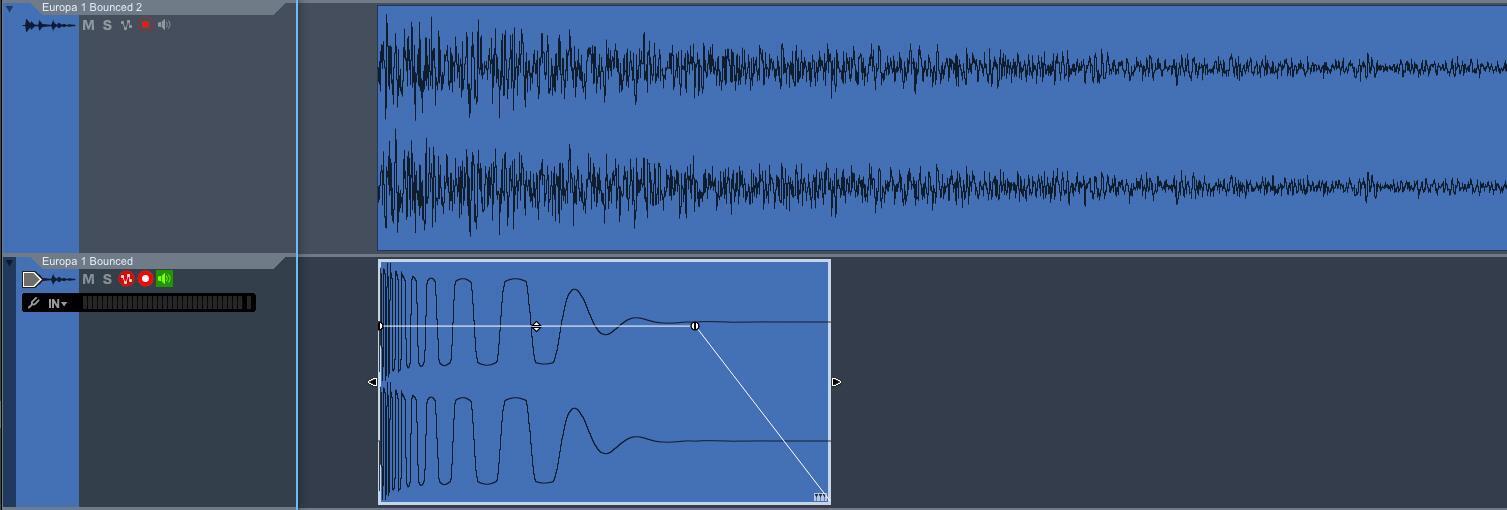
Snare – Sine Shifted 5ms

The top two samples share the same exact start time, while the bottom two samples are offset (the lower one is shifted to the right — starting 5ms later) to create different tones in the snare.
As you can hear, the snares now have two different tonal qualities. Having the noise layer come in slightly before can help “pull” the listener into the body of the snare, while the other sample has a bit more impact with both starting at the same time.
You can also experiment by layering all sorts of elements into your snares, such as a clap for an added crack in the attack of the sound or a spoon hitting a pan for a metallic ring. Experiment to find what sounds you like best.
Claps
Claps have been used in music for thousands of years, and it’s no surprise that, as technology evolved, the way that we create claps has changed, as well. One the most well-known clap sounds comes from the Roland TR808.

When looking at the waveform of the clap sample from the TR808, we can see there are a few very fast transients followed by a longer decay. This was done to emulate multiple people clapping together and the residual room sound after the claps.
We can easily re-create this using a synthesizer with customizable envelope shapes, such as Reason’s Europa. We can create an envelope shape similar to the clap waveform above to emulate the amplitude changes in the clap sample. Running white noise through this shape will give us the start to our clap sound.

Claps have the majority of their sonic information in the upper mids, so adding a bandpass filter allows us to focus the noise in that frequency range. After adding a bit of distortion and another EQ bump around 1kHz, we have re-created a classic clap sample.
Europa Clap

From here, we can modify our clap sound with more EQ to brighten it up, with reverb to put it in a space, or by layering it with other clap samples panned around to give it more stereo information. Pitching the sample up or down is another great way to change the tone of your clap. Pitching up will tighten the sound and allow it to cut better, while pitching down will give it more girth.
These are a few techniques I use to create my own percussion samples. Having your own samples to quickly grab from is a wonderful way to develop your signature sound as well as to enhance your workflow so you can spend less time browsing sample packs for the right sound and more time making music.