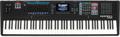
Over time we get quite a few questions from Kurzweil users that in one way or another reveal some misunderstanding about the V.A.S.T. architecture they use in the K2600 (or 2500 and 2000 from years past). V.A.S.T. is a highly advanced system that, until you understand it, probably seems a bit like rocket science. Additionally, lack of understanding about V.A.S.T. from users who do not yet own one of these machines has resulted in a high degree of misperception about how much power lies under their hoods. One particular area of confusion we’ve seen, and one aspect of V.A.S.T. that really needs to be understood for even basic editing, relates to gain structure. So today’s Tech Tip is gain staging tips for Kurzweil’s V.A.S.T. as found in the K2600 & K2661 (This is information taken from an article written by Kurzweil). This article sound very advanced, and many beginners will tend to experience the old eyes glazing over, but if you get in front of your machine with this you’ll find you can learn a lot about volume levels. Kurzweil has done some really smart things to give users a lot of flexibility.
There are several places in a typical V.A.S.T. program in which you can increase or lower the Gain. The following tips should help you understand how they work and what strategies you should apply for getting the best possible signal out of your K2600 or K2661. First we will discuss the basic voice gain structure then we will discuss the “output” gain setting.
Voice Gain Structure in V.A.S.T.
The gain path for one voice is primarily controlled by the algorithm for that voice’s layer. The order is pretty well made clear by the diagram you see on the screen, but a little explanation is needed. First of all, the samples in ROM or RAM have at least 6dB of headroom built in due to the way Hobbes (their name for the V.A.S.T. synthesis chip) processes samples. If a sample is not normalized, there will be more than 6dB of headroom. Typically in their programs this is all eaten up by the adjust setting on the F4-AMP page, which is often set to be +6dB or more.
But if we assume that we are using Algorithm 1 and the F4-AMP page is set to all zero, and we select the parametric EQ function with no pad, then we can always boost the EQ gain (F3-AMT) at least 6dB before that voice will exhibit clipping. Padding the input to the EQ on the F1-FRQ page will give even more… 18dB pad will give a total of 24dB headroom available for boosting the EQ. Of course different frequency ranges of different sounds have more or less energy, so with EQ you actually can often apply more dB’s of boost than you have headroom (the frequency range you are boosting may be many dB below the overall level of the sample) but if you are boosting near the fundamental it will work a lot like simple gain in terms of headroom.
Due to the ordering, if you boost the parametric EQ until it’s clipping, no amount of turning it down at the F4-AMP page will correct it. Each box in the Alg that applies gain must be aware of/provide it’s own headroom.
Hobbes generated waveforms do not have any headroom built in, they are full scale, except that the “saw+” and others that mix with the sample have 6dB headroom built in (so it won’t clip when it adds ’em, but once they’re added, not much headroom is left).
The output of the distortion, wrap, shape, etc. tends to be full scale or near it when the distortion is audible. Padding down the input to these doesn’t help, it just subtracts from your adjust setting.
The mixers (+amp) pad both inputs down 6dB before mixing to prevent clipping, but the output of the mixer will then tend to be near full scale.
All of this implies that you usually cannot set F4-AMP higher than 0dB unless the signal is filtered, cut, or padded somewhere along the line, or unless you apply no DSP, in which case you can always boost at least 6dB there. Don’t forget that Keytrk can cause clipping, as can source 1 and 2. Velocity tracking on the F4-AMP page will never add clipping though, it actually subtracts gain. Velocity tracking on other functions often does add gain.
Most layers created by soundware have been tweaked so that there is little or no headroom left, as soon as the user goes to add more boost anywhere, it will clip.
Low pass filter, high pass filters, bandpass filters, and EQ cut all reduce gain, providing any box following them with more headroom.
Output Gain
For the K2000, v3.18 or earlier or the K2500 v2 or earlier, the output gain setting on the MIDI Channels page simply replaces the one on each layer of that channel’s program (the Gain parameter on the OUTPUT page of the program editor). For the K2000 v3.54 or the K2500 v3 or later, or any K2600, the output gain parameter on the MIDI Channels page add or subtracts the selected dB amount from the amount specified on the layer settings in the program.
A setting of Prog makes it use the output gain programmed for each layer.
The output gain specifies how much gain to add when summing a voice onto the D/A Converter with the other voices. If we assume that each voice’s individual gain structure has been tweaked to be just below clipping, then an output gain setting of 6dB will tend to prevent “group” clipping when 24 voices are playing. If you were only playing a single voice, you could set the output gain as high as 30dB without clipping, but then when you played a second voice, both would clip.
One method you can use to maximize programming flexibility is to set the first pad in the Algorithm to 18dB, set the F4-AMP adjust to 0dB, and set the output gain to 30dB. Initially this is similar to (prog 199) no pad, F4-AMP set to 6dB and output gain set to 6dB, but you turn it down at the beginning and middle of the signal path, and turn it up at the very end (output). The overall gain has not changed. Now you can boost the parametric with no clipping, then you just turn down F4-AMP to compensate for the increased volume. If you are making a kick drum and you want it to be a bit louder than other layers, you can just turn up F4-AMP, instead of having to go to the output page.
The disadvantages to this method are: more quantization noise (error) from the EQ due to shifting the input down 18dB (it usually isn’t noticeable), more likelihood of getting “group” clipping (although little or no chance of individual. channel clipping), and finally it doesn’t work well for many algs/functions, especially those that use distortion type functions or Hobbes waveforms.
Finally, MIDI volume adjusts the F4-AMP page, and only turns it down. You may have noticed that some patches sound different and/or better when you adjust MIDI volume, this occurs when the patch clips the F4-AMP page.