Toontrack’s EZdrummer has long been a fantastic tool for songwriters looking to create great-sounding drum tracks for their songs and demos. But for drummers with an electronic kit, it unlocks a virtually endless universe of playable sounds to inspire creativity and fun. This guide will walk you through just how easy it is to connect EZdrummer 3 with your electronic drum kit, whether you’re using it as a stand-alone application or as a plug-in inside your favorite DAW.
Getting Set Up: The First Steps
Before you can start playing, a few simple setup steps are required to get the software and your hardware communicating properly. The first thing you’ll need to do is install the necessary drivers for your specific electronic drum kit onto your computer. Whether you have a Roland TD-50, an Alesis kit, a Yamaha kit, or another brand, having the correct driver installed is essential for EZdrummer 3 to recognize it.
Once your drivers are installed and you’ve launched EZdrummer 3, it’s time to configure the audio and MIDI settings.
- Audio/MIDI Setup: Navigate to the Settings tab in the upper-left corner and select Audio/MIDI Setup.
- MIDI Input: In the setup window, look for “Active MIDI Inputs.” Here, you should see your drum module listed — simply check the box next to it to make it active.
- Audio Output: Ensure your desired audio output is selected so you can hear the sounds. This could be your computer’s built-in speakers or a dedicated audio interface, such as one from Universal Audio. Many modern e-drum kits with MIDI-over-USB can also function as their own interface.
- Buffer Size: This is a critical step for preventing latency — that annoying delay between hitting a pad and hearing the sound. EZdrummer’s default buffer size is often high (around 512 samples). For real-time playing, you’ll want to lower this significantly. Depending on your computer’s power, a setting of 64 or 128 samples should provide a latency-free experience.
Fine-tuning for a Natural Feel
Toontrack has made the next part incredibly simple by including presets for nearly every major electronic drum kit on the market. In the Settings menu, select E-drums. A “Preset” dropdown menu at the top of the screen contains a comprehensive list of kits. Just find your model, select it, and you’re almost ready to play! Every drum you hit should now trigger the corresponding sound on-screen.
To get the most natural response, especially from your hi-hats, a small tweak is needed. In the “Hi-hat Pedal” section, you can adjust the open/closed range to match your playing style. A simple drag of the “Fully Closed” slider on the left will tighten up the response for a more realistic feel. Also, be sure to set “Openness Transitions” to “E-drum Optimized” for the best performance.
Custom Mapping for Your Unique Kit
What if your kit isn’t on the preset list, or you’ve built a custom setup with various pads? EZdrummer 3 makes manual mapping a breeze. From the E-drums settings page, click the Mapping button. To assign a sound, simply click the drum or cymbal you want to change on-screen, press the “Learn” button, and then strike the corresponding pad on your physical kit. The new sound is now mapped. You can assign any sound in the EZdrummer library — from a different tom to a hand clap or a tambourine — to any pad you wish.
Exploring the Sounds of EZdrummer 3
Now for the fun part: exploring the sounds. The core library of EZdrummer 3 boasts 15GB of samples recorded by legendary engineer Michael Ilbert (Coldplay, Adele, The Weeknd) at the iconic Hansa Studios in Berlin. These are truly high-end, world-class drum sounds at your fingertips.
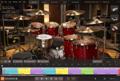
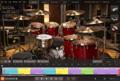
You can start tweaking sounds right away. Want a fatter snare? Just click on the snare drum on the main screen and pull down its tuning. You can instantly change the character of any piece in the kit. To explore entirely new kits, use the dropdown menu in the top right. You’ll find options like “Main Room,” “Bright Room,” and “Tight Room,” each with a unique visual environment to match the vibe.
Within each kit, another dropdown menu reveals a huge list of presets crafted by Michael Ilbert and the Toontrack team. You can instantly go from a tight, punchy sound like “Ambience Crunch” to a huge, resonant “70s Rock” sound with a single click, completely transforming your playing experience.
Creating and Saving Your Own Grooves
While EZdrummer is packed with pre-made grooves perfect for songwriting, you can also easily record your own. Head over to the Grooves tab and select the Grid Editor. Turn on the metronome, hit the record button, and lay down your beat. Your performance appears as notes in the timeline, ready for editing.
The “Timing” controls make it simple to perfect your groove. A quantize slider lets you tighten your performance to the grid, from a subtle nudge to a 100% lock. You can also add swing to give your beat a different feel or even randomize notes for creative effect. When you’re happy with your creation, just drag it from the timeline into the “User MIDI” folder on the left, give it a name, and it’s saved for future use.
As you can see, connecting your electronic drums to EZdrummer 3 is incredibly straightforward. With a few clicks, you can unlock a massive library of inspiring sounds that react dynamically to your playing. Take some time to explore all the kits, presets, and editing tools — you might just be there for days discovering your new favorite sounds.
If you have any more questions about Toontrack products or any other gear for your musical projects, don’t hesitate to reach out to your Sweetwater Sales Engineer.