
When most people think about Ableton Live, they think of a cool production environment that lets you manipulate loops and clips in a grid-based workflow. It’s notorious for how easy it makes putting tracks together from loops or sequenced grooves with any kind of virtual instrument plug-in. But there’s another side of Live that’s easy to overlook: sampling. In this guide, we’ll take an in-depth look at Live’s audio capabilities with a focus on sampling, chopping beats, and manipulating sounds in the Simpler sample player.
What Is Sampling?
In its fullest sense, sampling is the art of recording a (usually) short snippet of audio and reusing it in creative ways. Sampling is behind most modern synths, but its use in music took a major turn in the late ’80s and ’90s. That’s when beat slicing blew up with such iconic samples as the infamous “Amen break.” Today, taking a bar or four of a great beat, chopping it, and reassembling entirely new beats is business as usual for hip-hop and electronic music producers. Lucky for you, it’s super easy to do in Ableton Live.
What Makes Sampling in Live So Cool?
Many “samplers” are actually just sample players, but when you combine Live’s extensive audio manipulation tools and flexible Simpler sample player, you have a system that’s easier to use and far more versatile than your average sampler. For example, with Live you can record a live drum groove to the timeline, trim it in the Detail View, toss it into Simpler, slice the beat into samples, throw the chopped samples into a Drum Rack drum machine, transpose and reverse individual samples (already assigned to pads), and trigger all-new beats. And, you can do all of that in just a few minutes.
Working with Audio in Live
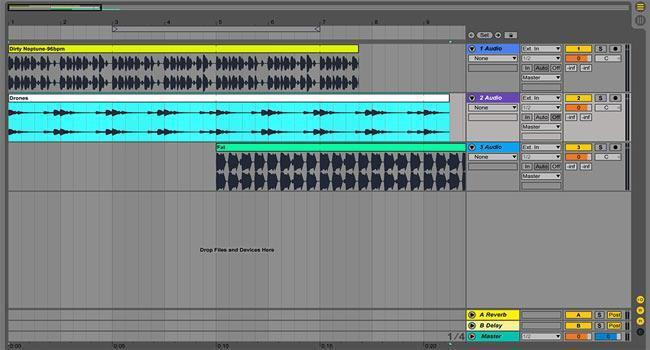
Before we dive into the power of Simpler and sample manipulation in Ableton Live, let’s cover Live’s amazing drag-and-drop environment and its general audio recording and editing capabilities. You can drag audio from anywhere on your computer or from within Live’s extremely cool, integrated browser, and Live knows what to do. Drag audio onto a MIDI track? Now it’s an audio track.
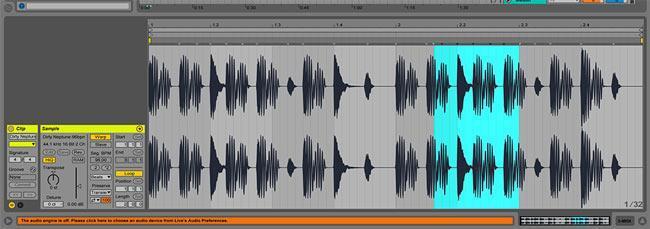
Despite the focus on the grid-style arrangement view, Live functions beautifully as a more traditional DAW with full multitrack recording capabilities. That means you can easily sample your own content, whether that’s a live bass groove you’re ready to lay down or your favorite cut of “Amen Brother” on vinyl. In fact, you can record your audio to a track, double-click on the clip to view the sample in the Clip View, and then trim it and make other adjustments, all without touching Simpler.
Getting Started
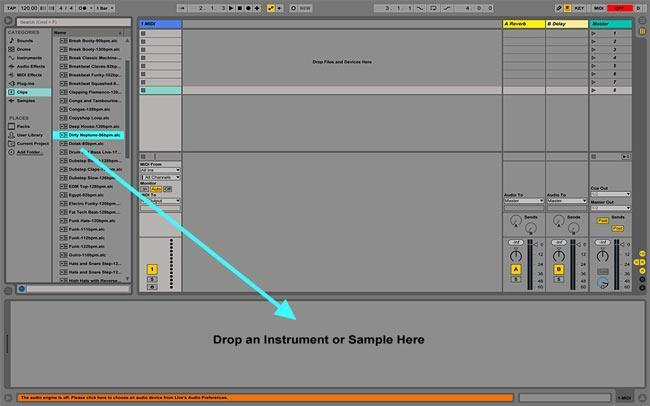
Start by finding your sample. You can grab one from anywhere on your hard drive, but the browser in Live is exceptionally cool when it comes to keeping your files organized. Either way, just select an empty MIDI track and drag your sample to the panel at the bottom. Be sure that the panel is set to Device View (not Clip View), or you’ll turn the track into an audio track. If you’ve done this correctly, then Live will have created a Simpler virtual instrument already loaded with your sample.
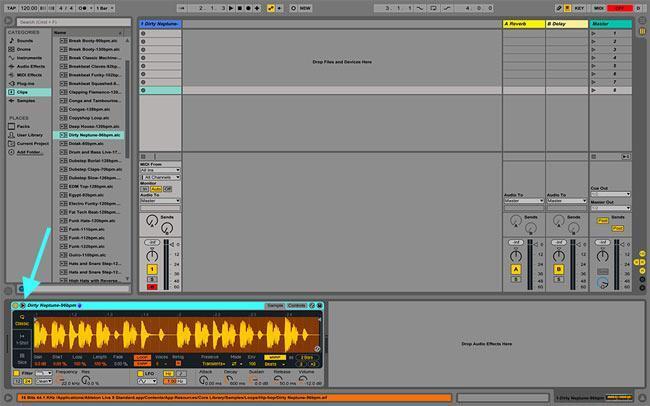
Like most Live instruments and processors, Simpler packs a ton of information into a small window that can feel a bit crowded. Click on the little triangle in the upper left corner of the Simpler window, and the main sample overview panel pops up much larger. This also gives you a simultaneous view of the controls behind Simpler. If you like to get nerdy, then you’ll find an impressive supply of creative tools for pitch and time warping in there.
How to Chop Up a Sample in Ableton Live
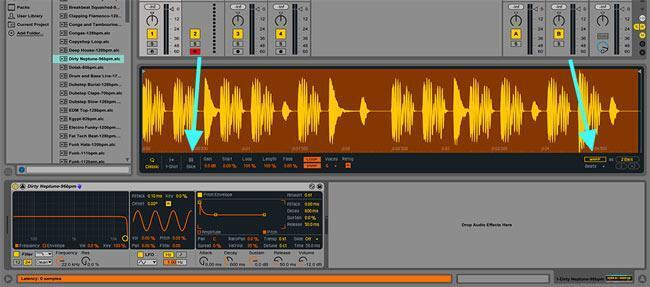
Chopping up samples in Ableton Live is almost too easy. At this point, Live may have already switched Simpler to Slice Mode with Warp on, but if not, go ahead and do that. Slice Mode adds markers at every transient. They may need some fine tuning, but nudging markers a little to the left or to the right is simple if you have to do so. If your material isn’t in the tempo of the rest of your track, Warp Mode will easily handle that, or you can go old-school and change the tempo with the pitch control.
Trigger New Grooves
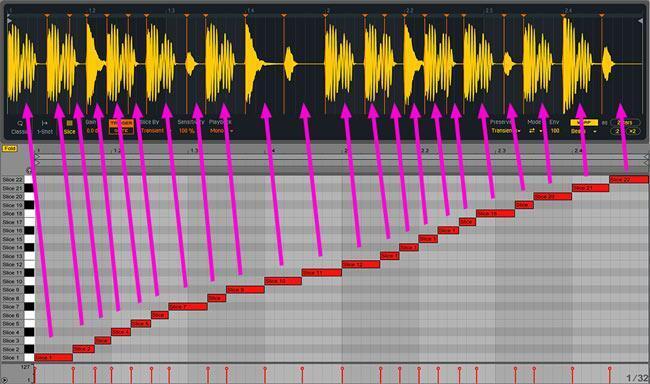
Once you’ve chopped your sample, you can trigger each slice via MIDI, starting at C1. This makes it easy to sequence or play your new sample slices. There are several controls at the bottom of Simpler’s waveform view, including playback modes. The playback modes feature both monophonic and polyphonic playback, plus Thru mode, which triggers the sample even if the MIDI note isn’t sustained, kind of like an old-school drum machine.
Drum Rack: Going Beyond Simpler
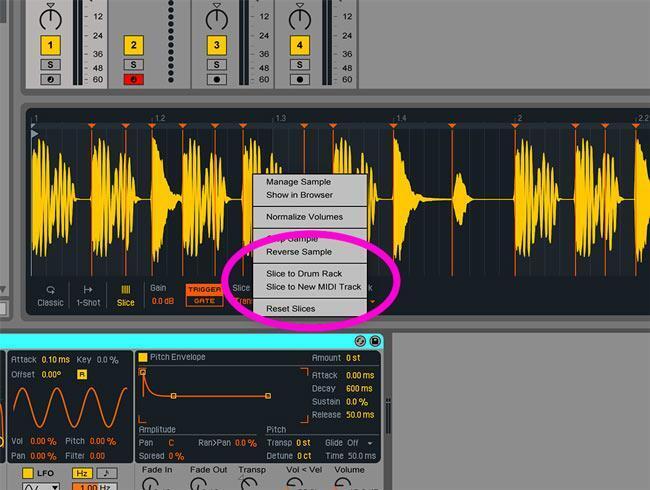
Technically, that’s all there is to the basics of slicing beats in Ableton Live, but there are a few other things you’ll want to explore. For instance, if you right-click on Simpler’s waveform view, you get the options “Slice to Drum Rack” and “Slice to New MIDI Track.” Both ultimately take your chopped beat or sample and assign each slice to a different pad in the Drum Rack drum machine. This gives you a ton of additional options for performance and sample tweaking.
How to Tune a Sample in Ableton Live
There are several ways to transpose and tune samples in Ableton Live. Transposition options are available in the main controls next to the waveform display in the Clip View, while Simpler features a lot of additional controls for manipulating pitch. Simpler’s Controls tab holds the key, providing you both with a simple Transpose knob and a set of envelope and LFO controls that let you pull off extremely sophisticated pitch modulation effects.
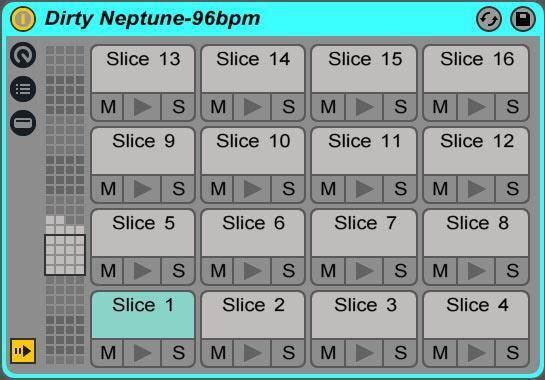
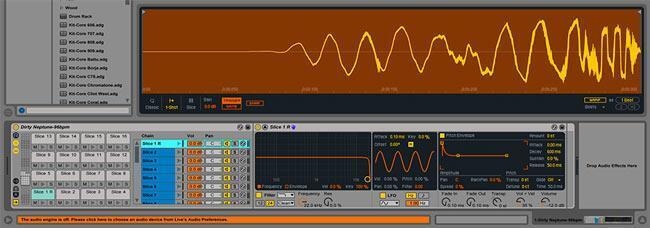
Drum Rack takes the power of Simpler and applies it to each slice individually. Another way to look at it is that Drum Rack is like an old-school 16-pad drum machine sampler, only each pad gives you almost as much control over the individual slice as Simpler did to the entire sample. You also get way more than 16 pads.
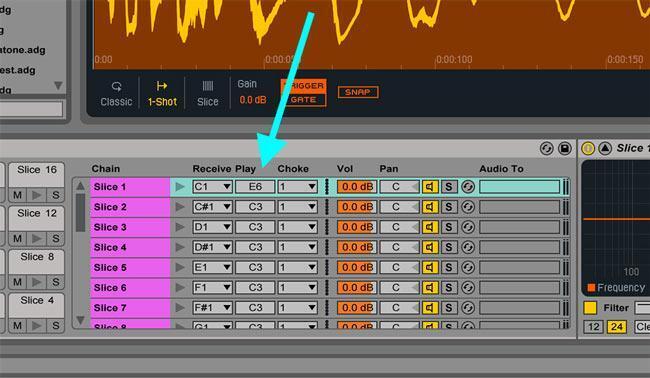
There are two easy ways to pitch shift in Drum Rack. First, if you expand Drum Rack’s control panels to include both the MIDI and the I/O sections, then you’ll see the full controls for each slice, including the ability to transpose slices by note values under the Play column. This is particularly useful if you’re transposing melodic samples because you can keep them in the same key as the rest of your project.
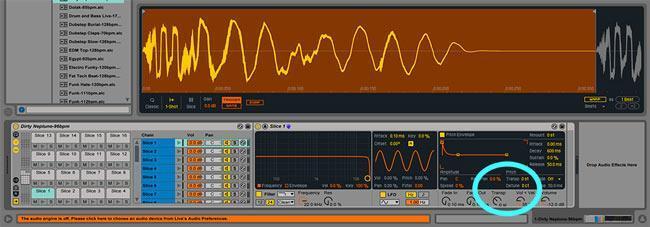
The other way to transpose individual slices in Drum Rack is also super simple. One of the Simpler features you’ll find in Ableton Live’s Drum Rack drum machine is the Controls tab. We cannot stress enough how cool this panel is. This section features three parts: a multimode filter, a pitch envelope, and a multi-pattern LFO you can assign in independently variable strength to four destinations. Tremolo, vibrato, filter sweeps, crazy pitch bending — you name it! Poking around this tab for a few minutes is sure to pay you back with inspiration.
How to Reverse a Sample in Ableton Live
Just like transposing samples, there are several ways to reverse samples in Live, including the Clip View, Simpler, and Drum Rack. You’ll usually reverse samples you just recorded in Live (not commercial samples) in the Clip View, since you’ll probably want to trim and possibly even warp the sample in the slightly more generous UI that Clip View offers compared to Simpler’s more technical layout.
If you’re starting in Simpler, most likely with a commercially prepared sample, then there’s no reason to go into the timeline or Clip View at all. If you right-click on the waveform, then you’ll find an option to reverse the entire sample. Note that this affects the entire sample, not individual slices.
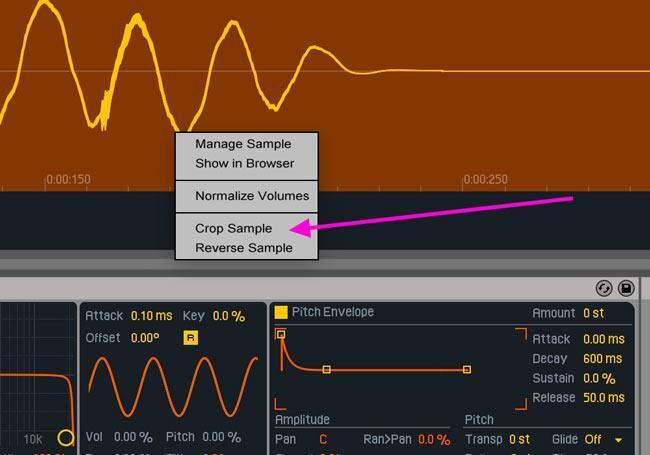
If you want to reverse individual slices, then you’re going to have to take your chopped sample into Drum Rack. Here it gets a bit different from transposing slices. If you want to reverse individual slices, then you’ll have to crop them. That’s as simple as selecting the slice, right-clicking on the waveform, and selecting “Crop Sample.” Do that again but select “Reverse Sample,” and you’re good to go.
We hope you’ve gotten a lot out of this guide to sampling in Ableton Live. As you can see, there’s a ton you can do with Live’s impressively straightforward sampling capabilities. Whether you want to be slicing up beats or creating cool and exciting new instrument sounds in Ableton Live, not only can you do it, but it’s also super easy. Call your Sweetwater Sales Engineer at (800) 222-4700 and get your copy of Ableton Live from Sweetwater today!