
As a guitarist, dead or broken strings can be huge bummer. If you’ve only got a short amount of time to practice, or if you’re already running late to a gig, taking the time to change strings doesn’t fit into your schedule. Changing strings on a regular basis will keep you from having to deal with these issues. Many guitarists have a near-phobic response to the thought of changing strings; the long, laborious process, filled with tedium and uncertainty, but ultimately worth the effort. Struggle no more! This article on how to change electric guitar strings is a complete guide that will help take the worry out of changing strings and like every other aspect of guitar, practice makes perfect.
Quick disclaimer: For expediency, this guide will cover changing strings on most electric guitars but does not cover changing strings on guitars equipped with Bigsby tremolos or Floyd-Rose-style locking tremolo systems.
Tools
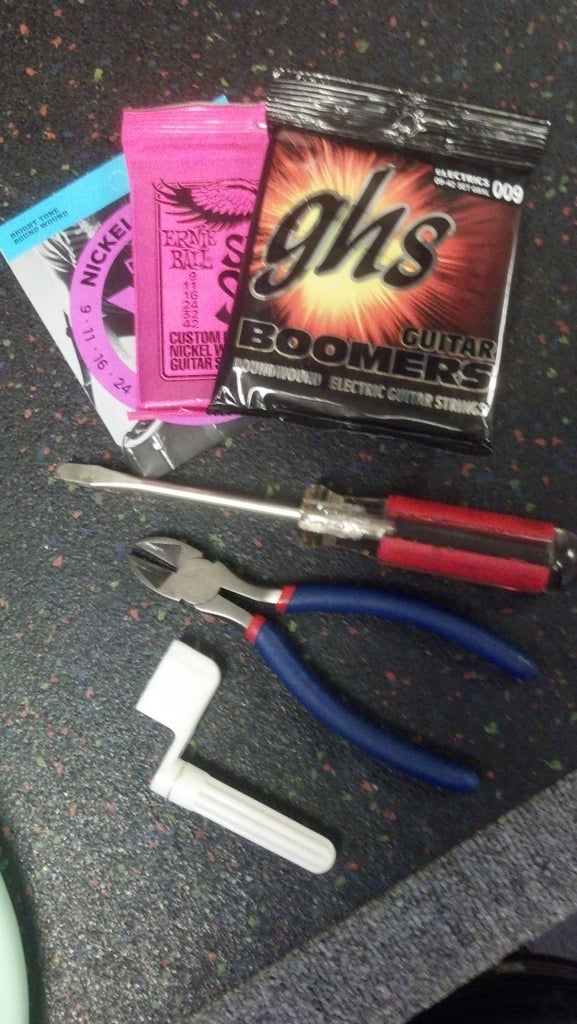
- New Strings — preferably the same gauge as are currently on the guitar. Changing gauges will require minor set-up work beyond the scope of this article.
- Peg Winder
- Wire Cutters
- Tuner
- Workbench, Neck Rest, and Guitar Pad — Okay, this is a best-case scenario as most of us will have the guitar sitting on our laps, but a padded workbench with a neck support makes it much easier and faster to change strings. If the guitar is in your lap, make sure to keep it flat so nothing falls out of the bridge of the guitar when a string is off.
- Flat-Head Screwdriver, et al — some guitars, such as PRSs with their locking tuners, may require additional tools
Removing the Old Strings
In most cases, removing the strings one at a time is best. To do this, loosen the string at the tuning peg by turning in a clockwise direction, using the peg winder as shown. (See Figure 1.)

The clockwise direction is as you’re looking down on the tuner. This works perfectly for guitars with all six tuners on one side. If you have a guitar with tuners on both sides of the headstock, all of the tuners are still turned clockwise to loosen but your perspective is different. If this gives you trouble, flip the guitar so you’re looking down on the tuners on the other side of the headstock. The string side of the guitar will be facing you.
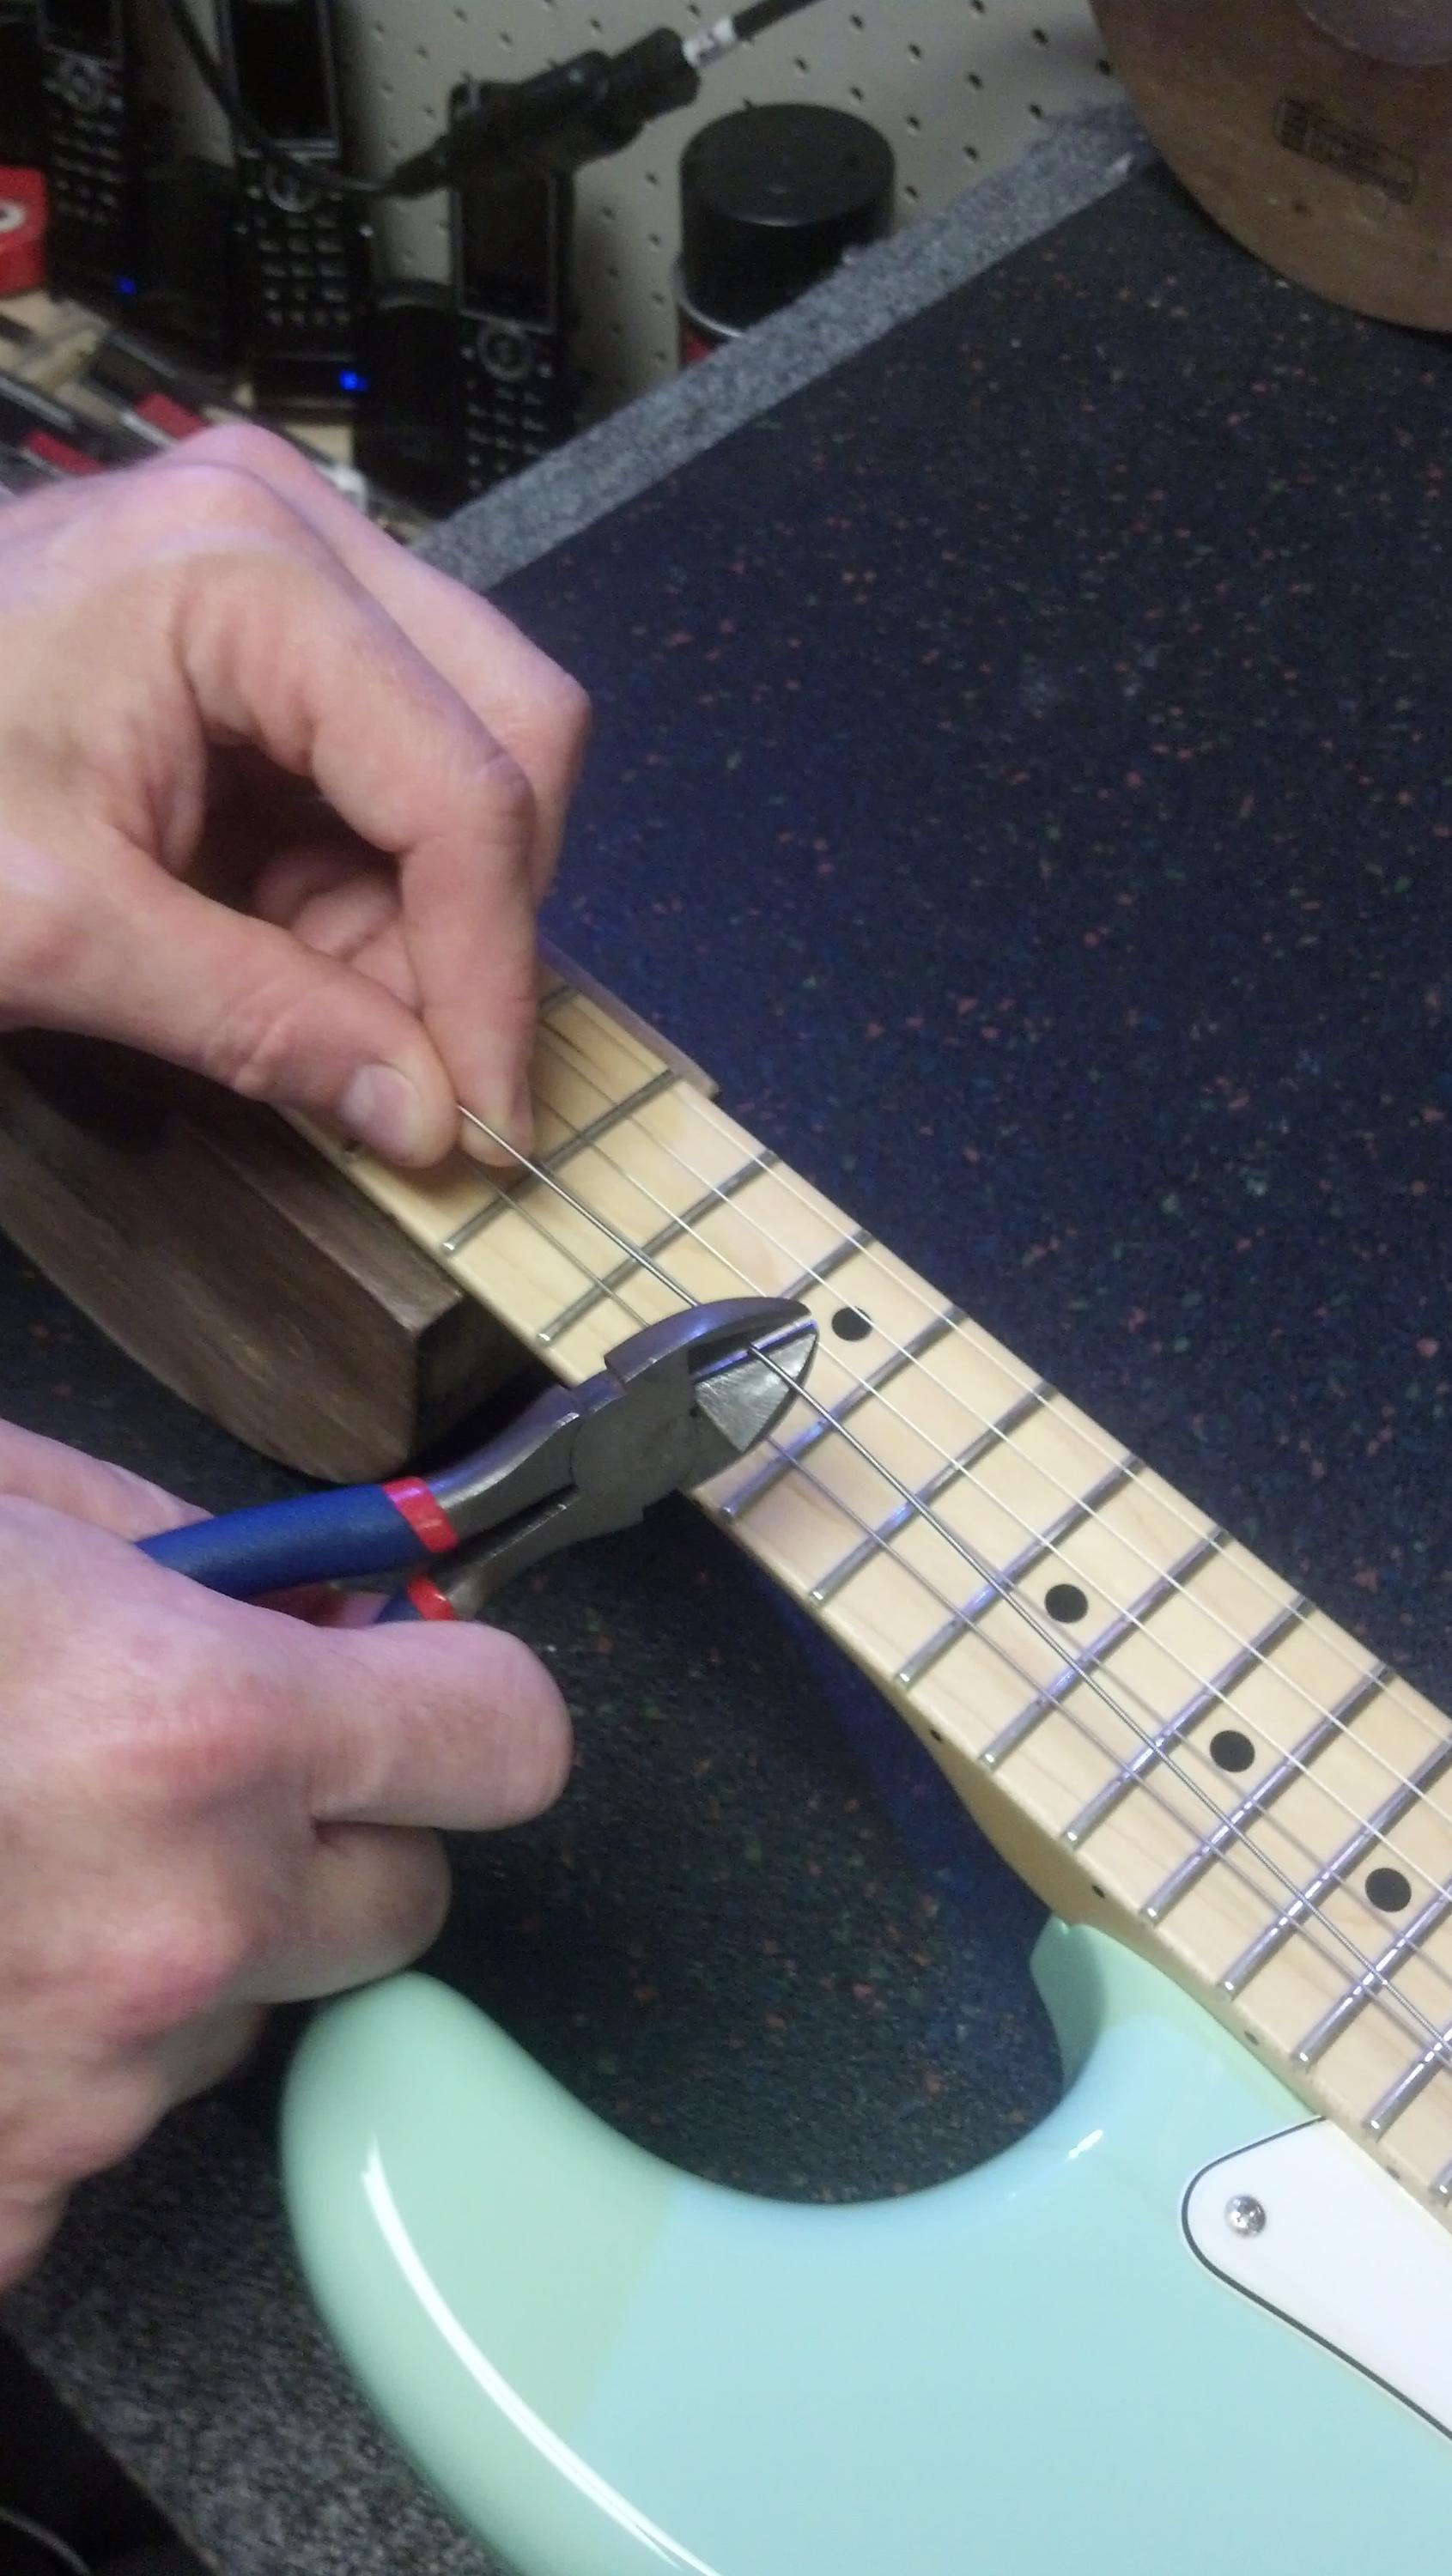
Once the string is thoroughly loosened, cut the string at the half way point between the bridge and nut (12th fret) using the wire cutters as shown in Figure 2. At that point, the ball-end of the string in the bridge should slide out easily, again dependent upon the type of bridge on your guitar. A top-loading, wrap-around style bridge is shown in Figure 3.

Many guitars require that the strings be loaded from the back of the guitar so take the cut end of the string and gently push it out as shown in Figure 4. This string will have an angle on it where it left the bridge and entered the body so as you push it through, remember that it won’t come straight out.

If you have a cover on the back of your guitar where the string goes through, that usually means that you have a tremolo bridge with a cavity that the cover is over. If the holes on the bottom of your bridge don’t line up properly with the holes on the cover, the bent string can possibly miss the hole coming out and get twisted around inside of the trem cavity. Be patient, try moving the string slightly side-to-side before the ball-end hits the cover and starts to twist so you can fish it out. In a worst case, remove the screws holding the cover on so you can see the bottom of the bridge clearly.
Next, remove the string from the tuning peg. If the string is loose enough, the windings should easily unwrap and the cut end will slide out of the hole in the tuning peg. See Figure 5. If you have locking tuners, unlock the tuner with the thumbscrew for Sperzel-style or flat-head screwdriver for PRS-style and slide through as in Figure 6. Some tuners load strings from the top and bend at a 90-degree angle, those should come out easily as well.


Taking all of the strings off at once is best left to someone experienced. Depending on the type of bridge you have, things may move around or fall off. For instance, a floating tremolo bridge will collapse and fall off the studs or a Les Paul-style stop tailpiece will fall completely off. An archtop-style bridge is normally not anchored to the body and will come off as well and unless it goes back in the exact spot, your guitar will not play in tune properly.
Putting on the New Strings
The first step is to take the string out of the package and unwind it. Make sure you have the correct string chosen. The sixth string is the largest and lowest in pitch and the first string is the highest in pitch and the smallest.
Take the plain, non-ball end of the string and push it through the tailpiece either on the top or back of the guitar, as in Figure 7. Make sure that it travels properly over the bridge and correct saddle as in Figure 8, and through the correct nut slot.


Next, turn the tuner so the hole lines up with the nut and place the string through the hole in the tuning peg. (See Figure 9.) For a PRS or Sperzel-style locking tuner, pull the string all the way through and tighten either the thumbscrew or top screw and begin bringing it up to pitch.

For strings with string retainers, make sure the strings are underneath them before bringing up to pitch. (See Figure 10.)

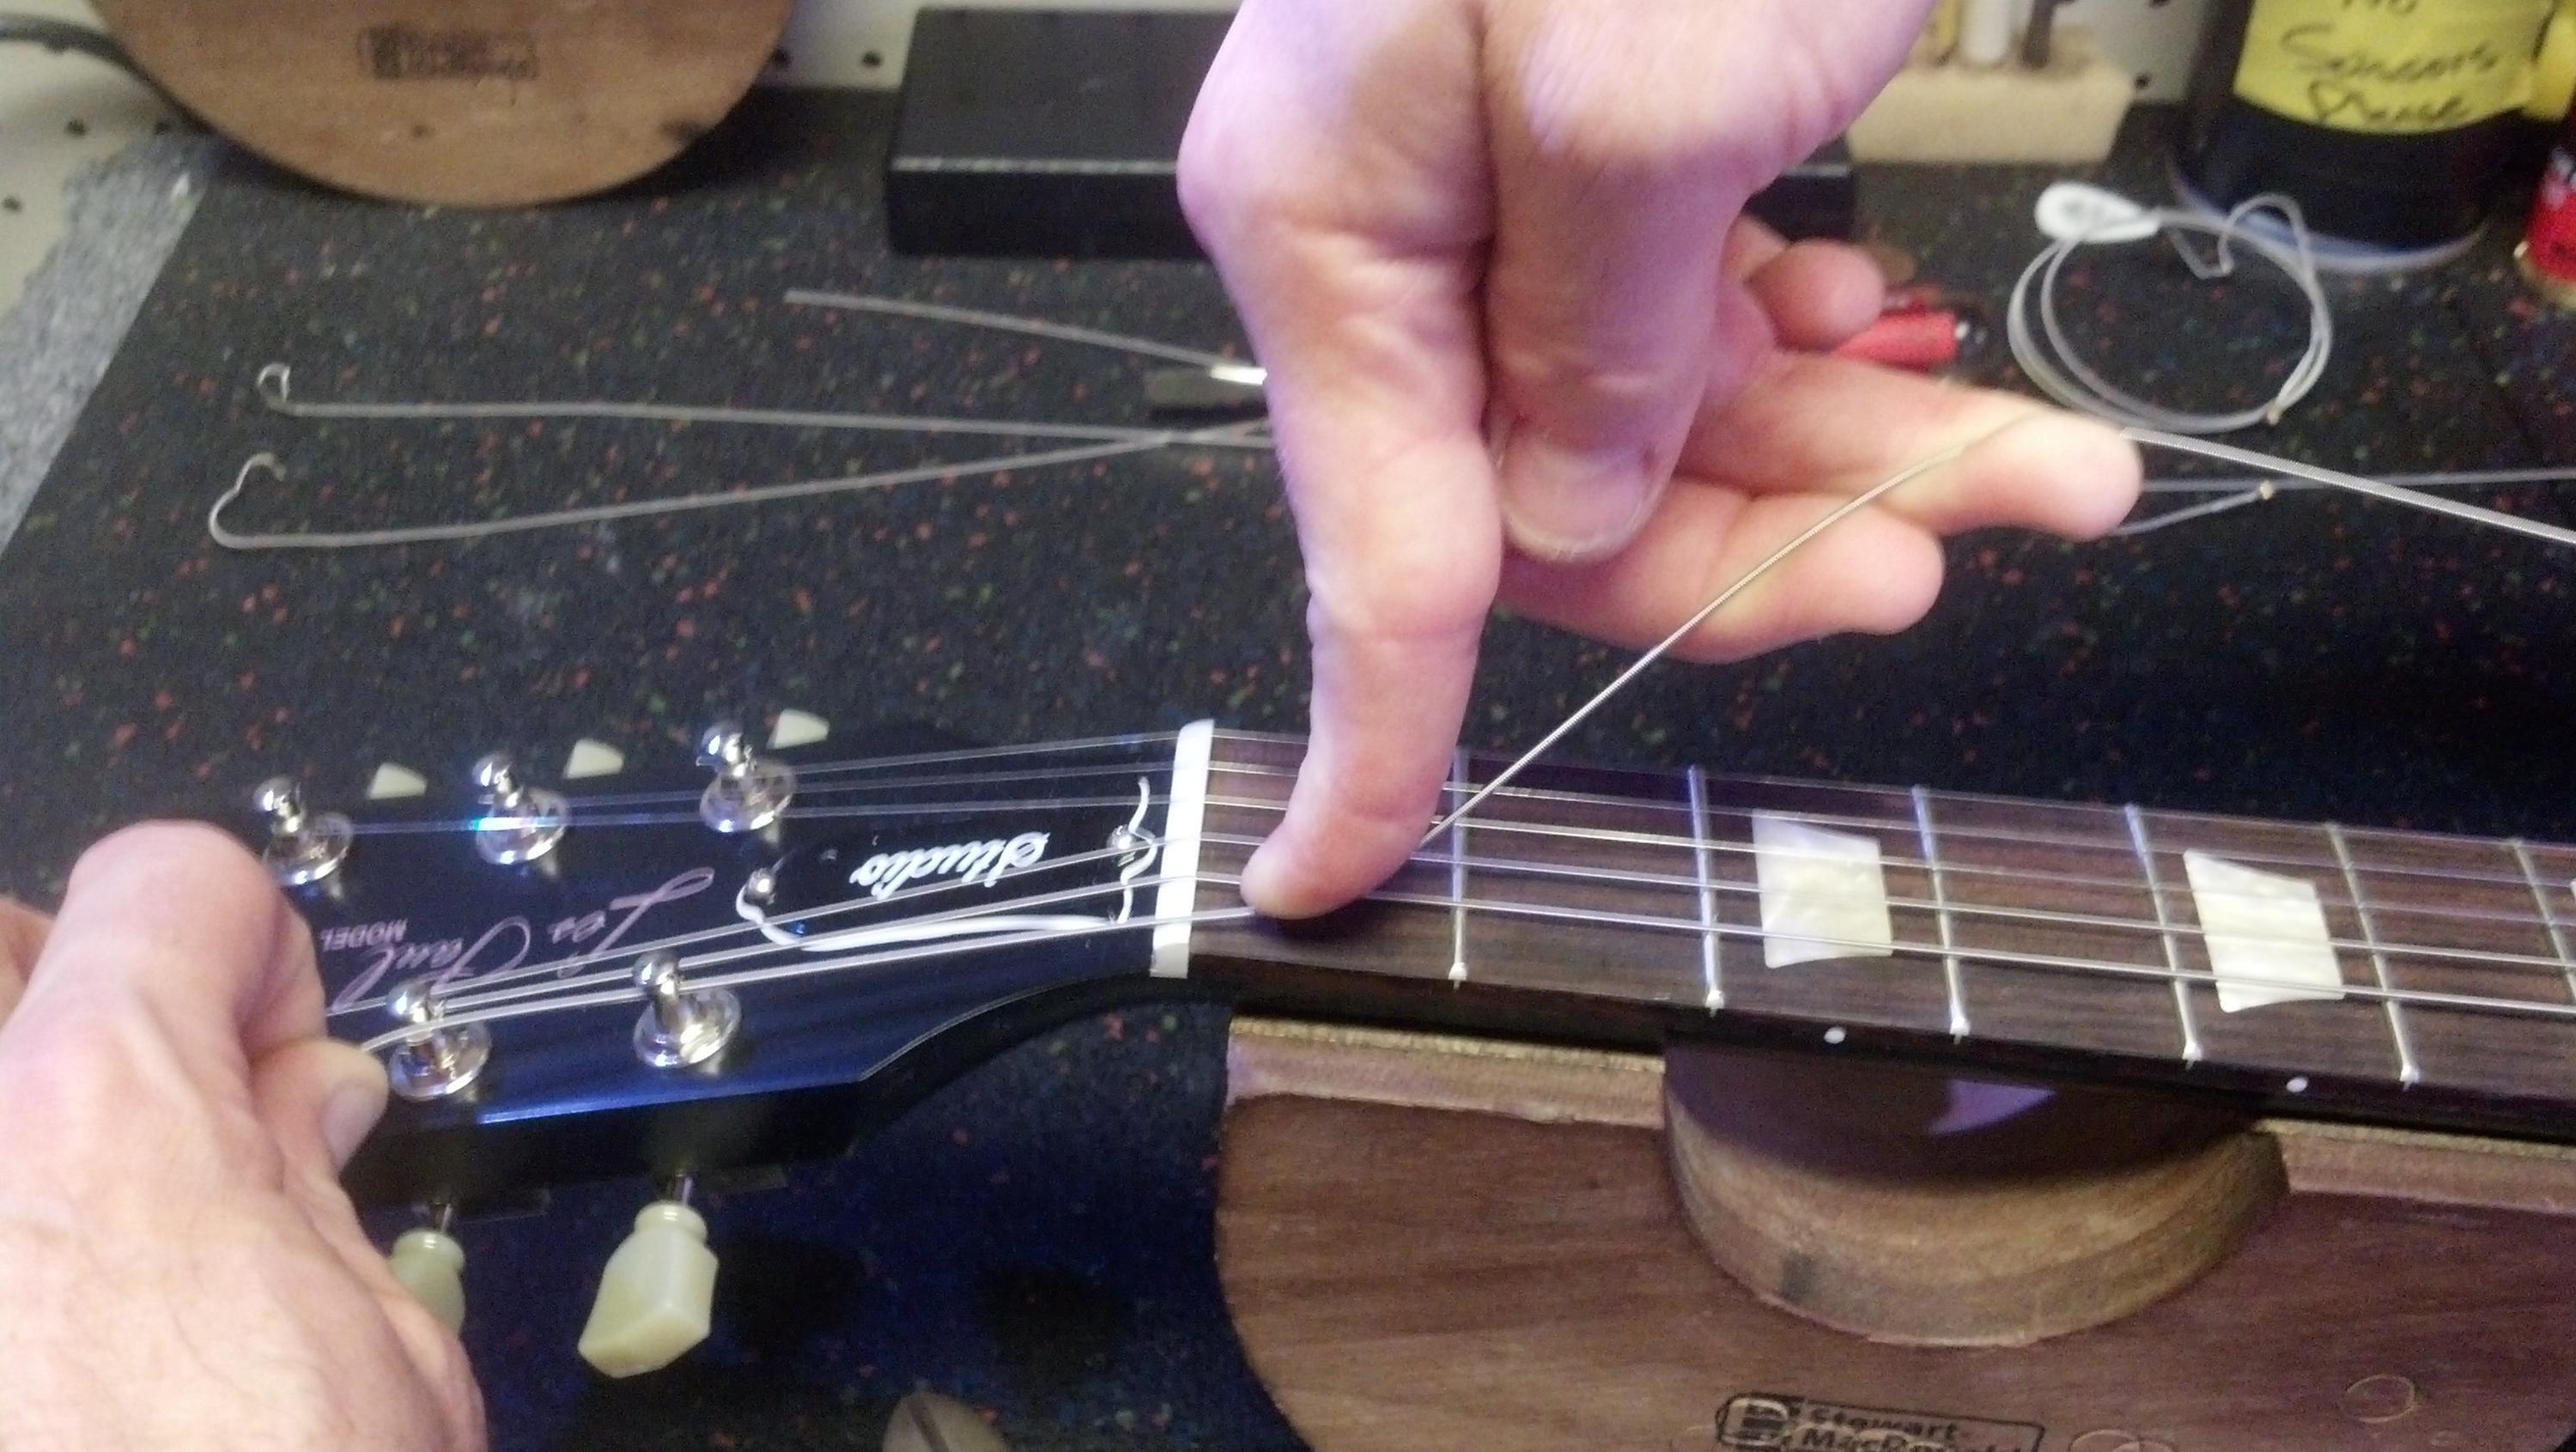
Most tuners do not have a locking mechanism and require leaving enough slack to create the proper amount of wraps around the post of the tuning peg. To do this, hold the string between your thumb and middle finger, raise your wrist upward, point your first finger downward until it’s extended and touching near the first fret. That is the proper amount of string for creating a wrap. (See Figure 11.)
In order to lock the string in place, with the proper amount of string sticking out, turn the tuner counter-clockwise until the string is at a 90 degree angle to the nut, as in Figure 12. Then, grab the end of the string that is sticking out of the tuner and pull it back to an opposite 90-degree angle. (See Figure 13.)
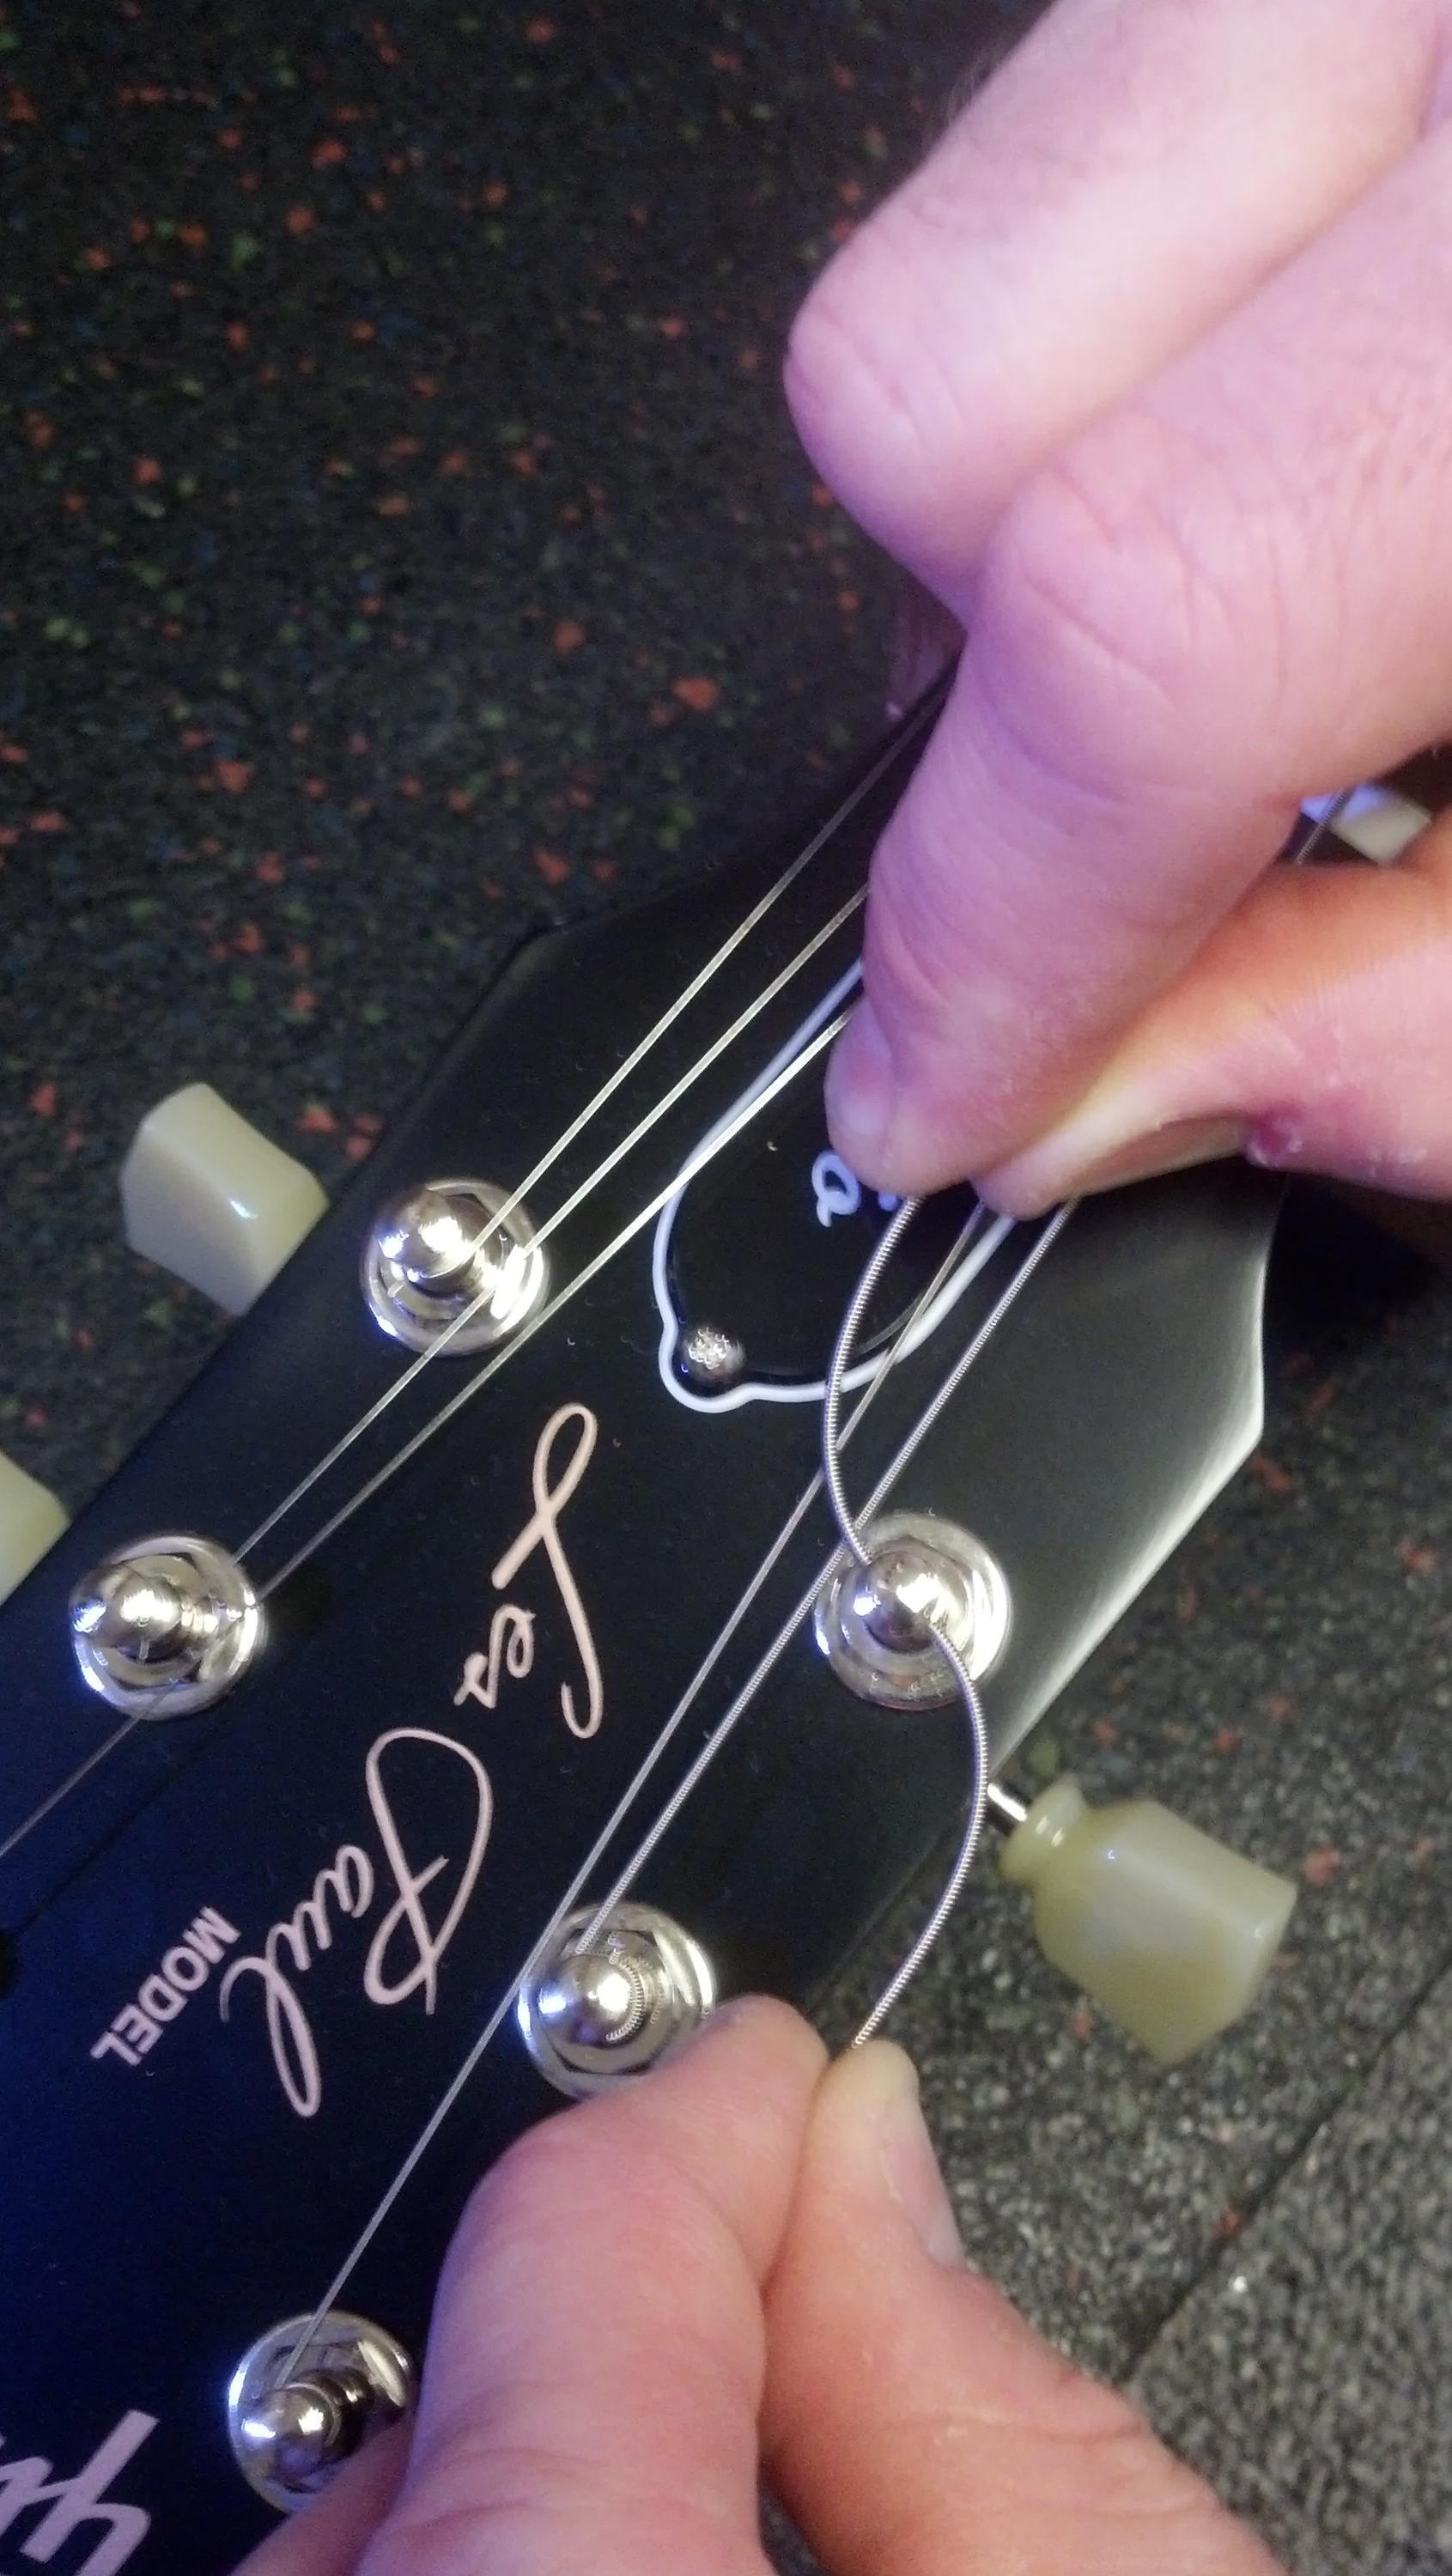

Grab the string and hold tension on it by resuming the wrist-up-forefinger-on-the-neck position, as in Figure 14. This will help you guide the string to ensure that the wraps around the post are evenly layered, starting from the top and working downward. Three wraps will do the trick, especially with the bigger, wound strings. The smaller strings will have more but the goal is to not have so many wraps that they overlap. When completed, it should look like Figure 15.


If you have tuners that load in from the top as opposed to through the side, cut off the excess string length before you load the end into the tuner. The wrist-up, string-holding method will not be necessary, nor will the 90-degree lock. The way to measure the proper amount of string for wrapping is to cut the string three tuners past the tuner you are putting the string into. That will be the proper amount for wrapping around the post. (See Figure 16.)

Put the cut-end of the string into the hole in the top of the tuning peg, bend at a 90-degree angle, and turn the tuner counter-clockwise to tighten, as in Figure 17.

Once the string is up to pitch, tug gently on it five times and re-tune. (See Figure 18.) Try that a few times to help the string settle into the right tension and to maintain pitch.

Finally, take the excess string sticking out of the post and using the wire cutters, trim the end off, leaving a small amount remaining, as shown in Figure 18.

Repeat the process for the remaining strings and play the guitar to help the strings settle into pitch. You’ll probably have to re-tune several times until the strings start holding pitch. When they do however, you’ll have the clean feel and snappy tone of fresh strings — enjoy!