

When Shawn Dealey, Sweetwater Studios’ Producer/Engineer, mentioned that he uses four mics on a kick drum, I was confused. “Four mics? On kick?” I blurted out. “Why in the world would you use four mics on the kick drum?”
“Because I can.” He smirks and laughs.
“It’s because it gets me the sound I’m looking for — a sound that’s not fully achievable with one microphone. It’s a combination of many different things. Each mic delivers a different component of the finished sound I’m looking for in a kick drum.”
Well, there you have it. If it sounds good, then it is good. So, I launched into a discussion about Shawn’s technique for using four mics on kick.
“The approach of using one microphone eliminates a lot of variables. Using lots of mics can cause problems if you’re not sure what you’re doing. Putting one mic inside a kick drum works easily, but I don’t feel it’s as fully featured as I like. So, if you put the mic inside, you get less bleed from cymbals and toms or other instruments, but you’re giving up low-frequency information. The mic inside will give you a punchier sound but not as much sub information. So, using a single mic seems like a compromise to me. And why compromise?”
Take a Listen First
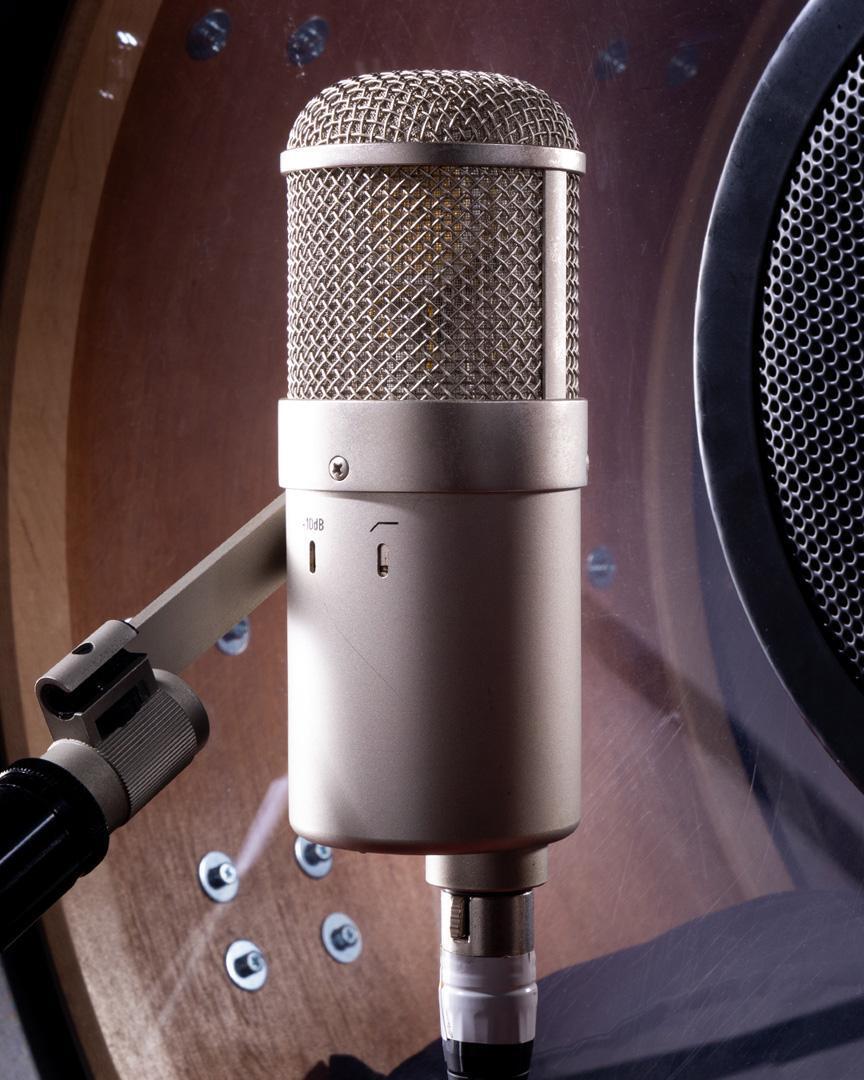
Let’s start by listening to what the combinations of mics sound like. Then I’ll run through the mic selections and placements along with spectrograms for each. These sound files will allow you to hear Mic 1, then Mics 1 and 2, then Mics 1, 2 and 3, and then all four together so you can hear what each mic adds to the sound. These samples were recorded in Sweetwater Studios during a tracking session.
Mic 1

“Using one mic is definitely the easiest approach. I’d start with a Shure Beta 91A lying on a pillow inside the kick drum, about halfway between the two heads and pointed at the batter head (where the beater strikes). It gives me attack and punch. It’s like a very scooped-sounding microphone, but it gives the attack you need for something like heavy metal. Not something I’d use by itself, but it gives great attack and foundational low end.”
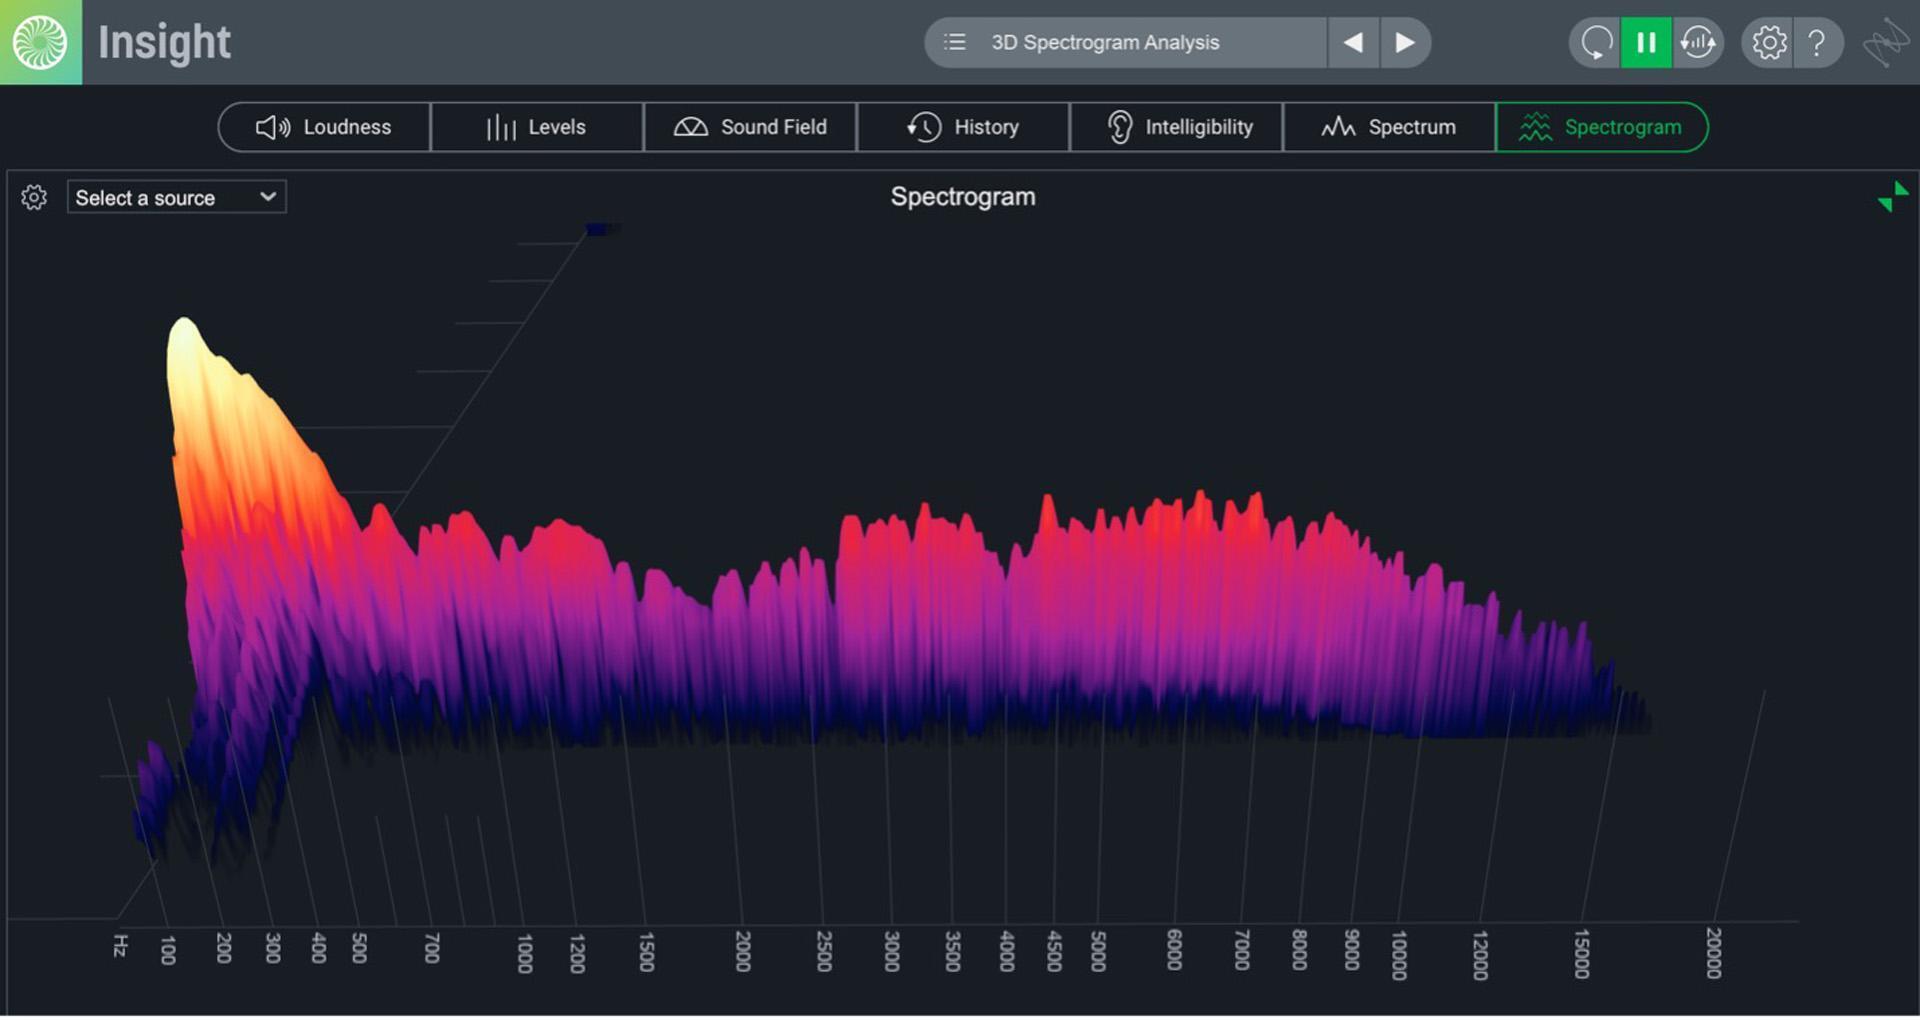
- Featured: Shure Beta 91A
- Alternates: Beyerdynamic TG D71c, Sennheiser e 901
Mic 2

“For the second mic, I’d use a large-diaphragm dynamic microphone, such as the Telefunken M82, which is a very mid-forward-sounding microphone. For this mic, I prefer to put it inside the kick, over the top of the Beta 91, pointed directly at the beater. Having the mics the same distance from the head makes sure they are aligned and are additive in the low frequencies. That mic gives me the chestier low-mid frequencies that fill out a kick drum, like AC/DC-style kick drum. That mic can also come out closer to the hole of the head, depending on what you want. Moving it away from the batter head aligns it more with Mics 3 and 4, which are outside of the kick. But overall, I feel I get better integration between the mics if I keep two inside and two outside.”

- Featured: Telefunken M82
- Alternates: Beyerdynamic M 88, Shure Beta 52A, AKG D12 VR, sE Electronics V Kick, Sennheiser e 602-II
Mic 3
“Mic 3 is a large-diaphragm condenser mic, such as the Neumann U 47 FET Collector’s Edition, that is positioned outside the resonant (or front) head, about a third of the way across the head from the hoop, usually about 3–6 inches away from the drumhead. I use the back of my hand to feel for the strongest push of air moving from the head when someone plays the kick. But this is not miking the hole, to be clear. This mic gives me a combination of chest and bottom end, so I get some of the note of the kick drum and the low-frequency extension.”
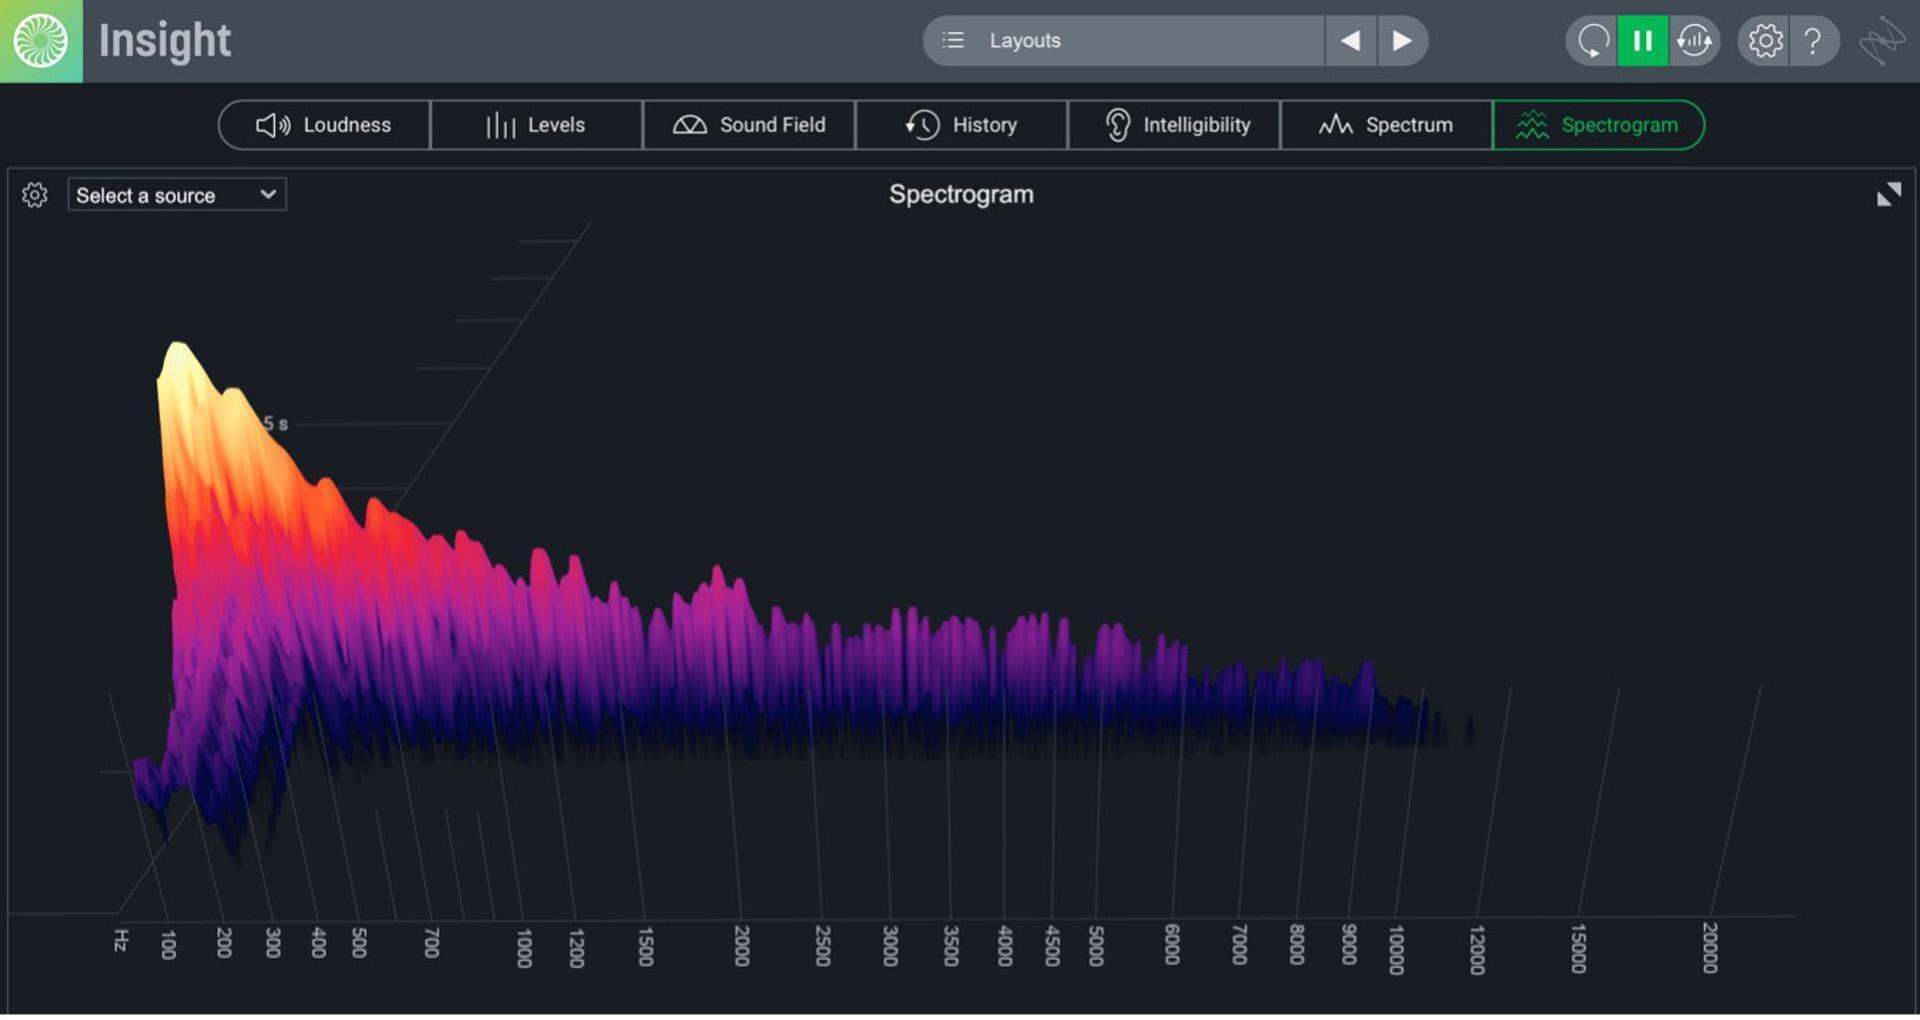
- Featured: Neumann U 47 FET Collector’s Edition
- Alternates: Warm Audio WA-47F, United Studio Technologies UT FET47, Audio-Technica AT4047/SV
Mic 4

“For the last piece of the puzzle, I use an extremely-large-diaphragm mic, which is actually a speaker wired up in reverse so it acts like a mic, such as the Solomon LoFReQ sub microphone. I use that to catch the lowest frequencies of the kick, capturing the sub-octave frequencies with that. I’ll place that mic toward the center of the head, next to the large-diaphragm condenser (LDC). I’m very observant of its placement, aligning it with the capsule of the LDC mic so those two mics are working together in terms of phase, making sure the polarity is absolutely the same between the two. Sometimes I’ll move it around in relation to the LDC, record both, and look at the waveforms to make sure both waveforms are moving in the same direction. Normally, there’s nothing much above 150Hz in that microphone. This mic is brought in ‘to taste’ to add the final bottom octave in the sound of the kick.”
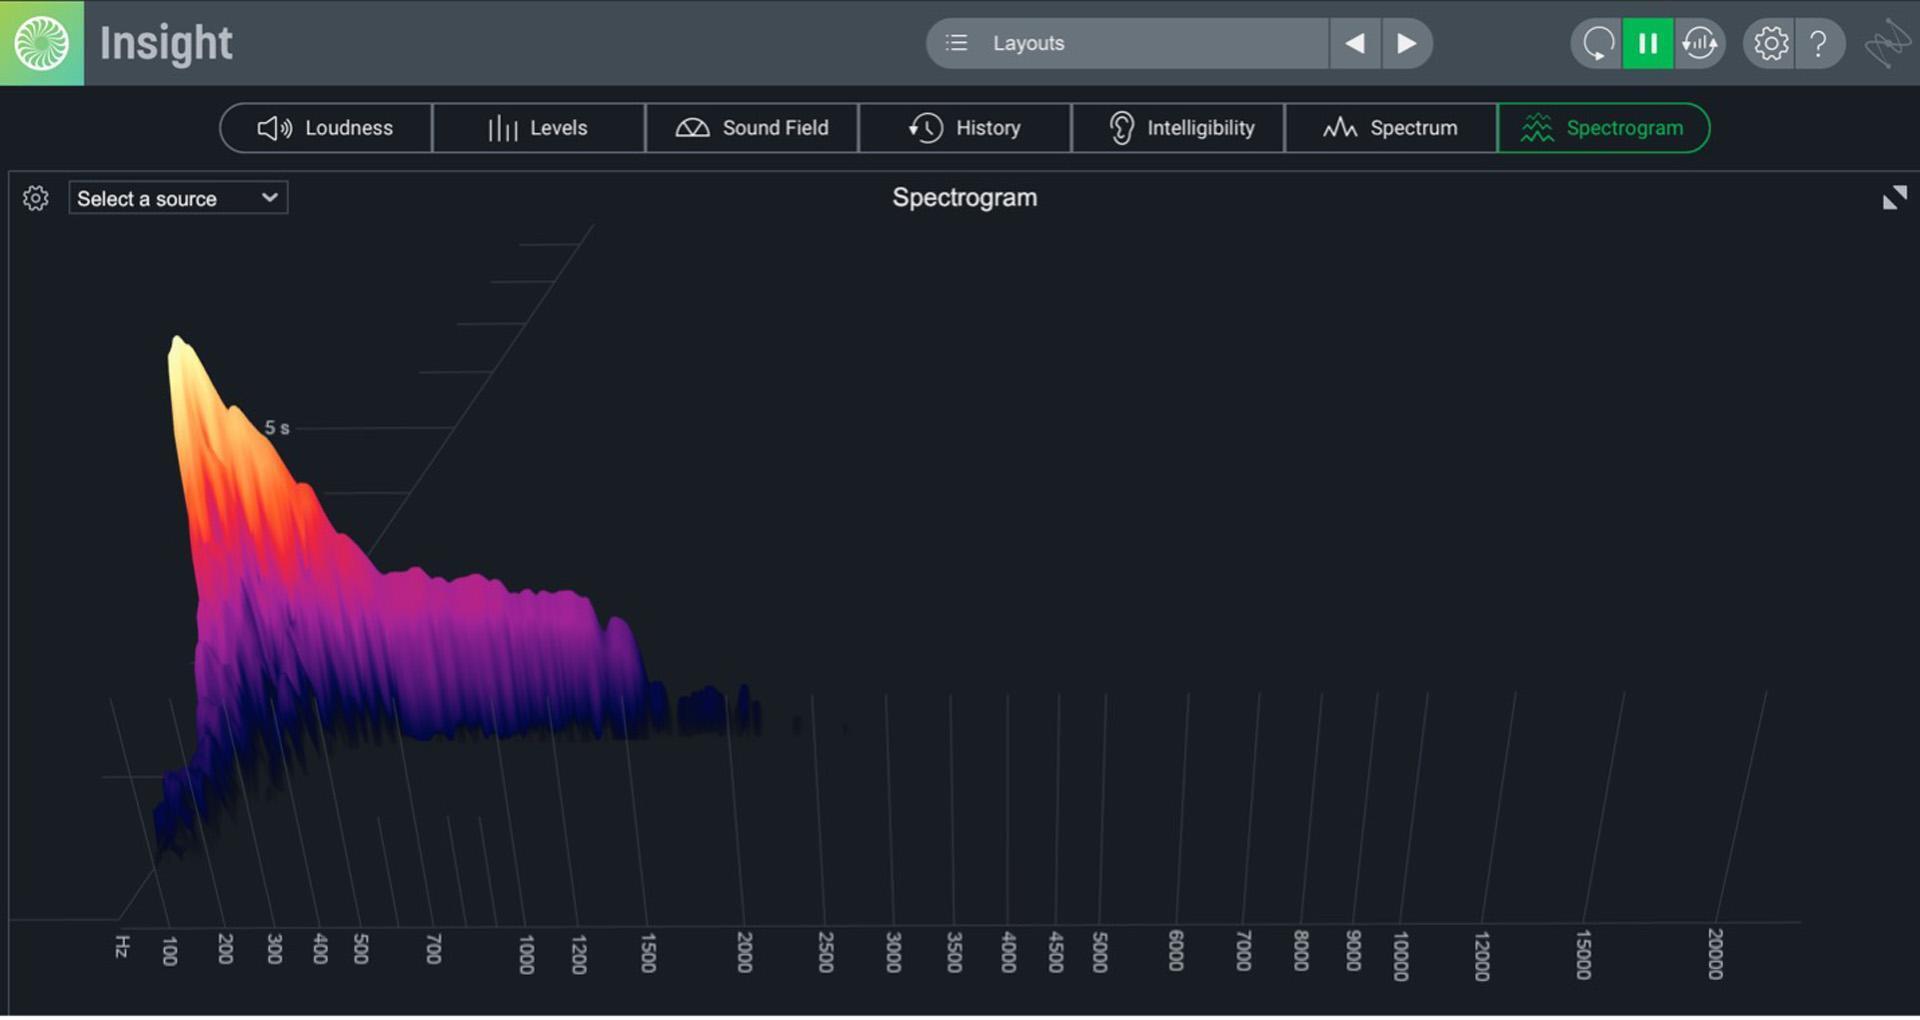
- Featured: Solomon LoFReQ
- Alternates: DW Moon Mic, Kicktone Mic
I Had More Questions
Fuston: When you talk about “aligning,” are you nudging recorded tracks, at the sample or millisecond level, to get them to line up visually?
Dealey: Absolutely not. All the adjustments are made by moving the mics and listening. The peaks and dips in the frequency response are caused by the interactions between the mics and the distance from the heads. Polarity is critical when adding mics together, so I always swap the polarity between the mics to make sure I have the most low end, comparing the two inside mics, the two outside mics, and then all four together.
If something doesn’t sound right, we’ll physically move the mic until we have the right alignment to yield the best possible sound.
How do you set the levels going into Pro Tools? All hitting near zero?
No. If I’m recording each mic to a separate track, I always record them so that when all the kick-mic faders are set to zero (all the same volume), that’s the blend I heard when I was tracking. That makes it easy to get back to what you heard live. Since I have the Neve 5088 console, I can take all those mics, bus them together, and commit that to a single track. But you have to be pretty confident to do that because you’re giving up the option of tweaking the balance later.
What if you don’t have four mics?
You can start with either of the first two mics and get something usable if you have a single input. Then each additional mic adds its own thing.
What about doing this live? Does anyone use four mics on the road?
I did in my live-mixing days. But if you need to stick to two mics, the standard option is a Beta 91A and a Beta 52. If you can’t get the kick to sound right with just those two, you may be in the wrong line of work.
Sweetwater Is Your Source for Kick-drum Mics
If you’re looking for the perfect kick-drum mic or mics, then you need to call Sweetwater. A search for “kick drum mics” on Sweetwater.com brings up 89 results! That includes mics, bundles, kick-drum-mic stands — everything you need to get your “best kick drum ever”! So, call your Sweetwater Sales Engineer at (800) 222-4700, and they’ll help you zero in on exactly what you need. Below are more resources to help you decide.