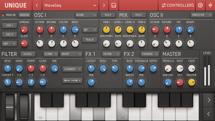
Layers and splits are integral parts of almost any keyboardist’s sound. The advent of mixing hardware synths and virtual instruments makes our palates even broader and allows us even more access to sounds. Luckily, Presonus’s Studio One provides some excellent tools for managing those tasks.
Layers
While you can certainly put instruments on two different tracks, Studio One provides a more elegant way to approach layers. If you drop a virtual instrument on a track that is already in use, you will get a prompt that looks like this:
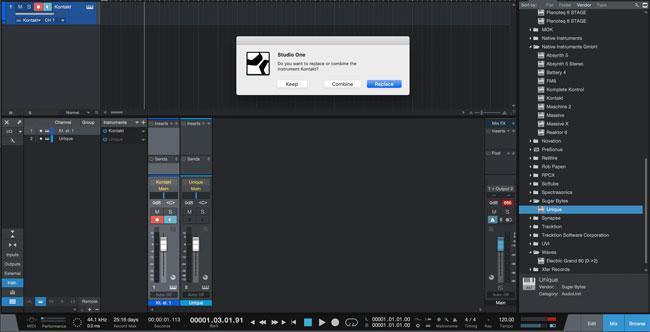
Figure 1: “I should choose the correct button…”
Instead of choosing “Replace” by default, click on the button that says “Combine,” and you will now have both plug-ins in a new Multi Instrument window. In this case, I have layered the Scarbee Mark I electric piano library in Kontakt with the delightfully quirky Unique from Sugar Bytes.
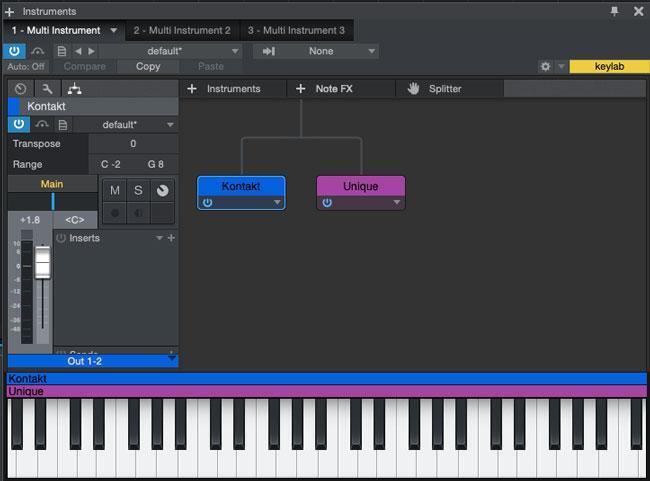
Figure 2: “Two instruments layered across the whole keyboard”
If you move your mouse to the edge of the colored bars on the top of the keyboard, you can scale the coverage for either instrument to whatever note range you like. When you select one of the instruments in the window, the controls to the left allow you to set the pan, level, and transposition for each instrument individually. Each instrument has its own access to effects and processing inserts, as well.
The Multi Instrument window is not limited to just two instruments and can get quite complex. You can group multiple instruments and use real-time note effects to create some really interesting patches or very intense layers.
In the next example, the keyboard is split at E2 with a Kontakt patch on the left and a layer of Unique and Omnisphere on the right (Figure 3, below).
The Kontakt bass patch plays a 16th-note rhythm on the left-hand part by using the Repeater note effect. The right hand is split into two patches, and the Input Filters are being used to do a velocity split between the two. At a velocity below 64, the Unique patch is being driven by the Arpeggiator. If I play harder than a velocity of 64, it switches to the Omnisphere pad. On top of all that, I have a Chorder module set to play a minor 9th chord on a single note when I play D5 or above. Of course, I can save the whole patch as a preset and open it back up in another song. This is an excellent way to build up a library of great patches for studio or live use.
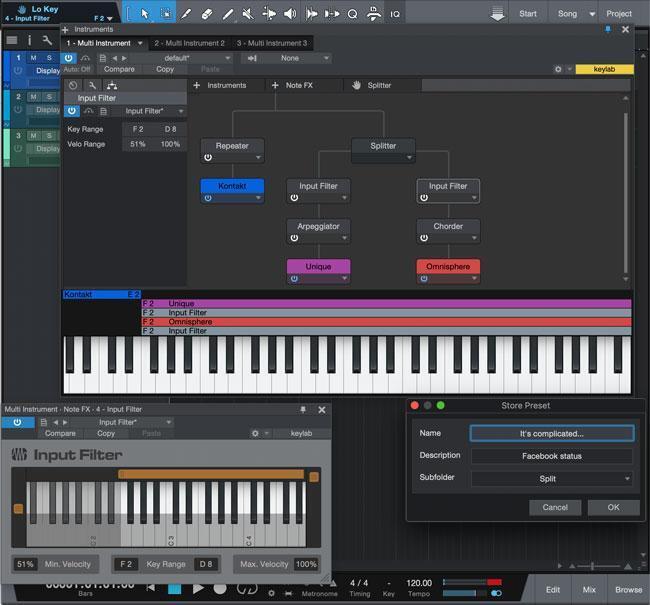
Figure 3: “All the note processing in one Multi Instrument. The open Input Filter window allows me to split incoming data by note or by velocity”
Hands on
The real power of this comes into play when you start assigning hardware controllers from your keyboard to control real-time aspects of your sound. I like to have some simple volume controls set to balance my levels in a live situation.
I have found that consistency in this makes my workflow much simpler. I want a fader to control my attack-based sound and a separate one for any pad elements. I also want the same two faders to control my bass sound and my upper-register sound in a split. This way I am not having to think about which control to grab when I should be locking into a groove. While this may sound difficult, it is actually very simple with the use of VCA groups in Studio One.
When you look at the mixer in Studio One for any Multi Instrument, you will notice that it has grouped all of your virtual instruments into a single channel strip. This cleans up the mixer and allows you to apply an effect to the output of the entire patch you have created, no matter how many instruments are inside of it. If you do want to expand the mixer to see all of the routing, you can click on the small folder icon right below the fader.
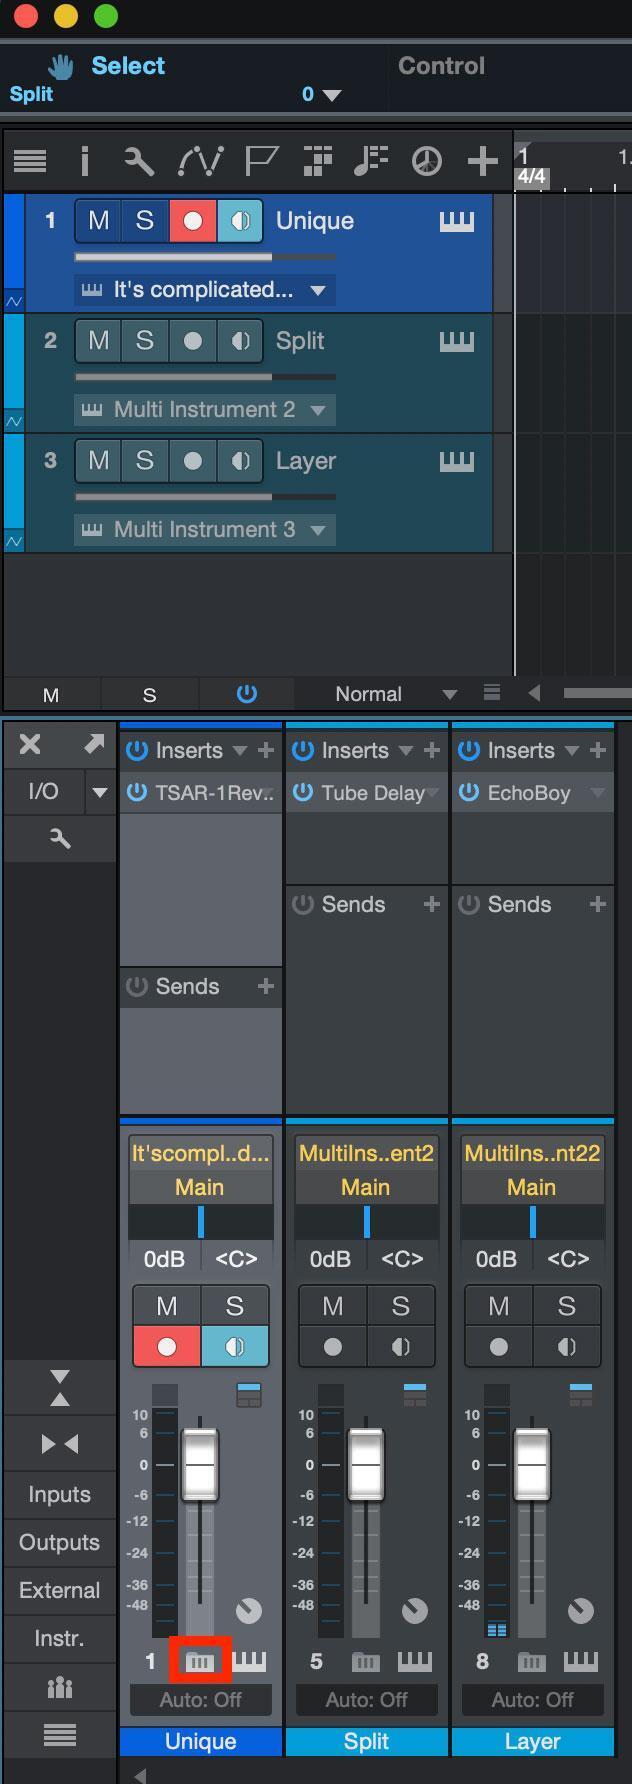
Figure 4: “Clicking on the ‘show subchannels’ button in the white box will expand the mixer to show the individual instruments”
When you do that, you will see a channel strip for each instrument in the Multi Instrument setup. Now, right-click in the mixer and add a couple of VCA channels.
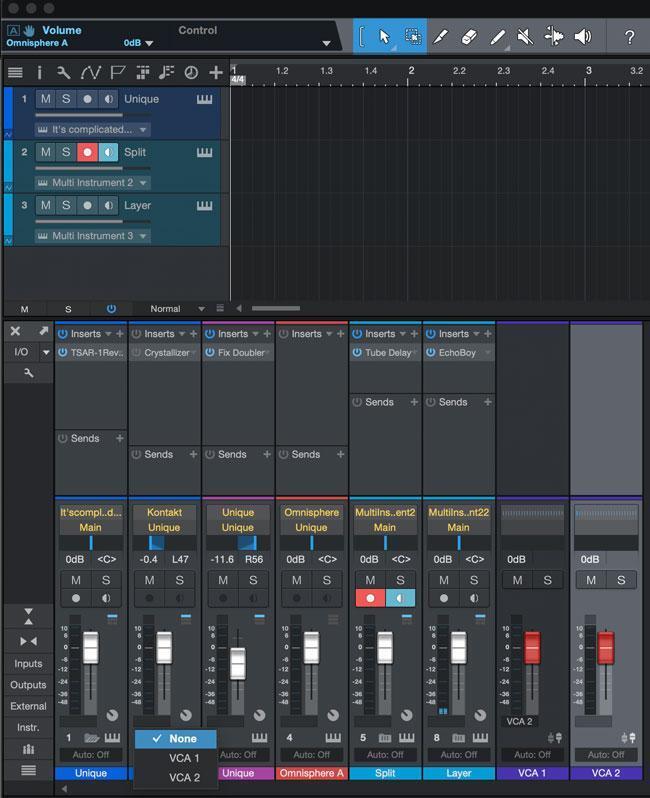
Figure 5: “The instrument channel expanded to show all three instruments with their panning, level, and any individual audio effects applied.”
Once you have added a couple of VCA channel faders, you will see a little box right below each fader. Assign the subchannel for all the sounds you want assigned to VCA 1 by using the drop box that appears when you click on it. For my setup, these are the piano sounds in my layers and for anything on the left-hand side of a split. Note that I have not assigned the overall channels (with the white accents) to any VCA, so the VCA faders will only control the levels of the parts of the sound they are assigned to.
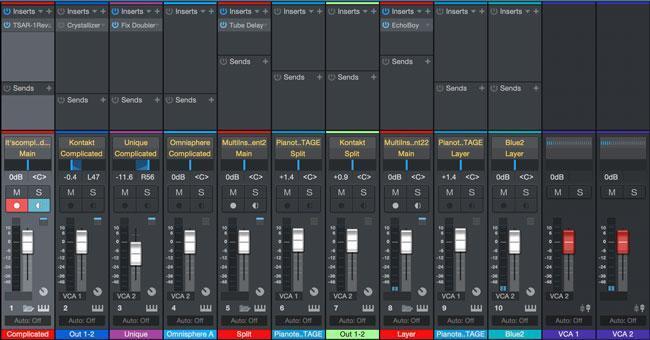
Figure 6: “Set up like this, my two faders can balance all the presets I have”
It is, then, easy to assign those two VCA faders to be controlled by any faders or knobs on your keyboard controller. Click the “External” button on the far left of the mixer and double-click on the controller you want to set up. Click the “MIDI Learn” button in the upper left-hand corner of this window and, as you move controls on your MIDI controller, they will appear in this window. In this case, I have assigned all of the knobs on the NI Komplete Kontrol S49 MK2, and I’m ready to assign them to the VCA faders.
Click the “MIDI Learn” button again so it is no longer lit up and move the control on your keyboard that you want to use to control the VCA fader. Right-click on the VCA fader and that control will be the suggested assignment at the top of the list. When you click on it, your hardware control should move the VCA fader on the screen. Repeat the process to assign a different hardware control to the second VCA fader.
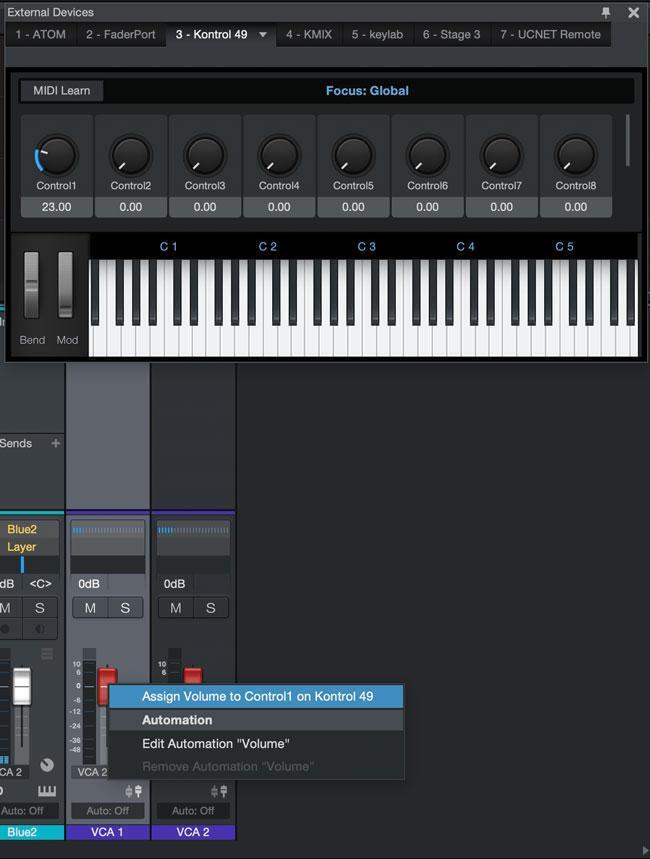
Figure 7: “Hardware controls for instant access!”
Now when you move the hardware control, it will change the level of all of the keyboard sounds assigned to this VCA, but it will keep the relative level offsets you already have set up. This is a powerful way to organize your keyboard patches for quick control.
Now you are ready to play with levels, or you can continue deepening your control by assigning buttons to the mutes or other controls in the mixer that are useful for you.
Studio One is filled with features, and it is just as easy to use as it is powerful. This means you can spend more time making music! If you want to add Studio One to your rig or pick the perfect keyboard controller to make your workflow a bit smoother, give your Sweetwater Sales Engineer a call at (800) 222-4700.