We all dream of having a big-studio budget to buy the premium preamps and must-have microphones that everyone on the forums seems to own. When you’re making room in your paycheck to carve out a bit of fun money, however, the financial realities of what you can afford can feel a bit stifling.
Before you go reaching for that stack of egg cartons and create a low-tech fire hazard for your vocal booth, let’s take a look at some more affordable and more effective (not to mention safer) recording options.
1. Get the Best Mic You Can Afford
 An old adage in the recording world is that if you want to improve a system, start on the ends and work your way in. As important as studio monitors may be, your top priority is going to be to procure an appropriate microphone. Our first piece of advice (other than “you get what you pay for”) is that you’re far better off investing in a single, great microphone than buying two or three bottom-dollar models.
If you need some suggestions, we have a few great guides just for helping you figure out where to start, and some general advice about microphone types. Check out our Studio Microphone Buying Guide for some suggestions. Condenser mics are more sensitive, but they require more controlled acoustics to produce their best results. Dynamic mics are forgiving, but not as bright or detailed as condenser mics. Multi-pattern mics are great, but you’re probably going to use the cardioid setting most of the time, so don’t worry about it too much.
Pro Tip: Don’t forget to grab a pop filter. Even a cheap one will work, and it can seriously save your vocal sound.
2. Keep It Simple, Keep It Clean
If you have cash to spare, then investing in a fine Universal Audio or Focusrite preamp designed to have character and warmth would be a fine investment, but since you’re on a budget, you’re going to want to use the simplest, cleanest signal path possible. Basically, you want to keep the signal path between your mic and your computer minimal.
If you have to choose either an all-in-one interface/preamp combination or a budget interface with an affordable external preamp, there’s no question: go for the better interface. Chances are, the preamp will be as good as or better than the external pre you were looking at, and better interfaces tend to include better digital converters as well.
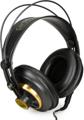
 If quality studio monitors aren’t an option for you, be sure to pick up a set of monitor headphones such as AKG K240 Studio or Sennheiser HD 280 Pros, which are designed for studio use. These offer a less flattering frequency response than typical consumer headphones, allowing you to hear a more accurate representation of your work.
Pro Tip: Grab a quality mic cable. Bad cables can cripple otherwise excellent systems. Look for cables with decent shielding. Pro Co Excellines are a safe bet and fit a tight budget.
3. Get Creative with Your Acoustics
Can’t afford a complete acoustic treatment overhaul? No worries. Here are a handful of tips and tricks that will let you get more out of what you do have. Every room presents its own unique set of challenges, whether it’s flutter echo in a rectangular room or weird resonances in oddly shaped spaces. Two things you’ll want to avoid are bare, flat surfaces and small rooms.
Second, a lot of people get close to a wall or, worse yet, face into a corner to record their vocals. This is exactly how you project reflections into your room and end up with a muddy sound. Instead, put your back to a wall on the long side of your room and put your mic in front of you as you are facing into the room. This way, by the time your voice reaches a reflective surface, it will have already lost a lot of its energy, and the buildup will be less.
 Third, reduce reflections where you can. Couches, curtains, and wall hangings in general diffuse and absorb a lot of sound, particularly high frequencies. You can add to this by draping blankets over mic stand booms to create movable baffles. They aren’t perfect, but they do a remarkably good job of killing reflections and breaking up room modes (a common acoustical problem). You can add to this by picking up a “portable vocal booth,” like the sE Electronics Reflexion Filter X, which stops sound from going past your mic into the room in the first place.
Pro Tip: The kind of thin and dense shipping blankets you can snag from your local U-Haul or even thick quilts off your bed make excellent high-frequency baffles.