
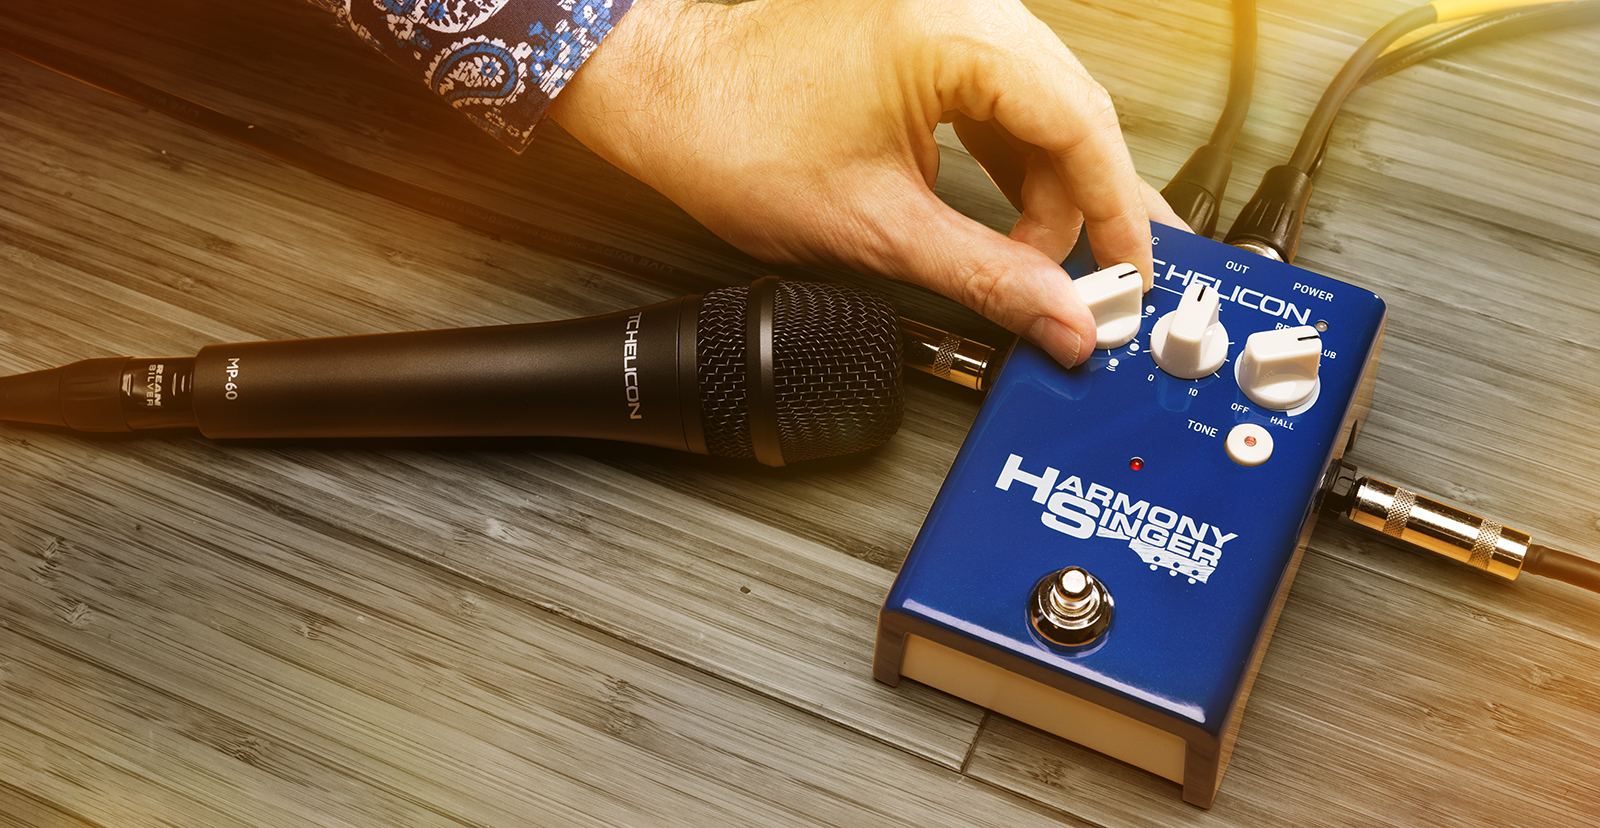
TC-Helicon Harmony Singer 2 QuickStart Guide
In this guide, we will show you how to register, set up, and use a TC-Helicon Harmony Singer 2. Follow the sections below to get started.
- Register Your Product with TC-Helicon to Get the Full Warranty
- Powering the TC-Helicon Harmony Singer 2
- How Does the Harmony Singer 2 Work?
- Controls, Inputs, and Outputs on the Harmony Singer 2
- How to Set up and Connect the Harmony Singer 2
- Have Fun Singing and Playing
- Footnote: Procedure for Updating the Firmware
Register Your Purchase with TC-Helicon to Get the Full Warranty
IMPORTANT: By default, TC-Helicon gives you a 1-year warranty. However, if you register your item on the website within 90 days of purchase, TC-Helicon gives you a 3-year warranty. It’s free.
TIP: Everything you purchase from Sweetwater comes with our 2-year Total Confidence Coverage (TCC) warranty. However, three years is even better than two, so please register with TC-Helicon today.
Powering the TC-Helicon Harmony Singer 2
There are two ways to power the unit:
- With a 9-volt center-negative external power supply, not included
- With four AA batteries. Remove the single screw on the bottom of the pedal to open the battery door. Make sure to orient the batteries with the correct polarity.
How Does the Harmony Singer 2 work?
The Harmony Singer 2 receives a solo vocal line and outputs one or two harmony vocal lines via pitch shifting. It determines what harmonies to create by examining the input from a second source, i.e., a guitar or a keyboard that plays chords. The Harmony Singer 2 calculates the correct harmonies moment-by-moment by comparing the pitch being sung to the notes in the most recent chord played. Therefore, in order to function, the Harmony Singer 2 requires you to connect a guitar or a keyboard and to play the chords while you sing into the microphone.
Controls, Inputs, and Outputs on the Harmony Singer 2
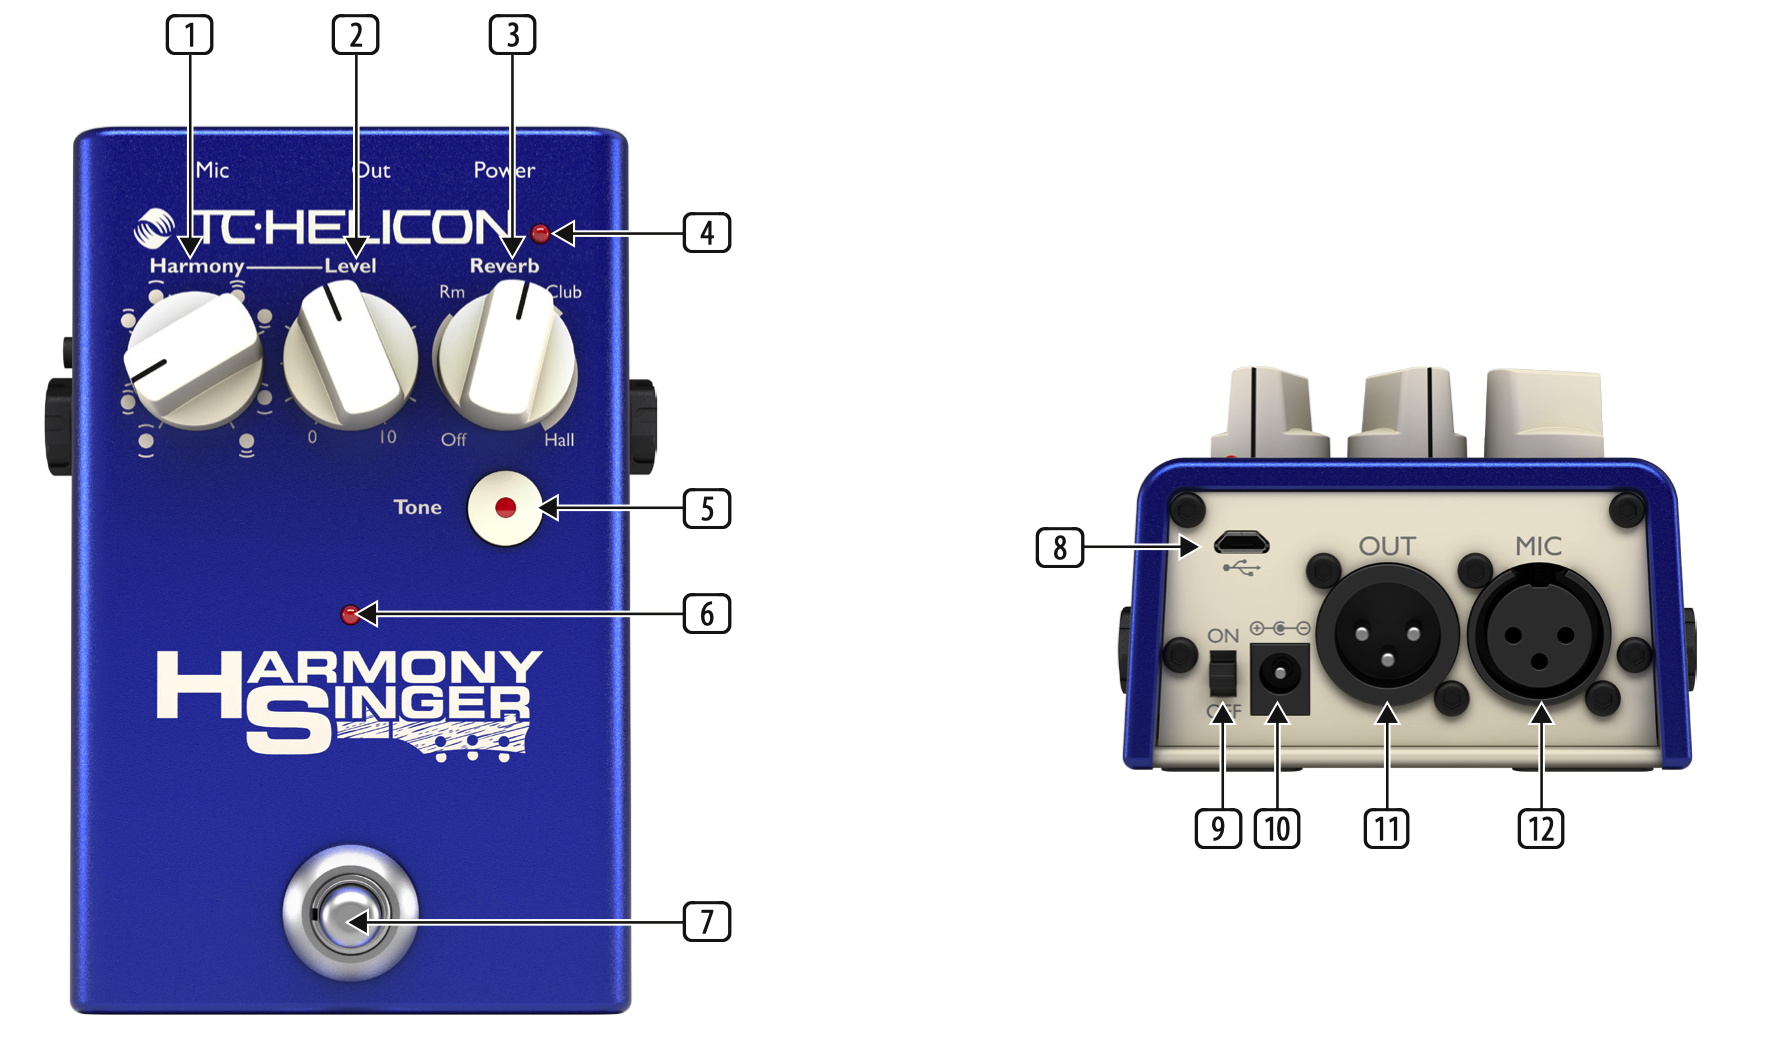
- Harmony knob selects the harmonies that will be blended with the voice.
- Level knob adjusts the volume of the harmonies
- Reverb knob selects the type and amount of reverb effect on your voice. The three types of reverb appear in order from the smallest space (Room) to the largest (Hall). Adjusting the knob within your preferred reverb space determines how pronounced the effect will be. Turning the knob fully counterclockwise turns the reverb off.
- Battery LED indicates the battery level, with green showing full charge, yellow being partial, and red to alert that the batteries should be changed.
- Tone button is explained below.
- On/Off LED lights when the effect is engaged.
- Footswitch bypasses the harmony effect but does not affect the reverb or Tone.
- USB port is explained below.
- On/Off switch powers the pedal on and off.
- Power input accepts a 9V center-negative external power supply (not included).
- Out jack accepts a balanced XLR cable for connection to a mixer or active speaker. This outputs the vocal signal with the effects applied.
- Mic input jack accepts a balanced XLR cable to connect your microphone.
Side Panel Controls
- INST IN accepts an unbalanced 1/4″ cable from a guitar or a keyboard.
Left side:
- INST THRU passes the instrument signal out using an unbalanced 1/4″ cable.
- GND is a ground lift switch. Toggle it if you hear hum or noise.
How to Set up and Connect the Harmony Singer 2
- Start with the Level knob on the front panel turned all the way down.
- Connect a microphone to the MIC jack on the back panel using an XLR cable. The Harmony Singer 2 provides 24-volt phantom power, which will power a condenser microphone but will also work correctly with a dynamic microphone. The Harmony Singer 2 will also automatically set the input gain: there are no controls for this.
- Connect an XLR cable to the OUT jack and connect the other end to a mixer, an audio interface, or a powered speaker.
- Connect a guitar or keyboard directly to the INST IN jack on the right side of the pedal. The Harmony Singer 2 will automatically set the input gain: there are no controls for this. The Harmony Singer 2 will function best with a clean, dry guitar or keyboard signal with no effects. You can then send the INST THRU signal to other effects pedals.
- Connect the INST THRU on the left to an amplifier, a pedalboard, or a mixing console.
- Turn up the Level knob, play chords, and sing.
Using the Tone button
Press the Tone button. This engages a preset combination of adaptive EQ, compression, de-essing, and noise gate. “Normal” and “Less Bright” settings can be toggled by holding the Tone button and pressing the footswitch. There are no other settings. If you like the sound that the Tone button produces, leave it on, but you have the option to turn it off.
Using the Harmony knob
The Harmony knob produces one or two harmony voices higher or lower in pitch than the singer’s voice. Select the harmony you want from the diagram below.
Moment-by-moment, the Harmony Singer 2 calculates whether to produce a major 3rd or a minor 3rd above, or a major 6th or a minor 6th below, by analyzing the vocal and the guitar or keyboard inputs, thereby creating consonant harmonies. When you play the guitar or keyboard, play chords and not a melody line. Make sure that the root and the third of each chord sound clearly.
To harmonize from the first note of a song, play the chord before singing.
Icon/Name

3rd above

5th above

3rd above
5th above

4th below

6th below

4th below
6th below

5th above
6th below

3rd above
4th below
Footswitch Latching mode and Momentary mode
The default setting for the footswitch is Latching mode. Each press of the footswitch turns the harmony on and off. You can change this to Momentary mode, in which the harmony is only active while the footswitch is depressed.
- If your unit is in Latching mode and you want to switch to Momentary mode, shut the power down. Press and hold the Tone button while powering the unit up.
- If your unit is in Momentary mode and you want to switch to Latching mode, shut the power down. Press and hold the Tone button while powering the unit up.
Have Fun Singing and Playing
That’s it. If you’ve got everything set up, you will be producing professional-sounding harmonies in no time.
Footnote: Procedure for Updating the Firmware
You will probably not need to do this, but there is a procedure for updating the firmware on the TC-Helicon Harmony Singer 2.
Download the VoiceSupport 2 app for Mac or PC.
On the Products page of the TC Electronic website, search for “VoiceSupport.”
Open the VoiceSupport page, and click Downloads.
Under “Windows” or “Mac”, select your version of the app. Download it and run the installer.
To connect the Harmony Singer 2 to your PC or Mac, you will need a Micro USB-B to USB-A cable, not included. Make sure that you are using a data cable and not a charging cable, which does not transmit data. To connect this cable to a Mac, you may also need a USB-A to USB-C adapter.
With the Harmony Singer 2 powered up, connect the USB cable to your PC or Mac and launch the VoiceSupport 2 app. When the app detects the Harmony Singer, it will display the current firmware version. It will connect to the Internet, inform you if there is a newer version, and prompt you to install the update. Follow the on-screen instructions.
TC-Helicon YouTube Videos
When you need help, Sweetwater has the answers!
Our knowledge base contains over 28,000 expertly written tech articles that will give you answers and help you get the most out of your gear. Our pro musicians and gear experts update content daily to keep you informed and on your way. Best of all, it’s totally FREE, and it’s just another reason that you get more at Sweetwater.com.


Offer applies only to single-receipt qualifying purchases. Select manufacturers may require that only the manufacturer’s products qualify towards the minimum purchase amount needed to be eligible for promotional financing. Otherwise, an invoice that meets the minimum purchase amount and contains at least one qualifying manufacturer product is eligible for promotional financing. No interest will be charged on promo purchase balance, and equal monthly payments are required on promo purchase until it is paid in full. The payments equal the amount financed divided by the number of months in the promo period, rounded up to the next whole dollar. These payments may be higher than the payments that would be required if this purchase was a non-promo purchase. During the last month(s) of the promo period the required monthly payment may be reduced due to the prior months’ rounding. Regular account terms apply to non-promo purchases. New Accounts as of 07/31/2025: Purchase APR is 34.99%. Penalty APR is 39.99%. Min Interest Charge is $2. Existing cardholders: See your credit card agreement terms. Subject to credit approval.
Offer applies only to single-receipt qualifying purchases. No interest will be charged on the promo balance if you pay it off, in full, within the promo period. If you do not, interest will be charged on the promo balance from the purchase date. The required minimum monthly payments may or may not pay off the promo balance before the end of the promo period, depending on purchase amount, promo length and payment allocation. Regular account terms apply to non-promo purchases and, after promo period ends, to the promo balance. New Accounts as of 07/31/2025: Purchase APR is 34.99%. Penalty APR is 39.99%. Min Interest Charge is $2. Existing cardholders: See your credit card agreement terms. Subject to credit approval.
The estimated required monthly payment shown which excludes taxes and delivery equals the amount financed divided by the number of months in the promo period, rounded up to the next cent. During the last month(s) of the promo period the required monthly payment may be reduced due to this rounding. These payments apply only with the financing offer shown. If you make these payments by the due date each month, you should pay off this amount financed within the promo period, if it is the only balance you are paying off. If you have other balances on your account, this payment will be added to any other minimum monthly payments.
Applies only to select items from this manufacturer. Ask your Sweetwater Sales Engineer for more details.