
Roland GO:LIVECAST Setup Guide

Getting started
In this guide we will show you how to use the Roland GO:LIVECAST for the first time. You’ll learn how to register the device, and also the different ways to set up and connect your mobile device. Follow the sections below to get started.
Register the device
Before we get everything set up, the first thing you’ll need to do is register the device with Roland. After registering the device, you’ll get access to Roland’s product support, an extended warranty, and training videos and clinic information. Follow the steps below to register and then continue to setup and configuration.
- Log in to your Roland Backstage account. If you don’t have one yet, you can create one here. Roland will then send an account activation email to the registered email address to complete the account creation process.
- On your account home page, click My Gear, and select Register a Product.
- Fill out the required information, including the serial number located on the bottom of the GO:LIVECAST and click Register.
- Keep your Sweetwater invoice handy, as you will need to enter the purchase date, method, and Dealer (Sweetwater).
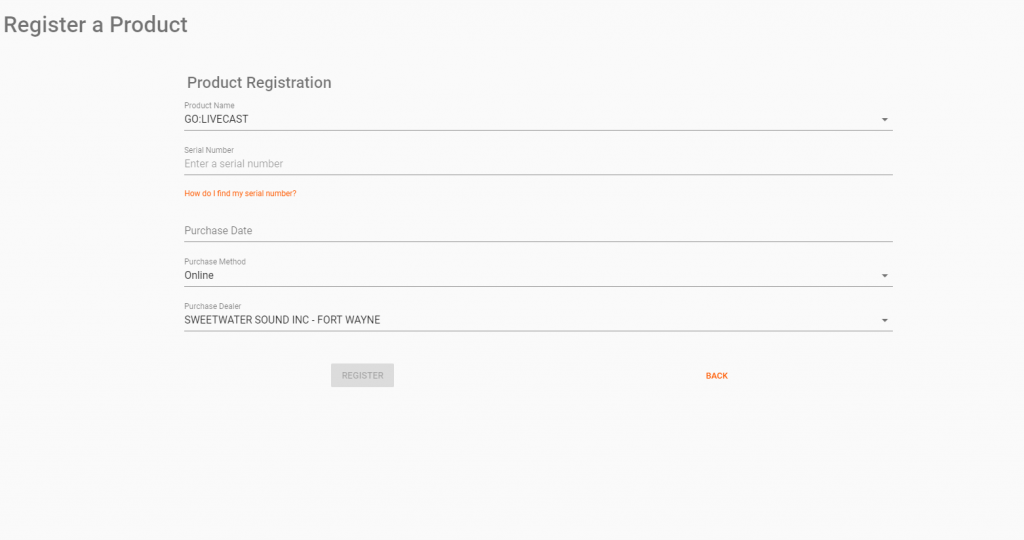
Click the image to register your GO:LIVECAST.
Download the GO:LIVECAST app
The GO:LIVECAST and its companion app are compatible on iOS and Android devices. For them to work correctly, you will need to download the app. You’ll use the app to stream, record, and edit your videos. Just go to the App Store (iOS) or Google Play Store and download the latest version.
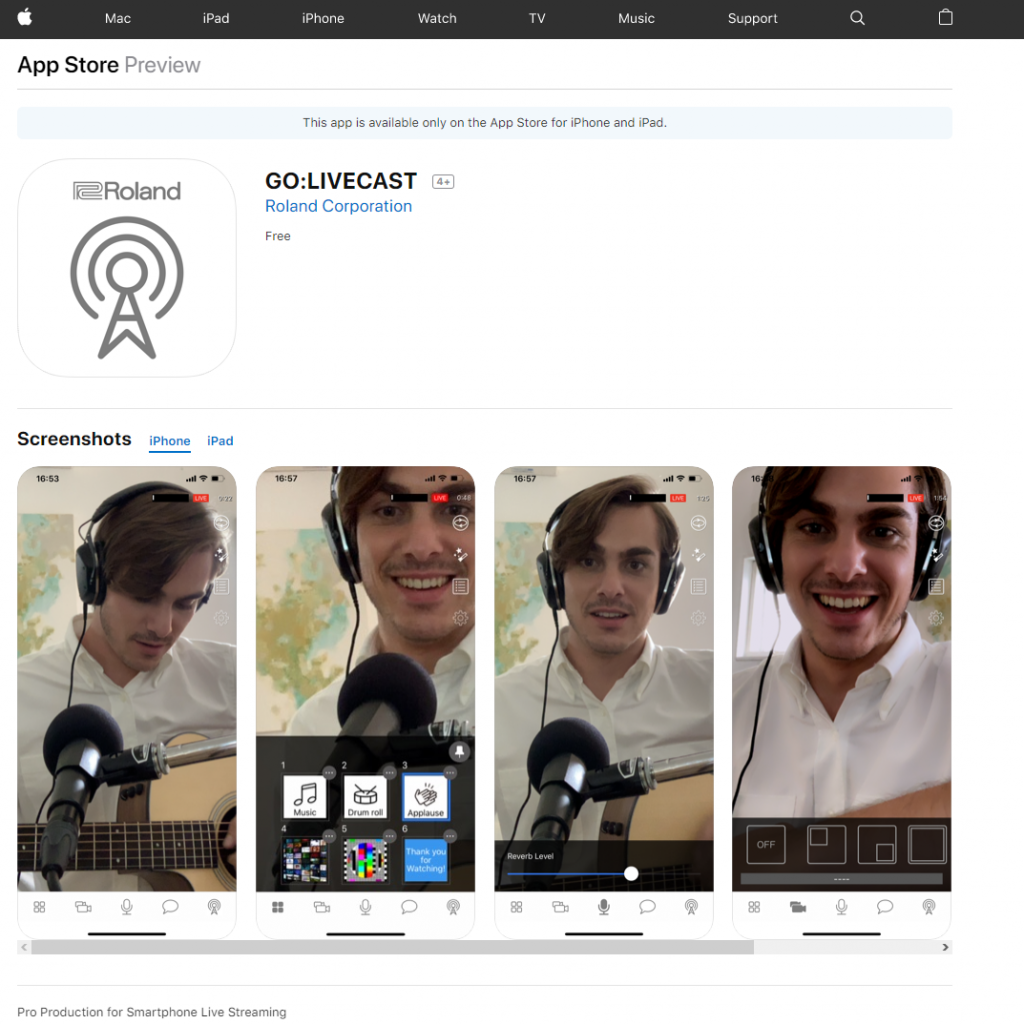
Click the image to download the app from the App Store.
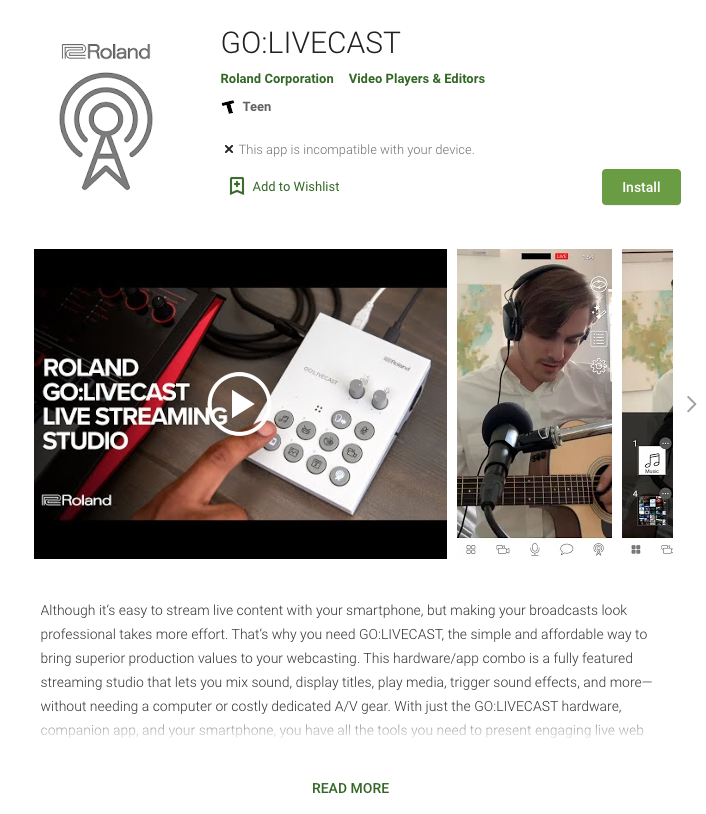
Click the image to download the app from the Google Play Store.
GO:LIVECAST setup and configuration
Before you launch the app, you will first need to get your hardware set up. The connections are straightforward. Just make sure that the volume is turned down when you do connect something to the GO:LIVECAST.
- Audio signal that goes through the LINE IN jack is summed to MONO.
- If a headset with a microphone is connected (one which has a TRRS connector), the GO:LIVECAST’s internal microphone is disabled.
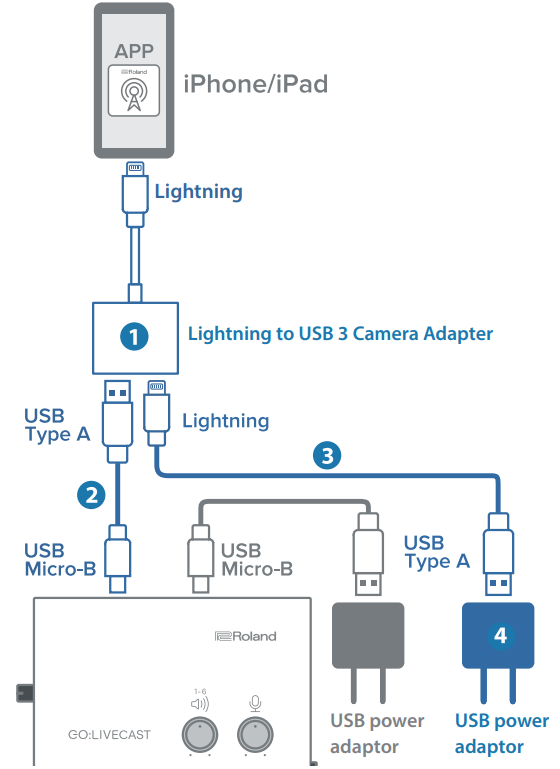
Supply power to your device
If you want to supply power to your mobile device while using the GO:LIVECAST, you must use the following cables and adapters for your specific device:
iOS
- Apple Lightning to USB 3 Camera Adapter
- Lightning to USB cable
- USB to Micro USB cable
- USB power adapter or USB power bank
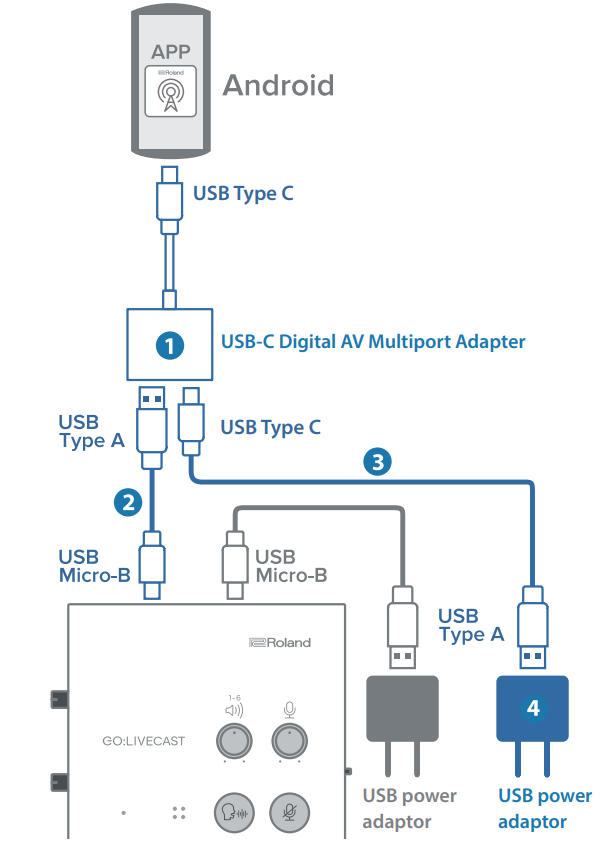
Android
- Apple USB-C Digital AV Multiport Adapter
- USB to Micro USB cable
- USB-C to USB-A cable
- USB power adapter or USB power bank
Connecting the Equipment
Create a livestream
TIP: If you’re experiencing feedback or if you’re streaming in a large room or outdoors, press the Mic icon on the app to turn down the reverb. Alternatively, you can press the Mic Effect pad to turn the reverb off completely.
Once everything is connected, it’s time to start a livestream. After you’ve launched the app, you’ll need to choose the platform you’re going to stream to, and depending on our setup, you may want to adjust some settings, as well.
- Speak into the microphone and adjust the input levels to a point where it won’t clip.
- Press the Cog (Settings) icon on your mobile device to open the Settings menu and adjust the following settings, if necessary:
- Streaming Volume: Adjusts the stream’s master output
- In Camera Mirroring
- Monitor buffer size: If you have a mobile device with low specifications, raise the buffer size to reduce the risk of dropouts or static.
- Press the On Air (antenna) icon on the app, select your streaming platform, and enter your login credentials.
- Visit the user manual for detailed setup instructions for your streaming platform.
- Press the On Air pad on your GO:LIVECAST to begin streaming.
Recording videos
There may be a time where you just want to record a video and wait until later to publish it to your social media account. Doing a quick test recording is also a really good way to fine tune your settings before starting a livestream! All you need to do is press the Settings icon and enable Record Mode.
Streaming or Recording Content
Satellite camera setup
IMPORTANT: The app must be installed on both devices, and they must be on the same Wi-Fi network to work correctly.
If you have multiple compatible iOS or Android devices, you can sync them together through the app. This is a great feature if, for example, you want to switch camera angles or have a picture in picture livestream. Follow these steps to set up a satellite camera.
- On your main mobile device, launch the app and press Satellite Camera. A screen will appear that displays the satellite camera settings.
- On the satellite mobile device, launch the app and press Satellite Camera to begin the pairing process.
- When the devices have been successfully paired, the name of the satellite mobile device will appear in the grey box on the main mobile device.
Streaming Two Cameras (Satellite Camera)
Related content

When you need help, Sweetwater has the answers!
Our knowledge base contains over 28,000 expertly written tech articles that will give you answers and help you get the most out of your gear. Our pro musicians and gear experts update content daily to keep you informed and on your way. Best of all, it’s totally FREE, and it’s just another reason that you get more at Sweetwater.com.


Offer applies only to single-receipt qualifying purchases. Select manufacturers may require that only the manufacturer’s products qualify towards the minimum purchase amount needed to be eligible for promotional financing. Otherwise, an invoice that meets the minimum purchase amount and contains at least one qualifying manufacturer product is eligible for promotional financing. No interest will be charged on promo purchase balance, and equal monthly payments are required on promo purchase until it is paid in full. The payments equal the amount financed divided by the number of months in the promo period, rounded up to the next whole dollar. These payments may be higher than the payments that would be required if this purchase was a non-promo purchase. During the last month(s) of the promo period the required monthly payment may be reduced due to the prior months’ rounding. Regular account terms apply to non-promo purchases. New Accounts as of 07/31/2025: Purchase APR is 34.99%. Penalty APR is 39.99%. Min Interest Charge is $2. Existing cardholders: See your credit card agreement terms. Subject to credit approval.
Offer applies only to single-receipt qualifying purchases. No interest will be charged on the promo balance if you pay it off, in full, within the promo period. If you do not, interest will be charged on the promo balance from the purchase date. The required minimum monthly payments may or may not pay off the promo balance before the end of the promo period, depending on purchase amount, promo length and payment allocation. Regular account terms apply to non-promo purchases and, after promo period ends, to the promo balance. New Accounts as of 07/31/2025: Purchase APR is 34.99%. Penalty APR is 39.99%. Min Interest Charge is $2. Existing cardholders: See your credit card agreement terms. Subject to credit approval.
The estimated required monthly payment shown which excludes taxes and delivery equals the amount financed divided by the number of months in the promo period, rounded up to the next cent. During the last month(s) of the promo period the required monthly payment may be reduced due to this rounding. These payments apply only with the financing offer shown. If you make these payments by the due date each month, you should pay off this amount financed within the promo period, if it is the only balance you are paying off. If you have other balances on your account, this payment will be added to any other minimum monthly payments.
Applies only to select items from this manufacturer. Ask your Sweetwater Sales Engineer for more details.