
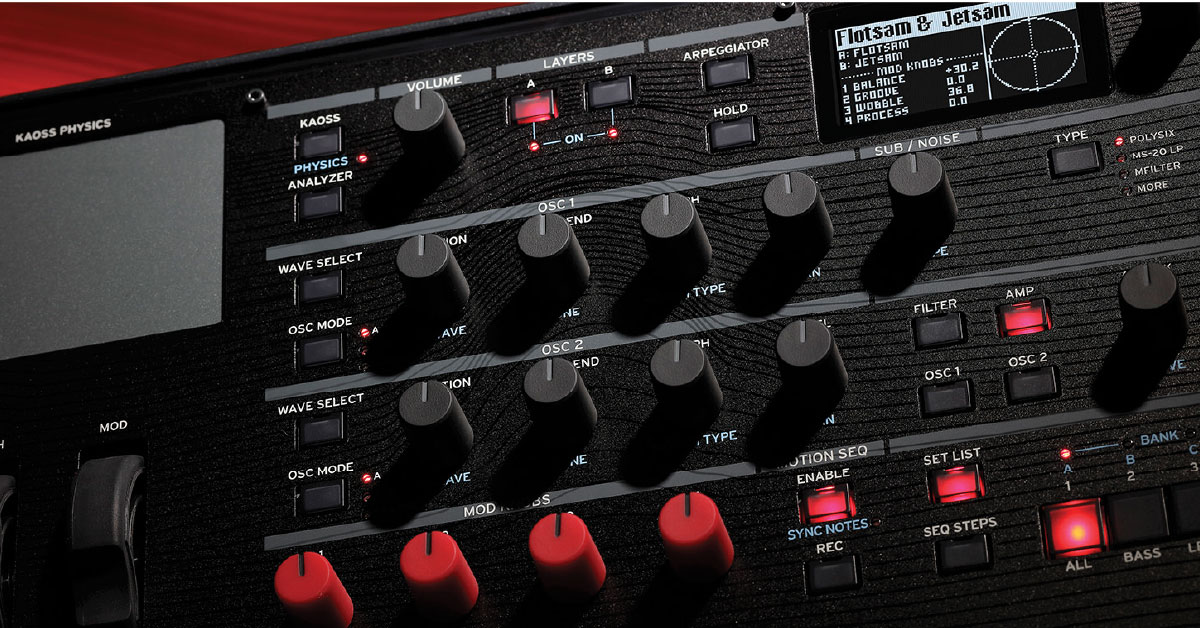
Korg modwave Firmware Update Instructions
Korg will release firmware updates periodically, which often adds new features or fixes bugs that are currently present in the current version. You’ll sometimes also need to update your firmware if there’s a new version of their Sample Builder or Editor/Librarian software that was just released. Follow the instructions below to get started.
IMPORTANT: Do not disconnect your modwave during the update process. Doing so may cause your modwave to become inoperable, and it will need to be sent in for non-warranty repair.
- Download the System Updater software
- Update the modwave firmware on macOS
- Update the modwave firmware on Windows PC
- Update the firmware in USB Boot Mode
Download the System Updater software
You’ll need to check which firmware version you’re currently on and compare it to the latest System Version for your device listed on Korg’s website. You can do this by pressing UTILITY and then SHIFT + < (PAGE -).
If your modwave’s firmware version doesn’t match, you simply need to go to the modwave Download page and download the latest version, then update your modwave. It may take a moment for the software download to show up.
TIP: Do not launch the installer once downloaded, as you’ll need to update some hardware settings first.
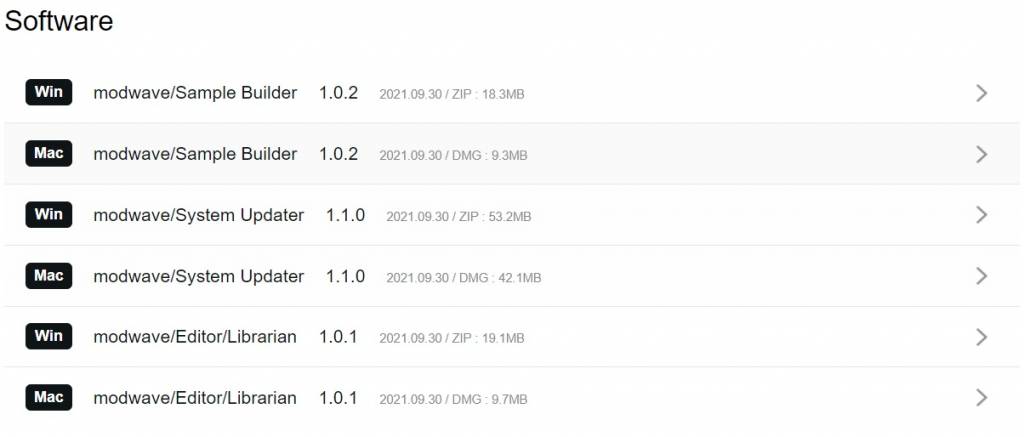
Click the image to download the latest version of the System Updater.
Update the modwave firmware on macOS
BIG SUR USERS: If your Mac is running Big Sur, Korg recommends that you update the firmware via USB Boot Mode. If this is the case, skip these steps and click here to learn how to update the firmware in USB Boot Mode.
Before performing the update, you must configure the modwave’s USB Network settings for the firmware update to work correctly. The process for Mac computers is simple. You just need to change the USB setting on the modwave then install it.
- Press Utility twice, then hold the SHIFT button and the press > (page -) button.
- Use the Page buttons to scroll down to USB Network and set it to NCM.
- If you had to change it to NCM, you will need to power cycle the modwave.
- Connect the modwave to your computer.
- Navigate to your Downloads folder, open the updater folder, launch the installer, follow the on-screen prompts, then press Start to begin the update process.
Update the modwave firmware on a Windows PC
IMPORTANT: You must follow the instructions exactly how they are laid out for your version of Windows, or else the update will fail.
The firmware update process differs slightly depending on the version of Windows your computer that is currently installed. You must set your modwave’s USB Network protocol to RNDIS on Windows 7 and Windows 8 computers and NCM for Windows 10.
Before updating the USB settings, you first need to install the Software Updater. Navigate to your Downloads folder, extract the .ZIP file, then launch the installer from the newly extracted folder. Once installed, follow the instructions below to configure the USB network protocol.
Windows 7
- Press Utility twice, then hold the SHIFT button and the press > (page -) button.
- Use the Page buttons to scroll down to USB Network and set it to RNDIS.
- If you had to change it to RNDIS, you must power cycle the modwave.
- Connect the modwave to your computer via USB.
- Click the Windows icon and open Control Panel.
- Click Hardware and Sound, then under Devices and Printers, select Device Manager.
- Confirm that a new RNDIS device (the modwave) is listed in Other devices).
- Right-click on the RNDIS device, select Update Driver Software, then click Browse my computer for driver software.
- In the window that appears, select Let me pick from a list of available drivers on my computer, click Network Adapter as the device type, then click Next.
- Click Microsoft Corporation from the Manufacturer list, then select Remote NDIS Compatible Device as the model.
- If you receive an Update Driver warning, click Yes.
- After changing the USB protocol, launch the modwave Software Updater, follow the on-screen prompts, and click Start to begin the update process.
Windows 8
- Press Utility twice, then hold the SHIFT button and the press > (page -) button.
- Use the Page buttons to scroll down to USB Network and set it to RNDIS.
- If you had to change it to RNDIS, you will need to power cycle the modwave.
- Connect the modwave to your computer via USB.
- Hold the Windows key and press X on your keyboard to open Device Manager.
- Check under Other Devices to confirm that a new RNDIS device is listed.
- Right-click on the new RNDIS device, select Update Driver, then click Browse my computer for driver software.
- On the window that appears, choose Network Adapter, then click Next.
- Select Microsoft from the Manufacturer list, click Next, then select Remote NDIS Compatible Device as the model.
- If you receive an Update Driver warning, click Yes.
- After changing the USB protocol, launch the modwave Software Updater, follow the on-screen prompts, and click Start to begin the update process.
Windows 10
If you’re running Windows 10, the modwave’s USB Network protocol needs to be set as NCM instead of RNDIS.
- Press Utility twice, then hold the SHIFT button and the press > (page -) button.
- Use the Page buttons to scroll down to USB Network and set it to NCM.
- If you had to change it to NCM, you must power cycle the modwave.
- Connect the modwave to your computer via USB.
- Right-click the Windows icon on your taskbar and select Device Manager.
- In Other Devices, check and make sure that CDC NCM is listed.
- If it isn’t showing up, disconnect and reconnect the modwave from your computer.
- Right-click on the NCM device, select Update driver and then choose Browse my computer for driver software.
- Select Let me pick from a list of available drivers on my computer.
- Select Network adapter as the device type and click Next if necessary.
- Select Microsoft as the Manufacturer, select UsbNcm Host Device as the Model, then click Next.
- If you receive a warning stating that installing the device is not recommended, click Yes.
- After you have changed the USB protocol, launch the modwave Software Updater, follow the on-screen prompts, then click Start to begin the update process.
Update firmware in USB Boot Mode
If there is no network connection available on your computer, you can update the firmware by turning on the modwave in USB Boot Mode. This is also recommended for Mac users who are currently running Big Sur.
- Power off your modwave and connect it to a computer.
- Press and hold the FILTER TYPE, FILTER ENV, and HOLD buttons.
- While holding these buttons, turn on the modwave. Let go of the buttons once USB Boot Mode appears on the display.
- Launch the Software Updater, navigate to Tools, then select Update Via USB Boot Mode.
- Press OK to continue.
- After you see Files written successfully, physically disconnect the modwave’s power cable.
- Plug the power cable back in, then turn the unit back on.
When you need help, Sweetwater has the answers!
Our knowledge base contains over 28,000 expertly written tech articles that will give you answers and help you get the most out of your gear. Our pro musicians and gear experts update content daily to keep you informed and on your way. Best of all, it’s totally FREE, and it’s just another reason that you get more at Sweetwater.com.


Offer applies only to single-receipt qualifying purchases. Select manufacturers may require that only the manufacturer’s products qualify towards the minimum purchase amount needed to be eligible for promotional financing. Otherwise, an invoice that meets the minimum purchase amount and contains at least one qualifying manufacturer product is eligible for promotional financing. No interest will be charged on promo purchase balance, and equal monthly payments are required on promo purchase until it is paid in full. The payments equal the amount financed divided by the number of months in the promo period, rounded up to the next whole dollar. These payments may be higher than the payments that would be required if this purchase was a non-promo purchase. During the last month(s) of the promo period the required monthly payment may be reduced due to the prior months’ rounding. Regular account terms apply to non-promo purchases. New Accounts as of 07/31/2025: Purchase APR is 34.99%. Penalty APR is 39.99%. Min Interest Charge is $2. Existing cardholders: See your credit card agreement terms. Subject to credit approval.
Offer applies only to single-receipt qualifying purchases. No interest will be charged on the promo balance if you pay it off, in full, within the promo period. If you do not, interest will be charged on the promo balance from the purchase date. The required minimum monthly payments may or may not pay off the promo balance before the end of the promo period, depending on purchase amount, promo length and payment allocation. Regular account terms apply to non-promo purchases and, after promo period ends, to the promo balance. New Accounts as of 07/31/2025: Purchase APR is 34.99%. Penalty APR is 39.99%. Min Interest Charge is $2. Existing cardholders: See your credit card agreement terms. Subject to credit approval.
The estimated required monthly payment shown which excludes taxes and delivery equals the amount financed divided by the number of months in the promo period, rounded up to the next cent. During the last month(s) of the promo period the required monthly payment may be reduced due to this rounding. These payments apply only with the financing offer shown. If you make these payments by the due date each month, you should pay off this amount financed within the promo period, if it is the only balance you are paying off. If you have other balances on your account, this payment will be added to any other minimum monthly payments.
Applies only to select items from this manufacturer. Ask your Sweetwater Sales Engineer for more details.