
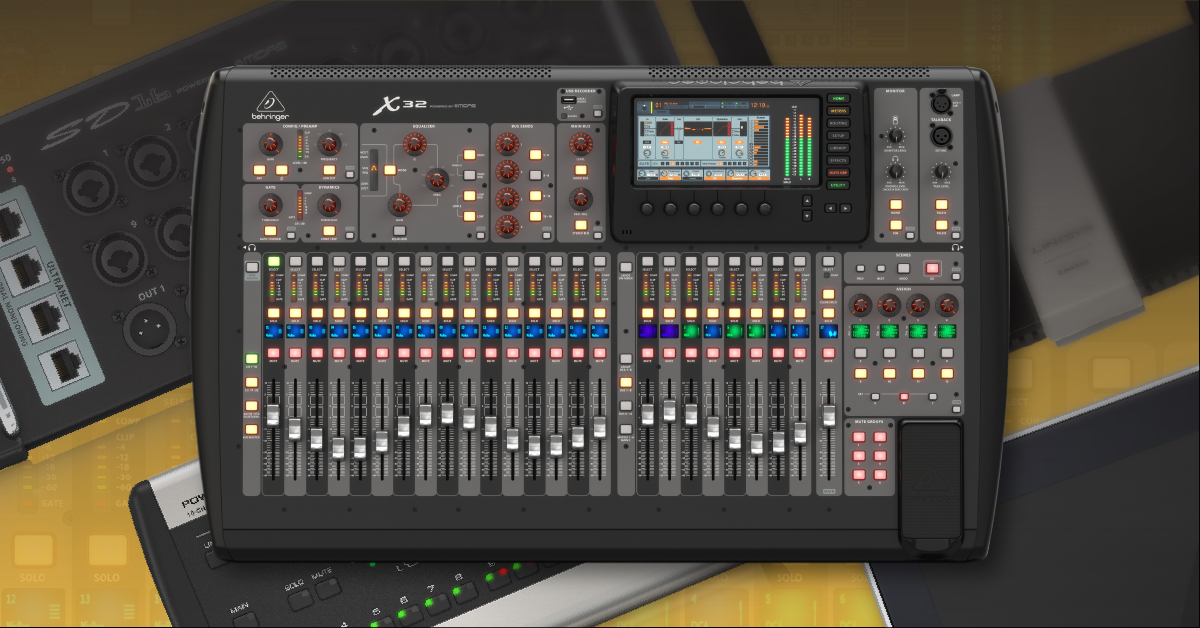
Behringer X32: Setup and Connections
In this guide, we will show you how to set up your X32 digital mixer. Each X32 model is a little different but are set up and configured the same way. You’ll first learn how to set up wireless remote control, stage boxes, and P16 personal monitor mixers. After that, we’ll show you how to connect a microphone and get sound to the main speakers. When you’re finished learn more in our X32 Getting Started Guide. Follow the sections below to get started.
Setup and connections
The X32 is a digital mixer, which means it is just like an analog mixer but with the advantages of digital routing, recallable settings, DSP processing, and even wireless remote control. All of the physical connections like XLR and TRS jacks are the same but the audio processing and routing occurs in the digital state. This makes it particularly useful for sending multiple channels of audio over the X32’s Ultranet and AES-50 connections. Analog signals are converted to digital once they enter the X32 and then converted back to analog when output.
Navigation screen and channel controls
Using the X32 digital mixer is not all that different from a typical analog mixer, but the navigation and digital controls add another layer of accessibility. Each X32 model may differ in how many faders, buttons, and encoders it has, but they all share the same navigation screen. That’s where you’ll access settings from the menu buttons and six encoders. Check out the video below to learn more about the X32’s TFT screen and continue reading to get started.
Digital features aside, the mixer works as you’d expect, but instead, a strip of controls for each channel the digital channel strip section always controls the currently selected channel(s). That means each channel or bus’ signal processing (preamp, dynamics, eq, etc.) is controlled by the same set of encoders and buttons, you just have to select the channel.
Set up Wi-Fi router for wireless remote control
You can control your X32 with its faders and knobs. You can also mix remotely over Wi-Fi on your iPad or Android tablet using the MX-Mix app, or on your Mac or Windows PC using the X32 Edit app. Performers can control their personal monitor mixes over Wi-Fi using the MX-Q app for iPhone and Android phone.
SweetCare Behringer MX-Mix and MX-Q Mobile Apps Quickstart Guide
Wired is pretty simple, just connect your computer’s ethernet port to the X32’s ETHERNET port. To use a wireless connection, you’ll connect a wireless router instead. Wireless routers need to be configured before you can establish a remote connection. Each wireless router is unique, but configuring them means selecting an IP assignment protocol and then setting a WIFI password.
IP address: static or dynamic
There are two network address options on your wireless router: dynamic (DHCP) and static (manual). Many users prefer to use DHCP because devices are automatically assigned an IP address once they join the network. Other setups may require manual IP assignment where you input the addresses manually.
If configured for a static IP address, enter the IP ADDRESS (eg. 192.168.1.120), SUBNET MASK (eg. 255.255.0.0), and GATEWAY(eg. 192.168.1.120). Note that devices on a network will share similar IP’s except for the last digit. Make sure the IP address isn’t already assigned on the network, otherwise the mixer won’t connect. Once done, press ENCODER 6 to assign the IP settings and join the network.
- Configure your wireless router for DHCP.
- This is unique for each wireless router, so check out your user manual for more information. If you are instead using a switch or manual IP assignment, take note of the router’s IP ADDRESS (e.g. 192.168.1.#), SUBNET MASK (e.g. 255.255.0.0), and GATEWAY (e.g. 192.168.1.1).
- On the X32, press the SETUP button and use the PAGE buttons to browse to the NETWORK tab.
- Press ENCODER 1 to enable DHCP (orange). The X32 will join the network and display it’s IP address settings.
- Connect your device to the wireless network and launch the MX-Mix app on iPad or Android tablet, or the X32 Edit app on Mac, Windows PC or Linux.
- MX-Mix: Upon launch, enter the X32’s IP address and press CONNECT.
- X32 Edit: Click SETUP and select the Connection tab. Click RESCAN, select the X32, and then click CONNECT. When prompted, select where to synchronize settings from (typically the mixer).
Connect digital stageboxes and P16 personal mixers
X32 digital mixers have ethernet connections for connection stage snakes and personal mixers. The AES50 connection is for S16, S32, SD8, and SD16 digital snakes. The Ultranet connection is for connection P16 personal mixers. These devices may need further routing configuration depending on how you plan to use them. Check out our guides for X32 digital snakes and personal mixers for more information.
Connect a mic and get sound
The best way to make sure your X32 is working correctly is to get sound in and out. Follow the sections below to get input signal and then output sound to the main speakers. If you’re already set up, check out our X32 Getting Started Guide to learn more about the channel strip, monitor mixes, and more.
Get input signal
A simple way to get signal into your X32 is by connecting a microphone or music player. Mics connect to the IN XLR jacks while line level devices like connect to the AUX IN TRS jacks.
- Connect a microphone to IN 1 and press the SELECT button on channel 1.
- Press the HOME button to see the channel strip starting with the CONFIG/PREAMP page.
- (optional) Use the encoders to adjust each channel’s settings and press the LAYER buttons to change which bank of settings the encoders control.
- (optional) See the sub-menus for specific channel strip functions by pressing their respective VIEW button or browsing with the PAGE SELECT buttons.
- Speak into the microphone and turn up the GAIN (ENCODER 1). Increase the gain so that the signal is as loud as possible without overloading (red LED meters).
- (optional) Press the 48V button to turn on phantom power for condenser microphones and active DI boxes.
Getting To Know The X32: Channel Strip
Getting To Know The X32: Dynamics Section
Getting To Know The X32: EQ Section
HOW Live! Webinar: Signal Flow Of A Digital Console
Output sound to mains
Your X32’s default configuration makes it easy to get signal to the main outputs (i.e., 15-16 or 7-8). The X32’s last two XLR outputs are assigned the MAIN mix by default, but each analog output can be assigned to receive a different signal source. The other XLR outputs are assigned their matched mix bus (Mix Bus 1 for OUT 1, 2 for 2, etc.) and each TRS aux output its respective insert. Since you’ve already input signal into the mixer, you should only need to turn up the MAIN fader to control the mains output level. Follow the steps below to assign which signals are sent to each output.
Main outputs
The main mix level is controlled by the MAIN fader and outputs signal from OUT 15-16 (X32) or OUT 7-8 (compact, producer, and rack).
- Set the master fader level to 0 (unity) and adjust the speakers to the optimal level.
- A microphone with enough gain is good for setting speaker levels, but you can also connect a phone or tablet to an AUX input to play back line level audio. Just make sure the device and the music app’s output volume is turned all the way up.
- Use each channel fader to create the main mix and the MAIN fader to control the main mix level.
Any other outputs
To get output from AUX OUT 1-6, OUT 1-14 (X32) or OUT 1-6 (Compact, Producer, and Rack), you must assign the input or mix bus which will go to each XLR or TRS output.
- Press the ROUTING button and use the PAGE select buttons to view the out 1-16 menu.
- Assign a signal source to each XLR or TRS output:
- Rotate and press ENCODER 1 to select the Analog Output.
- Rotate and press ENCODER 3 to select the Category and ENCODER 4 to select the specific signal source (main or bus mix, direct-out, etc.) and Tap point. Continue below to learn how to create a mix bus.
Getting To Know The X32: Routing Overview
X32 Quick Tip: Card Output Routing
Here’s Sweetwater’s Mitch Gallagher with his Behringer X32 Getting Started Guide.
X32 Signal, Routing, and Recording
In this guide, we’ve shown you how to set up your X32 digital mixer, but there is so much more it can do. Learn more about the channel strip, stage monitors, and more in our X32 Getting Started Guide.
Related Articles
When you need help, Sweetwater has the answers!
Our knowledge base contains over 28,000 expertly written tech articles that will give you answers and help you get the most out of your gear. Our pro musicians and gear experts update content daily to keep you informed and on your way. Best of all, it’s totally FREE, and it’s just another reason that you get more at Sweetwater.com.


Offer applies only to single-receipt qualifying purchases. Select manufacturers may require that only the manufacturer’s products qualify towards the minimum purchase amount needed to be eligible for promotional financing. Otherwise, an invoice that meets the minimum purchase amount and contains at least one qualifying manufacturer product is eligible for promotional financing. No interest will be charged on promo purchase balance, and equal monthly payments are required on promo purchase until it is paid in full. The payments equal the amount financed divided by the number of months in the promo period, rounded up to the next whole dollar. These payments may be higher than the payments that would be required if this purchase was a non-promo purchase. During the last month(s) of the promo period the required monthly payment may be reduced due to the prior months’ rounding. Regular account terms apply to non-promo purchases. New Accounts as of 07/31/2025: Purchase APR is 34.99%. Penalty APR is 39.99%. Min Interest Charge is $2. Existing cardholders: See your credit card agreement terms. Subject to credit approval.
Offer applies only to single-receipt qualifying purchases. No interest will be charged on the promo balance if you pay it off, in full, within the promo period. If you do not, interest will be charged on the promo balance from the purchase date. The required minimum monthly payments may or may not pay off the promo balance before the end of the promo period, depending on purchase amount, promo length and payment allocation. Regular account terms apply to non-promo purchases and, after promo period ends, to the promo balance. New Accounts as of 07/31/2025: Purchase APR is 34.99%. Penalty APR is 39.99%. Min Interest Charge is $2. Existing cardholders: See your credit card agreement terms. Subject to credit approval.
The estimated required monthly payment shown which excludes taxes and delivery equals the amount financed divided by the number of months in the promo period, rounded up to the next cent. During the last month(s) of the promo period the required monthly payment may be reduced due to this rounding. These payments apply only with the financing offer shown. If you make these payments by the due date each month, you should pay off this amount financed within the promo period, if it is the only balance you are paying off. If you have other balances on your account, this payment will be added to any other minimum monthly payments.
Applies only to select items from this manufacturer. Ask your Sweetwater Sales Engineer for more details.