
Arturia Pigments 3 Quickstart Guide
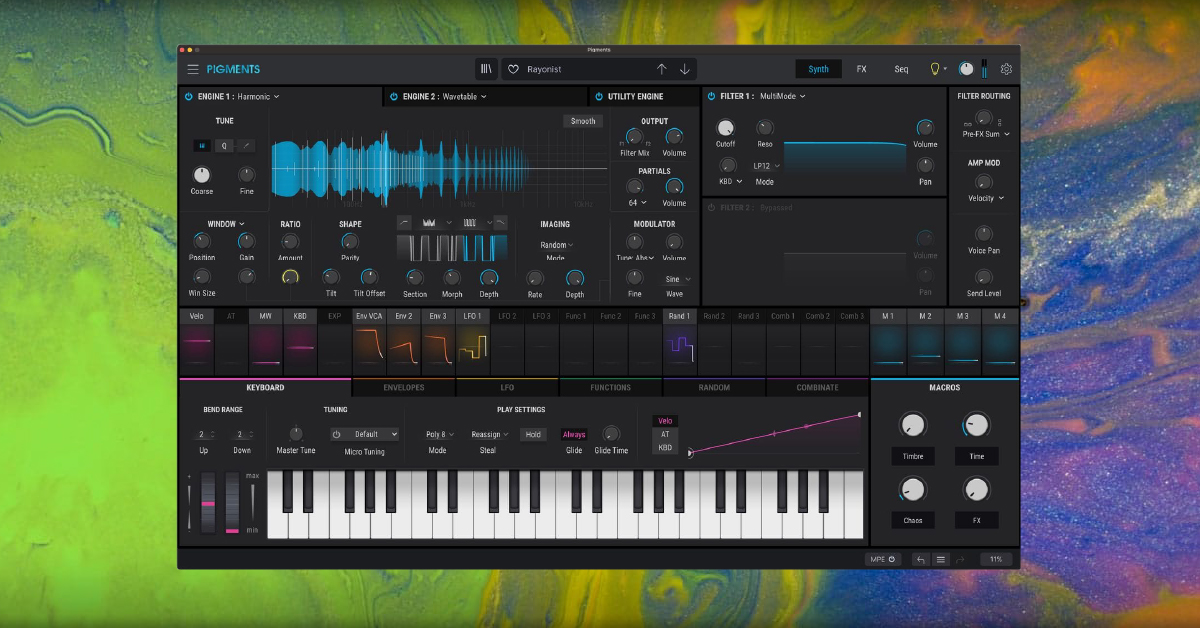
If this is your first time with Arturia’s Pigments software, then you’re in the right place. This guide will help you navigate the virtual instrument and work with the settings to create custom sounds. Follow the sections below to get started.
Audio and MIDI setup
NOTE: When you use Pigments in standalone mode, you will need to close any program using your current audio driver, or else you’ll run into audio distortion and dropouts.
After you’ve downloaded, installed, and activated your Arturia Pigments virtual instrument, you first need to configure your audio and MIDI settings.
- Launch the Pigments software, click the three bars at the top left corner of the window, and select Audio MIDI Settings.
- Use the dropdown boxes on the left side of the window and select your current audio device, buffer size, and sample rate.
- Click the Play button to play a test tone to confirm you’re getting a clear sound.
- Optional: If you have a MIDI controller connected, select it in the MIDI Settings section of the Settings window.

Audio and MIDI setup settings in Pigments 3.
Navigating Pigments
TIP: If you’re not sure what a specific knob or setting does, then click the light bulb icon at the top right of the application to enable the Sound Design Tips feature.
Arturia Pigments is a very powerful synth virtual instrument with many settings to play with, which means you can get creative in no time! Navigating Pigments is very easy, too. While there are plenty of buttons and knobs to tweak, you can break down Pigment’s main controls into three sections: the synth engine, the filter, and the modulation bar.
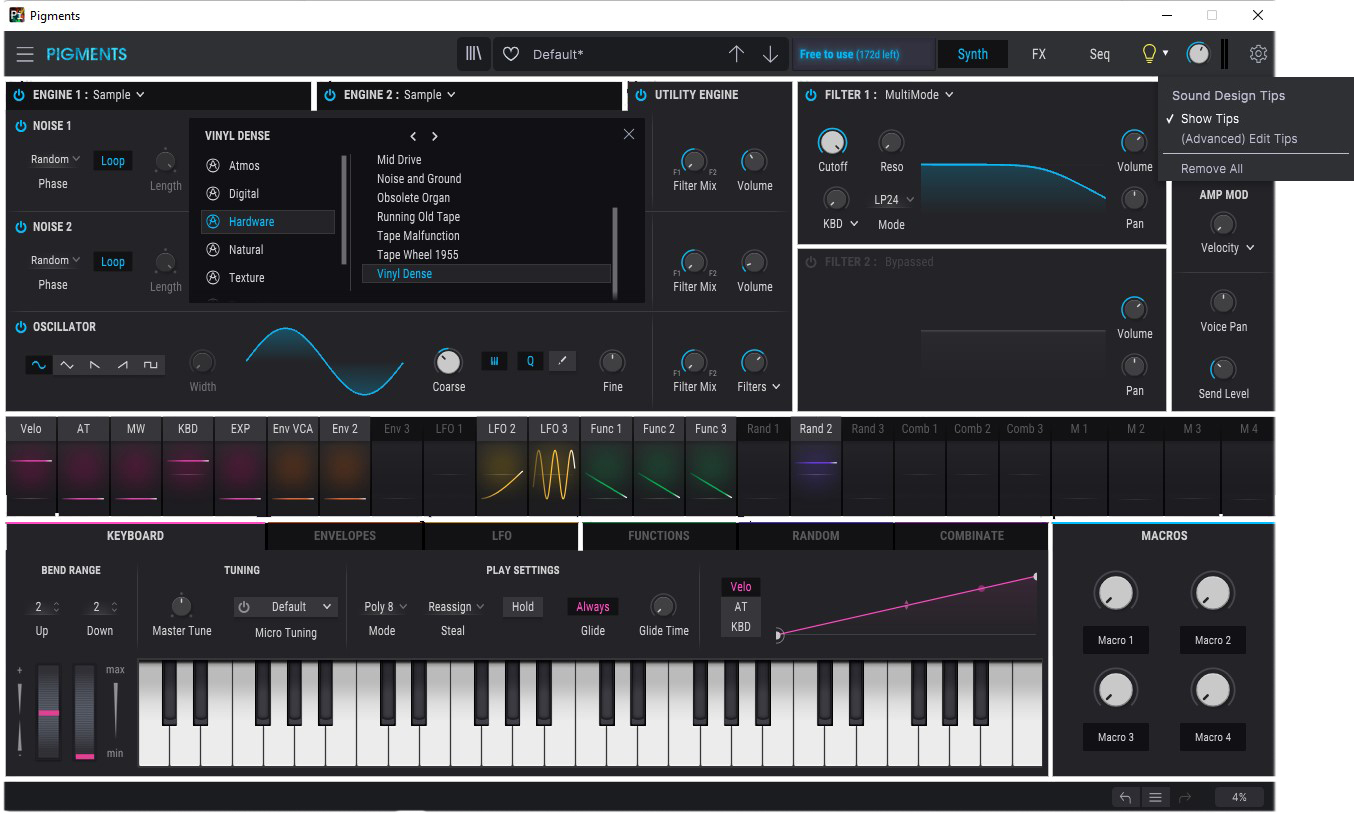
Click the light bulb icon at the tip right to show tips.
Synth engine

The synth engines, located at the top left of the virtual instrument, are the building blocks of your patch. There are four types of synth engines available for you to use: Analog, Wavetable, Sample, and Harmonic. The great thing is that you can layer two engines together and load up to six samples per engine to make your patch sound more unique! Just click the power button located next to the engine to do this. Follow these steps if you want to use custom samples for an engine.
- Click the Engine tab you want to use (Engine 1 or Engine 2), click the down arrow next to the engine listed (Engine 1 or Engine 2), then select Sample.
- Select the sample location (A–F), click the space that says, “Click here to add a sample,” then scroll down and select Imported.
- Navigate to the folder path where your sample resides, select the sample, then click OK.

Sample engine
Utility engine
OSCILLATOR ROUTING: You can route the Utility engine’s output to the filters, FX A, FX B, or Direct Out.
The Utility engine combines two selectable noise sources with an oscillator, which gives you extra grit and more body to your patch. What’s great is that the noise and oscillator within the Utility engine are separate from the main Synth engine, meaning you have independent control. You can also turn it on and off without making any destructive edits to the patch.
Tutorials | Pigments – Episode 2: The Synth Engine
Tutorials | Pigments – Episode 7: Harmonic Engine
Tutorials | Pigments – Episode 8: Utility Engine
Modulation bar

Modulation bar
One of the best features of Pigments 3 is the Modulation Bar, located in the middle of the VI’s window. You can control pretty much any synth’s parameters, and you’ll get real-time visualization of each setting’s behavior. Like all other Arturia instruments, it’s easy to work with.
All you need to do is click on the respective modulation source you wish to edit (e.g., Env VCA, Func 1, Rand 3) and adjust the knobs associated with that source. If you click one of the modulation tabs called Mod Source Groups (Keyboard, Envelope, LFO, Functions, Random, Combinate), you can adjust the global settings of each of its global parameters.
Tutorials | Pigments 3 Episode 1: Overview
Step sequencer and arpeggiator

Sequencer window
Pigments 3 has a built-in step sequencer and arpeggiator that can inspire, give the song more motion, more dynamics, and more melody, which can take your music to the next level. Arturia made this simple to navigate, operate, and understand so you can get creative in no time! To access the sequencer options, click Seq located next to the lightbulb at the top of the window.
Here is a breakdown of the primary functions for the step sequencer and arpeggiator.
- Pitch: Adjust the triggered pitch of individual steps (one octave range). The Pitch function is only available when using the sequencer.
- Octave: The root note can be +/-2 octaves of the factory default setting.
- Velocity: You can adjust each step’s velocity between 1–127. This is great for making your pattern more dynamic.
- Trig Proba: The trigger probability function dictates whether the probability of that step will be played back. If it’s set to 0, the step will not trigger. On the other hand, the step will always trigger if the trigger probability is set to 100.
- Gate Length: This determines the length of each step. If you’re looking to add a bit more groove to your pattern or make a particular rhythm more accurate (e.g., a dotted 16th note), then you can increase or decrease the gate length.
- Slide: The slide parameter is self-explanatory. The higher the setting, the faster it takes for one step to slide to another pitch.
- The slide length is not affected by gate lengths higher than 100%.
- If the root step does not contain a note, then the step you want to slide to will not do anything, as it doesn’t have a note to slide from.
Sequencer and arpeggiator tips
Now that you know how to operate the step sequencer and arpeggiator, here are some tips to help speed up your workflow.
- If you want your pattern to sound unique, hover your mouse over the dice icon, then click and drag up and down to utilize the Randomize function.
- Hover your mouse over the grey line after the last step, then click and drag left and right to shorten or lengthen the pattern.
- If you hover your mouse over the Sync knob, a + icon will appear. Click that to sync the sequencer to the tempo of the target track (like the DAW’s project tempo), binary, triplet, or dotted.
What’s the difference between the sequencer and the arpeggiator?
The functions of sequencers and arpeggiators get confused with each other sometimes. While they may sound the same (repeated melodies), they’re slightly different.
A sequencer will play the pattern with the notes you programmed, meaning you have to program the notes before playing back. For example, if you want to play a sequence of C-E-G-C, then you need to enter those notes before you press a note.
However, an arpeggiator is based on the notes you hold on the keyboard. So, if you hold the C-E-G-C keys on your MIDI keyboard, the pattern will play C-E-G-C during the sequence. This is why you’ll notice the Pitch section of the sequencer window of Pigments 3 greyed out when the arpeggiator is selected.
Arturia Pigments 3 User Manual
Tutorials | Pigments 3 – Episode 9: Multiband Compressor
Andrew Huange on Pigments: Sound design tips
Tutorials | Pigments 3 – Episode 10: Pitch Shift Delay
Livestream | Pigments 3
When you need help, Sweetwater has the answers!
Our knowledge base contains over 28,000 expertly written tech articles that will give you answers and help you get the most out of your gear. Our pro musicians and gear experts update content daily to keep you informed and on your way. Best of all, it’s totally FREE, and it’s just another reason that you get more at Sweetwater.com.

