
There are many variables when miking a guitar cabinet: the mic type, mic position, type of cabinet, and room ambience all have a major influence on the final sound. Let’s look at the most important elements in getting a great cab sound.
1. Dynamic mics: the hardy perennial
The inexpensive Shure SM57 (fig. 1) is the classic guitar cabinet mic — many engineers choose it even when they have far more expensive mics in their mic lockers. For upscale dynamic mics, the Electro-Voice RE20 and Sennheiser MD 421 II are excellent choices for miking amps.
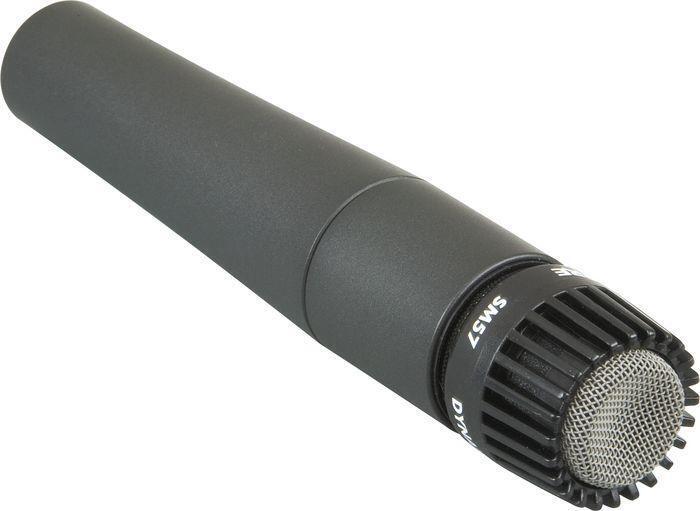
Figure 1: The SM57 is probably the most popular dynamic mic of all time and has a natural presence peak.
2. Use condenser mics for articulated note attacks
Condenser mics are often too sensitive for close-miking loud amps, because the signal can overload the preamp inside the mic (sometimes called the head amp). They can give a more open response and make good secondary mics, though. Placing a condenser mic somewhat further back from the amp, or in the room, adds definition and articulation to the note attacks. AKG’s C414 XLS is a great, but expensive, choice; their C214 gives similar performance for less than half the cost. Neumann’s U 87 is beyond most budgets, but the more affordable, small-diaphragm Audio-Technica AT4051 has a similar character (plus it’s great for vocals).
3. Ribbon mics and multi-cab setups
Although ribbon mics used to be fragile, newer models are more rugged. They have a warm personality and a polar pattern that picks up sounds from the front and back — but not the sides. In multi-cab guitar setups, ribbon mics let you choose which cab sounds to accept, and which to reject, based on mic placement in relation to the amps. Beyer’s M 160 is a classic ribbon mic; among newer mics, Royer’s R-121 and R-122 MKII are popular for miking cabs.
4. Pads can be helpful
Many mics have attenuator switches (called pads) to lower the sound level, for example by -12dB (fig. 2). With loud amps, engage this to avoid distortion.
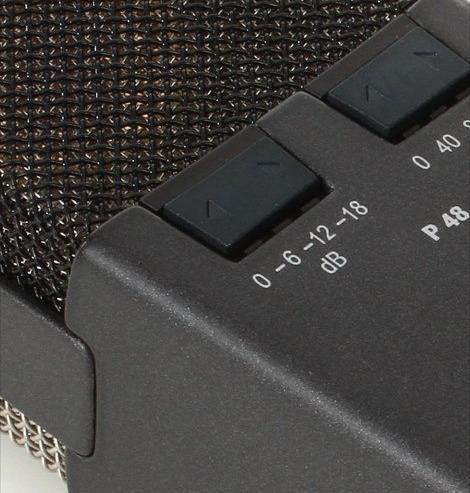
Figure 2: The pad switch on AKG’s C414 mic offers 6dB, 12dB, or 18dB of attenuation.
5. How mic placement influences tone
Start off with the mic an inch or two back from the cone, perpendicular to the speaker, and about half to two-thirds of the way toward the speaker’s edge. Moving the mic closer to the speaker’s center tends to give a brighter sound, while moving it more toward the edge darkens the sound (fig. 3). Angling the mic toward the speaker at 45 degrees provides a tighter, warmer sound. To capture more of the cabinet’s influence on the sound (as well as some room sound), try moving the mic a few inches further back from the speaker. This is a Beyer M 160 positioned on the edge of the cone.

Figure 3: Miking the edge of a speaker’s cone gives a darker sound than miking the center (photo courtesy Phil O’Keefe).
Also note that some amps include more than one speaker, like a low-frequency woofer and high-frequency driver. Moving the mic closer to one driver compared to the other lets you dial in the desired balance of warmth and brightness.
6. Try different speakers
Each speaker in a multi-speaker cabinet should sound the same, but that’s not always true, depending on each speaker’s age and type. Experiment with miking each speaker, and if needed, choose the best-sounding one.
7. Combining direct and miked sounds: problems and solutions
Some amps offer direct feeds (sometimes with cabinet simulation); combining this with the miked audio can give a “big” sound. However, the miked sound will be delayed very slightly compared to the direct sound — about 1ms for each foot of distance from the speaker. Nudge the miked sound earlier in your recording program until the miked and direct sounds line up and are in phase (fig. 4).

Figure 4: The top, white waveform is the direct sound. The blue waveform shows the output from the mic sound before it is time shifted — note the delayed waveform compared to the original. The lavender waveform shows the miked sound shifted earlier (to the left) to align the timing with the direct waveform.
8. Convert your open-back amp to a closed-back cabinet
Open-back amps have less bass response than closed-back amps because some of the sound emanating from the back is out of phase compared to what comes out the front. This can cause partial cancellation due to the long waveform length. It’s not too hard to convert a closed-back amp to sound like an open-back cab — use EQ to thin out the bass end a bit. It’s a little harder to do the reverse, because a closed-back amp compresses the speaker so the sound is tighter, not just bassier. For a simple solution, place the open-back amp so the back faces down on a rug, and point a mic down at it (fig. 5). There’s only one caution: you don’t want to block the ventilation or air flow any more than necessary to prevent overheating.

Figure 5: It’s possible to convert an open-back amp into a closed-back one, but act quickly to prevent overheating.
9. Raise Your Amp
Place the amp on a chair, secure it so it doesn’t vibrate, and mic it at the higher position — the sound will be different compared with miking the amp when it’s sitting on the floor.
10. Learn mic placement with a virtual miking simulator
Most amp sims let you move virtual mics around in relation to a virtual amp. The results parallel what you’d hear in the real world, and you can learn a lot about how mic placement affects an amp’s overall recorded sound (fig. 6). This experience can be very informative in the studio when you’re miking amps with physical mics.

Figure 6: MOTU’s Digital Performer includes a live room with two mics and an XY pair you can position around an amp.
If you need help picking a mic for your guitar cabinet, call a Sweetwater Sales Engineer at (800) 222-4700. For more info about miking techniques for guitar cabinets, check out these other resources: