Stage monitors are an essential part of any live sound rig, but setting them up can feel daunting if you’re new to the game. They provide the crucial foldback that allows musicians on a loud stage to hear themselves and their bandmates—vital for a tight, in-tune performance. Once you understand a few key concepts, getting your monitors dialed in is a straightforward process.
In this guide, Sweetwater’s Mitch Gallagher explains the types of monitors, how to wire them, where to place them to avoid feedback, and how to create the perfect monitor mix.
Active vs. Passive Monitors: What’s the Difference?
The first thing to understand is the two main types of stage monitors: active and passive. The key difference lies in where the power amplification happens.
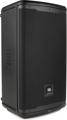
An active monitor, like the JBL EON710, has its power amplifier and other electronics built directly into the speaker cabinet. This makes it a “very convenient, easy-to-hook-up, one-stop-shopping solution for stage monitoring.” You simply plug it into a power outlet, connect a signal cable from your mixer, and you’re ready to go.
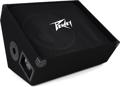
A passive monitor, such as the Peavey PV 12M, is the more traditional design. It lacks a built-in amplifier and requires a separate, external power amplifier to drive the speaker. The signal path is mixer -> power amp -> speaker. This setup involves a few extra cables and an additional piece of gear but works just as well.
This difference becomes critical when you need to connect multiple monitors. With active monitors, you can “daisy-chain” them by linking one to the next with a standard microphone cable. With passive monitors, connecting additional speakers changes the system’s overall impedance (electrical resistance). You must be careful that the total impedance doesn’t fall below the minimum rating of your power amplifier, as this could cause damage. For example, two 8-ohm passive monitors wired together present a 4-ohm load to the amplifier.
How to Wire Active Stage Monitors
Let’s walk through connecting active monitors using a PreSonus StudioLive AR16c mixer. After connecting the monitors to AC power, your next step is routing audio from the mixer’s auxiliary (aux) outputs.
- For a Single Shared Mix (Daisy-chaining): If multiple performers are sharing the same monitor mix, connect a cable from the mixer’s “Aux 1” output to the input of the first monitor. Then, run a second cable from that monitor’s “Thru” or “Link” output to the input of the second monitor. Now, both speakers are receiving the exact same signal.
- For Multiple Independent Mixes: If your mixer has multiple aux outputs, you can create separate mixes for different performers. To do this, run one cable from “Aux 1” on the mixer to the first monitor and a second cable from “Aux 2” to the second monitor. As the presenter notes, “this allows us to send a separate feed from the mixer for each of these monitors and create two independent mixes”—perfect for giving the vocalist and drummer their own custom sound.
How to Wire Passive Stage Monitors
Setting up a passive system involves an extra piece of gear: the power amplifier. For this example, we’ll connect our mixer to a QSC GX5 stereo power amplifier, which will then drive our passive monitors.
The signal flows from the mixer’s aux output into one channel of the power amplifier. From there, you must use a heavy-gauge speaker cable—not a line-level signal cable—to connect the amplifier’s output to the first monitor. A speaker cable is essential “to handle the high power that the amplifier is putting out.”
To add a second monitor to the same mix, simply use another speaker cable (a “jumper”) to connect the parallel output of the first monitor to the input of the second. Remember to check your impedance! Two 8-ohm monitors create a 4-ohm load, which is the minimum for the QSC GX5, so you wouldn’t want to add a third monitor to that single amplifier channel. To create a second, independent passive mix, you would simply repeat the process using the mixer’s “Aux 2” output and the amplifier’s second channel.
Monitor Placement for Maximum Clarity and Minimum Feedback
Proper placement is key to ensuring performers can hear themselves without causing “that squealing feedback that we all hate so much.” The goal is to aim the monitor at the performer’s ears while positioning it in the microphone’s “null point”—the area where it is least sensitive to sound.
- For Cardioid Microphones: These mics, common for live vocals, have a heart-shaped pickup pattern and reject sound from the rear. Their null point is directly behind the microphone. Place the monitor on the floor in front of the performer, angled up toward their head, so the back of the mic is pointed directly at the monitor.
- For Hypercardioid/Supercardioid Microphones: These mics have a tighter pickup pattern in front but are slightly sensitive to sound from directly behind. Their null points are off to the sides, typically at about 110–120 degrees. For these mics, you’ll get better results by placing monitors slightly to the side rather than directly in front.
Also, be mindful of other sound sources. A loud monitor from another musician pointed toward your vocalist’s mic can cause feedback just as easily. Pay attention to the placement of all monitors on stage.
Creating a Monitor Mix on Your Console
Once everything is wired and placed, it’s time to build the mix. On an analog console like the StudioLive AR16c, you’ll use the auxiliary sends. It’s vital to use a pre-fader aux send for monitors. This means the signal is sent to the monitor before it reaches the channel fader that controls the volume for the main front-of-house mix. As Mitch notes, with a pre-fader send, “anything we’re doing as we move the fader to create our main mix… will not affect what’s going through the monitors.”
The process is simple:
- Turn up the master aux send knob for your desired mix (e.g., Aux 1) to unity gain (often marked as “0”).
- On each channel strip, turn up the corresponding aux knob (Aux 1) to send that instrument or vocal to the monitor mix. A little more vocal for the singer? A bit of kick drum for the bassist? You control it here.
- Start with the overall monitor volume low to avoid any initial feedback, then bring it up to a comfortable level for the performer.
Repeat this process for each separate monitor mix you need to create. By balancing the individual channel sends, you can build a custom mix that gives every musician on stage exactly what they need to hear to deliver their best performance.
Monitor Comparison
| Specification | JBL EON710 | Peavey PV 12M |
|---|---|---|
| Powered | Yes (Active) | No (Passive) |
| Power Handling | 1300W Peak, 650W RMS | 200W Program |
| LF Driver Size | 10″ Woofer | 12″ Woofer |
| HF Driver Size | 1″ Tweeter | 1.4″ Tweeter |
| Maximum Peak SPL | 125dB | 97dB |
| Frequency Response | 50Hz-20kHz | 68Hz-17kHz |
| Inputs | 2 x XLR-1/4″ combo | 2 x 1/4″ (Parallel) |
| Outputs | 1 x XLR (Thru) | 2 x 1/4″ (Parallel) |
| Mounting Options | Pole, Floor Wedge, Suspension | Pole, Floor Wedge |
| Weight | 26.23 lbs. | 37 lbs. |
With these fundamentals, you’re well-equipped to set up stage monitors for your next gig. By choosing the right type of monitor for your needs, wiring it correctly, placing it strategically, and building a clear, feedback-free mix, you can ensure every performer on stage has the confidence to deliver their best show.
If you have questions about stage monitors, mixers, or anything else for your live sound rig, don’t hesitate to contact your Sweetwater Sales Engineer. They have the expertise to help you find the perfect gear for any application.