Let’s say you’re working with recorded audio files that sound great, but simply contain too much reverb — how do you reduce the reverb without ruining the source audio? Mitch Gallagher shows you how to reduce reverb in pre-recorded audio tracks in your DAW software.
More and more, we’re seeing studio audio production move in the direction of “committing” as you record. This means laying down your tracks along with any processing you might be using in the studio. If you’re monitoring the drums through compression, those compressed sounds should be laid down to disc. If your solo features an 1/8-note delay and chorus, those effects should be captured onto the same track along with the guitar. The idea is that the sounds are “committed” into the tracks, as opposed to recording dry tracks and then adding effects and processing after the fact.
Committing to effects and processing as you record removes the need to re-create those effects later to duplicate the sounds you heard during recording. It makes mixdown much easier, since you’ve captured the tracks in pretty much their “finished” states. It also moves you away from a “fix-it-in-the-mix” mentality and forces you to make decisions as you record. This reduces “option anxiety” later in the process, a malady where you have so many choices that you can’t make a decision.
The downside is that if you make a mistake or want to change the processing or effects you’ve committed into a track, you might have to go back to square one and re-record the part with the new processing or effects. However, depending on what you want to change, there are some amazing tools out there that allow you to reach into a track and modify certain things. We’re going to look at one such example in this article.
The Project
I like the idea of committing to sounds and effects as you’re recording. It’s an organic approach and makes mixing down much easier. But this approach did bite me when it came time to mix down one of the songs on my EP, Foundation. The song, a complex “funk meets Zappa” instrumental named “Finch Food,” features guest tracks from a friend of mine, super-guitarist Carl Verheyen, whose credits include years as a member of Supertramp and literally thousands of music, movie, and TV recording sessions, along with an incredible catalog of solo records. (His latest, Essential Blues, was once again recorded right here at Sweetwater Studios. I highly recommend checking it out — along with the video on how the album was made!)
When we tracked Carl’s parts, he was adding rhythm guitar and “ear candy” parts to the basic tracks, before the melody, solos, and horn section had been put in place. Carl always gets fantastic tones that are perfect for the track (and that require little or no EQ after the fact). In this case, he was playing his signature LsL Strat-style guitar through a TC Electronic Helix phaser pedal into a reissue Fender ’65 Deluxe amp that Sweetwater Studios’ Mark Hornsby and I converted into a head and tweaked a bit. The amp was played through a 1 x 12″ cabinet loaded with an Eminence Cannabis Rex speaker and miked with a Royer R-121 ribbon mic and Telefunken M80 dynamic mic through a pair of Rupert Neve Designs Shelford 5052 preamps into Pro Tools. We did the recording in Sweetwater Studios Studio B. It sounded fantastic.
But as the producer, I made the mistake of tracking Carl’s parts with the amp’s spring reverb cranked up. It sounded great during the session, but when it came time to mix, with all the other parts in place, I felt the reverb was too much and was obscuring the mix. There’s so much going on: drums, bass, Hammond organ, 6-piece horn section, sax and guitar melody, and lots of additional guitar parts. Extra reverb in any of those tracks was problematic — for example, I didn’t use the room mics for the horn section on the mix, in order to keep the sound tighter. I preferred the mix with the individual dry tracks all routed together through a “room” reverb that gave a sense of space and of the band performing in the same room at the same time. So I set out to reduce or “dry up” the reverb on Carl’s guitar tracks (and on several other tracks).
A Caveat
I try to be conservative and keep perspective when using any sort of audio processing techniques or software; it’s very easy to push things too far and either introduce undesirable artifacts into the signal or change the character of the signal you’re trying to clean up. Use a light touch and listen closely, constantly comparing the original with the processed version, both in solo and in context in the mix. In most cases, you don’t have to completely dry out the track. In a mix, a small amount of reverb in a track will not be audible, and you can usually cut out any isolated reverb tails during breaks in a part by simply editing the track.
With that word of warning out of the way, there are two plug-ins that I rely on for removing reverb from tracks. Here’s how I put them to work.
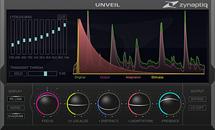
Zynaptiq Unveil
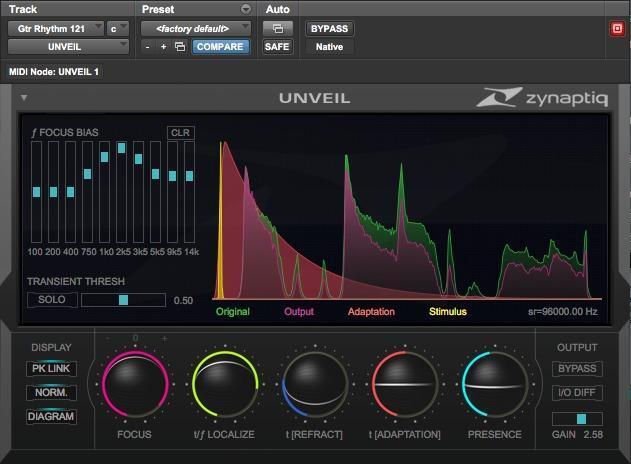
This plug-in uses clever technology to isolate and reduce reverb in your tracks, whether room sound, spring reverb in an amp like I have here, or artificial reverb that was added after the fact. You can also use it to boost the level of reverb, if your tracks were captured without enough ambience, and to punch up transients. According to Zynaptiq, Unveil doesn’t use phase cancellation or other conventional tricks to reduce reverb. It works by “de-mixing” a track — separating the “foreground” components from the “background” components using pattern recognition and perceptive modeling. It’s very impressive technology. You can even pull out the reverb from a track and route it to additional outputs, creating an instant surround mix.
Unveil is an easy plug-in to figure out and use. In fact, I found that the Gentle De-Reverberation preset that’s included with the plug-in was a great starting place. On Carl’s guitar track in my song, I selected that preset, turned up Focus (a sort of “blend” control between the reverb and the direct signal) and 1/f Localize controls (Zynaptiq describes this as a “number of bands” control), and was pretty much done — the results were amazing. I was thrilled.
iZotope RX 6 De-Reverb

De-Reverb is one of the processing modules that’s included with both iZotope’s RX and RX Advanced audio restoration/editing software; I used the latest version of RX Advanced, RX 6, to reduce the reverb in my tracks. De-Reverb is included with RX 6 as both a processing module within the standalone RX software application and as a separate plug-in that you can run in real time within your DAW. That’s how I used De-Reverb — as a plug-in within my session. A big plus here is that De-Reverb is part of RX and RX Advanced, so you get not only a reverb-removal tool, but also an incredible array of additional audio restoration and editing tools as part of the package.
De-Reverb works by learning the reverb characteristics (called a “profile”) in your track, then subtracting those characteristics during playback. So the first order of business is to find an unobscured reverb tail (where no dry sound is playing), select a section of it, and tell the plug-in to learn the reverb’s profile. De-Reverb then sets its parameters appropriately to take that reverb out of your track without harming the remaining audio. In my case, I found the processing settings De-Reverb came up with on its own were a little heavy-handed, resulting in “pumping” in the audio during playback. I turned down the Reduction slider and then pulled back a little bit on the four bands of Reverb Profile sliders and was once again amazed and thrilled with the results.
Which Would I Choose?
Which of these two reverb-removal processors would I choose? Honestly, I was completely satisfied with the results with both of them. In comparing them, after tweaking the settings a bit, it was hard to tell the difference between the two final outputs.
Unveil is super easy and fast to use, and it offers that optional transient enhancement, which I found pleasing in this case. Carl’s part was a funky, clean rhythm track, so the extra attack punch helped the tone cut through without need for extra EQ. I had no problem “drying up” my track as much as I needed.
De-Reverb in RX 6 is also easy to use. There is the extra step of “learning” the reverb profile, but that’s a simple, fast thing to do. Learning the profile also means it’s required to find a clean reverb tail for best results. In most cases, this is easy to find, even in the midst of a track. Just look for a break in the playing or singing where the reverb tail continues to ring after the part has stopped. Only a short bit of isolated reverb is required for De-Reverb to work its magic.
Reverb-removal Caveats
I’ll repeat what I said earlier: try to be conservative when applying any audio processing techniques or software like this. “First, do no harm” may be a mantra of the medical world, but it applies here as well!
The other thing to keep in mind is that reverb removal using either plug-in requires serious mathematics and processing power. Though you can run either De-Reverb or Unveil as a real-time processor, I don’t recommend it. You may encounter latency issues (where the processed track is delayed compared with the original); you may overload your computer’s CPU causing audio hiccups, dropouts, or distortion in the audio; or you may use so much processing power from your computer that there’s not enough leftover to drive any other plug-ins you might want to use. My advice is to solo the track, apply the processing, get it as dry as you want it, then “freeze” or “commit” the processing either to the same track or to a new track. (I prefer the latter, so I can always go back to the “raw” audio if need be.) Freezing or committing allows you to deactivate the reverb-removal plug-in after you’ve used it, but without removing the plug-in instance from the track, and gain back the CPU power it was using.
It’s Like Magic
The results I got with both Unveil and De-Reverb/RX 6 are, in a word, amazing. It’s almost unbelievable — like magic. Who would think that you could dry up unwanted reverb after the fact without killing the sound of a track? Kudos to both companies for a job well done — you can’t go wrong with either of these reverb-removal tools.
Reverb removal may not be something you do every day. But when you need to do it, you definitely want to reach for the right tool. I recommend Zynaptiq Unveil or iZotope RX 6 with De-Reverb as my top choices.