And not just any impulses — we’re talking impulses that create sustaining, smooth reverbs with almost the same relationship to conventional reverb as CGI graphics have to photographs. Best of all, you can make these yourself in minutes.
For a quick refresher, there are two main types of reverb: algorithmic (or synthesized) reverb and convolution reverb. The difference is similar to synthesizer vs. sampler, or painting vs. photograph. Algorithmic reverb uses complex algorithms to model what happens to sound in an acoustic space, while convolution reverb loads an impulse (an audio file with the characteristics of a particular acoustic space, like a particular studio, cathedral, etc.) and imparts the characteristics of that sample on audio going through it.
It’s difficult to capture room characteristics and convert them into impulses, but the impulses we’re about to describe are based on the well-known fact that using noise in a convolution reverb produces reverb effects. Generally, using noise isn’t that exciting, which it why it hasn’t been done all that much in commercial convolution reverb plug-ins. But once you add filtering, amplitude envelopes, comb filtering, reverse, and other effects, impulses become very interesting. What’s more, the reverb tail can be as long as you want, within the constraints of the convolution reverb plug-in being used. This has profound implications for sound design if you want something like a 20-second reverb tail, reverb with tremolo, or super-spooky reverse reverbs. Skeptical? Listen to the audio examples.
The examples are individual hits with 10-second reverb (00:00), vocal with chamber-shaped reverb (00:12), drums with hall-shaped reverb (00:21), guitar with preverb so the reverb doesn’t conflict with the attack (00:33), and reverse reverb on drums (00:44).
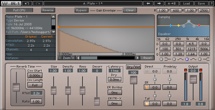
There are quite a few programs that allow loading your own impulses (fig. 1), such as PreSonus Open Air, Overloud TH3 (load as a cabinet IR), Waves IR-1, Native Instruments Reflektor (part of Komplete 11), Ableton Convolution Reverb Pro, Cubase REVerence reverb, and many others. Although many convolution reverbs have a proprietary impulse format, most also import WAV or AIF files.
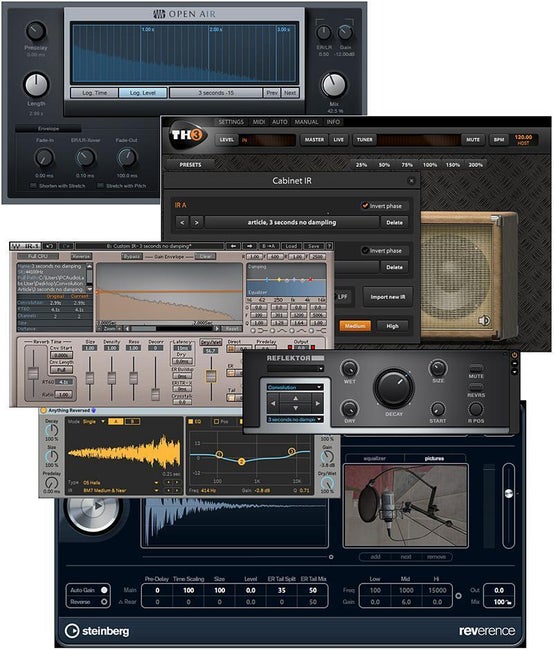
Figure 1: Several convolution reverbs. From top to bottom: Open Air, TH3, IR-1, Reflektor, Convolution Reverb Pro, REVerence.
Start with a Noise Source
The best noise is the analog noise generated by an analog synthesizer, because it’s not periodic. Record about 20 seconds of pink noise into your recording software, and you’ll have all the raw material you need. Alternatively, many virtual analog synths can generate pink noise, so create a noise-only patch and render the instrument output into an audio track.
You can also use the noise generation option in a digital audio editing program, like the signal generator (Tools > Signal Generator) in Steinberg WaveLab or the synthesis option in Magix Sound Forge (fig. 2).
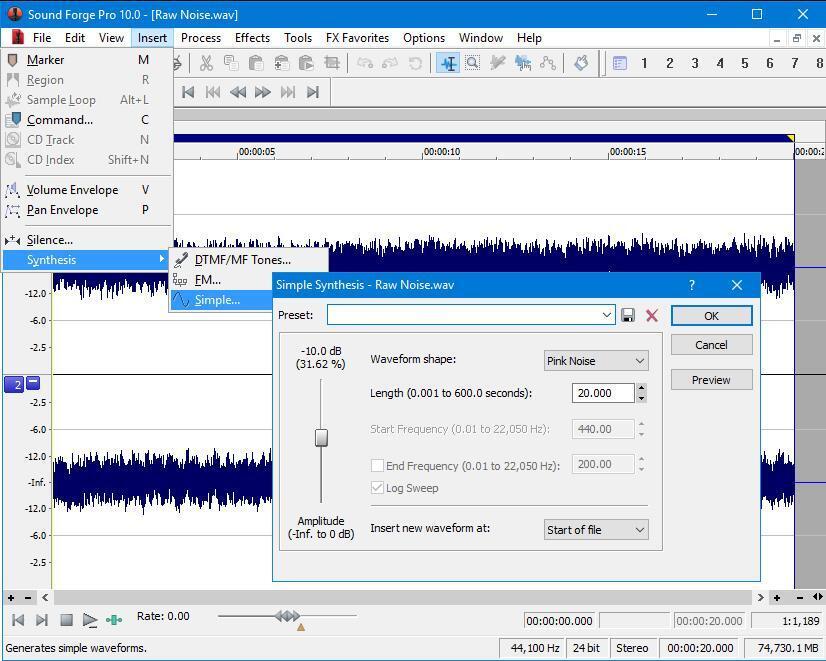
Figure 2: Here’s 20 seconds of pink noise that I created in Sound Forge.
You can create long white noise files (you want around 20 seconds or so of noise) and place different noise in the left and right channels to make sure there’s no correlation between the two channels (or just reverse one of the channels). I’d also recommend normalizing to around -6dB to -10dB; some convolution reverbs I’ve tried don’t seem to like WAV impulse responses that use up all the available headroom.
C’mon Feel the Noize
The main goal here is to shape the noise into the amplitude and frequency response characteristics you want the reverb to adopt. For example, with a typical impulse, you’d want an amplitude decay as well as to reduce the highs somewhat as the impulse decays. Probably the easiest way to get creative is to load the noise into a track in your recording software and automate changes or use DSP.
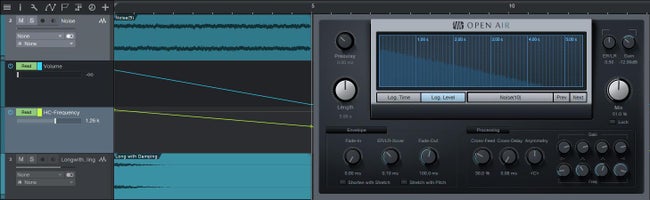
Figure 3: White noise set up in Studio One for impulse creation.
In figure 3, white noise is loaded in the top track in Studio One. One automation lane creates the amplitude change; the other pulls down the frequency of a high-cut filter. The bounced result is in the lower track. The Open Air reverb (inserted in an instrument track) makes for easy testing, because it’s possible just to drag the bounced file into the Open Air impulse window to hear the result.
Another option is to use a synthesizer for shaping the sound, because you can apply an envelope to the filter and VCA and render the result. This is fine for doing conventional impulses, as well as adding attack times to do reverse impulses. Overall, though, I find using recording/editing/mixing software to be ideal; editors like Sound Forge and WaveLab are also suitable. You can create chopped reverb, as well as reverb that swells up and then disappears, or a super-bassy or ultra-thin reverb.
There’s also a way to create less abrupt pre-delay. I’m not a fan of having a space before the reverb appears, but introducing reverb simultaneously with a sound’s attack can blur the attack. Noise to the rescue: create an impulse where the noise amplitude ramps up to full over about 100ms–200ms, and have a lowpass filter increase from 1kHz to, for example, 5kHz–10kHz over the same amount of time. The reverb steps out of the way during the most important part of the attack, but then blooms after the attack. Noise with some subtle tremolo can also produce interesting reverb effects — try mild chorusing, too.
Of course, noise-based impulses are not a panacea. Sometimes you really want audio to sound like it’s in a real room, and a real room impulse is the solution. Noise reverb is more like a sound designer’s dream, the key to virtual reverbs, and a way to generate reverbs so smooth that they sound idealized. But one thing’s for sure: you won’t be able to capture a room impulse that does what shaped noise can do, so experiment — you’ll have sounds no one else does.