
Few processors are as often used — and as useful — as compressors. Compressors drop the volume of your audio when it gets louder than a predetermined threshold, which helps you tame loud peaks. This is especially important with drums, which can have extremely sharp peaks on hits. Proper use of compression will let you clamp down on the tracks without crushing them, and also let you shape the snap, crack, and sustain you want in your drums. Here are some useful tips for using compression on drums to add punch and excitement while still keeping the dynamics under control.
Over the Threshold
The compressor threshold determines the level in decibels at which the compressor “turns on.” In other words, if you set the threshold at -10dB, that means that when the signal reaches -10dB, the compressor starts compressing. Setting a high threshold means the compressor will only activate when the signal gets really loud. That’s a great way to control peaks, but we’re compressing drums, and often we want the entire drum signal to be compressed. So when compressing drums, you’ll generally set your threshold low enough that basically any incoming drum signal is enough to trigger it.
Let the Attack Shine Through
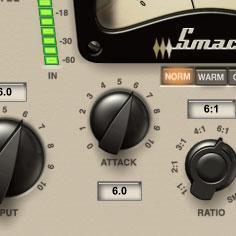 Much of a drum’s snap and punch is found in the initial few milliseconds when the sound first hits. This is called the “attack” portion of the sound. Nearly all compressors let you adjust the attack time. If you set the attack time too fast, the compressor will clamp down on the initial attack of the drum, reducing its impact and snap. Instead, set the compressor’s attack to kick in just after the initial attack so that the drum track keeps its initial crack and snap. A good starting point is to set the attack to around 30ms (or to “slow” if there’s no fine-control knob), and then adjust it suit to your specific drum hit from there.
Fast Release
The release control determines how quickly the compressor shuts off after it’s first triggered. The idea is to set the release to be fast enough that the compression turns off before the next drum hit. (At least as much as possible.) You can think of it the opposite way you thought of adjusting attack: the attack value should be slow enough to let the drum’s snap and crack through, but you want the release to be fast enough so that it lets go of the signal before the next drum hit. A decent starting point is to set the release around 200ms (or select “fast” if there’s no fine-control knob) and then adjust it to your specific drum hit.
The Golden Ratio
The compression ratio determines how much the output signal increases for a given increase in the input signal. For example, a ratio of 3:1 means that once the signal crosses the threshold, if the signal increases by 3dB, its gain will be will be attenuated (reduced in volume) so that at the output it increases by 1dB. A low ratio lets more dynamics through, since the signal won’t be attenuated as much. A good place to start with drums is to adjust the ratio to 4:1. If the drums are still too dynamic, up the ratio to 5:1 or higher. Use your ears here, not just the signal level on the meters.
Parallel Compression
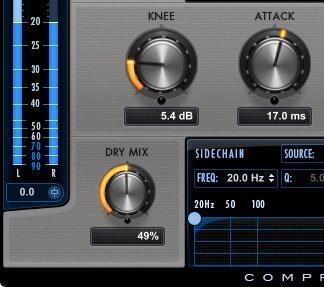 Now we’re getting into some fancy tricks. Parallel compression (some engineers refer to it as “New York compression,” because it was audio engineers in New York City that first popularized this technique) means blending compressed signal with uncompressed signal. Mixing the compressed signal with the uncompressed signal is a way to maintain more dynamics from the original drum track, while still gaining the benefit of the dynamics shaping and taming that a compressor offers. It also lets you really smash your drum signal and only blend in a little of it with the “dry” signal, so that your drums get bigger sounding, and still sound alive.
The easiest way to achieve parallel compression is to use a compressor with a “built-in” mix control to dial in the amount of compression. But if your compressor doesn’t have a mix knob, you can always put the compressor on an auxiliary track and then use a send on your drum track to route signal to the compressor, and the fader on the aux track to blend in the amount of compressed signal you want to hear in with the uncompressed signal.
Ride the Bus
Most of these tips assume that you’re using compression on individual drum tracks. Another tried-and-true mix technique is to not only compress individual drum tracks but also to send all the drums to the same auxiliary track or bus and to compress that drum mix with one compressor. This is a great way to “glue” the drums together after you’ve shaped each one individually with compression. You don’t want to compress the drums too hard at this stage — just gently squeeze the drum mix together by setting a higher threshold and lower ratio to reduce the dynamics by only a dB or two at the peaks. A drum mix is also a great place to consider parallel compression, to blend the compressed kit in with the drum mix.
Keep in mind, while you can never use too many compressors, you can overcompress, which will result in flat, lifeless, small sounds. I recommend using compression often — on individual instruments, submixes, and even full mixes — but use it judiciously! As always, let your ears be your guide!
If you have any questions about drum compression products, don’t hesitate to reach out to your Sweetwater Sales Engineer at (800) 222-4700.