If you’re reading this article about how to mic a saxophone, then we guess you’re either an engineer who has never recorded saxophone before or a saxophone player with limited experience in recording. Either way, you’ve come to the right place. We’ll take you from “not knowing enough” to feeling equipped to handle the task at hand. And now Sweetwater Band & Orchestra can handle all your instrument needs along with everything you need to mic or record your saxophone.
- Choosing the Best Mic
- Positioning the Mic
- Using the Best Signal Chain
- Does Your Room Need Acoustic Treatment?
Choosing the Best Mic
How do you know which is the best mic for the job, regardless of the instrument you’re about to record? You start by listening to that instrument, whether it’s sax, trumpet, or even voice. Listen to what it sounds like. For saxophone, listen to whether it sounds dark, thin, or clacky (lots of key noise). Your mic decision will be informed by the sound of the instrument.
Good Mics for Saxophone
Here are some perennial-favorite mics for sax that you’ve likely seen in the studio or onstage. Depending on the engineer’s preference, the sound of the instrument, and whether the player is moving around onstage, any of these may be the best choice.
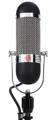
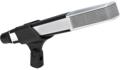
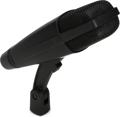
Dynamic
Ribbon
Here are some other microphones that we frequently use on saxophones of all types.
Dynamic
Ribbon
Choosing the Right Type of Microphone
Choosing the right mic depends on the space you’re in and the sound you’re going after.
Condenser Mics
Condenser mics will tend to pick up the most detail if that is what you’re after. They will frequently have the clearest top end and will pick up the most ambience. That can be great if you’re in a good room with a good instrument. If not, then they will pick up extraneous noises like air conditioning noise, street noise, and even things your ear might not notice, including the sound of the pads hitting the instrument.
Dynamic mics
Dynamic mics will tend to be the most forgiving in terms of room and extraneous noise pickup. They are frequently used in live settings because they are typically cardioid or hypercardioid mics that focus their sound pickup directly in front of the mic. If you don’t understand microphone polar patterns, please check out this excellent article, “Microphone Polar Patterns Demonstrated — Use Your Ears,” where you can actually hear the differences.
Ribbon mics
Ribbon mics are especially flattering and forgiving on saxophones. Usually, they have a softer (less bright) top end, which means they accent the tone and body of the instrument and they will pick up less mechanical (key) noise; and, by virtue of their figure-8 pattern, they can actually tame the sound of a live, bouncy room. By utilizing the nulls on either side of a ribbon mic, you can find the problem areas in your space and point the nulls toward those. For instance, if you have a bad slap echo (called flutter echo) between two walls, then put the sides of a ribbon mic so they are pointing toward the problem area. The problem will be reduced drastically. Also, if you are miking a horn group with players all lined up as in a typical stage or big-band setup, figure-8 mics actually offer better rejection between players (counterintuitively) than even cardioid or hypercardioid mics.
Positioning the Mic
Start with the mic about 12–24 inches away from the bell of the saxophone, not pointing directly into the bell, but a third of the way up the horn between the bell and the mouthpiece. That will capture a balanced sound coming from the bell and the body of the horn. If the player is seated, then a mic height approximately even with their right elbow is a good starting point. If they’re reading from a chart, then position the mic about even with the bottom of the music stand and right beside it (typically on the right-hand side from the player’s perspective). That way you won’t interfere with them reading the chart.
Brighter
If you want a brighter sound, then pull the mic closer to the bell. This will give you the most direct sound and minimize reflections or other instruments, but it is not necessarily the most flattering sound since it may be honky and strident.
Fuller
If you want a fuller, more balanced sound, then move the mic higher and away from the horn. This will capture more of the body of the instrument and more tone than point. For intimate recordings, this is a great option. If the sound of the keys is too much, then pull the mic back farther or angle the mic off-axis (away from the horn) to minimize high-frequency pickup. Realize that the angle of the mic to the horn (using the directional pickup of the mic to your advantage) is also a major factor in the sound, not only where you place the mic.
Direct
If you are working in a live situation and gain before feedback is the most important factor, then it’s hard to beat a mic that is mounted directly to the horn. Not only do you not have to worry about the mic position changing, but it’s also as close as you can get to the sound coming from the horn. You may have to do some drastic EQ to get it to sound right, but the rejection of unwanted sounds and consistency in placement (from song to song, night after night) is typically worth the tradeoff in live situations.
Ambient
If you are recording in a great-sounding space and you want to capture the natural tone of the instrument and the space, then you can use two mics (in XY, A-B, or M-S) just a few feet away from the horn or use distant mics in an equilateral triangle. We heard a recording of an alto sax on a piano-duet album that was recorded with two U67s that were 15 feet apart and 15 feet away from the player in a cavernous room. It sounded glorious.
Sidebar: If we lost you with those XY, A-B, and M-S abbreviations, then read this article: “7 Stereo Mic Techniques You Should Try.” It explains all of those.
Using the Best Signal Chain
Anyone who has ever recorded anything knows that your recording can only be as good as the weakest link in the chain. So, you need to make sure you plug your mic into the best possible signal chain.
Audio Interface
If you already have an audio interface that you use for recording, then that’s where you start. If you are shopping for an interface and aren’t sure what you need, check out our Audio Interface Buying Guide that will explain the fundamentals. If you are familiar with interfaces (or already have one) but are looking for something that sounds better, then this article, “Best Audio Interfaces for Your Home Studio,” is a great guide for your next step. Still not sure? Give your Sweetwater Sales Engineer a call.
Mic Preamp
If you are really ready to commit to getting the finest recording possible, then we would suggest investing in a dedicated mic preamp. These come in all price ranges with lots of features, but, ultimately, they offer the finest sound available.
Solid-state Preamps
If you want clarity in your sax recording, then there are no finer options than these solid-state standalone preamps.

Grace Design m101 Half-rack Microphone Preamp

Millennia HV-3C 2-channel Microphone Preamp

Rupert Neve Designs Shelford Channel Microphone Preamp, Inductor EQ & Diode Bridge Compressor

Neve 1073DPX 2-channel Microphone Preamp & EQ
Learn More
Tube Preamps
If you are going for a classic, smooth, 1950s sound from your horn, then consider one of these tube preamps.
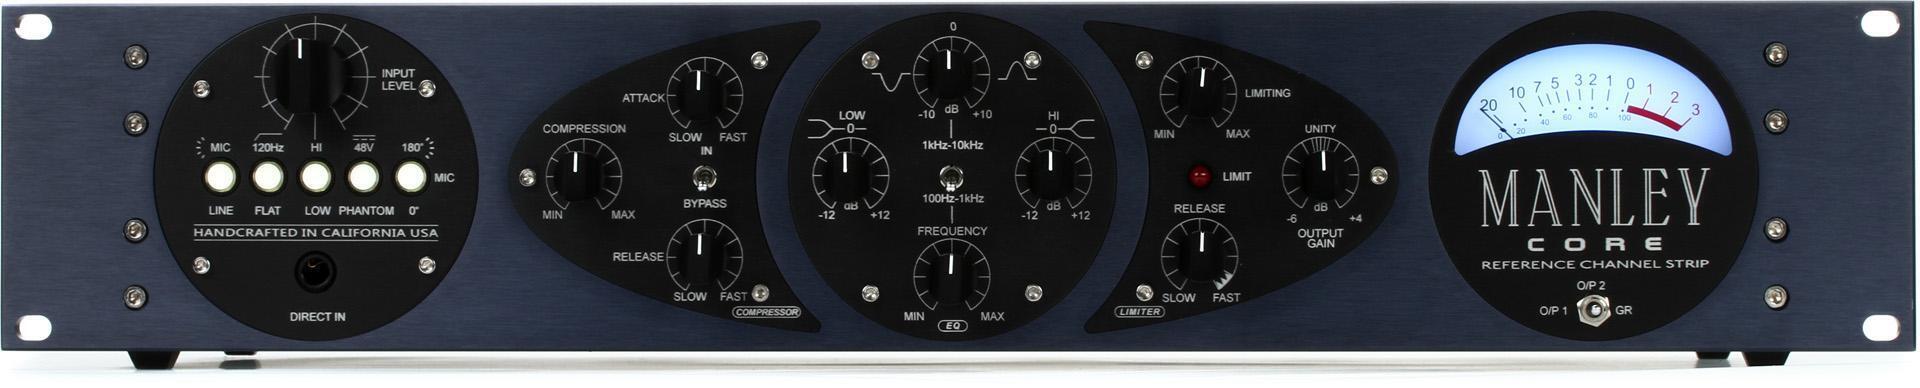
Manley Core Reference Tube Channel Strip
Learn More
Universal Audio LA-610 Mk II Tube Channel Strip
Learn More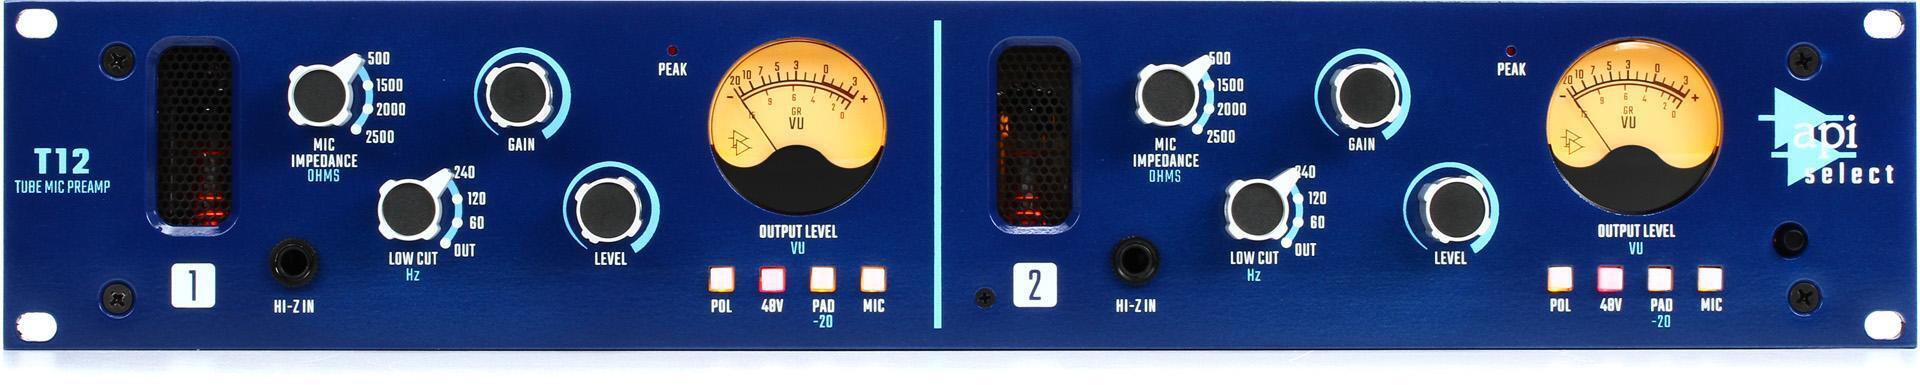
API Select T12 2-channel Tube Microphone Preamp
Learn More
Chandler Limited REDD.47 Tube Microphone Preamp
Learn More
Does Your Room Need Acoustic Treatment?
The most straightforward answer is yes. The saxophone is a uniquely powerful instrument capable of producing loud volumes with loads of harmonics. So, you’ll need to record your saxophone in a space that does the instrument justice. And the best way to do that is with acoustic treatment. Grab some Auralex Studiofoam Wedgies or a Primacoustic London 8 acoustic room kit and make sure your room sounds its best.
Sweetwater Sound’s Dave Martin on Sax Miking
Since different engineers have different techniques, we reached out to Dave Martin, Sweetwater Sound staff producer/engineer and former studio owner, and asked him about his techniques for miking saxophone both live and in the studio.
“For live performances, there’s little that works better than a clip-on microphone attached to the bell. While an omnidirectional clip-on can sound more natural than a directional clip-on, a cardioid- or hypercardioid-patterned clip-on will help get plenty of level before feedback; and, though some fairly drastic EQ may be needed, a clip-on (especially a clip-on with a wireless pack) can be a great problem solver. I’m a fan of DPA mics, and DPA’s 4099 Core with the clip and the 4011 microphone have worked great for me.”
According to Dave: “I’ve been using U47s on saxes in the studio for years. I like that the 47 is a warm-sounding mic — there’s detail in the top end, but it’s not overly bright or harsh.”
“I will start with the mic 8–15 inches from the instrument, about 45 degrees away from the bell, but pointed more or less toward the middle of the sax body. This is important because the mic will be placed a bit higher when recording alto or soprano than when recording a tenor or baritone sax (the middle of a baritone sax body is surprisingly close to the floor). A number of considerations will determine how close the mic needs to be — the sound of the room, the sound of the horn, proximity to other musicians (recording a horn section or a big band is a different set of parameters than recording a single sax player), and, of course, the sound you want to have on the recording.”
We’ve Got Everything You Need!
Miking up a saxophone isn’t as daunting as it seems! We have everything you need to start recording your saxophone at home and onstage from acoustic treatment to interfaces, mics, and saxophones. So, call Sweetwater at (800) 222-4700 to get started today.