Editing drums with Beat Detective isn’t particularly exciting or unusual these days — but editing drums to a grid isn’t your only option. Try using Groove Templates the next time you have an editing job to do. Here’s how it works.
For this article, we’ll demonstrate using a stereo drum track from a live performance. While the track is in time, on the whole, some of the eighth notes are a little out of the pocket. In any case, the first step in groove quantizing is to open Beat Detective (on the Event menu in Pro Tools), then choose Clip Separation as the first operation. I’ve chosen to work with an 8-bar phrase. The highlighted section in figure 1 shows the start and end points, with the grid resolution set to eighth notes. Notice that the Detection section in Beat Detective allows you to choose the sensitivity of the detection as well as the resolution (bars, beats, or sub-beats). Click the Analyze button.

Figure 1
With the Sensitivity control at 0%, no separation points are visible. Moving the control to the right allows the program to detect the peaks in the audio and draw separation points (the purple lines) at those peaks (fig. 2).
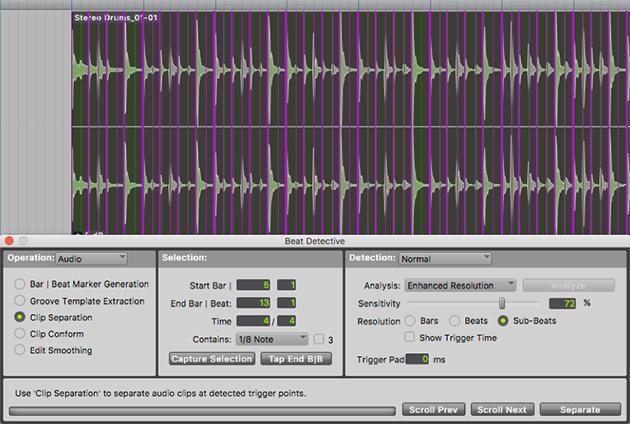
Figure 2
Increase the sensitivity to the point that all the sub-beats have a mark delineating the peak (fig. 3). In this instance, the sensitivity is set at 72%. Then click the Separate button. Once the sections are separated, the audio track will contain multiple new regions — subdivisions of the original track.
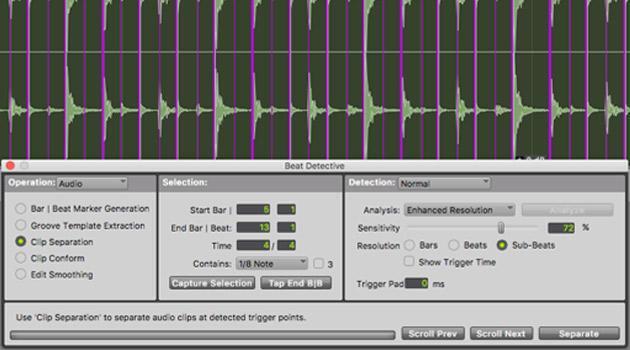
Figure 3
If you select Clip Conform under Operation: Audio, and choose Standard from the Conform pull-down menu with the Strength at 100% (fig. 4), each audio peak will be aligned to the beat. Notice that while some peaks have moved a bit, there’s not a major change in the look of the audio track. However, the resulting sound is much more machine-like.
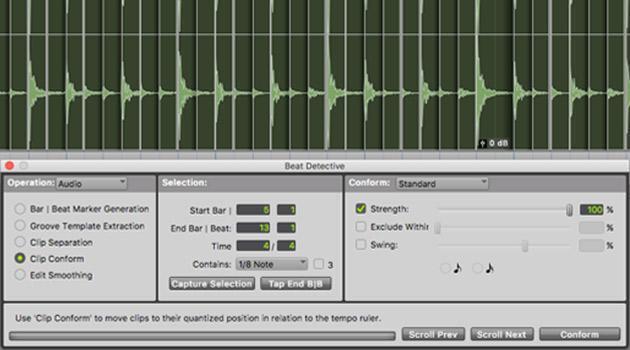
Figure 4
The other option is to use a groove template; for this article, we’ll use a groove template from Logic. Find the stock groove templates in Beat Detective in the Conform: Groove pull-down menu (fig. 5).
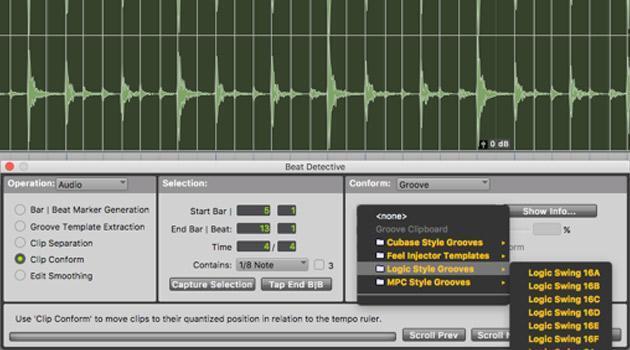
Figure 5
For this example, we’ll use a groove template (Logic Swing 8D.grv) that imparts an eighth-note swing to the track (fig. 6). Notice the difference in the look of the audio track — some of the separated audio peaks are moved quite a bit; some of the moves leave blank spaces in the audio (which sound like dropouts), and some of the regions will cause pops or clicks if played back.

Figure 6
Fortunately, there’s a solution to this; choose Edit Smoothing under Operation: Audio. Then choose Fill and Crossfade under Smoothing (fig. 7).

Figure 7
The reason for this process is to use a groove template to create a new feel from an existing track. In this case, the original stereo drum track was a straight feel; the final version has a very interesting swing feel.
You don’t need to use the supplied templates. Click the button labeled Groove Template Extraction, and you can capture the template of one audio track and apply it to another. Let’s assume that you have a drum track and a bass track — with one of the instruments not quite feeling what the other is playing. You can take the drum track, extract a groove template based on the drums (see below), then apply the template to the bass track. The principles are the same as those described here — and the steps are both relatively simple and self-explanatory.
Extracting a Groove Template
To extract a Groove Template from an audio selection, select the audio you want to use as the groove template, then choose Groove Template Extraction in the Operations: Audio window (fig. 8).

Figure 8
In the Selection pane, set the time signature and the resolution of the groove (from the Contains dropdown window), then hit the Capture Selection button in the Selection window. This gives Beat Detective information about exactly what it’s working with.
Click the Analyze button in the Detection window, adjusting the Sensitivity control to capture all the peaks. Use the Grabber tool to add any adjustment points that Beat Detective doesn’t see by clicking on any peaks that (A) are part of the groove that you want, and (B) don’t have a purple line on them to indicate that Beat Detective sees them.
Click the Extract button on the lower right of the Beat Detective Window (fig. 9).
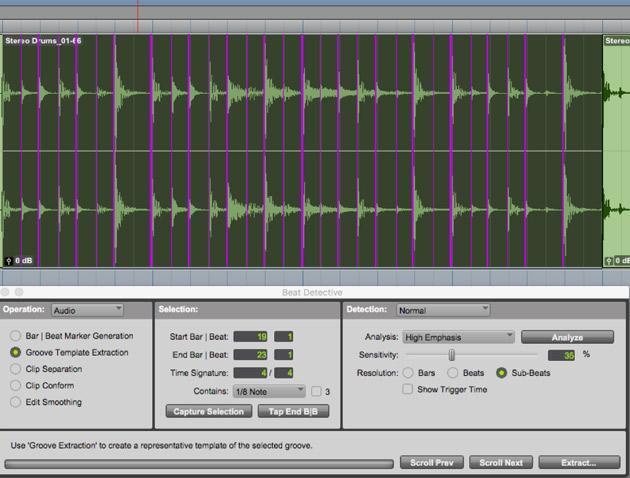
Figure 9
The Extract Groove Template window appears (fig. 10), with information about the length of the groove template and the time signature (both of which were chosen on the Selection pane of the Beat Detective window).
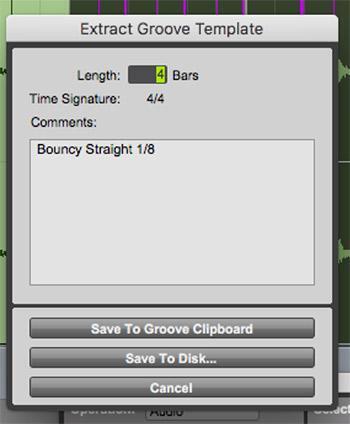
Figure 10
Choosing Save To Disk will let you name it, then add it to the Grooves folder in Pro Tools, and it will appear in the dropdown Groove window (fig. 11).
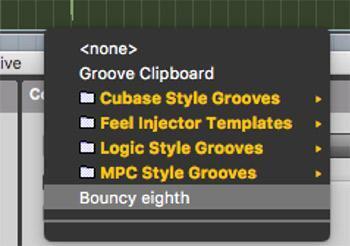
Figure 11