When recording a voice-over — whether it’s a single sentence or a whole audio book — there are several things that you can do to improve the quality of the voice-over.
Engineer’s Tips
1 — Put the right mic in the right place
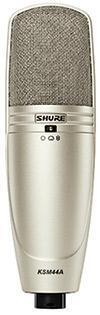
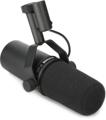
Try to start with the right microphone: if at all possible, experiment with your current microphone collection to see if one or more of them make the voice sound like you want it to sound. If so, that’s great. If not, look at a couple of different options. Here in the Sweetwater Studios, we use large-diaphragm condensers — specifically, Shure’s KSM44A — more than any of our other mics for voice-over (commonly abbreviated as VO) sessions. But that doesn’t mean that we won’t use a dynamic microphone such as the Shure SM7B when that sounds better for a particular voice. Our practice is to use mics in a cardioid pattern — and if there’s a low-cut filter on the mic, we’ll use it.
When recording the voice-over, start with the microphone 8–12 inches in front of the talent’s mouth. This is close enough that the voice will sound clear and “present,” but far enough away that the voice won’t sound muddy due to the microphone’s proximity effect.
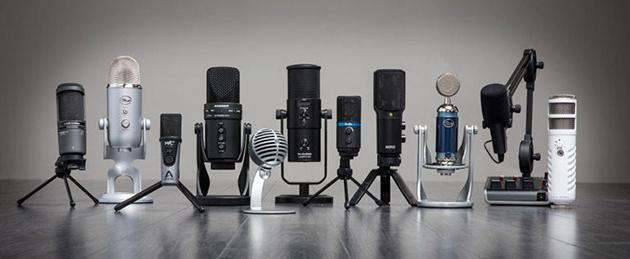
If you are planning to do voice-overs and don’t have a studio already set up, all you need is a USB mic to plug into your existing computer, plus recording software. Take a listen to some of our favorites in our USB Mic Shootout.
2 — Use a pop filter
Pop filters are enormously handy when recording voice-overs; besides helping to protect against plosive sounds, you can also use one to help position the voice-over artist at the correct distance from the microphone. If you place the pop filter 4–6 inches in front of the mic, the visual reference makes it easier for the voice-over artist to stay 4–6 inches away from the pop filter rather than trying to consistently stand 8–12 inches from the mic.
3 — Use a music stand
I suggest that you use a music stand for the script. A music stand will not only help the voice-over talent stand the correct distance from the mic, but it will also help to minimize the sound of papers rustling since pages are slid instead of turned when the script is on a stand. Plus you can position the script high enough so the talent is looking up at the mic instead of looking down, which can restrict the vocal cords.
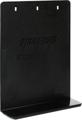
Make sure the music stand doesn’t ring when tapped. The resonant frequency of a music stand can be right in the vocal range and can be audible when the talent speaks or sings loudly. Using a thin piece of carpet or industrial rubber will dampen resonances. Even better, the Stand Outs M91 stand extender (which fits the Manhasset M48 stand) not only dampens the resonance but also allows the talent to spread out several pages at once.
4 — Make sure the recording space is not too live
It’s easy to add reverb or roominess to a vocal that is recorded dry but difficult to take room ambience out of a recording. In order to make the VO sit well in a track or over backing music, make sure the ambience of the room is minimized. If you are working in a large room with reflective walls instead of a professional vocal booth, then acoustic filters can make a huge difference in the sound of your VO. Reflexion filters can help tame the reflections of a live room. If you don’t have a quiet room to record in, then the ISOVOX Home Vocal Booth is a great solution for recording in an extremely live or reverberant space.
5 — Make sure you have a copy of the script and keep copious notes
You may think you’ll remember what changed between Take 25 and Take 26 of Chapter 3, but once you finish recording all 12 chapters of the book, it will all seem like a blur, trust me. Your notes during the read cannot be too detailed. Use markers in the timeline to indicate takes. It will save lots of frustration when it comes time to assemble the final.
Performer’s Tips
6 — Watch your posture
If possible, stand to read. If not, at least sit up straight. Good posture will help you maintain good breath support, which makes it easier to speak in a strong, clear voice.
7 — Have a drink close at hand
Make sure that you stay hydrated. Water works very well, either hot or room temperature. If your mouth gets dry, it will make noises — smacks, clicks, pops — that will distract from the message.
8 — Remember that speaking is not the same as talking
Though talking is the most natural thing in the world, “speaking” — especially into a microphone — is pretty unnatural. When you’re talking to another person, you’re not only using your voice, but also facial expressions, body language, gestures — all things that help you to be fully understood in a face-to-face conversation but don’t translate well to voice-overs. To make sure that each word is understandable, speak clearly. Make sure that you’re not speaking so quickly that words slur together, nor so slowly that you’ll put the listener to sleep.

9 — Warm up your voice
Warm up your voice by reading the script aloud before starting the recording. This lets you find the right combination of volume, projection, and pacing for the voice-over.
10 — Pre-read the script
It’s not uncommon for a paragraph that is written very well — one that is concise, understandable, and informative — to be challenging to read aloud. The only way to know is to actually read the script aloud, to see where the difficulties lie. Then find a way to bring clarity to those difficult sections, by inserting pauses to break up a hard section or, if the client approves, by changing a sentence or even a single word if that solves the issue.
11 — Don’t be afraid to mark up the script
As you read through the script, keep a pencil (or two, with erasers) handy; make marks to remind you when to breathe, when to pause, and even when to pitch your voice lower or higher for emphasis. The goal is to make your voice-over sound natural, comfortable, and appropriate for the spot. And finally, when you make a mistake in your reading, pause for a couple of seconds. Then, back up a sentence or two, and begin reading again. Those pauses will give the engineer a great visual cue when editing your voice-over for broadcast.
If you have any other questions about mics, room treatment, interfaces, or anything you need to create great-sounding voice-overs, give your Sweetwater Sales Engineer a call at (800) 222-4700.