
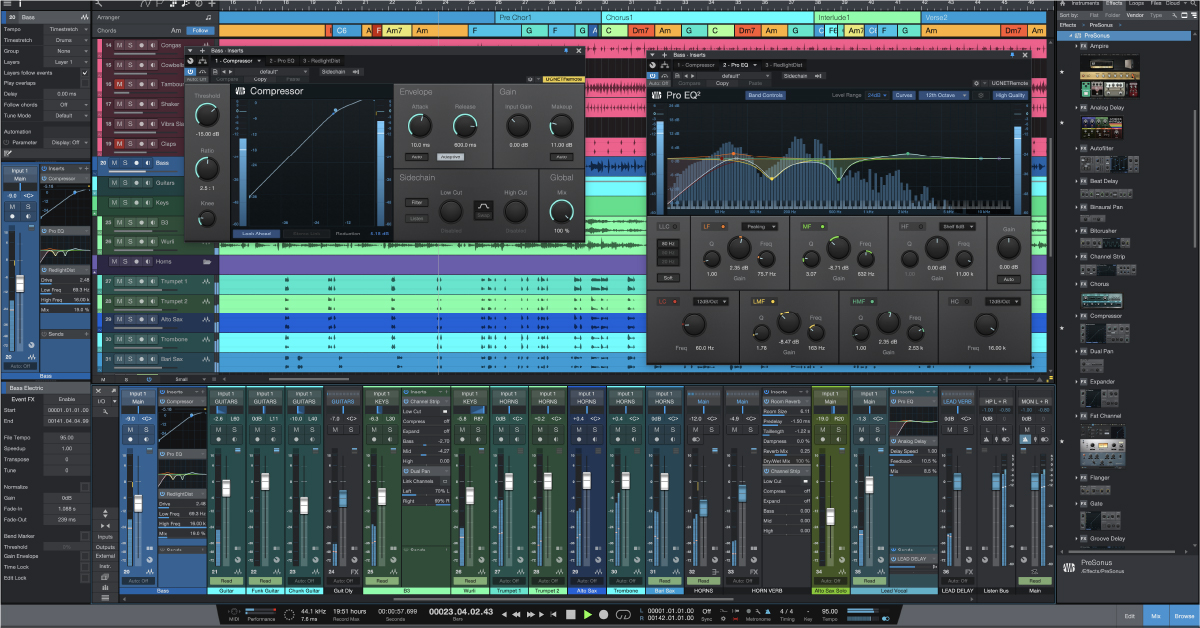
Working With Plug-ins in Studio One
IMPORTANT! This article applies to PreSonus Studio One software. If you are looking for Fender Studio Pro plug-in content, please visit our guide “Working With Plug-ins in Fender Studio Pro”.
In this guide, we’ll show you how to use plug-ins inside of Studio One. You’ll learn how to scan, add, and route them in a project. We’ll also provide some tips and tricks along the way. Follow the sections below to get started.
Scan plug-ins in Studio One
When you install an effect plug-in or virtual instrument, you’ll be prompted to install it to a specific directory of your computer. Your plug-ins or virtual instruments won’t show up if this directory isn’t added to the Studio One scan list.
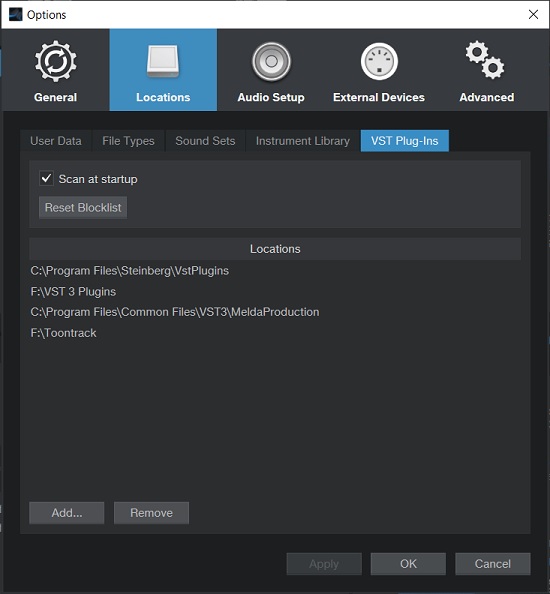
- Launch Studio One, click the Studio One dropdown located at the top left of the application (next to the Help dropdown), then click Options.
- Select Locations, click the VST Plug-Ins tab, click Add… then select the directory where your newly installed plug-in or virtual instrument resides.
- Click Apply so Studio One can scan the new directory. Be patient, as the scan process can some time, especially if you have many plug-ins and virtual instruments installed.
- You may receive a message saying that you’ll have to restart a plug-in for it to be scanned. If you do, exit out of it, then relaunch Studio One.
VST plug-in window
What is the blocklist?
Sometimes, Studio One will place specific plug-ins on a blocklist, meaning it will skip scanning that specific plug-in even if it’s installed to the correct location. More often than not, this is caused by a plug-in not launching correctly; not being activated; or if it’s an iLok-based license, the license isn’t present (USB dongle not connected, cloud session not running, etc.). Antivirus and VPN software can cause this on rare occasions, as they may be considered “malicious” files. To fix this, follow these steps.
- Click the Studio One dropdown located at the top left of the application (next to the Help dropdown), then click Options.
- Select Locations, click the VST Plug-Ins tab, then click Reset Blocklist.
- Exit out of Studio One.
- If you have antivirus or VPN software, temporarily disable it.
- Launch Studio One to let the blocklisted plug-ins be scanned.
Add plug-ins onto a track
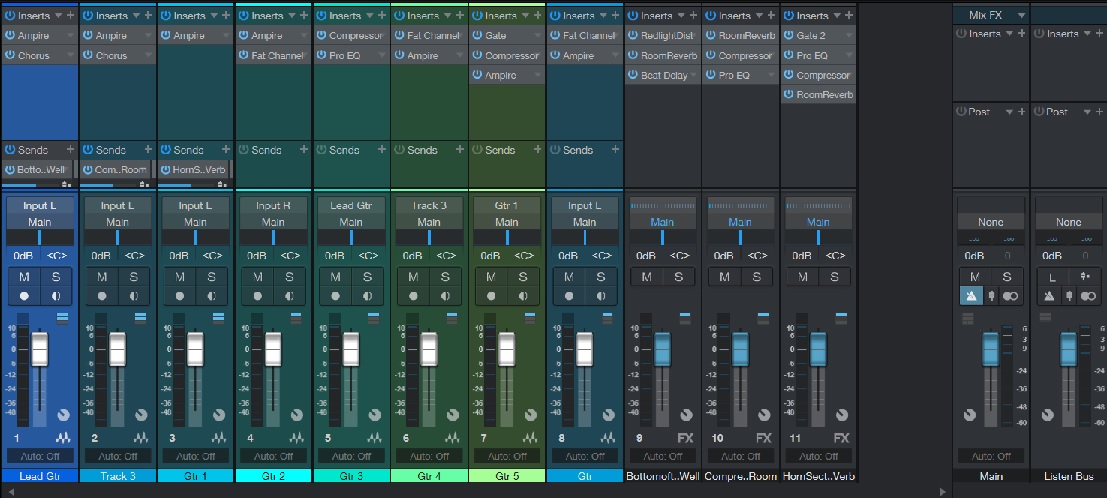
PreSonus has made adding plug-ins to a track straightforward. Simply navigate to the right side of Studio One, click Browse, locate the plug-in you want, then drag and drop it onto the track of your choosing.
You can also do this when you have the Mix window open since FX, Aux, Bus, and VCA tracks don’t show up in the Record/Arrangement window. Here are a few things to remember when using plug-ins in Studio One.
- Any plug-in you add BEFORE beginning your recording will be printed to the track.
- This means you won’t be able to change any settings unless you delete the take.
- If you’re sure you’ve found the tone you like, you might want to add an effect like a guitar amp sim or EQ before recording.
- Any effect you add AFTER recording will be non-destructive and won’t print.
- Unless it’s part of your guitar amp sim, adding time-based effects (like a delay or chorus) in your mix would be best added afterward.
How to toggle multiple Plugin Windows
Organize your Plugins in Folders!
Rearrange plug-ins
The order of plug-ins will affect the processed signal, so you may want to rearrange them to get your desired sound. To rearrange plug-ins inside of Studio One, all you need to do is click and drag the VST plug-in up or down to the preferred slot on the channel’s mixer track. There are a few other options available to rearrange your plug-ins:
- To copy the plug-in to another track, click and drag it to the desired track.
- To delete the plug-in, hold the Ctrl (PC)/Cmd (Mac) on the keyboard while dragging it to another track.
- To move the plug-in to another track, hold the Alt key, then drag it to the desired track.
Preset FX chains
Preset FX chains let you save and load a custom group of VST plug-ins on the fly. This is very useful when you need to recall plug-ins from one session and add them to another without adding every plug-in individually again. This is perfect when you’re recording an album and need the mix to sound consistent. While the factory presets are a great starting point, you can also create custom presets tailored for your mixing workflow.
To load a preset FX chain
- Click the Effects tab in the Browser window, expand FX Chains, then expand the instrument’s folder (guitar, drums, instruments, etc.).
- Click and drag a preset directly to the track. If you want to create a bus track with the FX chain, just click and drag the preset to a blank section of the Mixer window.
- You can expand the FX preset and click and drag individual plug-ins if you don’t want to load the entire chain.
To save a preset FX chain
- Click the Down icon next to Inserts to pull up the FX chain preset list.
- Select Store FX Chain, give it a unique name, place it in a subfolder, then click OK.
Mix window
How to route multi-out virtual instruments
One thing that we highly recommend is to route multi-output virtual instrument tracks to dedicated audio tracks. This is often used when working with virtual drum instruments. Routing multi-out instruments allow you to control the mix of individual parts without ruining the overall mix of your virtual instrument.
For example, you want a different EQ on the kick than the hi-hat because the EQ frequencies are so different. So, by creating multiple outputs, you can apply an EQ with separate settings on each track so your drum mix sounds tight.
- Go to the Instruments tab in the Browser window, then click and drag the virtual instrument you want to use.
- Go to the virtual instrument’s mixer or output tab, and update the sample’s outputs so they’re routed to dedicated outputs.
- The process differs from software to software, so be sure to refer to its user manual to learn more on assigning separate outputs for each track.
- Click the right (output) arrow (located directly to the right of the default dropdown box), then enable the outputs you assigned to each sample within the virtual instrument to match that of the outputs created in the project.
- For example, if you assigned kick, snare, tom, hi-hat, and room to separate outputs 1-5 respectively, click the output arrow, then enable output 1-5 so mixer tracks are created to their respective outputs.
Working With Multi Output Instruments (feat. Superior Drummer 3, Kontakt 6)
When you need help, Sweetwater has the answers!
Our knowledge base contains over 28,000 expertly written tech articles that will give you answers and help you get the most out of your gear. Our pro musicians and gear experts update content daily to keep you informed and on your way. Best of all, it’s totally FREE, and it’s just another reason that you get more at Sweetwater.com.


Offer applies only to single-receipt qualifying purchases. Select manufacturers may require that only the manufacturer’s products qualify towards the minimum purchase amount needed to be eligible for promotional financing. Otherwise, an invoice that meets the minimum purchase amount and contains at least one qualifying manufacturer product is eligible for promotional financing. No interest will be charged on promo purchase balance, and equal monthly payments are required on promo purchase until it is paid in full. The payments equal the amount financed divided by the number of months in the promo period, rounded up to the next whole dollar. These payments may be higher than the payments that would be required if this purchase was a non-promo purchase. During the last month(s) of the promo period the required monthly payment may be reduced due to the prior months’ rounding. Regular account terms apply to non-promo purchases. New Accounts as of 07/31/2025: Purchase APR is 34.99%. Penalty APR is 39.99%. Min Interest Charge is $2. Existing cardholders: See your credit card agreement terms. Subject to credit approval.
Offer applies only to single-receipt qualifying purchases. No interest will be charged on the promo balance if you pay it off, in full, within the promo period. If you do not, interest will be charged on the promo balance from the purchase date. The required minimum monthly payments may or may not pay off the promo balance before the end of the promo period, depending on purchase amount, promo length and payment allocation. Regular account terms apply to non-promo purchases and, after promo period ends, to the promo balance. New Accounts as of 07/31/2025: Purchase APR is 34.99%. Penalty APR is 39.99%. Min Interest Charge is $2. Existing cardholders: See your credit card agreement terms. Subject to credit approval.
The estimated required monthly payment shown which excludes taxes and delivery equals the amount financed divided by the number of months in the promo period, rounded up to the next cent. During the last month(s) of the promo period the required monthly payment may be reduced due to this rounding. These payments apply only with the financing offer shown. If you make these payments by the due date each month, you should pay off this amount financed within the promo period, if it is the only balance you are paying off. If you have other balances on your account, this payment will be added to any other minimum monthly payments.
Applies only to select items from this manufacturer. Ask your Sweetwater Sales Engineer for more details.