
Oberheim OB-X8 Firmware Update
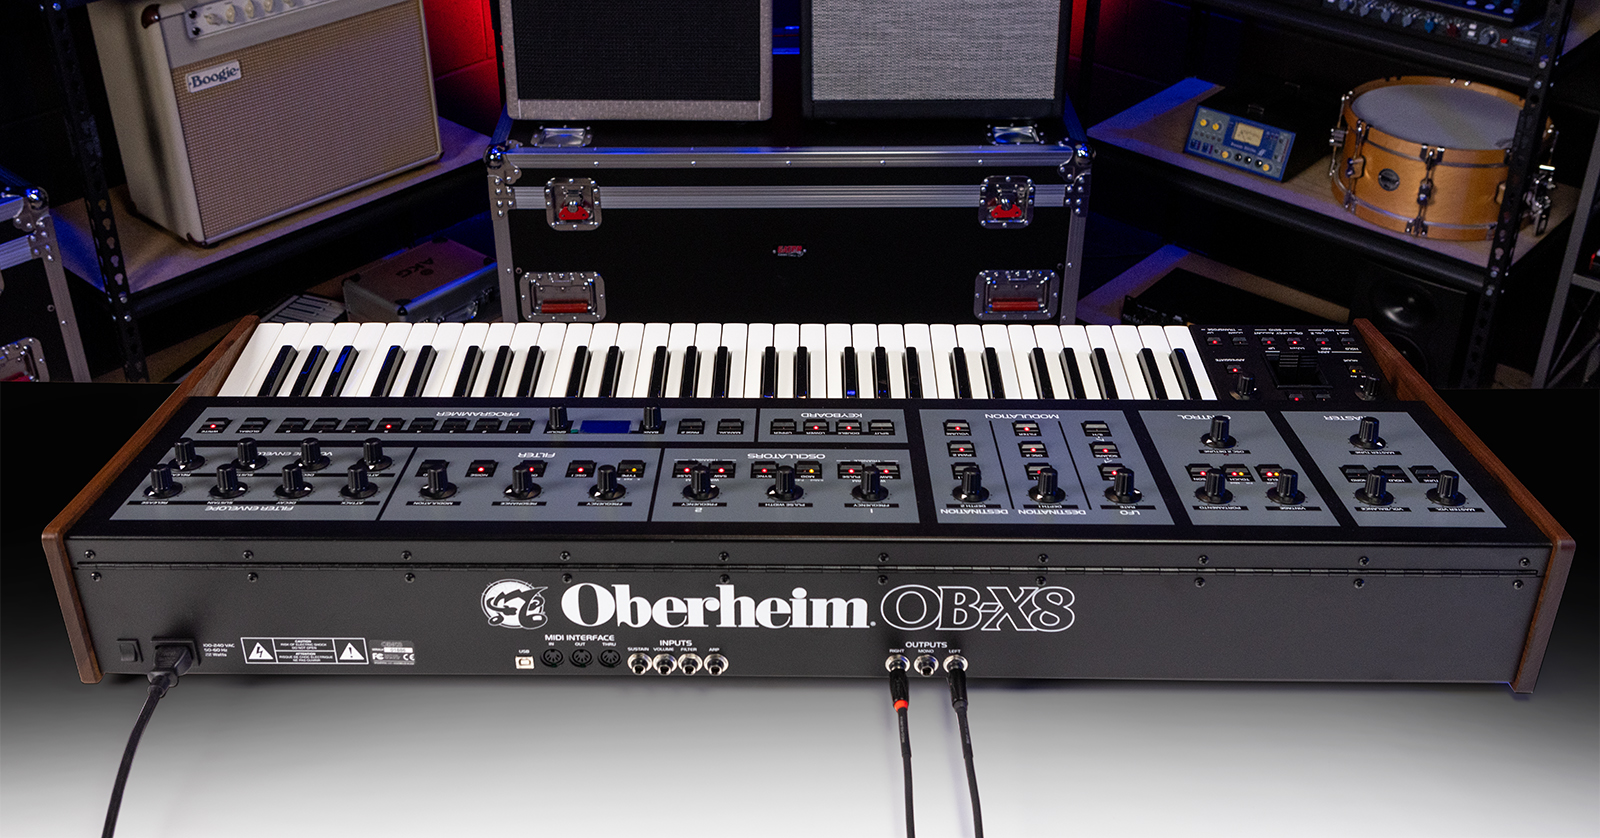
From time to time, Oberheim will release a free firmware update that will fix bugs and may add new features to your Oberheim OB-X8 keyboard and Oberheim OB-X8 desktop module. Oberheim refers to a firmware update as a “software update,” and gives each version an “OS” number. We wrote this guide to explain the update process.
- Oberheim OB-X8 OS v2.0
- Check Your OB-X8 Firmware Version
- Overview of Updating the Firmware
- Firmware Update Procedure
- Reset Global Parameters and Calibrate Your OB-X8
Oberheim OB-X8 OS v2.0
On July 2, 2024, Oberheim announced their firmware update, OB-X8 OS v2.0. It’s a major update that provides new features including:
- Support for MPE (MIDI Polyphonic Expression)
- Instant binaural mode that pans individual voices hard left and right for true stereo operation
- Simultaneously selectable waveshapes for each oscillator that extend timbral variety
- New 4-pole lowpass filter type with fuller bass at high resonance
- New VCO 1 and 2 level LFO modulation destinations for independent timbral mixing
- Arpeggiator clock sync, now with selectable note-division values for expanded rhythmic control
- Twice the Split and Double memory locations, including program storage directly in the new banks, for 512 more stored sounds
- Separate MIDI channels for lower/upper split bi-timbral operation
- Support for chaining three more OB-X8 units for up to 32 voices
Learn more in the Oberheim OB-X8 OS v2.0 product announcement.
At the time of release, Oberheim provided banks of new sounds that you can download and install after you have upgraded the firmware to OS v2.0. Instructions are on the Oberheim OB-X8 product page under OB-X8 Support.
Check Your OB-X8 Firmware Version
Here’s how to find out if you have an older firmware version and need to perform the update.
On your OB-X8, press the Global button, and the OS version will appear on the display. Take note of the number, for example “1.1.0.0.”
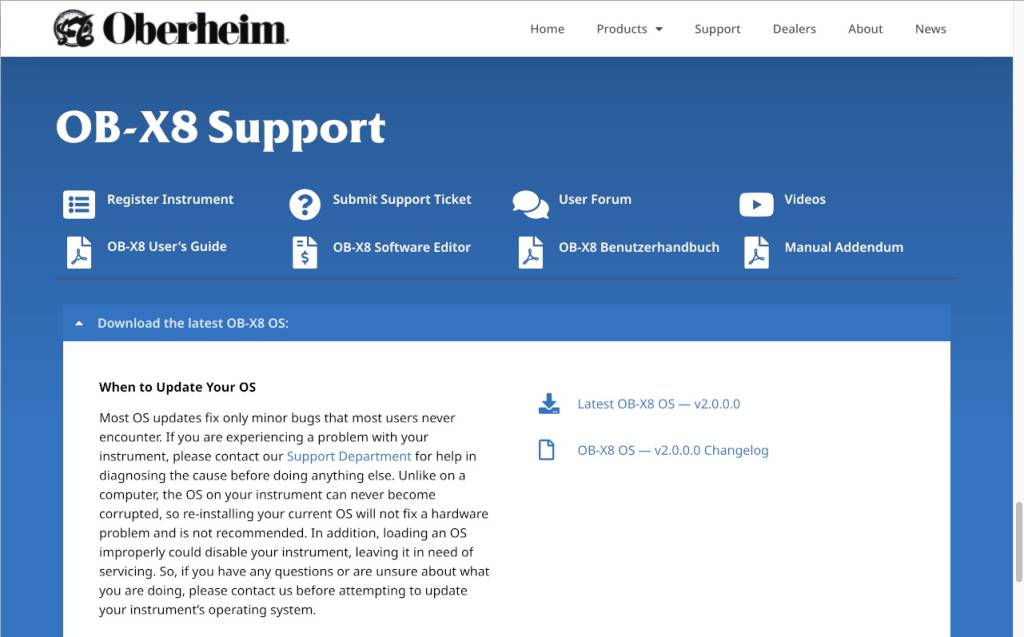
The OB-X8 Support section on the Oberheim website
On your computer, go to the Oberheim OB-X8 product page. Scroll down to the OB-X8 Support section. Click Download the latest OB-X8 OS. A pane will open. On the right, you will see an icon to download the newest firmware update, for example, Latest OB-X8 OS – v2.0.
If the number of the newest OS is higher than the number of the version running on your OB-X8, then you need to perform the firmware update.
Overview of Updating the Firmware
Here is an overview of Oberheim’s instructions.
The OB-X8 update is performed old school, using MIDI SysEx (system exclusive) data.
On your Windows or Mac computer, you download the firmware updater SysEx file from the Oberheim website.
Then you connect your OB-X8 to your computer using a USB data cable.
To accomplish the transfer, you need a third-party shareware app that reads the SysEx file from your computer’s hard drive and uploads the MIDI data to your OB-X8 over the USB cable. Use MIDI-OX on Windows or SysEx Librarian on macOS.
[While it’s possible to use a 5-pin DIN MIDI cable to connect your OB-X8 to a MIDI-to-USB interface to your computer, and while it may be possible to transfer SysEx through a DAW, it’s more straightforward to use the USB port and either of these apps, so that’s the method we recommend.]
When the SysEx data is transferred to your OB-X8, it will initiate the update process.
After the OB-X8’s display indicates that the firmware update has been installed, you must reset the global parameters and run a full calibration.
Here are the detailed steps.
Firmware Update Procedure
Install MIDI-OX for Windows or SysEx Librarian for macOS

MIDI-OX for Windows and SysEx Librarian for macOS
If you are on Windows, go to the MIDI-OX website, download the newest version of the app, and follow the installation instructions.
If you are on macOS, go to the Snoize.com SysEx Librarian website and do likewise.
Download the Firmware Updater from Oberheim
On your computer, go to the Oberheim OB-X8 product page. Scroll down to the OB-X8 Support section. Click Download the latest OB-X8 OS. A pane will open. On the right, click Latest OB-X8 OS to download the updater.
The updater will arrive as a .zip file. Locate it in your Downloads folder. Extract the .zip file and you will see the SysEx file, named OBX8_Main_2.0.0.0.syx or similar. This is the file you will upload to the OB-X8.
Install the Firmware Update
Set the OB-X8 to Receive MIDI SysEx
- Press Global.
- From the Global menu, use the scroll knob to select MIDI SysEx Cable. Choose USB.
- Press Global again to exit the menu.
Disconnect any MIDI cables from your OB-X8. Connect the OB-X8 directly to your computer using a MIDI USB-B data cable and a USB-C adapter cable if needed.
On Your Computer
IMPORTANT: Be patient during the firmware update procedure. Do not disconnect the USB cable, do not shut down the MIDI app, do not shut down your computer, and do not shut down the OB-X8 until the display on the OB-X8 prompts you to restart the unit. Doing any of these will cause the update to fail.
Whether you are on macOS or Windows, close your DAW and all other apps that use MIDI, and disconnect any other MIDI devices or interfaces from your computer.
On macOS
- Load the SysEx Librarian app.
- Choose OB-X8 from the Destination menu.
- Click Add/+. An Open dialog will appear. Browse to and open the file named in the format OBX8_Main_2.0.0.0.syx that you downloaded from the Oberheim website. The file name appears in the file list and should be highlighted.
- Click the Play button to transmit the file.
On the OB-X8, the display will show a numeric progress readout, and the program button LEDs will light sequentially to indicate the progress of the SysEx file’s transfer. Follow any directions displayed on the OB-X8 screen. When the file transfer is complete, the OS will be written to memory.
Wait until the OB-X8 prompts you to restart the unit. Only then can you turn the power off and turn it back on. It’s upon restart that the firmware update is loaded and installed.
Once the unit finishes booting up, you can verify the installation by pressing Global. The installed OS version will appear on the display.
When you have confirmed that the update has been installed, skip down to the section below on resetting global parameters and calibrating the OB-X8.
Troubleshooting for SysEx Librarian
If the numeric progress indicator stops before the file transfer is complete, turn the OB-X8 off, then on. On your computer, in SysEx Librarian, click Play and try again.
If this does not work, turn the OB-X8 off and on again, and in SysEx Librarian, lower the Transmit Speed to 80% and click Play to retransmit the SysEx file.
If this does not work, try reducing the Transmit Speed by 10%. You can also check to make sure that Pause Between Played Messages is set to one second. You may have to adjust the Transmit Speed setting several times before finding the right combination.
If the OB-X8 displays Status Byte Received In Data, turn the OB-X8 off, then on. This error means some other MIDI message the OB-X8 was not expecting was sent from your computer over USB. Make sure all other audio, MIDI, or DAW software is closed and that no other MIDI devices are connected. If you continue to receive this message, try restarting your computer and opening SysEx Librarian as your only application.
On Windows
- Load the MIDI-OX app.
- From the Options menu, choose Configure Buffers.
- Set the Low Level Output Buffers Num and Size to 1024.
- Click OK to close the window and save the settings.
- From the Options menu, choose MIDI Devices.
- In the lower-left quadrant of the window, select the MIDI port to which the instrument is connected. If the connection is via USB, choose OB-X8. Click OK to close the window.
- From the View menu, choose SysEx.
- From the Command Window menu, choose Load File. Browse to and open the file named in the format OBX8_Main_2.0.0.0.syx that you downloaded from the Oberheim website.
- From the Command Window menu, choose Send SysEx.
On the OB-X8, the display will show a numeric progress readout, and the program button LEDs will light sequentially to indicate the progress of the SysEx file’s transfer. Follow any directions displayed on the OB-X8 screen. When the file transfer is complete, the OS will be written to memory.
Wait until the OB-X8 prompts you to restart the unit. Only then can you turn the power off and turn it back on. It’s upon restart that the firmware update is loaded and installed. Once the unit finishes booting up, you can verify the installation by pressing Global. The installed OS version will appear on the display.
Troubleshooting for MIDI-OX
If the numeric progress indicator stops before the file transfer is complete, turn the OB-X8 off, then on. On your computer, in MIDI-OX, issue the Send SysEx command again.
If this does not work, turn the OB-X8 off and on again. In MIDI-OX, double the Low Level Output Buffers Num and Size values, and use the Send SysEx command again.
If this does not work, try reducing the Num and Size settings. You can also try doubling or quadrupling the Size setting. You may have to adjust the Low Level Output Buffers settings several times before finding the right combination.
If the OB-X8 displays Status Byte Received In Data, turn the OB-X8 off, then on. This error means some other MIDI message the OB-X8 was not expecting was sent from your computer over USB. Make sure all other audio, MIDI, or DAW software is closed and that no other MIDI devices are connected. If you continue to receive this message, try restarting your computer, then open MIDI-OX as your only application.
Reset Global Parameters and Calibrate Your OB-X8
You must perform these steps in order after the firmware update.
Reset Global Parameters
On the OB-X8, press the Global button.
Use the scroll knob to select Reset Globals on the display. Then press the Write button.
Clear Calibration
Hold Transpose Up + Down and press the Global button.
Select the first option to Clear Calibration. Press Write.
Run Full Calibration
Press the Global button.
Use the scroll knob to select Full Calibration, then press the Write button.
The synthesizer performs its auto-calibration procedure. This will take several minutes. Do not turn off the power while it is doing this.
When the procedure is finished, the front panel controls return to normal.
Now you can enjoy the improved performance of your OB-X8.
Related Articles
When you need help, Sweetwater has the answers!
Our knowledge base contains over 28,000 expertly written tech articles that will give you answers and help you get the most out of your gear. Our pro musicians and gear experts update content daily to keep you informed and on your way. Best of all, it’s totally FREE, and it’s just another reason that you get more at Sweetwater.com.

