
Focusrite Vocaster – How To Use Vocaster Hub
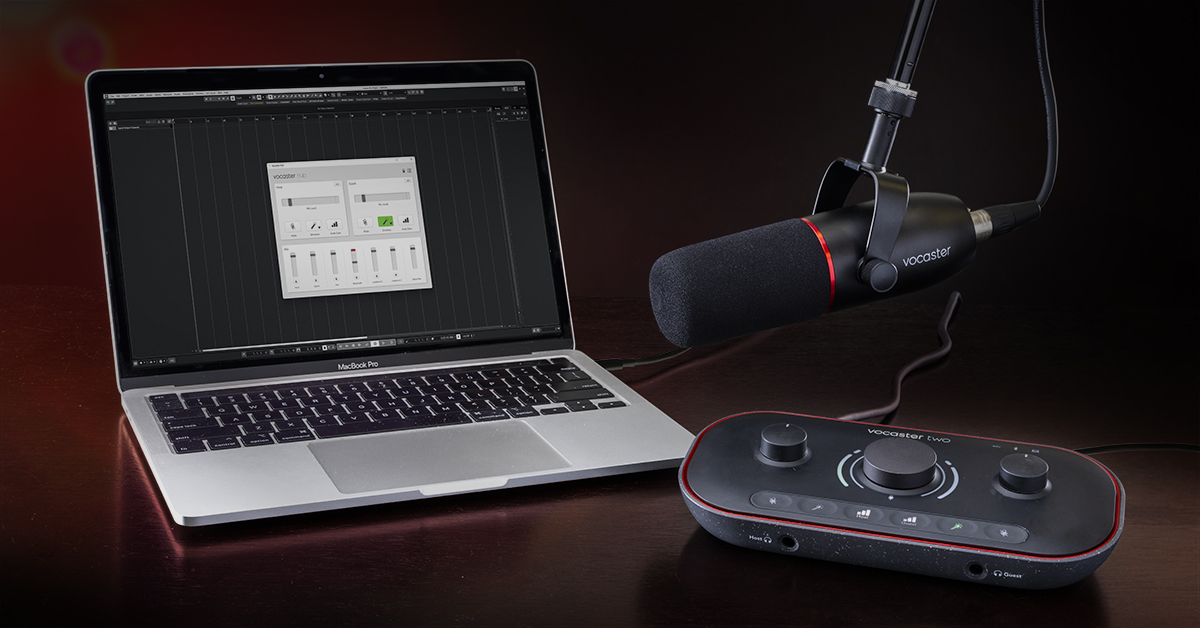
In our Vocaster Getting Started guide, you learned how to download and install the Vocaster Hub software during the registration process. In this guide, we will show you how to use it to its full potential! Follow the sections below to get started.
Adjust Vocaster audio settings
Changing audio settings Vocaster Hub couldn’t be easier. Unlike other audio interface routing software, this is straightforward to use. While you can easily adjust some settings with a touch of a finger on your interface (e.g., Auto Gain), sometimes it’s easier to do it within Vocaster Hub. Since most settings are straightforward, here are a few tips to get you up and running:
Enhance

When Enhance is enabled, it will apply different compression, EQ, and HPF settings to get the best tone possible.
- To turn Enhance on, you can press and hold the Magic wand button on the interface or click the Enhance button within Vocaster Hub.
- To change between Enhance presets, click the down arrow, then select the best preset that suits your voice.
Auto Gain

As the name implies, Auto Gain allows you to set the input channel’s level without needing to fine-tune anything.
- To use it, press and hold the Auto Gain button on the Vocaster or click the Auto Gain button within the software, then begin speaking for 10 seconds. The halo around the main output knob will illuminate white and count down.
- The halo will illuminate orange if the input signal is too quiet or too loud.
- The halo will illuminate red if the input signal isn’t detected at all.
- If this is the case, try a different cable or mic. If it’s a condenser microphone, be sure that phantom power (+48V) is enabled. You can enable it within Vocaster Hub or by pressing the 48V button on the back of the interface.
Mix
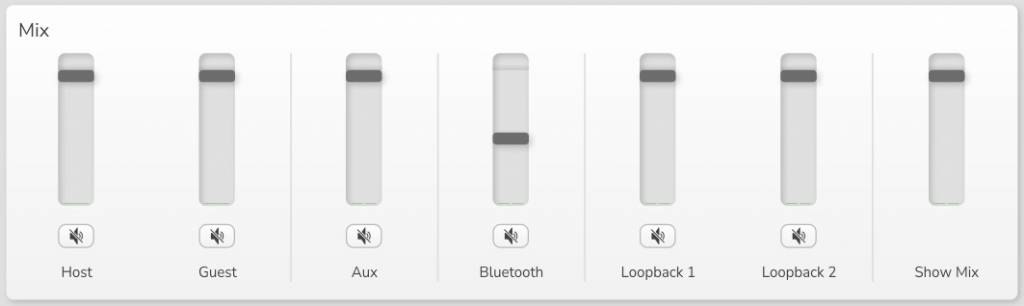
The Mix area of Vocaster Hub is where you will adjust the output settings of each channel and the overall mix, and there’s only one thing to note: if the Bluetooth, Aux, or Loopback begins to clip, turn the source audio down — not the channel fader. If the Show Mix clips, use the channel faders.
Vocaster audio routing
Once you’ve set your levels in Vocaster Hub, you can now record in your DAW! While it has hardware inputs for your mics, phone, and camera, it also has virtual loopback inputs that allow you to record playback audio from your computer, such as a streaming music service and video conferencing applications! This is particularly useful, as each audio source will be recorded on a dedicated channel.
Because of this, you will notice additional inputs within your DAW settings. The total amount of channels available is dependent on your interface, so check out the charts below to see what channels to use.
TWO COLUMN: VOCASTER ONE CHANNELS VOCASTER TWO CHANNELS
Using Hindenburg Pro
When you register your Vocaster, you’ll receive a free copy of Hindenburg PRO, which is a DAW specifically geared for podcasting. It’s a very intuitive and powerful application for your podcasting needs, and we have provided a helpful tutorial playlist from Hindenburg to show you how to get up and running in no time!
Hindenburg Pro & Vocaster Pro
When you need help, Sweetwater has the answers!
Our knowledge base contains over 28,000 expertly written tech articles that will give you answers and help you get the most out of your gear. Our pro musicians and gear experts update content daily to keep you informed and on your way. Best of all, it’s totally FREE, and it’s just another reason that you get more at Sweetwater.com.

