
Dreadbox Typhon Quickstart Guide
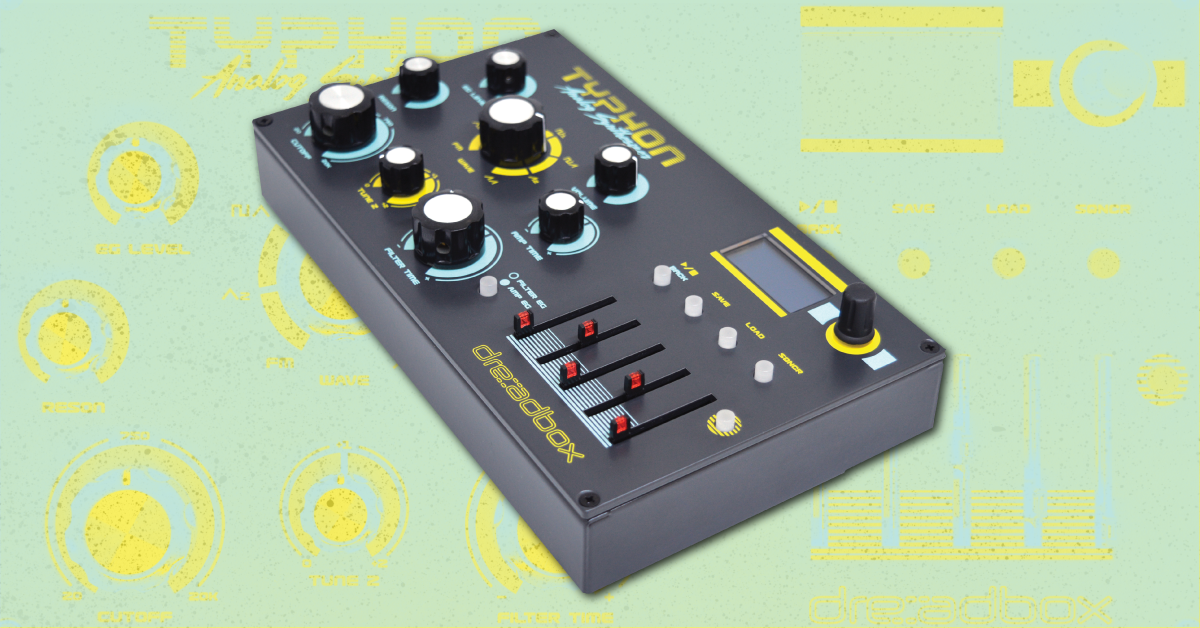
Getting started with the Dreadbox Typhon
In this guide, Sweetwater’s synth guru, Daniel Fisher, will show you how to register, explain the fundamentals, and try out the Factory presets on the Dreadbox Typhon for the first time. Follow the sections below to get started.
- Register and update your Typhon
- Powering up your Typhon
- Exploring the factory presets on your Typhon
- Tweaking Typhon presets
Register and update your Typhon
Before we dive into using the Typhon, the first thing to do is to register the synth with Dreadbox and update it with the latest firmware.
- Go to the Dreadbox Register page, enter your information and Typhon serial number, then click Submit.
- Keep your Sweetwater invoice handy as you’ll need to enter the purchase date.
- Go to the dreadbox Downloads page and get the highest numbered firmware version (V2.01 as of this writing), as well as the Owner’s Manual, and then click on and watch the “How To Update Your Typhon” video.
How to update Typhon Synthesizer by Dreadbox
Powering up your Typhon
Your Typhon is powered by USB (bus powered), which means that you can use your computer’s USB port, a powered USB hub, any USB phone charger, or even a portable phone charger battery.
After connecting the USB cable to your Typhon, you’ll see the Dreadbox logo. Press the knob (called the encoder) to the right of the screen to get to the next “SINEVIBES” window, and once more to get to the main screen.
Exploring factory presets on your Typhon
Connect the Left and Right 1/4” Output jacks to a mixer or amp, or connect headphones with an 1/8” plug to the jack with the Headphone symbol.
- If you own a MIDI keyboard or MIDI controller with a standard 5-pin MIDI Out jack, connect it with a MIDI cable to the MIDI In jack on the Typhon. The initial MIDI Channel is set to ALL, so any MIDI channel you send will work.
- If you don’t have a MIDI controller handy you can still play the sequences that are included on many of the Factory presets. If you have a DAW on your computer you can send MIDI to your Typhon via the USB cable.
- Play the Typhon with either the MIDI keyboard, MIDI controller, or with your DAW. If you have none of those, simply press the first of the four buttons under the screen which will Start and Stop the sequencer. Bring the volume knob up slowly until you have a comfortable listening level.
- To try the next preset press the third button that says LOAD, and then press the encoder knob (to the left of the screen) once to select the A Bank. Now use the encoder to scroll to preset 2 and press the encoder one more time to load it.
- This method allows you to choose any of the 64 presets from any of the four Banks (A, B, C, D). Once you are in a Bank you can change Banks by pressing the LOAD button and then the BACK button.
Analyzing 3 presets on the Dreadbox Typhon
Tweaking Typhon presets
Now that you have the basics down and you know how to navigate the Dreadbox Typhon, it’s time to create your own presets!
Besides the Volume knob, all of the Typhon’s knobs on the left side are used to change various synth parameters. Explore the possibilities of each knob without fear because, unless you save those changes, they will disappear as soon as you go to a new preset.
- If you want to tweak the Amplitude (volume) Envelope, press the button to the left of the sliders. You can now use the first four sliders to change the Amp EG‘s (Envelope Generator) Attack, Decay, Sustain and Release (you may hear the term ADSR) segments. Pressing the button to the right of the sliders will toggle between AMP EG and FILTER EG.
- If you want to try making changes to the three Modulators, make sure that the FILTER EG/AMP EG button is not lit. This makes the screen display the main page with M1, M2, and M3 at the top left of the screen. Now, the encoder knob on the top right of your Typhon will let you scroll to M1, M2, or M3 and the five sliders allow you to edit the parameters of that Modulator.
- The SHIFT button (to the right of the sliders) lets you change the Modulation type for that Modulator.
- If you want to try making changes to the three digital FX, make sure that the FILTER EG/AMP EG button is not lit. This makes the screen display the main page with FX1, FX2, and FX3 at the top right of the screen.
- Now, the encoder knob will let you scroll to FX1, FX2, or FX3 and the five sliders will allow you to edit the parameters of that effect. The SHIFT button (to the right of the sliders) lets you change the Effect type for that FX.
Creating an INIT (Initialized) Patch
Saving and naming Typhon preset changes
If you’ve created something you want to save, simply press the SAVE button (2nd button) and use the encoder knob to choose a Bank. (Banks C and D are empty for your use.) Then, scroll the encoder knob to select where you want to store your preset and press one more time. You can now either store the preset by pressing the SAVE button once, or you can change the name of your preset using the encoder knob (see the manual for full details on naming).
Backing Up Your Synth Patches
Related content
Sweetwater Synth Clips Playlist
Learn more about the basics of synthesizers!
Learn More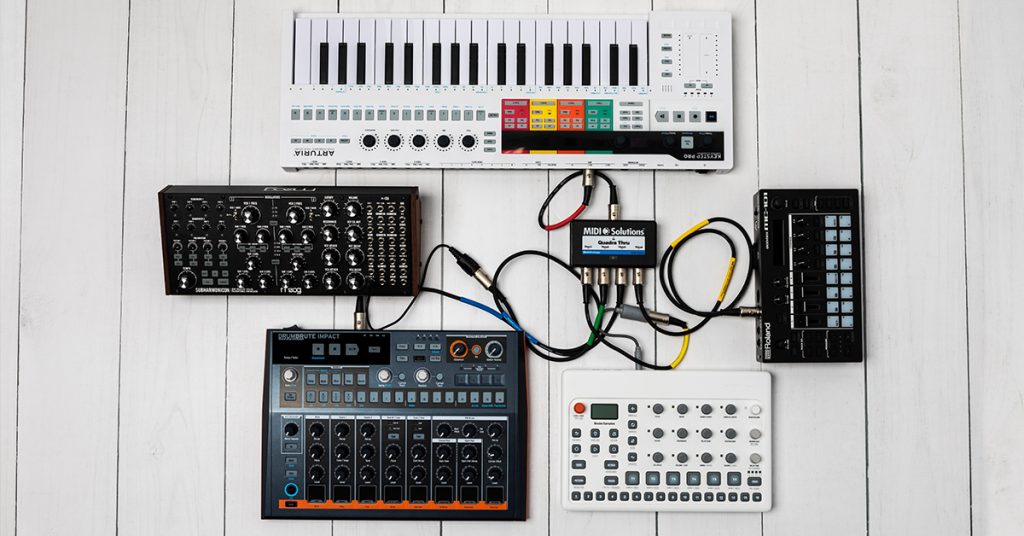
Learn more about how to sync MIDI hardware!
Learn MoreAdditional resources
When you need help, Sweetwater has the answers!
Our knowledge base contains over 28,000 expertly written tech articles that will give you answers and help you get the most out of your gear. Our pro musicians and gear experts update content daily to keep you informed and on your way. Best of all, it’s totally FREE, and it’s just another reason that you get more at Sweetwater.com.


Offer applies only to single-receipt qualifying purchases. Select manufacturers may require that only the manufacturer’s products qualify towards the minimum purchase amount needed to be eligible for promotional financing. Otherwise, an invoice that meets the minimum purchase amount and contains at least one qualifying manufacturer product is eligible for promotional financing. No interest will be charged on promo purchase balance, and equal monthly payments are required on promo purchase until it is paid in full. The payments equal the amount financed divided by the number of months in the promo period, rounded up to the next whole dollar. These payments may be higher than the payments that would be required if this purchase was a non-promo purchase. During the last month(s) of the promo period the required monthly payment may be reduced due to the prior months’ rounding. Regular account terms apply to non-promo purchases. New Accounts as of 07/31/2025: Purchase APR is 34.99%. Penalty APR is 39.99%. Min Interest Charge is $2. Existing cardholders: See your credit card agreement terms. Subject to credit approval.
Offer applies only to single-receipt qualifying purchases. No interest will be charged on the promo balance if you pay it off, in full, within the promo period. If you do not, interest will be charged on the promo balance from the purchase date. The required minimum monthly payments may or may not pay off the promo balance before the end of the promo period, depending on purchase amount, promo length and payment allocation. Regular account terms apply to non-promo purchases and, after promo period ends, to the promo balance. New Accounts as of 07/31/2025: Purchase APR is 34.99%. Penalty APR is 39.99%. Min Interest Charge is $2. Existing cardholders: See your credit card agreement terms. Subject to credit approval.
The estimated required monthly payment shown which excludes taxes and delivery equals the amount financed divided by the number of months in the promo period, rounded up to the next cent. During the last month(s) of the promo period the required monthly payment may be reduced due to this rounding. These payments apply only with the financing offer shown. If you make these payments by the due date each month, you should pay off this amount financed within the promo period, if it is the only balance you are paying off. If you have other balances on your account, this payment will be added to any other minimum monthly payments.
Applies only to select items from this manufacturer. Ask your Sweetwater Sales Engineer for more details.