
Akai Force Quickstart Guide
In this guide, we’ll show you how to get started with the Akai Force. That means, we’ll show you how its user interface works, how to update the firmware, and how to create a song. Follow the sections below to get started.
- Getting Started with Force
- Akai Force Firmware Update
- Create Your First Project
- Performing with Force
- Building a Song
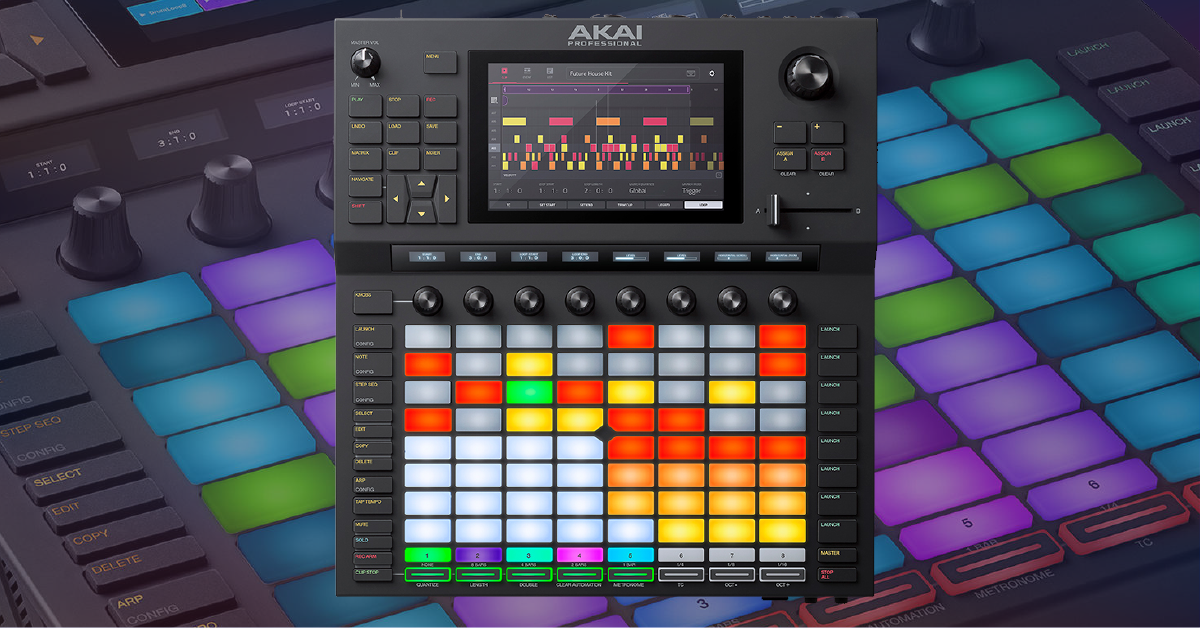
Getting Started with Force
Congratulations on your new Akai Force! We’ve created this getting started guide so you can enjoy making music right away. Let’s begin by checking that your Force has the latest firmware. After that, we’ll show you how to create your first project. Once you’re up and running, continue further below to learn tips and tricks for getting the most out of your Force projects.
Akai Force Firmware Update
If you’re getting started for the first time, we recommend checking for updates to the Force’s firmware. That means getting the latest updates and features to the Force’s internal software. The version on your Force will vary depending on when you purchased it, so updating is recommended before diving into music production. Check the Akai Force page for up-to-date information about firmware updates and their included features. Follow the instructions below to update the firmware on your Force.
- Go to the Akai Force download page to download and install the firmware file for your OS or USB. Go to your Downloads folder and run the installer.
- Windows (PC): Double-click the .exe file to begin the installation process.
- Mac Users: Double-click the .zip file to extract it, then double-click the Updater .app file.
- USB thumb drive: Move the file from your downloads folder to a USB thumb drive and connect it to one of the USB ports on the back of the Force.
- Power the unit on and connect it to your computer.
- Navigate to the Force Preferences by pressing the yellow Menu pad located next to the screen, then tap the gear icon. Hold the Shift pad then tap the Update button on the screen.
- Launch the firmware installer and follow the on-screen instructions. The unit will restart once completed.
Create Your First Project
Once your Force is on the latest firmware version, it’s time to dive into how the system works. The Force is essentially a sequencer, but you can input notes, record audio, and trigger sound by pressing the pads too.
When you want to start a new song, you’ll be creating a Project. Within the project, you will create all the tracks, each with their own unique instruments and sounds. Each track can play a series of clips, which are grouped in scenes. That means, for example, a project (song) will have a track for each of its instruments (sounds). You’ll enter clips (patterns) for each track, and then choose to play them back in groups of scenes (verse, build up, chorus, hook, bridge, drop, etc.). You aren’t limited to playing clips from one scene at a time, change it up and play clips from all over the place to explore your creativity.
- Turn the Force on, then press EMPTY PROJECT at the bottom of the touchscreen.
- If you already have a project open and want to create a new one, press the SAVE button. When the Save options appear, press NEW PROJECT.
Start with a template!
Templates are very useful for learning the ins and outs by exploring a premade Project. To load a preset Template, press the Load pad, tap Project, then open the Templates folder.
Performing with Force
Mode Overview
If you need to edit tracks or navigate to different parts of the project, you’ll need to change to a different mode. Within these modes, you can record, browse, delete, change note behavior, and more. Here’s a quick synopsis of what each mode does.
Matrix Mode
Matrix mode is your main window where you can view, record, arrange and play tracks.
Navigate Mode
Each project is an 8×8 grid. If you have a large project, go to Navigate mode and tap a location on the screen to take you to that part of the project.
Note Mode
While in Note mode, you can play and record different groups of notes. Each time you press Note, it will change the notes behavior. The options are Piano, Chromatic, Progression, Bass, Chords, and Guitar.
Launch Mode
Launch mode is for working with clips on every track. The LED’s on the pads line up with the columns on the Matrix screen.
Need to edit or delete clips?
- To delete a specific clip, go to Launch mode, hold the Delete pad and press the pad the clip is on.
- To copy a certain clip, hold the Copy pad and press the pad in which you’d like to copy. While still holding the Copy pad, press the pad where you want to copy it to.
- To change the default duration of a clip, hold the Shift pad and press Launch.
Building a Song
Once you’ve created a new project, it’s time to build your song using clips preset or custom clips. By default, each clip is two bars (eight beats). To shorten or lengthen them, you can enter Launch Config (SHIFT + Launch) and change the length of a clip. Follow these steps to create a song.
- Press the + button while on the Matrix screen and select the type of track you wish to add. You can also press and hold the track number pad at the bottom of the unit to choose the kind of track.
- Double tap an empty clip box to create a new clip.
- Record arm the track by pressing and holding the Rec Arm button while pressing the track number pad on the bottom, then press Record to begin.
- Tap the clip on the Matrix screen or the corresponding pad to begin playback. If there are multiple tracks on that scene, press the Launch pad of that row.
- To stop the scene, press the Stop All pad. To stop an individual clip, press the Clip Stop pad, then press the track’s number pad.
Recording drum beats?
While you can use the standard record function when recording drum beats, you may find it more convenient to enter Step Sequencer mode (Step Seq). The bottom left quadrant of pads are the drum samples, and the bottom right quadrant is for velocity. Just press a pad to select the sample, then use the top left and right quadrants to insert the sample on a specific beat.
Force Tutorial Series – Browsing Samples
Loading and Changing Instruments
You can load and change instruments after creating a new track or replace an existing one. You need to select or create a track, then go into the content library and load the instrument. Follow these steps to load an instrument.
IMPORTANT: If you wish to add more disk space, you must use an external drive. Do not delete internal content in an effort to make more space. Doing this will brick the unit, and will need to be serviced by Akai.
Instrument plug-ins
- Load an instrument plug-in by double tapping the name of the track to bring up the Track Settings screen. Alternatively, you can press the Load pad, and select the plug-in you wish to add.
- To change a plug-in, select the track, press the Load pad, then navigate to the instrument you want to switch.
Drums
- To load or change a drum kit, press the Load pad, then press the Kit icon that appears in the content screen. Select a kit, then tap LOAD on the display.
Are you importing custom audio samples?
If you want to load audio samples from an SD card or USB stick, press the Load button, then press Places on the left screen and select your external device. You can only load .WAV, .FLAC, and .OGG audio files.
Related Akai Content
AKAI FORCE Academy Tutorial playlist
When you need help, Sweetwater has the answers!
Our knowledge base contains over 28,000 expertly written tech articles that will give you answers and help you get the most out of your gear. Our pro musicians and gear experts update content daily to keep you informed and on your way. Best of all, it’s totally FREE, and it’s just another reason that you get more at Sweetwater.com.


Offer applies only to single-receipt qualifying purchases. Select manufacturers may require that only the manufacturer’s products qualify towards the minimum purchase amount needed to be eligible for promotional financing. Otherwise, an invoice that meets the minimum purchase amount and contains at least one qualifying manufacturer product is eligible for promotional financing. No interest will be charged on promo purchase balance, and equal monthly payments are required on promo purchase until it is paid in full. The payments equal the amount financed divided by the number of months in the promo period, rounded up to the next whole dollar. These payments may be higher than the payments that would be required if this purchase was a non-promo purchase. During the last month(s) of the promo period the required monthly payment may be reduced due to the prior months’ rounding. Regular account terms apply to non-promo purchases. New Accounts as of 07/31/2025: Purchase APR is 34.99%. Penalty APR is 39.99%. Min Interest Charge is $2. Existing cardholders: See your credit card agreement terms. Subject to credit approval.
Offer applies only to single-receipt qualifying purchases. No interest will be charged on the promo balance if you pay it off, in full, within the promo period. If you do not, interest will be charged on the promo balance from the purchase date. The required minimum monthly payments may or may not pay off the promo balance before the end of the promo period, depending on purchase amount, promo length and payment allocation. Regular account terms apply to non-promo purchases and, after promo period ends, to the promo balance. New Accounts as of 07/31/2025: Purchase APR is 34.99%. Penalty APR is 39.99%. Min Interest Charge is $2. Existing cardholders: See your credit card agreement terms. Subject to credit approval.
The estimated required monthly payment shown which excludes taxes and delivery equals the amount financed divided by the number of months in the promo period, rounded up to the next cent. During the last month(s) of the promo period the required monthly payment may be reduced due to this rounding. These payments apply only with the financing offer shown. If you make these payments by the due date each month, you should pay off this amount financed within the promo period, if it is the only balance you are paying off. If you have other balances on your account, this payment will be added to any other minimum monthly payments.
Applies only to select items from this manufacturer. Ask your Sweetwater Sales Engineer for more details.