
Creativity can be unruly. Sometimes inspiration strikes and the idea comes right away; and, other times, it’s an all-out struggle to find the idea. Often, capturing the perfect part in the studio is a similar experience. Sometimes you sing the line and it’s perfect from the start; other times, it takes multiple takes to get the phrasing, tone, and vibe just right.
While in the process of trying to capture the perfect part, you need a tool that stays out of your way and helps you get to the best part as quickly as possible.
With the addition of comping in Live 11, you now have an incredibly powerful tool that stays out of your way and helps you quickly capture the perfect part. Let’s dive into comping in Live 11 and talk about the multiple ways to use it.
What Is Comping?
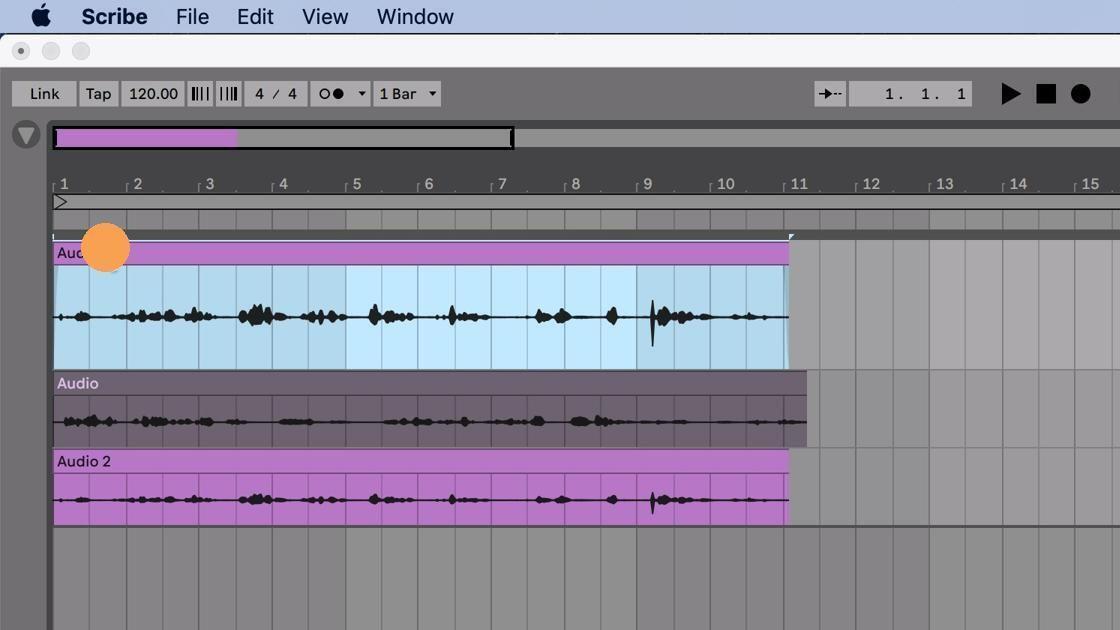
Comping is the process of recording multiple passes or “takes” of a single part and assembling the parts together into a composite track, or “comp.” For example, you can record multiple takes of a song line by line to form the perfect vocal part and afterward choose which parts of which takes sound the best. This allows you to create the “perfect take.”
In some ways, this tool can be “abused” to create parts that feel too perfect or artificial, but with power comes responsibility — and the ability to comp and help you quickly capture all your parts. This is an especially handy tool for those recording at home with no one around to engineer their session.
If you’re in your home studio trying to record vocals, then you don’t want to break the flow of the moment to fuss with re-enabling a track to record and starting and stopping your DAW. For example, you can enable the loop brace in Live to stay in the flow and record multiple takes of a chorus or even a specific part without stopping. Once you’re back at your computer, you can choose from various parts to assemble the perfect take.
So, now that we’ve established what comping is and why it’s important, let’s take a look at how comping in Live 11 works!
Recording the Perfect Take
First, before you create your perfect take, you’ll need to record a few parts. It’s worth mentioning you can comp both audio and MIDI in Live. For this example, I’ll be recording audio, but the exact same principles apply to MIDI, as well.
You’ll first need to make sure that your audio interface is set up, connected, and ready to record if you’re recording audio or that your MIDI controller is set up and connected properly if you’re recording MIDI. Check out these tutorials for a quick refresher:
Ways to Record Takes in Ableton Live
There are three ways to “record” takes in Ableton Live. Let’s take a look at each method.
Recording individual passes
Without needing to learn a new workflow, you’re already recording “takes” in Live 11. If you re-record a part in the same track, then you’ll automatically have that part captured and you may not even know it. Let’s take a look at how that works.

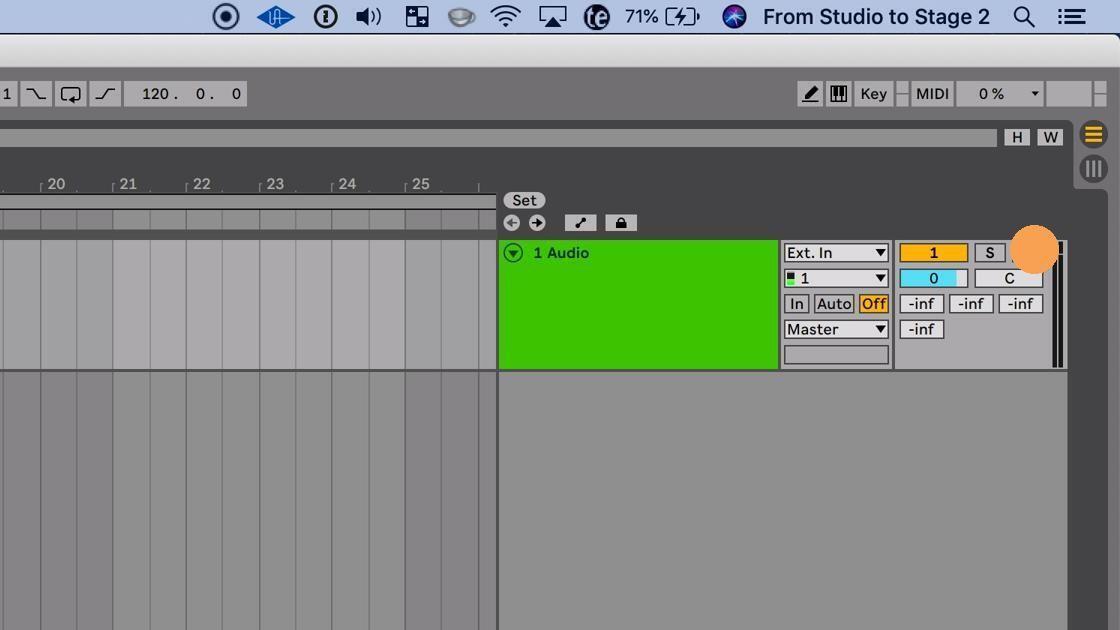
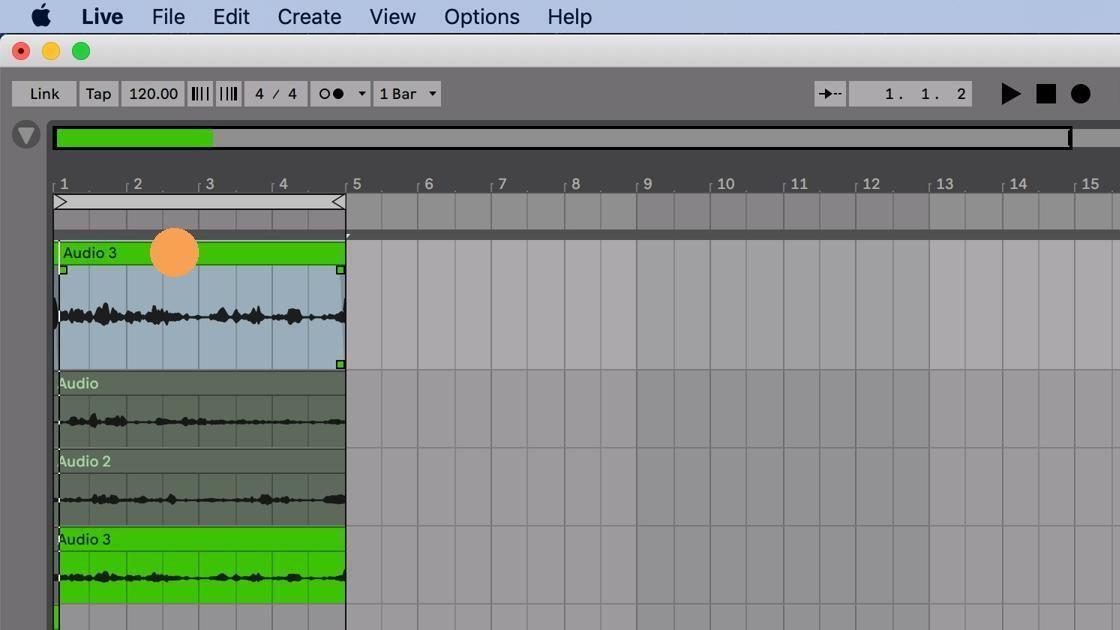
1. Click the Arm button to enable your track to record.
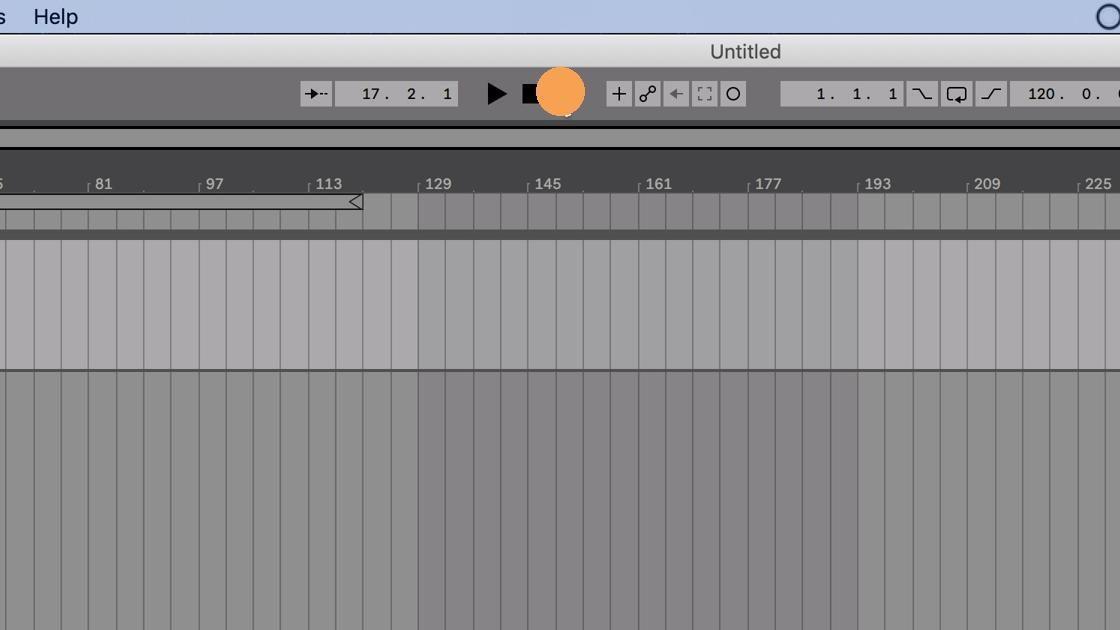
2. Click the Arrangement Record button to record the section of your song.
3. After you’ve recorded your song section, press stop.
4. Once you’re ready to begin again, press the Arrangement Record button one more time.
5. Click stop to stop recording once you’re finished.
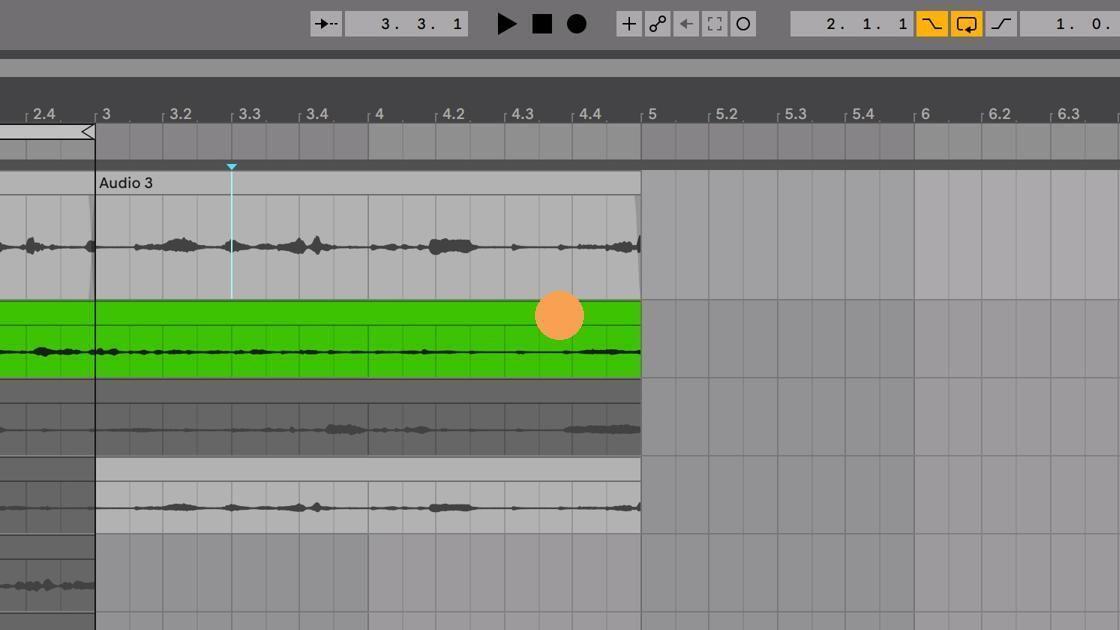
Now that you’ve got two “takes” recorded, let’s talk about how to see them.
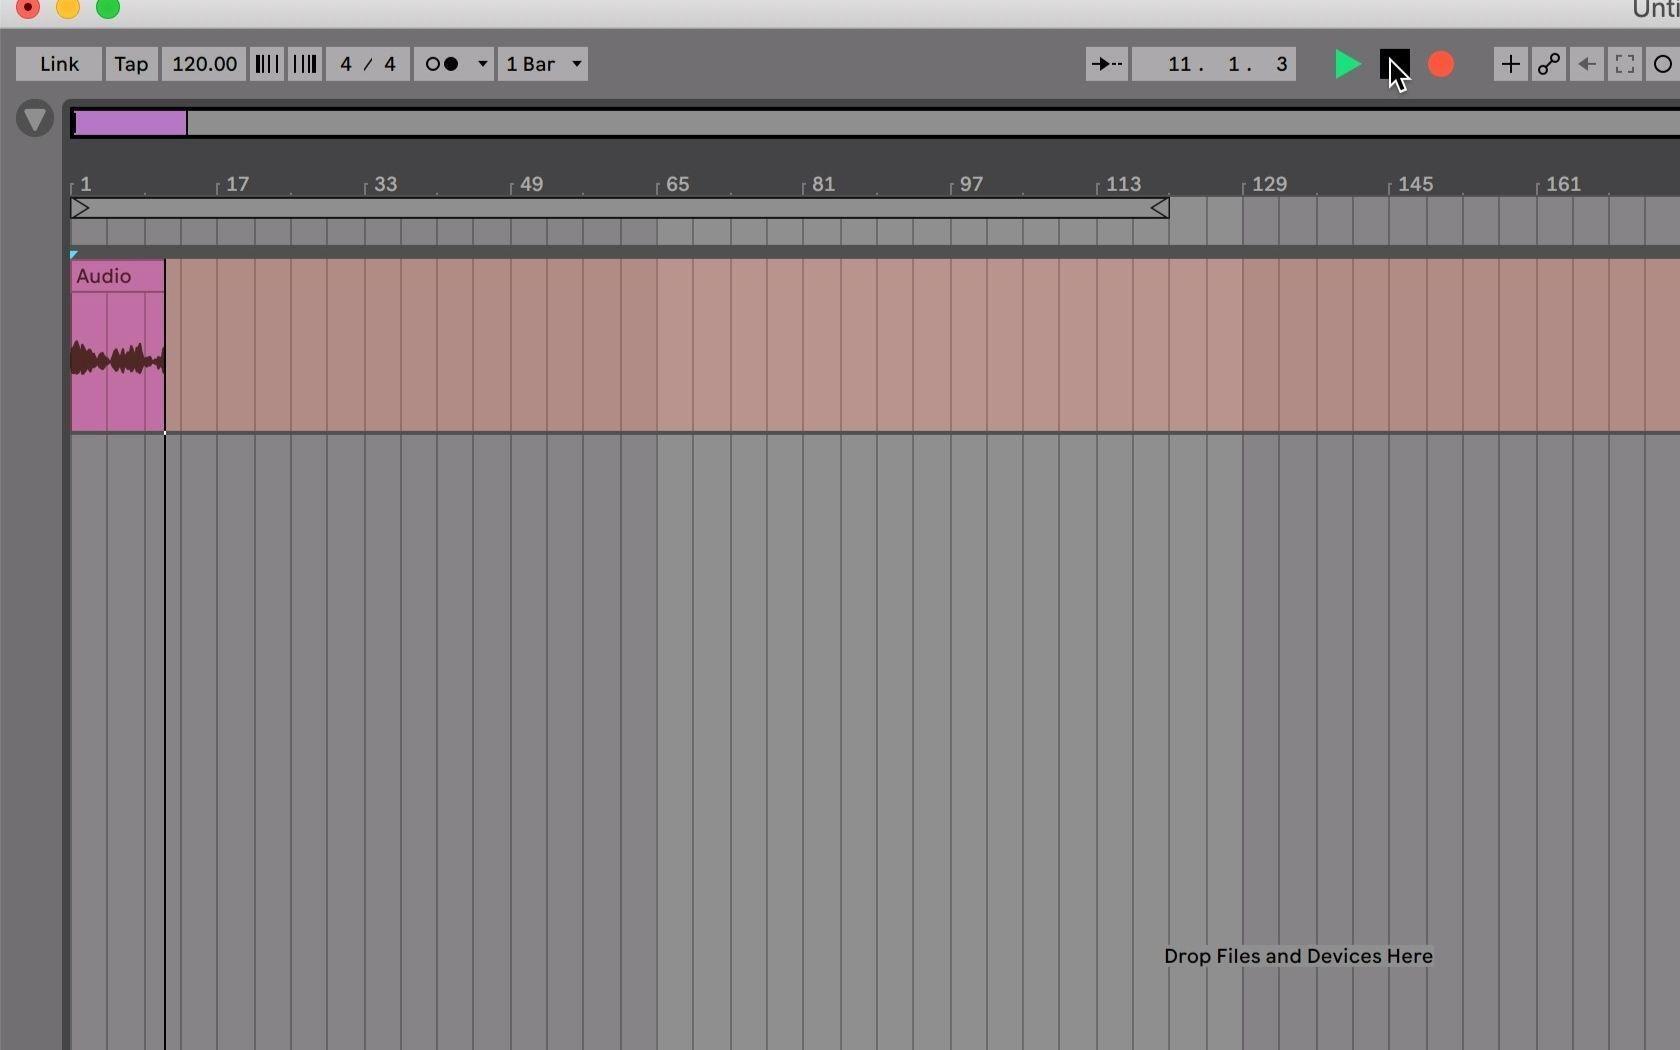
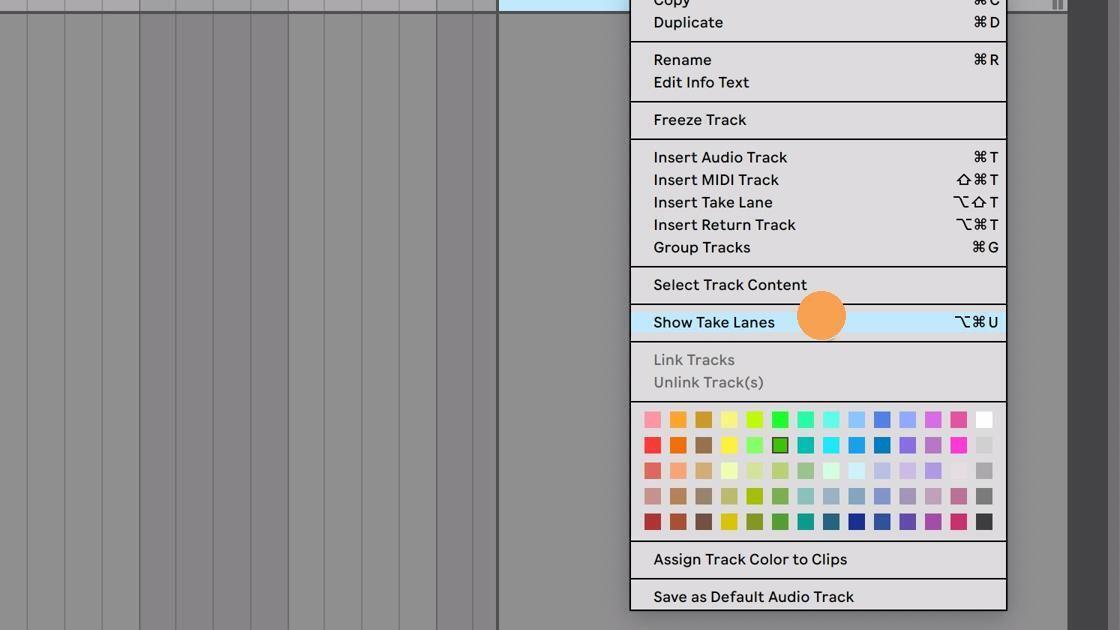
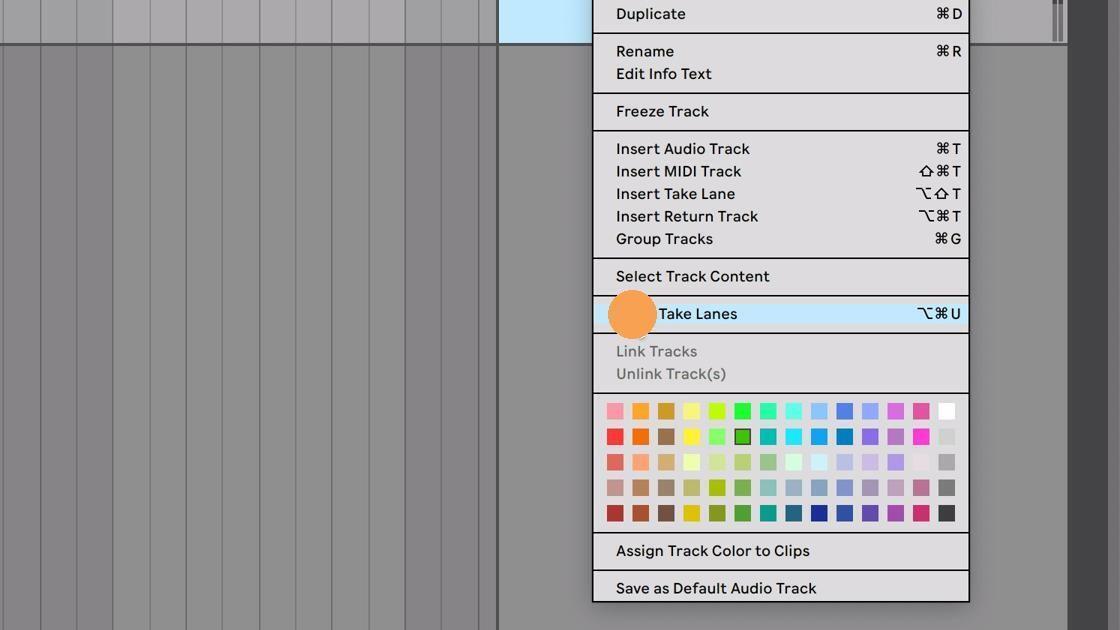
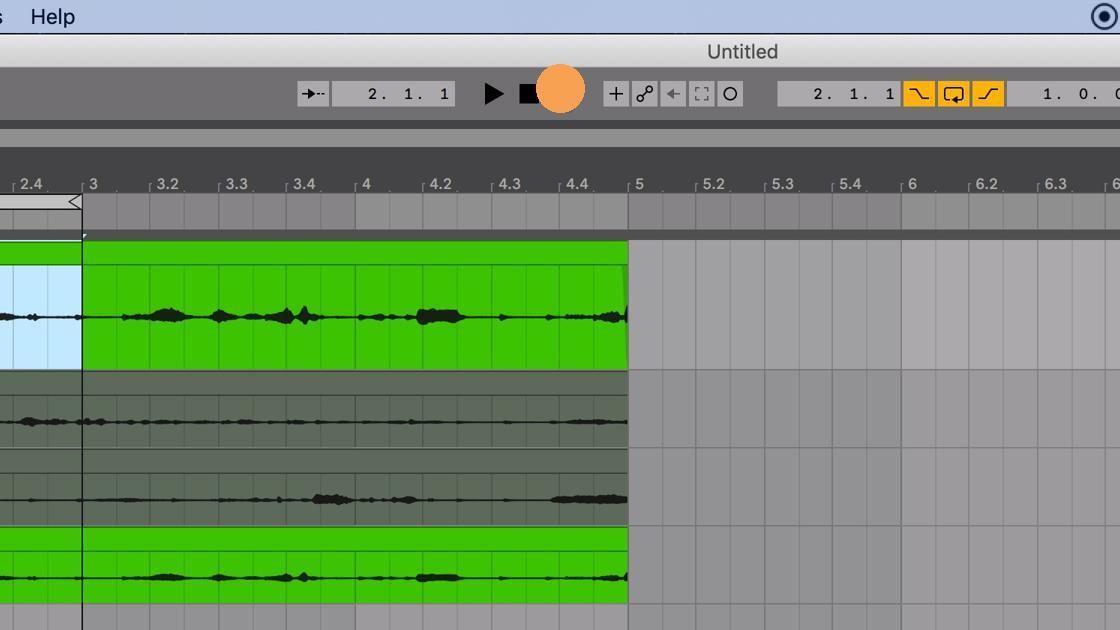
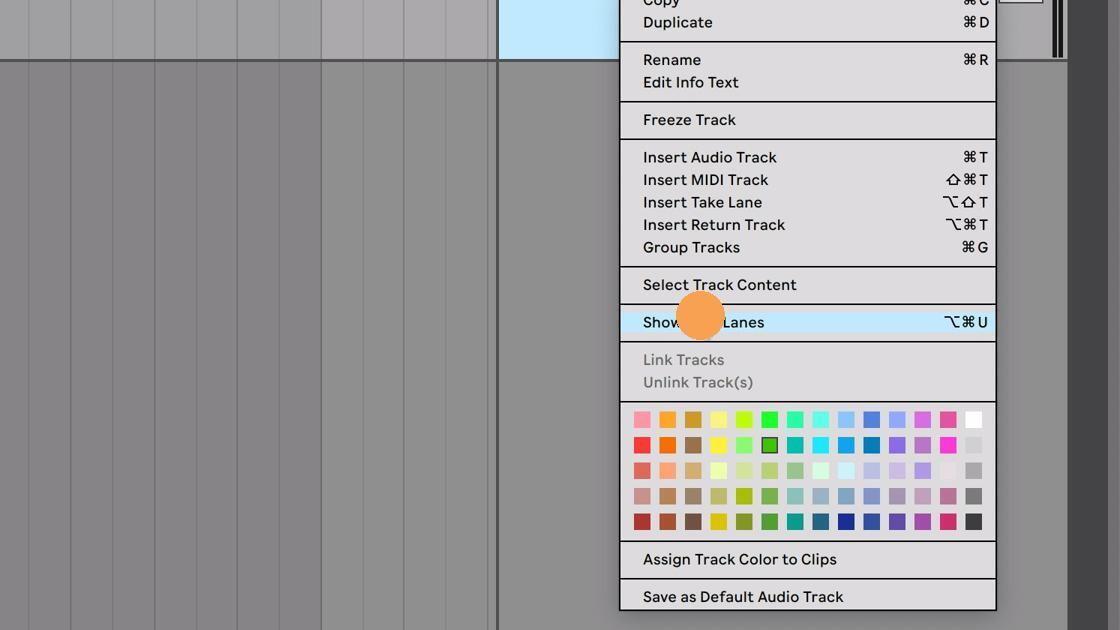
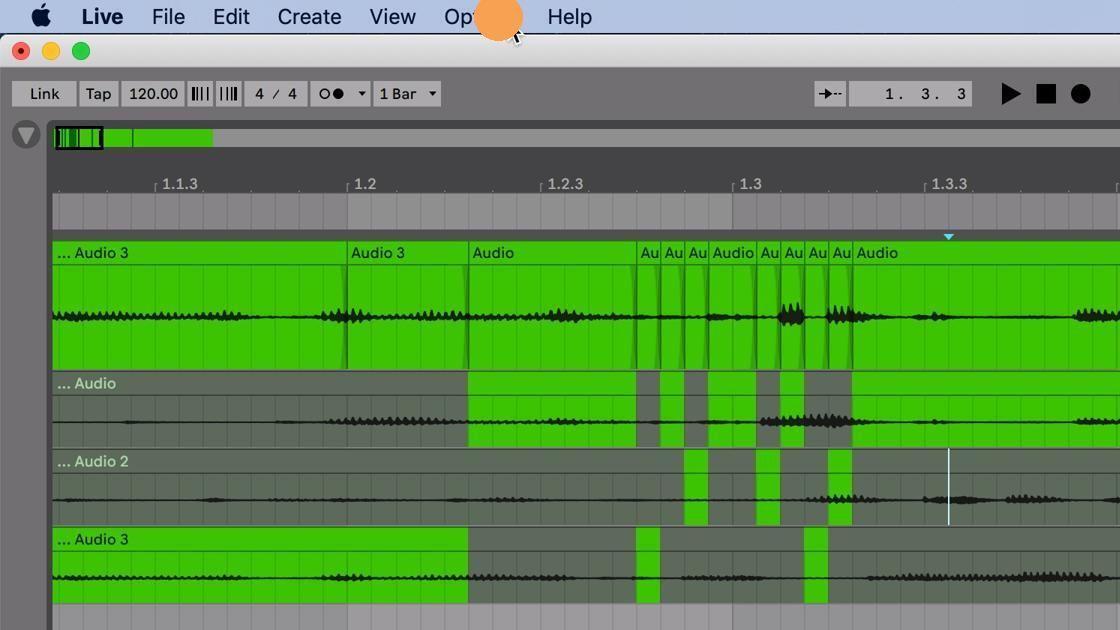
6. Right-click on your track and choose “Show Take Lanes.”
7. Now you’ll see both “takes” you recorded that you can use to comp together your final part.
If you don’t see “Show Take Lanes” when you right-click on your track, it’s because Automation Mode is enabled. Here’s how to disable it.
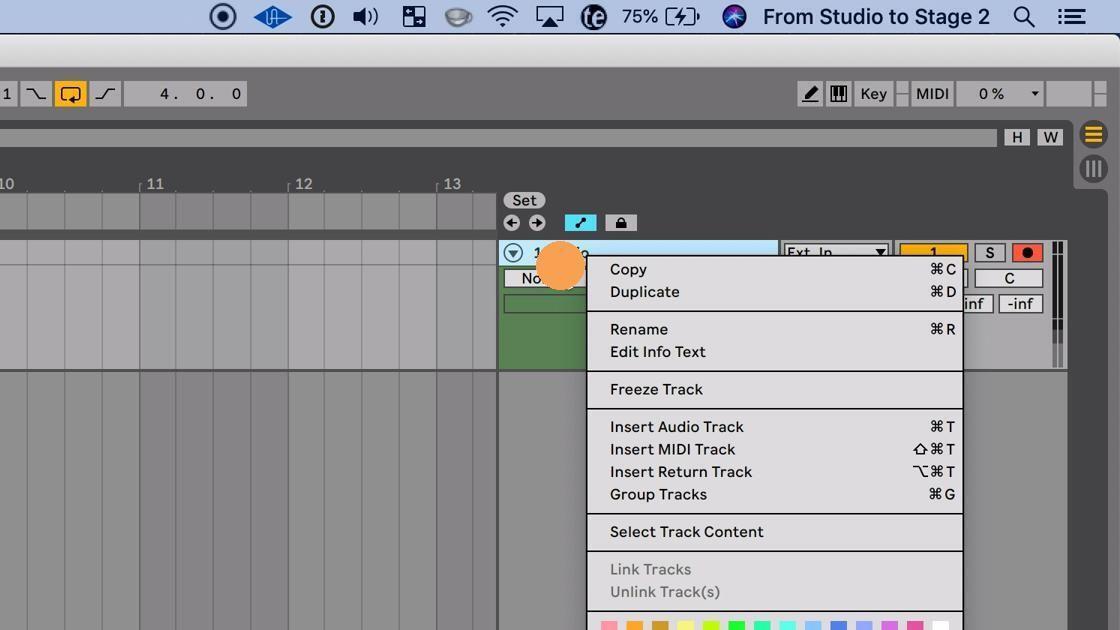
8. Right-clicking on a track with Automation Mode enabled, you’ll notice there is no “Show Automation Lanes” option in the drop-down.
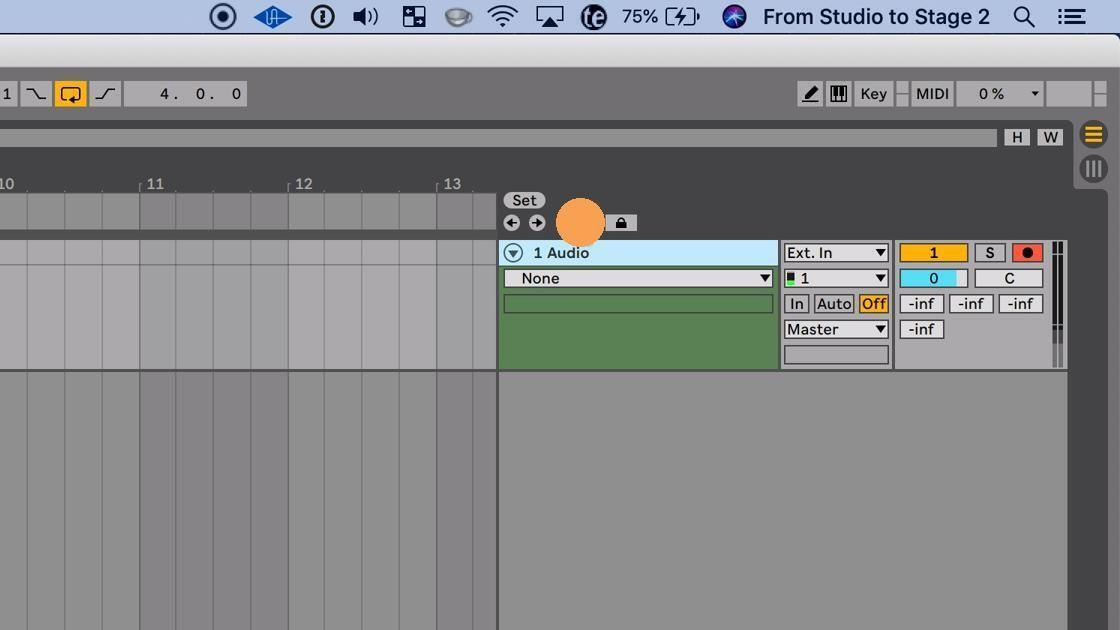
9. Click on “Automation Mode” to disable Automation Mode.
10. Right-click on your track again, and you’ll notice that, with Automation Mode disabled, the “Show Take Lanes” option is now available.
Recording with the loop brace
As I mentioned earlier, if you’re recording alone without an engineer or if you want to record multiple takes back-to-back without stopping, Live makes it incredibly easy to record multiple takes using the loop brace. Here’s how:
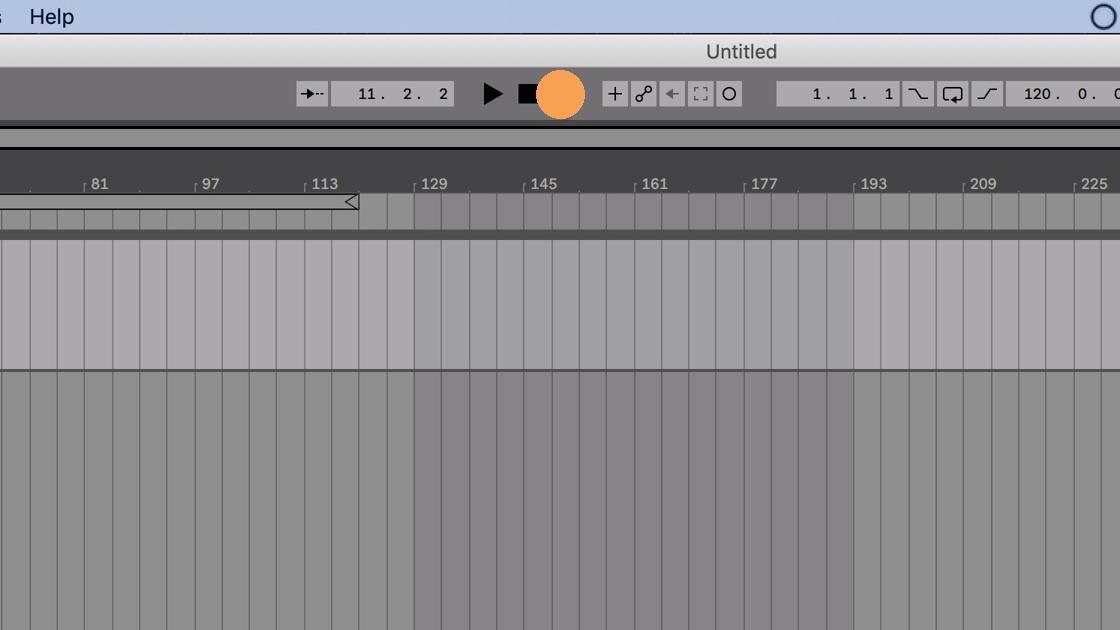
11. Click the Arm button to enable your track to record.
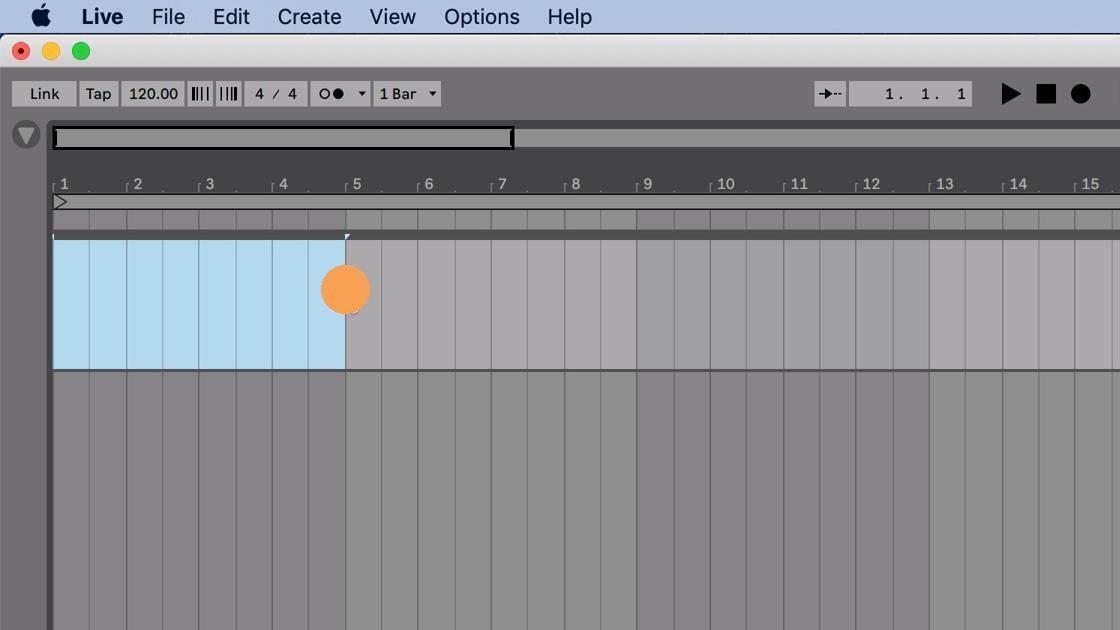
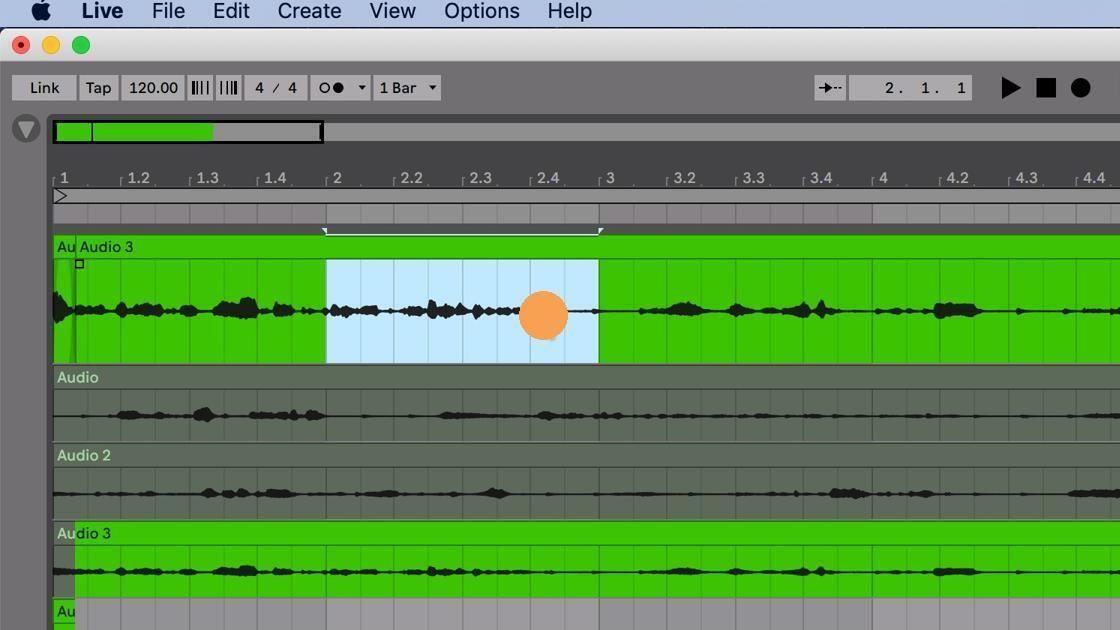
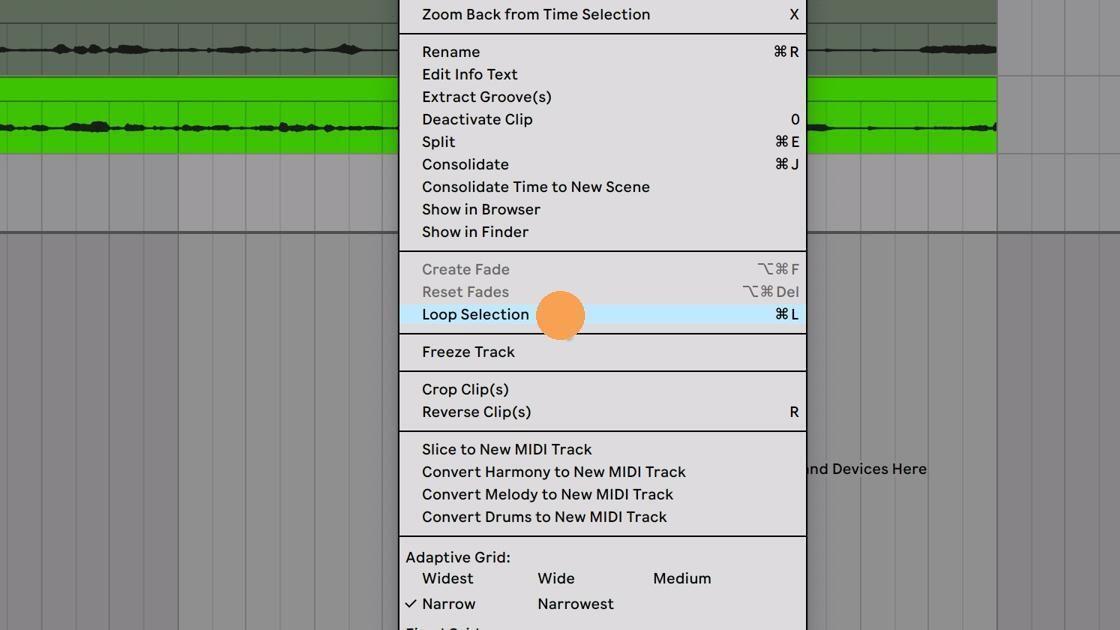
12. Select an amount of time that you’d like to loop while recording.
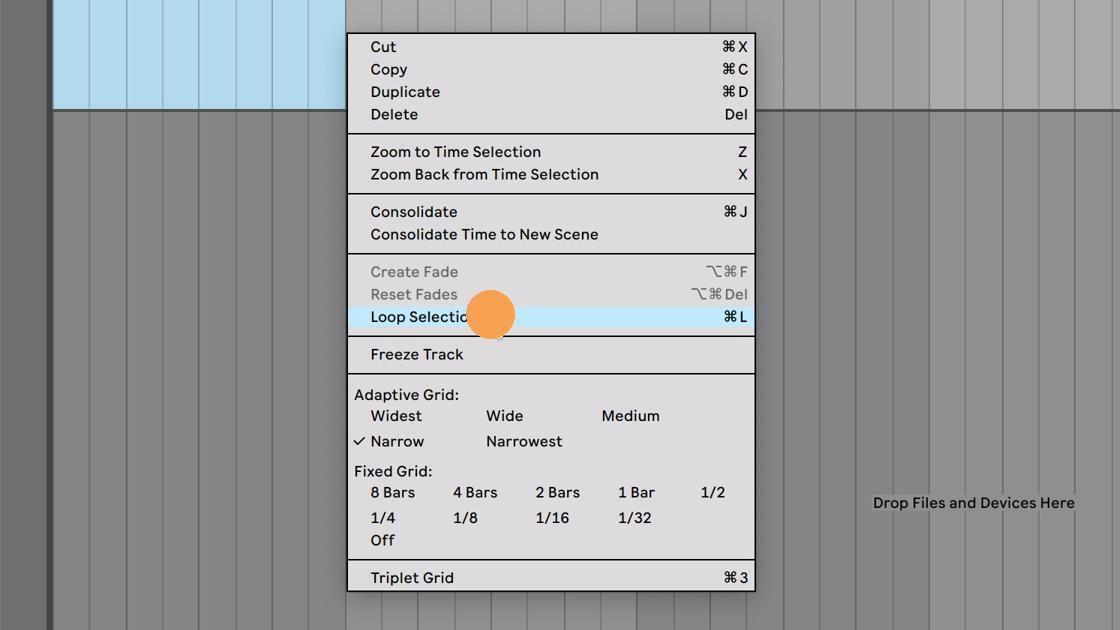
13. Right-click and choose “Loop Selection” to set the loop brace to that length of time.
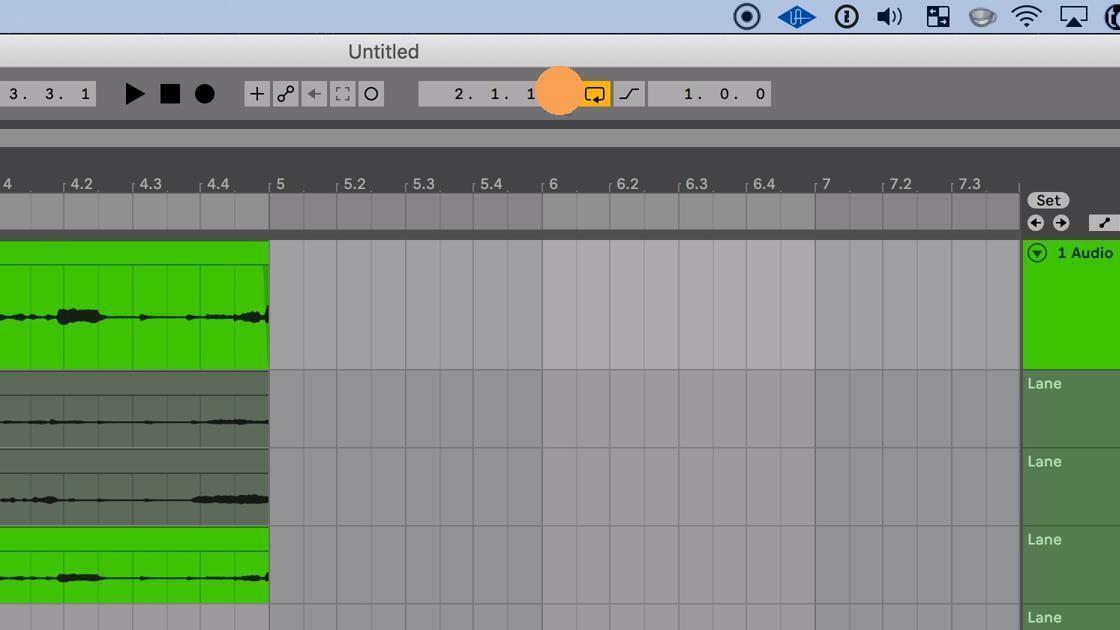
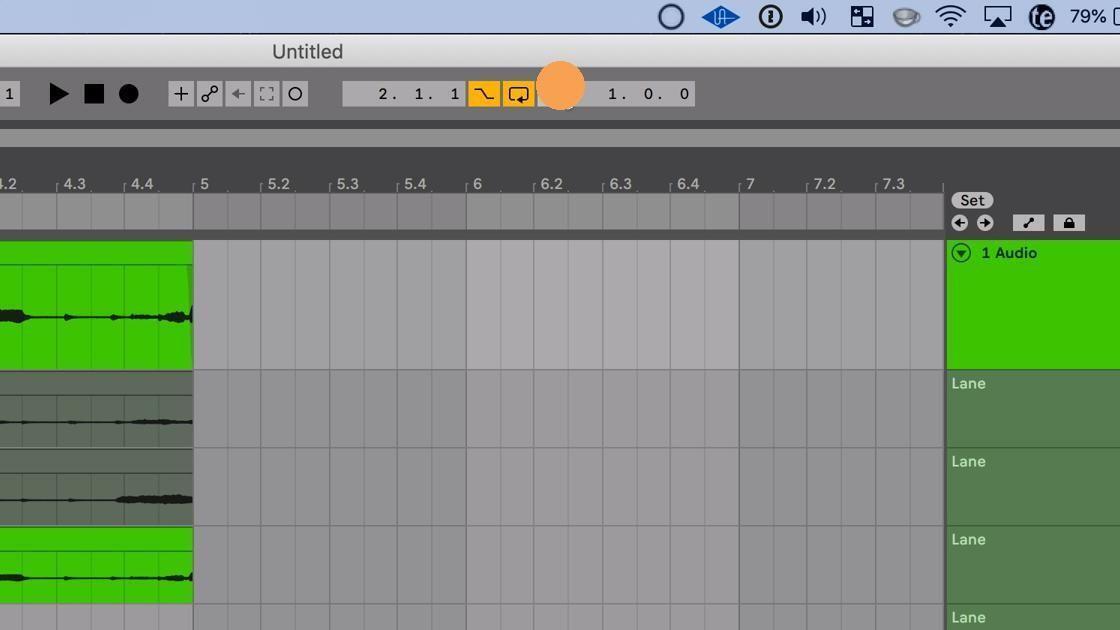
14. Click the Arrangement Record button to start recording.
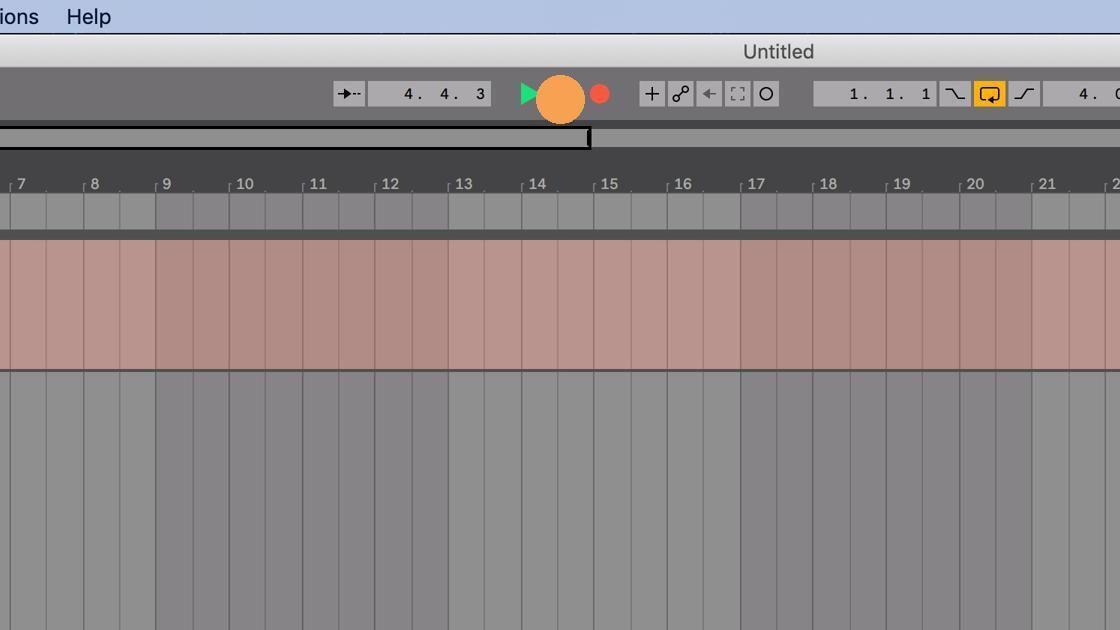
15. Record multiple takes of your part, and, once recording is done, press stop.
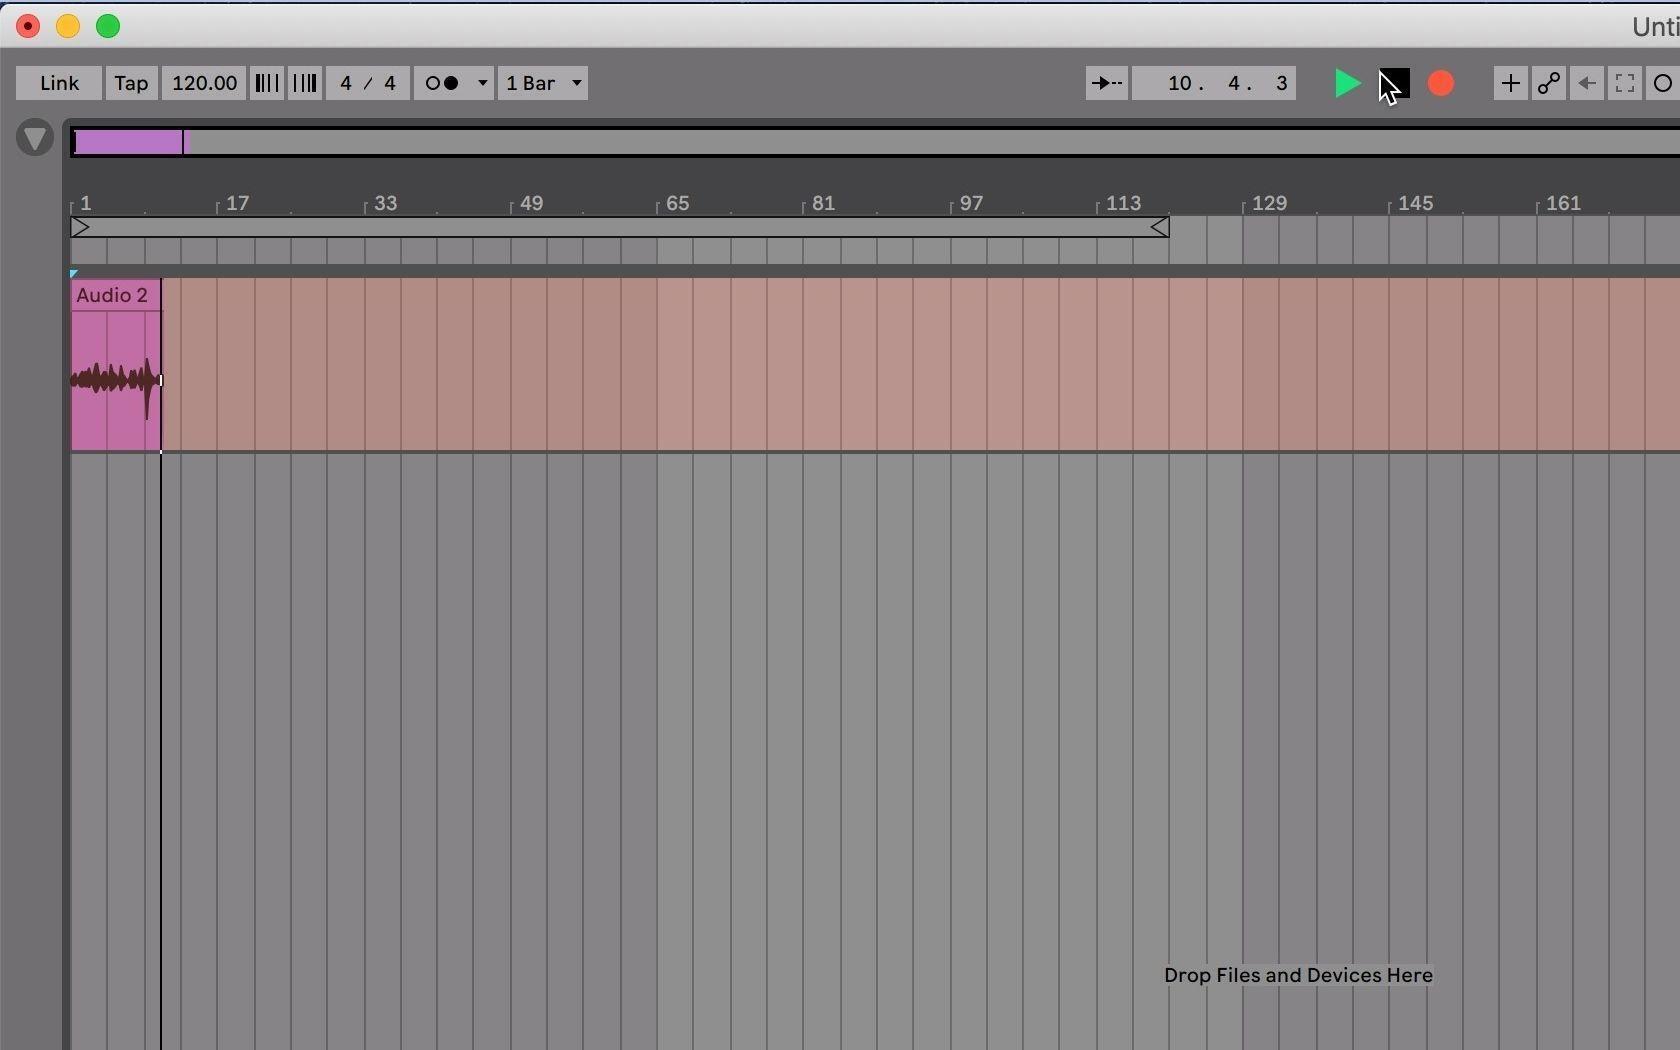
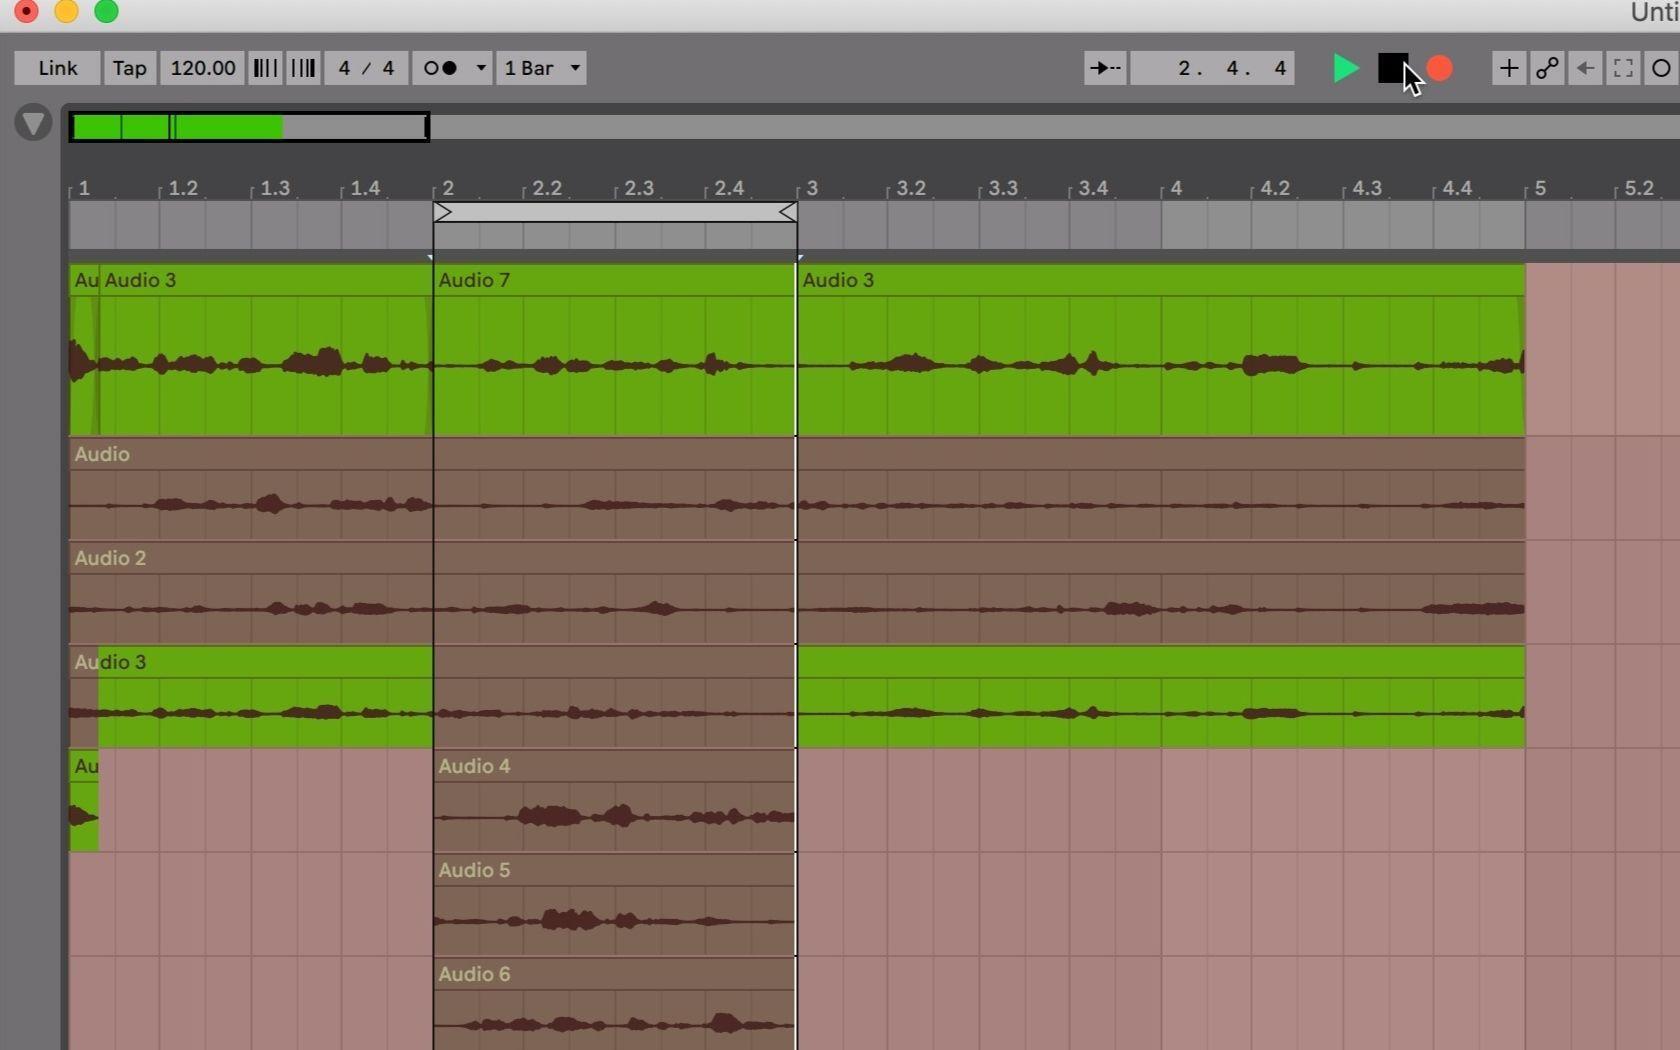
16. Right-click on your track and choose “Show Take Lanes.”
17. With take lanes visible, you can now see all the parts you recorded while looping.
Punch in/out takes
Once you’ve got a few parts recorded, you may want to go back and re-record one small section of a part. This is where recording using the Punch-In/Out buttons will come in handy. You don’t want to re-record an entire song if you only need to fix one small section. Even when you’re punching in and out, you’re still recording takes. Let’s take (pun intended) a look at how that works.
18. Click the Arm button to enable your track to record.
19. Click and drag on your clip to select the time frame you’d like to punch in and out.
20. Right-click and choose “Loop Selection.”
21. Click on the Punch-In switch to set your punch-in point.
22. Click on the Punch-Out switch to set your punch-out point.
23. Once you’re ready, click the Arrangement Record button.
24. Once recording is complete, click stop to stop recording.
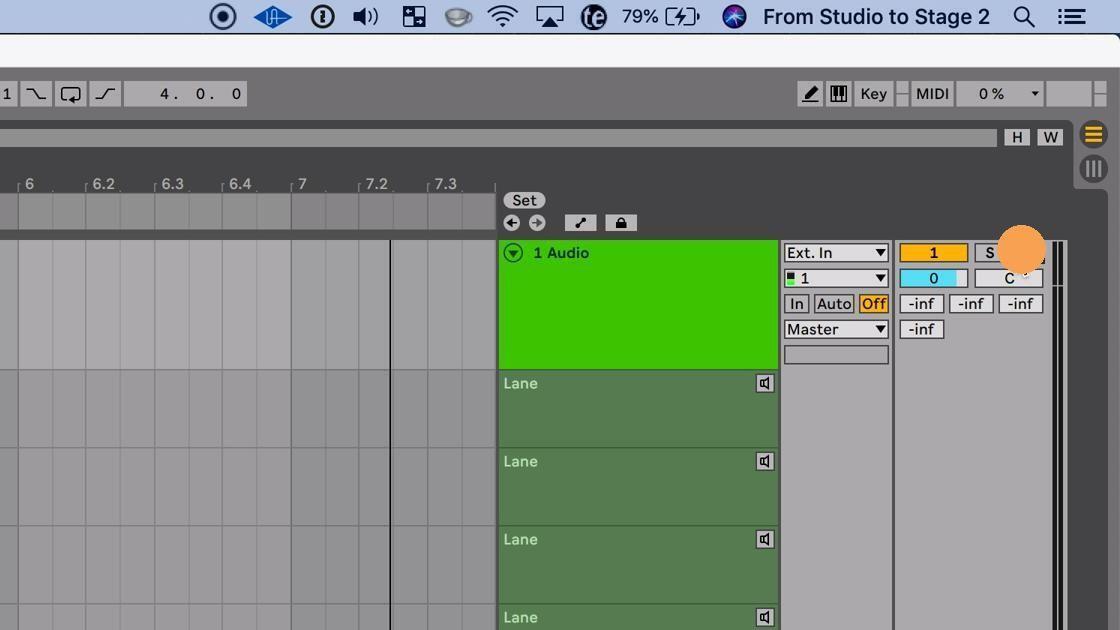
25. With “Show Take Lanes” enabled, you’ll notice the multiple takes of your punch-in in new take lanes, below your previous takes.
It’s worth noting that you don’t have to “loop record” in order to punch in and out. I find enabling loop is a timesaving way to set your punch in/out points. If you’d like to record only once, then you can click the Loop switch (between the Punch-In and Punch-Out switches) to disable loop.
Auditioning Take Lanes
Now that you’ve got your recorded takes, you need to decide what parts you want to use in your final comp track. Before you can start “comping” your vocals, you need to listen to them in isolation to determine what parts you want to keep. Here’s how:
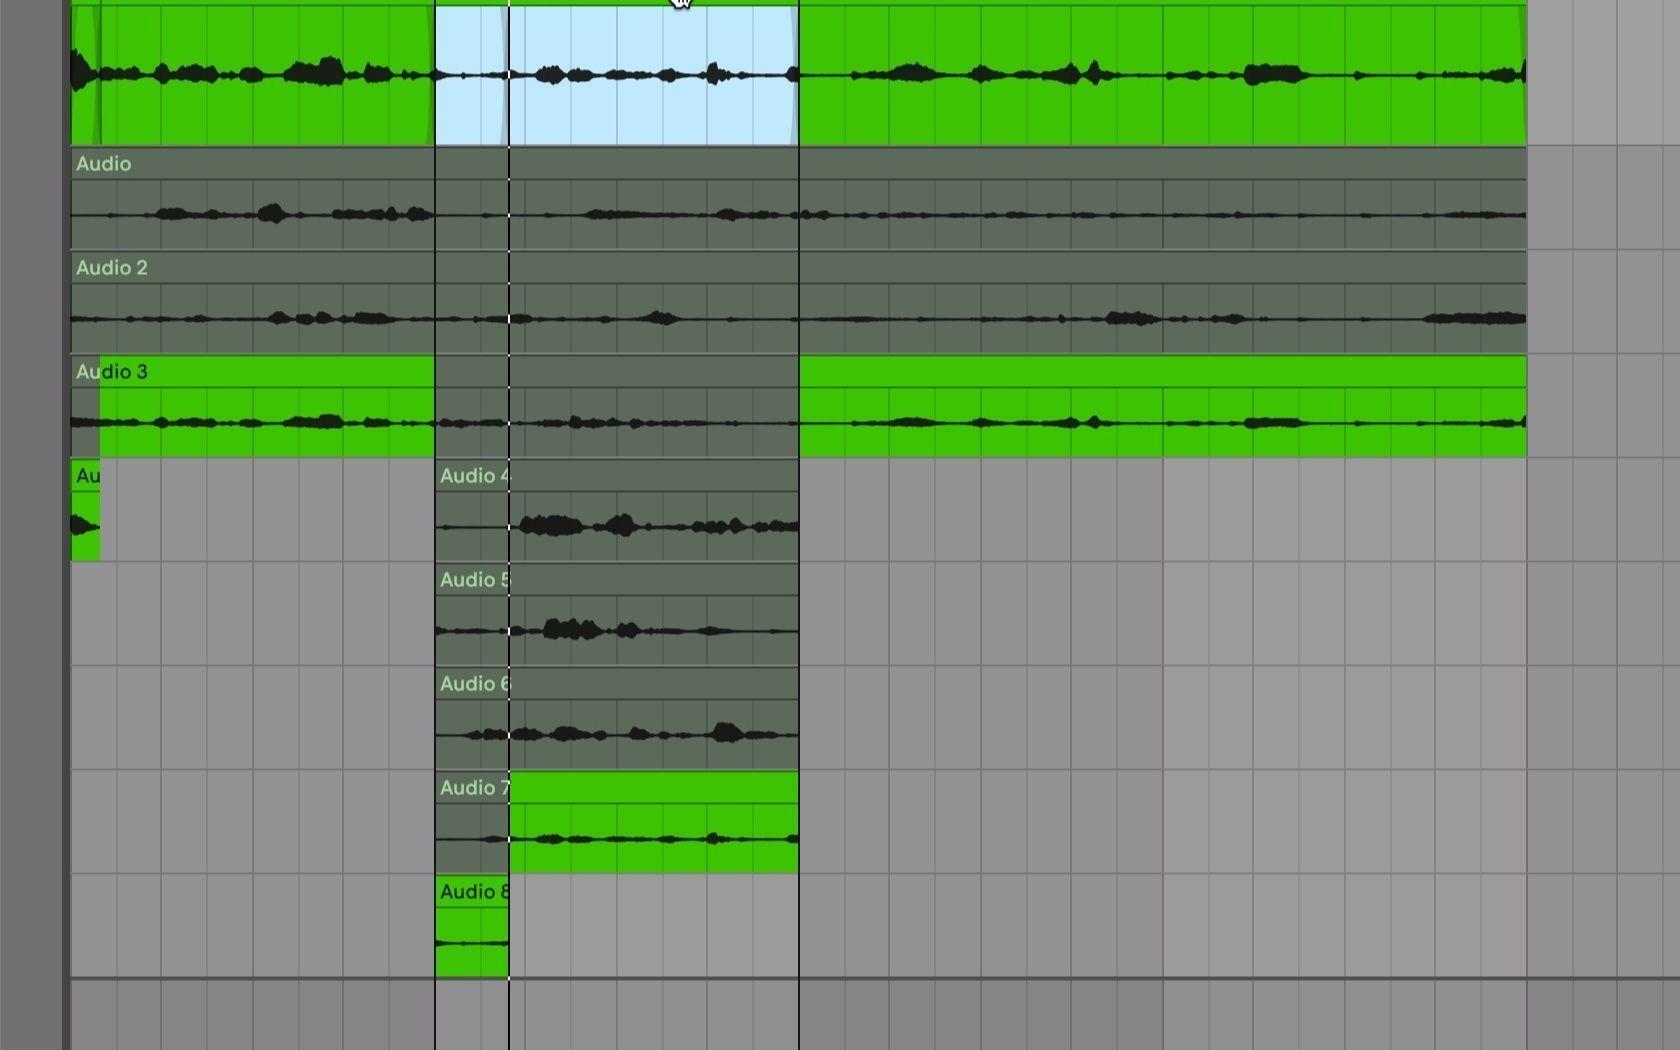
26. Click the Audition Take Lane button on the take you want to listen to.
27. You’ll notice the take lane you’re currently hearing retains its color, while other takes turn gray to signify they aren’t currently active.

28. You can also click on the take lane you’d like to hear and type “T” to audition that particular take in isolation.
Creating the Comp
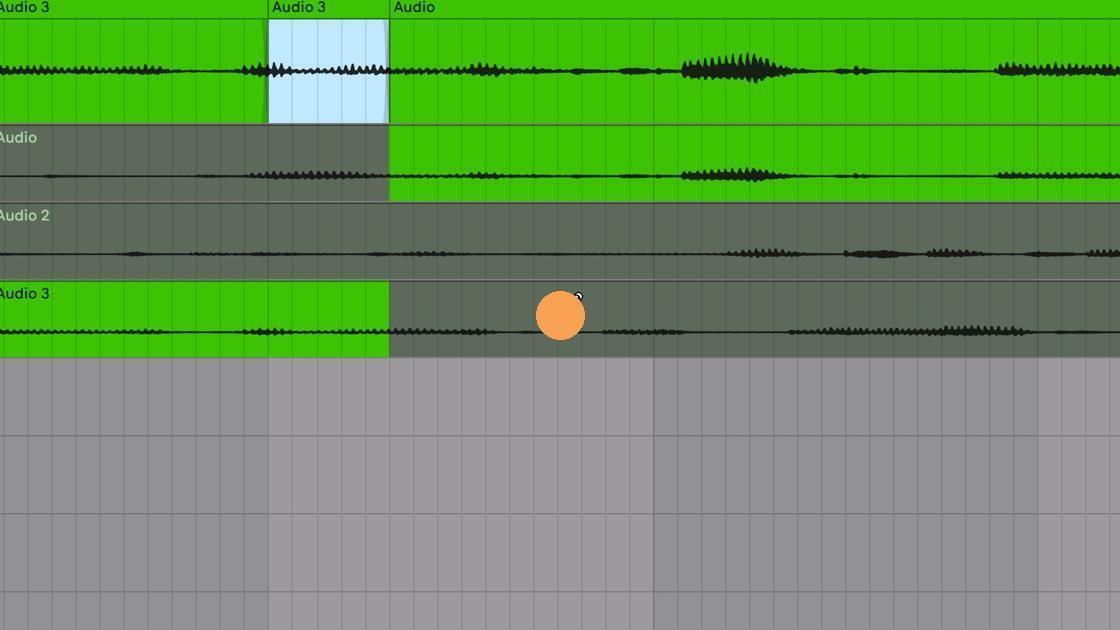
Now that you’ve recorded multiple takes and auditioned those takes to determine what you want to keep, you now need to create your composite track, or “comp.” This involves choosing what part of each take you want to use and copying that selection to the main lane. Here’s how you can quickly do that in Live.
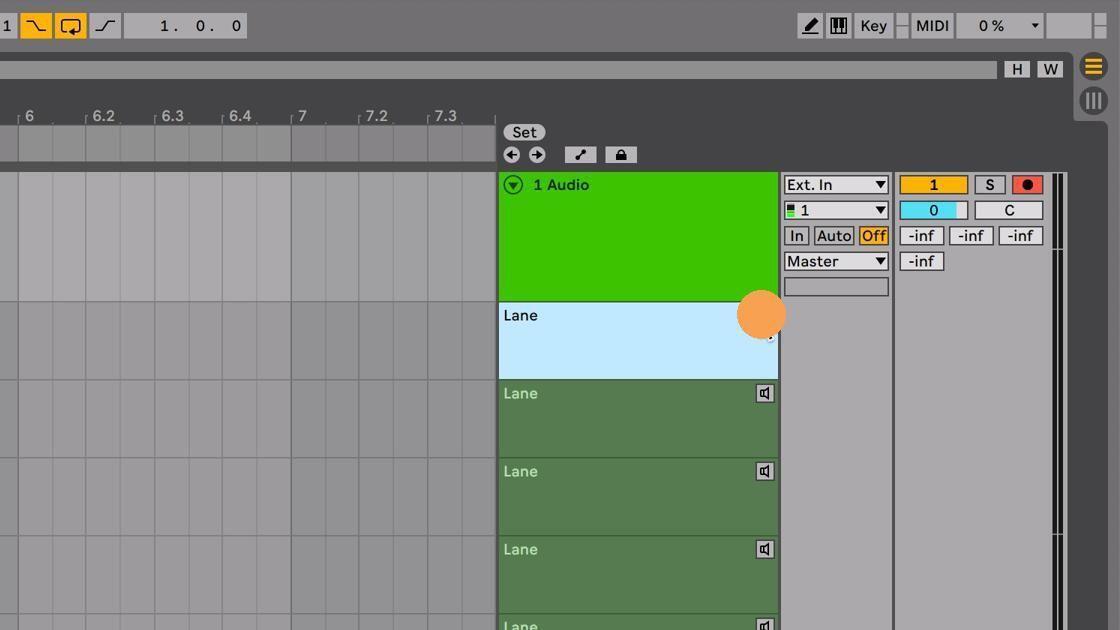
29. Make sure “Show Take Lanes” is enabled. If you don’t currently see your take lanes, then right-click on your track and choose “Show Take Lanes.” As a reminder, if you don’t see that menu option, then make sure to disable Automation Mode as shown earlier in the article.
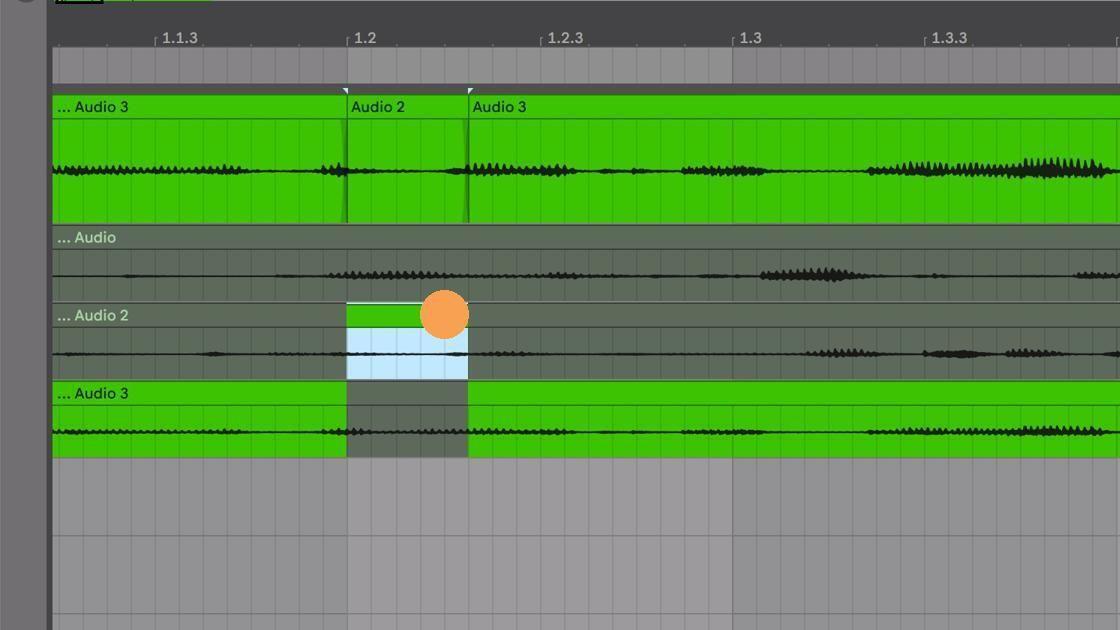
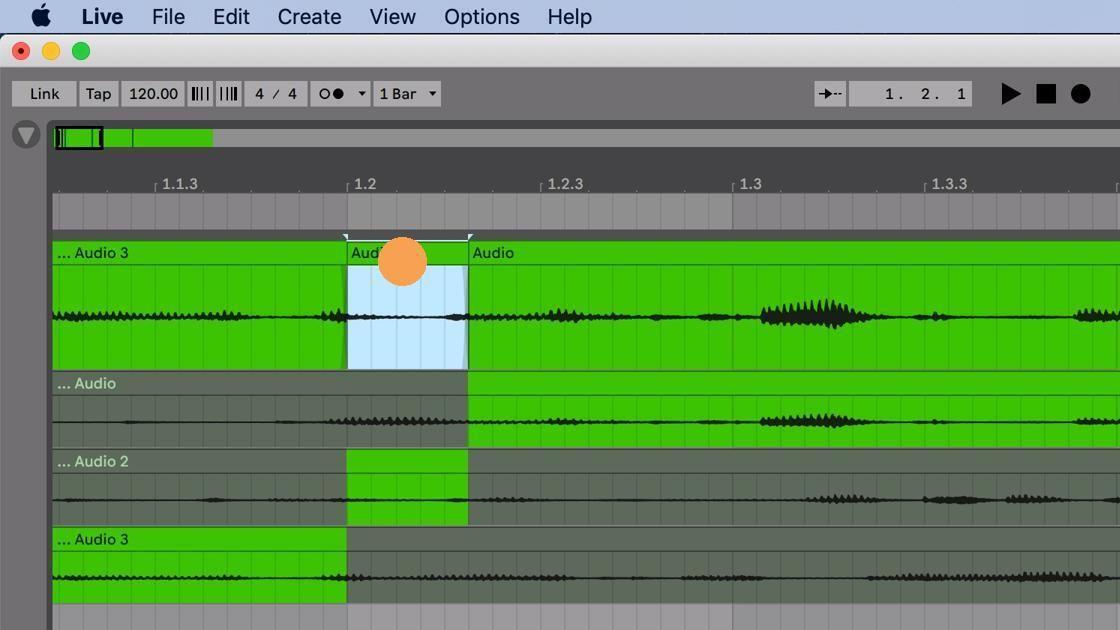
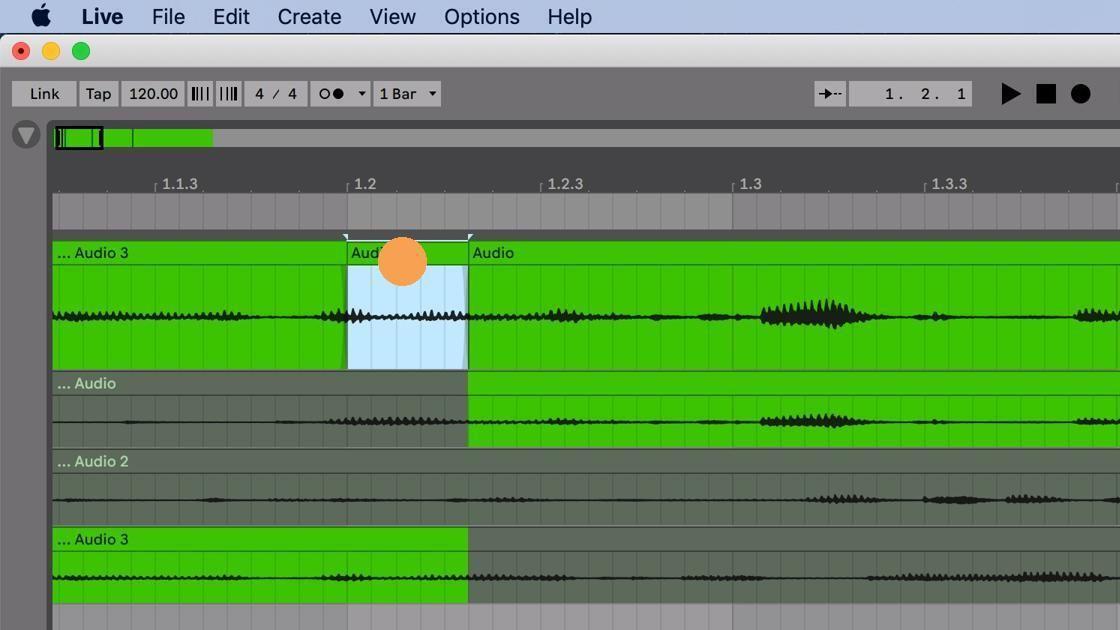
30. Select a time frame of a take that you want to move to the main take lane and press Return. You’ll know which take is currently being used because inactive takes will be grayed out.
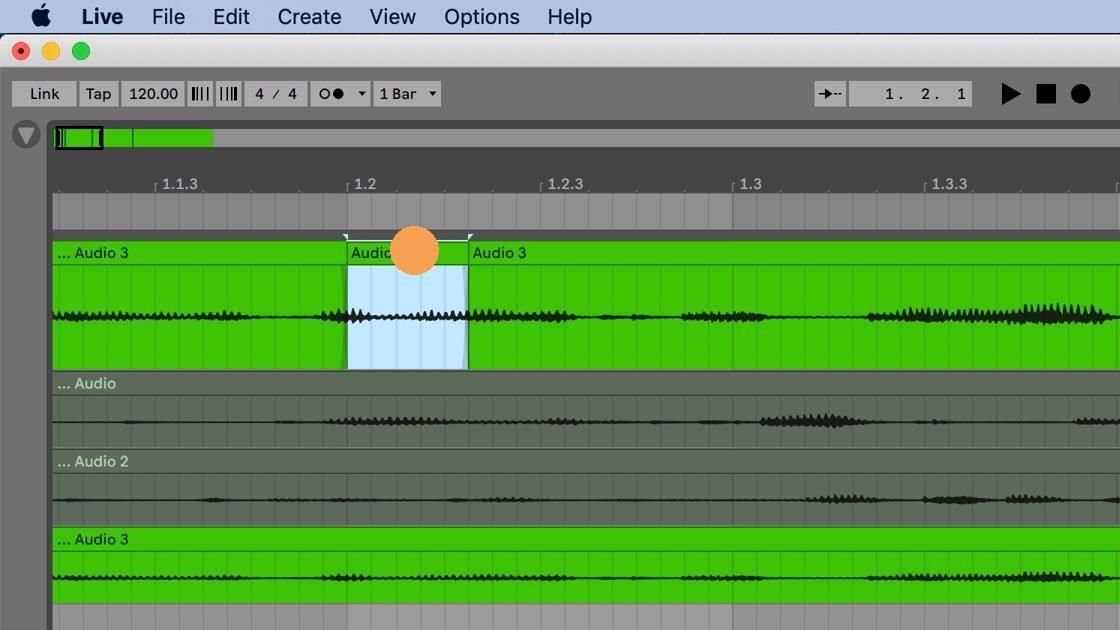
31. (1/3) To quickly audition the other takes within that same time range, click on the clip in the main take lane. Press Command-Down to navigate down and press Command-Up to navigate up through the various takes — all within the same time range.
32. (2/3)
33. (3/3)
34. (1/2) You can also use Draw Mode for precision selection of various takes. Press “B” on your keyboard and click and drag throughout your arrangement to choose various parts of takes.
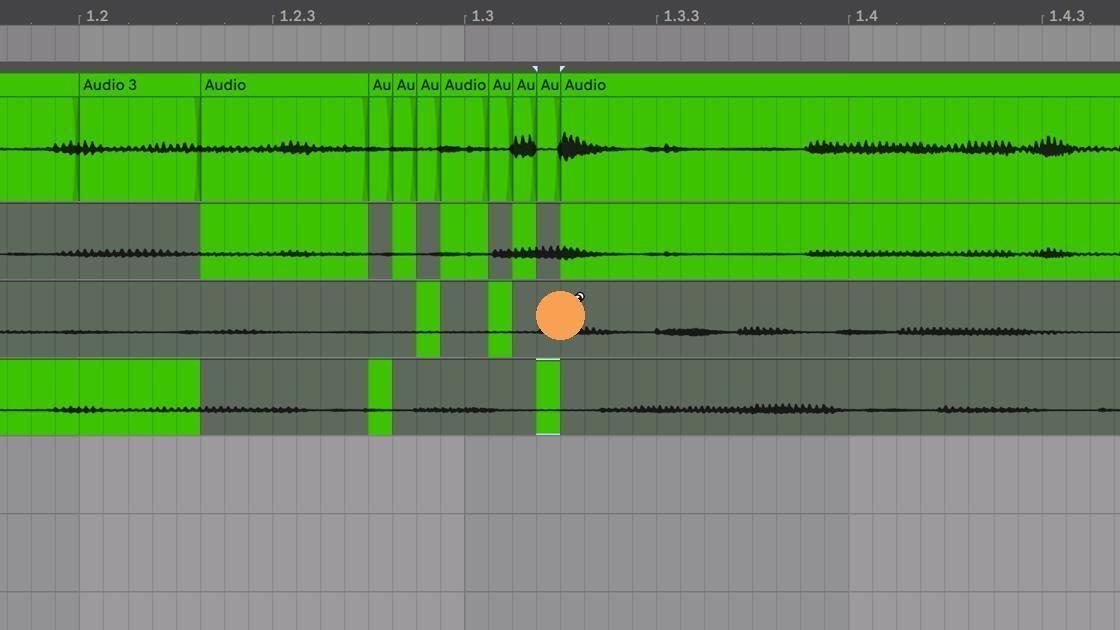
35. (2/2)

36. You can also click and drag on the edges of a take lane to get your comp just right. Drag slightly to the left or right to find exactly when you want to swap between various takes.
You may find that you need more control of where to select in your clip. By default, Live will “Snap to Grid” to keep everything in time. You may need to get more accurate control selection by disabling “Snap to Grid.” Here’s how:
37. Click the Options menu.
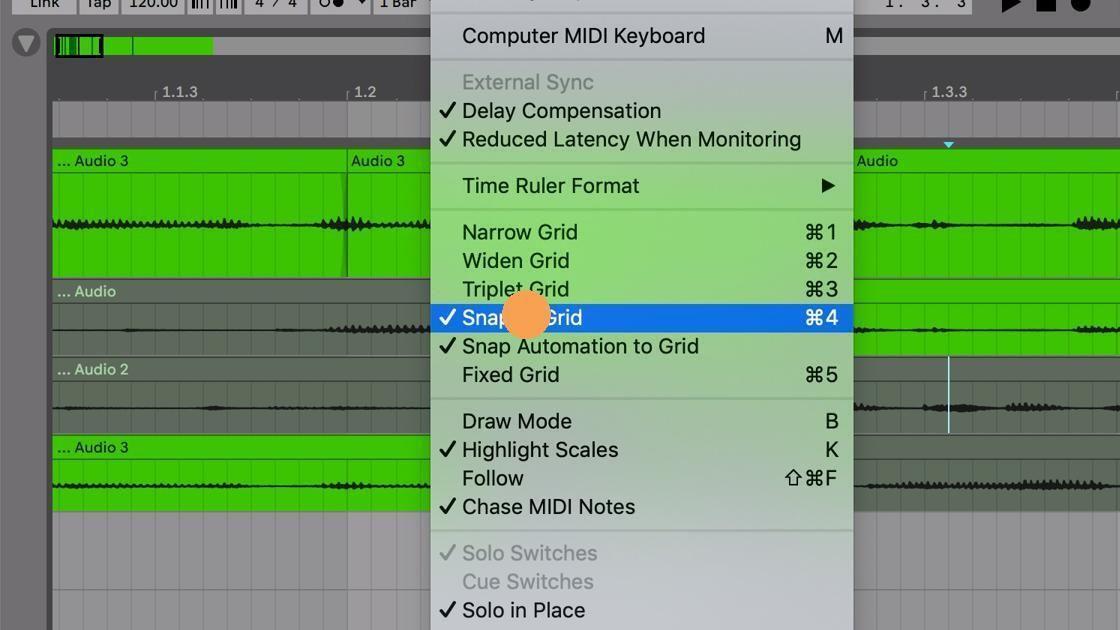
38. Click “Snap to Grid” to disable the “Snap to Grid” feature. You can also use the Command-4 shortcut or hold Command to temporarily disable “Snap to Grid” when it’s enabled.
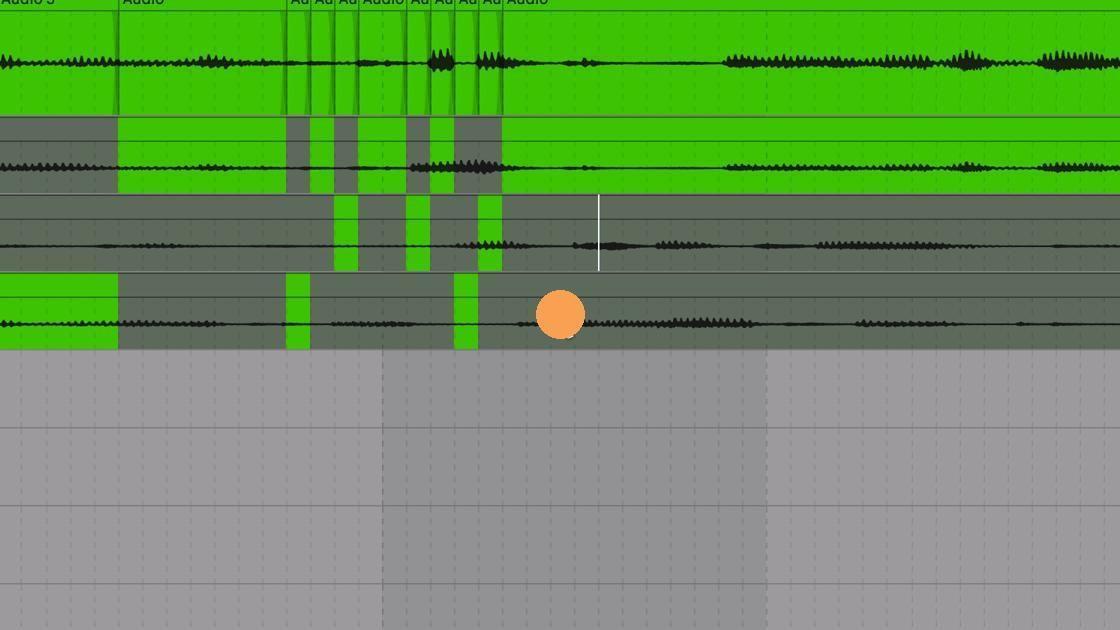
39. Now you can click and drag freely to highlight time sections without being locked to the grid.
Finally, for even more control of your comp, and to “clean up” any bad transitions between takes, you can select a time range between two takes in the main take lane.
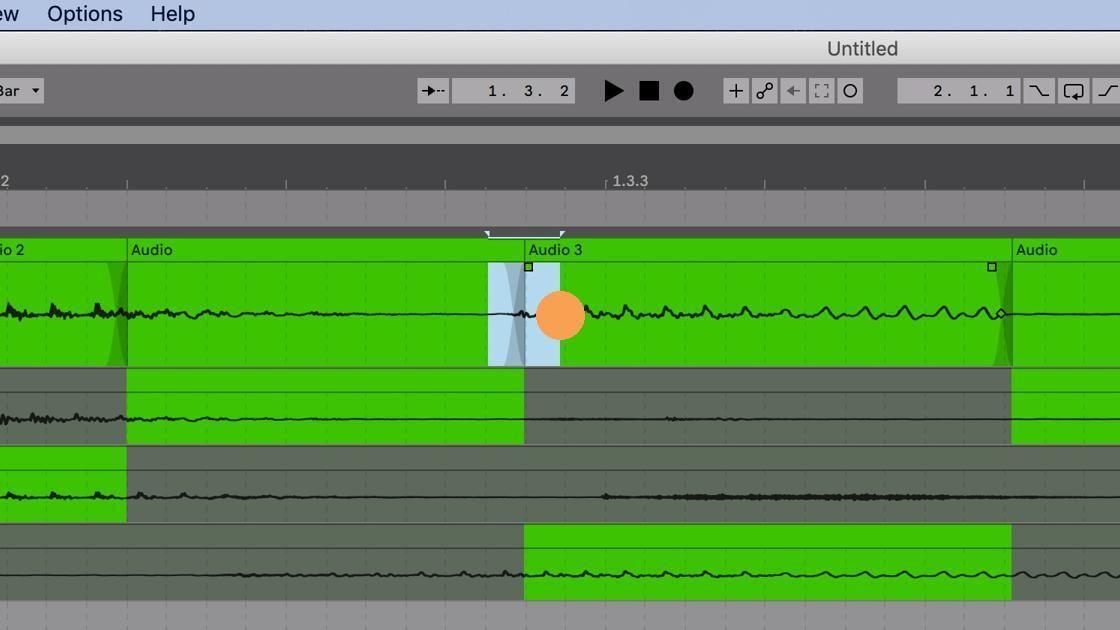
40. With your time range selected, press Command-Option-F to apply a fade to the clips’ edges.

41. You can also manually adjust the fade between takes using the fade-out start handle and the fade curve handle.
In Search of the Perfect Take
Recording the perfect take is difficult if not nearly impossible. By using comping in Live 11, not only will you be able to craft the perfect take, but you also can stay in the moment and continue to create and then edit later. Similar to Stephen King’s advice to authors, focus on creating your crappy first draft (or crappy first take) and edit and craft it later into the perfect take.