
I got a call asking me to perform in a theater show called Mercury: A Tribute to the Music of Freddie Mercury. As you know, most of Freddie’s work was with Queen, which features the legendary guitar work of Brian May. Killer music, iconic guitar parts, the signature sound — I’m in! It’s not a “tribute band,” as such, so no Red Special or curly, white ‘fro for me, which is good because I look nothing like Brian May.
Two Essentials
First, learning the parts would be fun because most of those songs are burned into my brain and Brian’s feel and phrasing are the stuff of legend. I knew the tricky part would be deciphering what part of which layer to play, but, heck, Queen did it as a quartet for decades. That sound! The gear is well documented: homemade Red Special guitar, Vox AC30 amps, Echoplex, phase shifter, treble booster, etc. Those are all well known, but there’s one problem, which brings me to the second essential.
Most of the shows require me to fly to get there (a fly-date in musician-speak), and I have to bring my own gear. Plus, we’re playing 500- to 1,000-seat theater shows, as opposed to clubs, so controlling the volume level is a factor. Well, so much for re-creating Brain’s rig using piles of vintage gear. The key issues for these dates would require being compact, reliable, and controllable.
Step One — YouTube It
Step one was learning every song; but, beyond just copying the parts, I wanted to get closer to the essence of the performances. YouTube offered a lot of shortcuts that helped make that possible. Concerning Queen’s music, I started with the original studio recordings, which happen to be the best-known versions of each song. As I was listening, I tried to be as objective as possible. I’d heard most of these songs a thousand times and even played some in cover bands way back in the day. I didn’t want my preconceived notions to affect my ability to capture as much detail as possible.
I played through the songs, taking a lot of mental and written notes: guitar sounds, how many parts in each section of the song, layered parts, important bends, slides, phrasing, etc. YouTube’s speed controls proved to be very helpful, not just for learning fast parts but also for working something up to tempo and nailing the phrasing, fingering, and position shifts.
I also referenced as many live performances of the songs as I could. With Queen’s history, there are live recordings of songs from multiple eras. This helped me zone in on what the most important guitar parts are from Brian’s perspective as well as what sonic choices he made live to cover the parts. As an added bonus, I got an idea of where on the neck Brian played each phrase and what shifts were involved. Instructional videos take this idea even further, and Brian has a couple classics that break down parts, sounds, etc. Those gave me an under-the-hood look at his process.
Pro Tip
It’s all about positions for Brian’s playing. He stays close to one finger per fret with his fretting hand and rarely stretches his pinky or first finger beyond the four-fret position. He will reach his ring finger four frets from his first finger, especially for a bend on the top two strings, à la your favorite pentatonic blues licks. All of his solo lines fall easily under your fingers and shift effortlessly up and down the neck, which factors into why his playing is so smooth and lyrical. If you’re struggling to play a Brian May line, then you’re probably fingering it wrong.
Step Two — Gear?!
As stated earlier, Brian’s gear is well documented. Most of it is available in some form, but it’s pretty specific, and it’s quite a bit of gear. Consequently, here were some of the non-negotiable parameters that drove my gear choices:
- No consistent backline
- Commercial flights to most gigs
- Controllable onstage volume
- Enough flexibility to cover all of May’s recorded guitar sounds
- Hauling my own gear
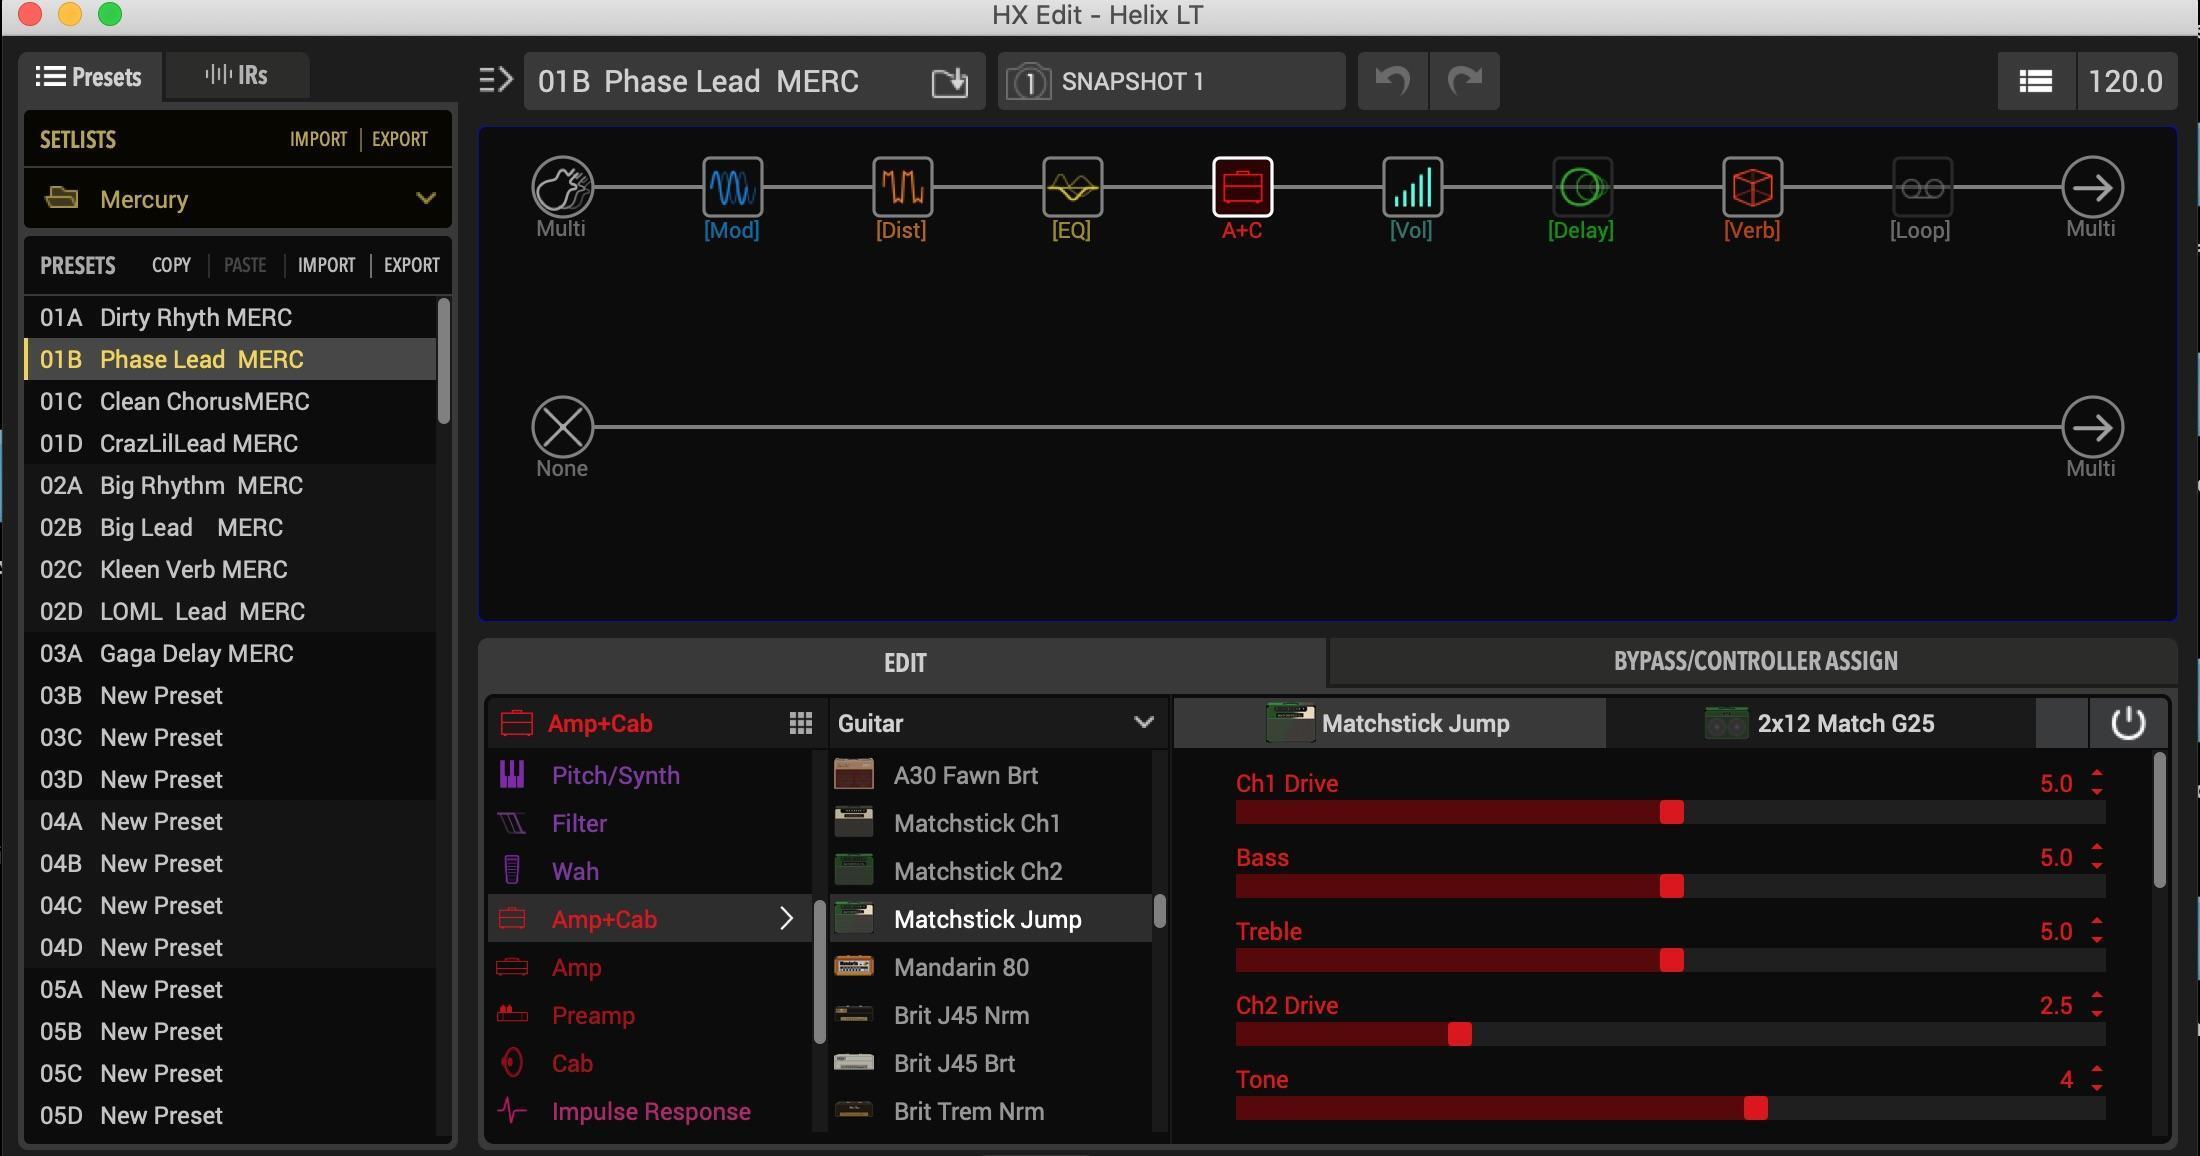
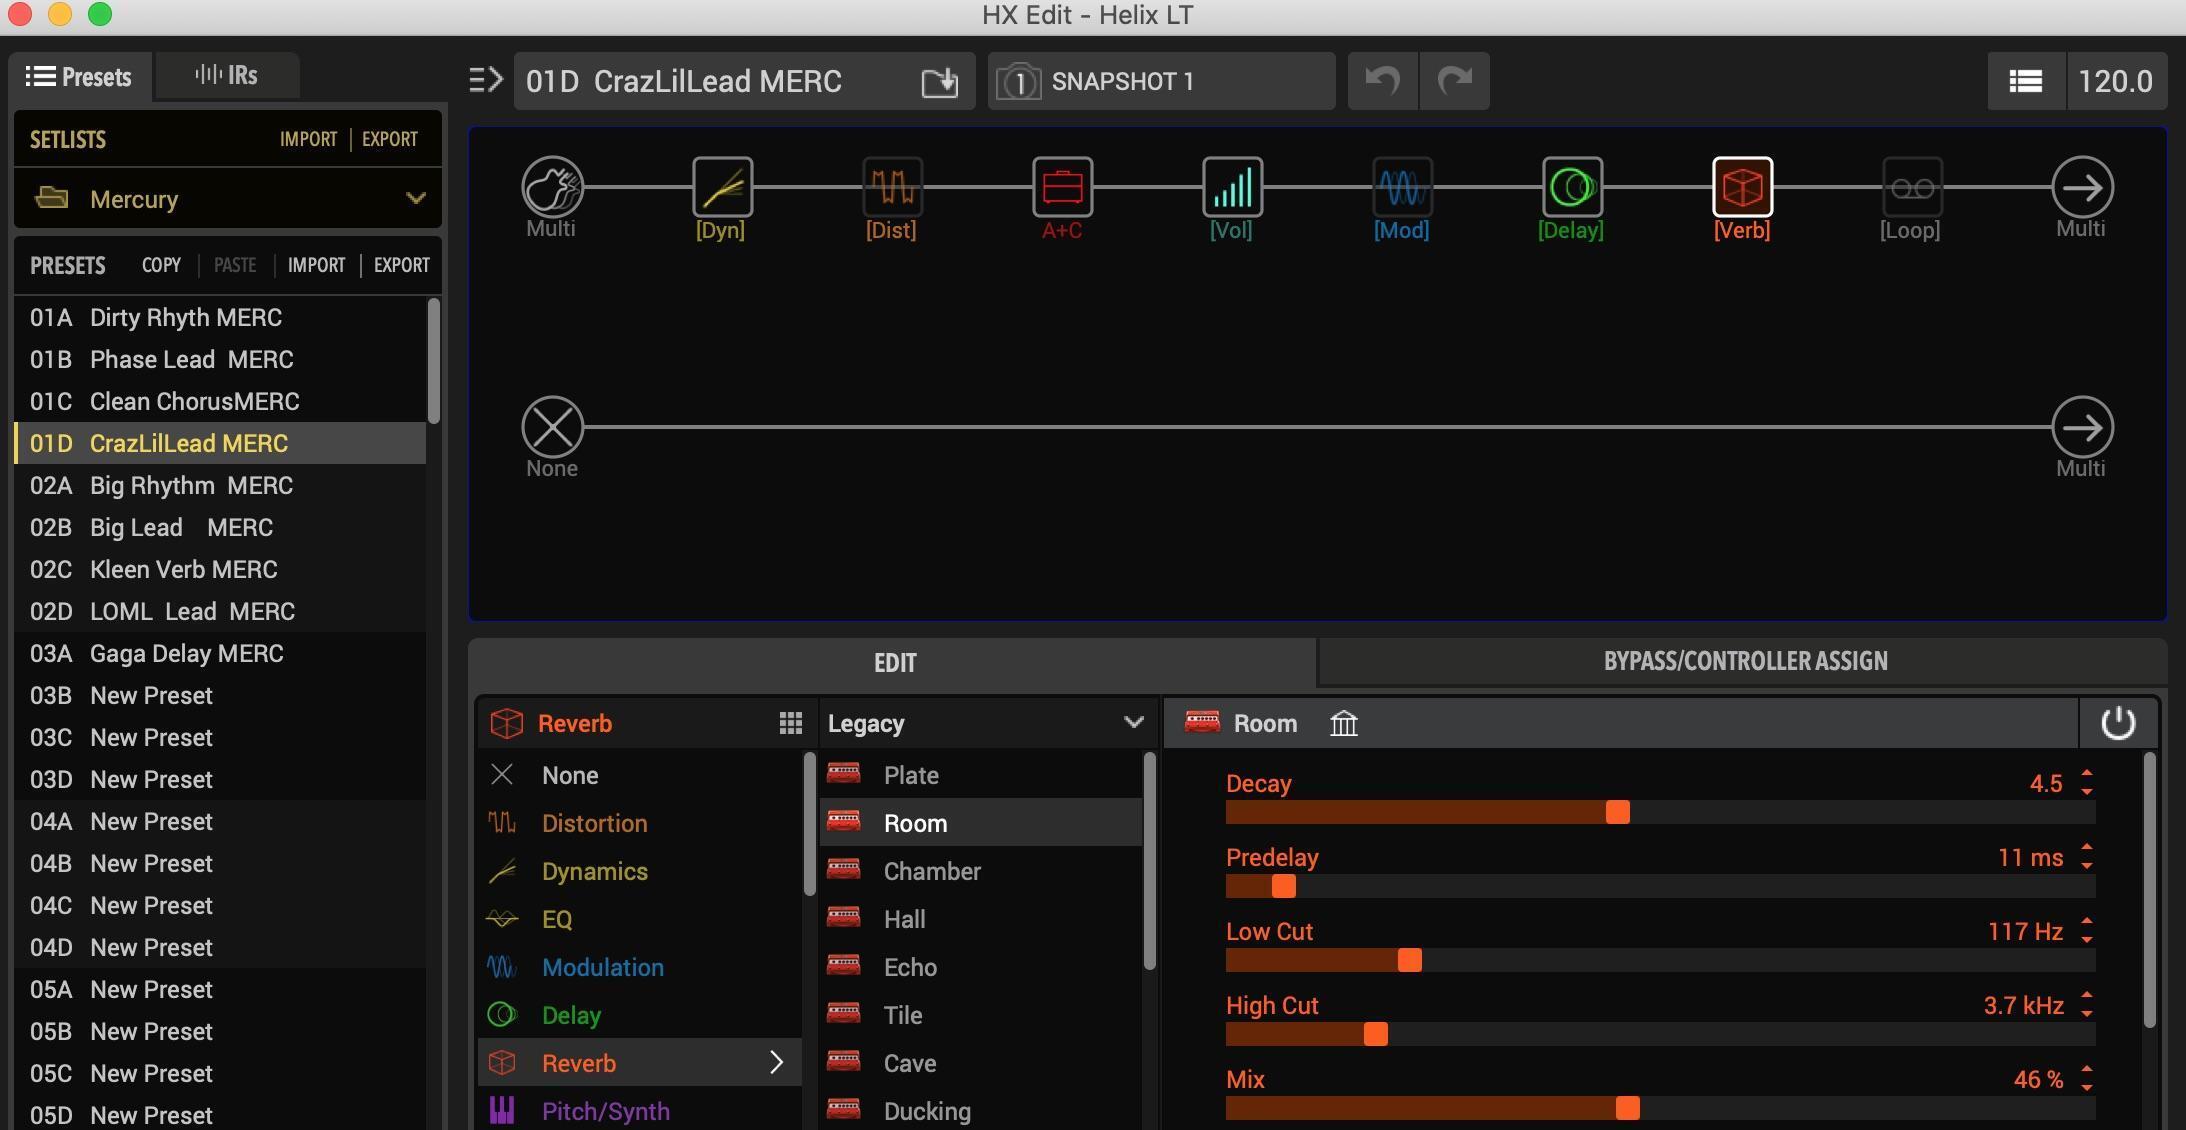
Being self-sufficient, self-contained, and portable took priority here. Digital modeling to the rescue! Thankfully, great choices are plentiful. I chose the Line 6 Helix. It has all the amp, cabinet, mic, effect, and post-processing sounds that would allow me to essentially fit Brian May’s sound in my carry-on bag. It’s one unit with footswitches, an expression pedal, and XLR outs. For the sounds I’m using, it works perfectly in stereo or summed to mono using the same patches.
The other consideration was, of course, the guitar. My go-to is the super-versatile PRS 513, which I’m totally comfortable with. I can coax a wide variety of tones from it, and I knew the Helix would help me dial it in further.
Disclaimer
Before I go any further, let me say that it was never my intention to totally nail the guitar sounds to the point of being indistinguishable from the originals. Trying to transfer that to a live-band setting is a pointless endeavor. The goal here was to conjure up the magic of those iconic guitar performances. The majority of that would be performing faithful guitar parts. The guitar sounds need to facilitate the idea while blending with the band and filling in sonically where needed. We (as a band) need to sound like the records and give the audience an experience.
With that said, the Matchstick and Matchstick Jump amp models with the 87 Cond mic model were a great start. I used the Script Mod Phase and Colordrive pedal models before the amp. I found myself using a parametric EQ sometimes before the amp — sometimes after — depending on if I wanted to shape the overall sound or just the drive or guitar tone. A short room reverb added a lot to the overall character.
Onstage Monitors
The next consideration was what will it sound like to me onstage and what will I be hearing it through? In-ear monitors would be ideal, but that would mean we’d have to have a full-time monitor engineer and carry our own monitor system. Not a practical solution. My first thought was to use the power section and speaker from a guitar amp, thinking that would have the most punch. Without a consistent backline, however, the results would be hit-and-miss. Turns out, I was overthinking it. The sounds I had dialed up on the Helix worked as well through a standard full-range, powered monitor wedge as they did in the front-of-house system. Onstage, the monitor is behind me facing outward, like a guitar amp. That way, I can hear my guitar when I’m in different locations on the stage and the monitor engineer doesn’t have to follow me around. The sound is also fairly directional and totally controllable; I’m able to blend with the onstage-band sound. Since I’m performing the same parts every time we play, I only need to hear enough of myself to know I’m not playing on the wrong fret! So far, this system has worked out perfectly.
Final Thoughts
Every gigging situation is different, and this will give you some insights to how I solved this particular puzzle. I considered every parameter and only ruled out possibilities when they didn’t fit. What I hope you take away from this is that the solution that makes the most sense to you for your situation is the best one, regardless of what anyone else might do or think. Most importantly, keep making music!