
“We don’t use tracks, because we can’t be spontaneous.”
Maybe you’ve uttered that phrase before. I’ve surely heard it many times before as a reason why people aren’t using tracks. It might be the thing keeping you from using tracks. Or perhaps you’re using tracks, but you wait till the song ends to be spontaneous. During the song, you’re stuck to an arrangement, but once it’s over and the tracks end, you can really be free.
The truth of the matter is, you can use tracks and have freedom and flexibility. You don’t need to wait until the end of the song to have flexibility; you can repeat any song section and jump around the song while using tracks.
In this article, I’m going to share four tips for formatting your tracks for flexibility in Ableton Live and then tell you how to practically apply these concepts to gain more freedom in your music presentation.
Warp Your Tracks
Warping might be one of the most difficult concepts in Ableton to wrap your head around, but it’s actually easy to do. Warping your tracks provides lots of benefits, including the ability to change the key and tempo, but in this case, it’s giving us the ability to line up Live’s grid with our tracks.
Syncing our tracks up with Live’s grid is going to allow us to jump around in our song, in time. While warping might feel overwhelming, it’s incredibly easy to warp songs you download from MultiTracks.com. Here’s how:
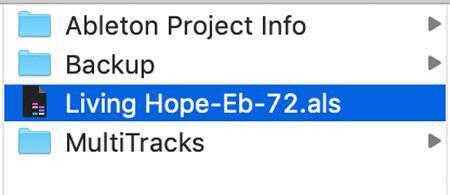
- Download the song from MultiTracks.com, in this case “Living Hope Eb.”
- Open up the Live set included with your song.
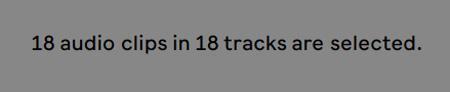
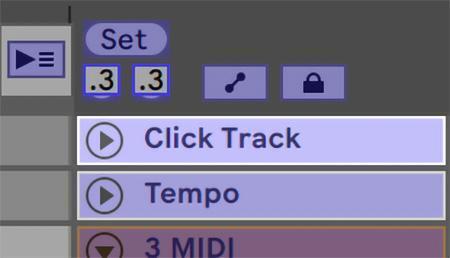
- Select the last clip in your song, hold Shift, and select the first clip in your set. You’ll see a message letting you know how many clips you currently have selected.
- With all the clips in your set selected, enable Warp on the clips.
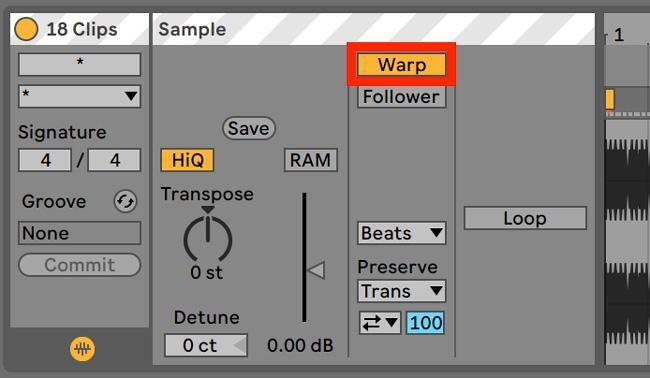
- Next, change your warp mode to “Complex.”

Now, sit back and relax, because you just warped your tracks! Again, the process is this simple for songs you’ve purchased from MultiTracks.com because they’ve done most of the work for you beforehand. If you’re using a song you haven’t purchased from MultiTracks.com, then line up your click to Live’s grid by adding warp markers every few beats.
For a more in-depth look at how to warp songs and to get a better understanding of what warping is and why it matters, check out the tutorials linked below:
Warping Audio in Ableton Live: 1-How Live Treats Audio
Warping Audio in Ableton Live: 2-Warping Stems and Multitracks
Warping Audio in Ableton Live: 3-Changing Key and Tempo
Warping Audio with Ableton Live 4: Warping Audio with Tempo Changes
Add Locators
With our tracks warped and synced to Live’s grid, we’re ready for the next step, which will give us all the freedom we need with our tracks. In order to navigate our song easily, including repeating sections or jumping to sections, we need to add locators to our song.
To add locators to your session, follow these steps:
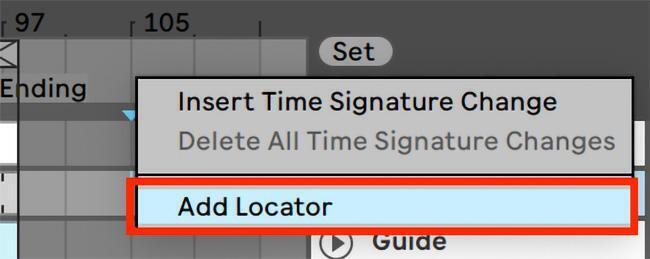
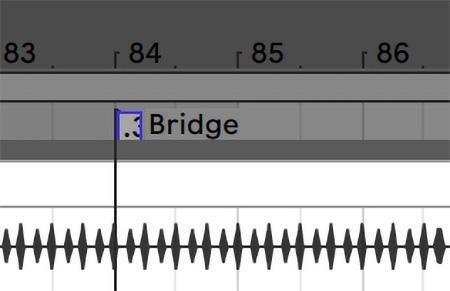
- Put your mouse in the scrub area below the measure numbers on the timeline.
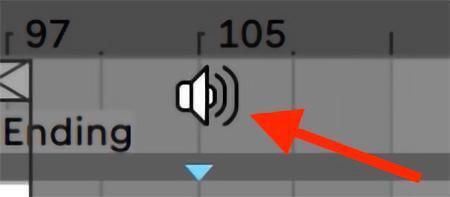
- Right-click and choose “Add Locator.”
- Name your locators to match sections of your song.
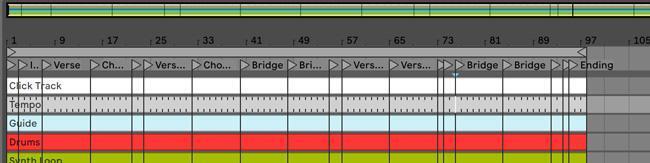
- Click a locator while your audio is playing, and it will jump to that song section. Because of Live’s Global Quantization, we can jump around the song in time, without trying to get the transition just right. With Global Quantization set to “1 Bar,” that means you can select a locator, and on the next downbeat of 1, or start of the next measure, you’ll jump to that section. We can use this feature to our advantage when we add in a MIDI controller.

Use a MIDI Controller
To really unlock the ability to have freedom with tracks, you’ll want to use a MIDI controller. We’ve talked previously about the many benefits of MIDI controllers, but in this case, it makes navigating your song incredibly easy.
While there are infinite numbers of aspects you can control with your MIDI controller, in order to have flexibility with tracks, you need to map the Previous and Next Locator buttons. Here’s how:
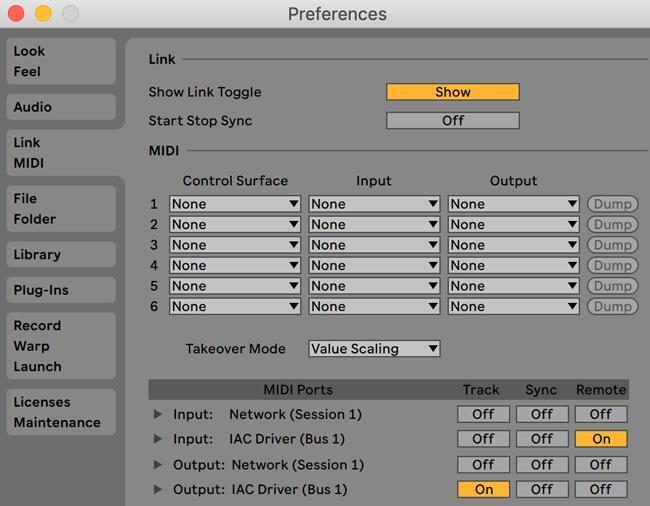
- With your MIDI controller connected, open Live’s Preferences and click the Link/MIDI tab. Under the input of your MIDI controller, enable “Remote.” This will allow us to remotely control Live from our controller.
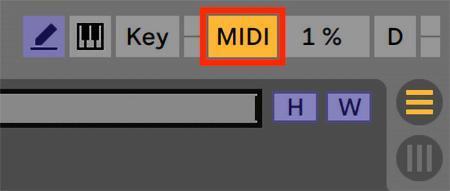
- Press CMD + M to enable MIDI map mode.
- Click on the Previous Locator button and press a key on your MIDI controller. Click on the Next Locator button and press a key on your MIDI controller.
- Now you can jump to the previous and next locators from your MIDI controller. We’ll use this to our advantage to easily have freedom to jump to sections in our song. Let’s look at how to apply this both in the moment and when planning on spontaneity.
In-the-moment Spontaneity
What happens if in the middle of the service you want to repeat a chorus? With the work we’ve done previously, this is as simple as the press of a key on your MIDI controller.
If you want to repeat the section you’re currently on, then you can trigger the Previous Locator button to jump back to the start of that song section. Again, because Live’s Global Quantization is set to 1 Bar, you can trigger this anytime in the last measure of the section.
If you’re using guide cues with your song, then you’ll notice this brings up an interesting dilemma. When you repeat the section, you’ll still hear the guide cue for the next section instead of a repeat of the current section. The easiest solution to this problem is to MIDI map the Track Activator button for the guide cue track. This would allow you to mute the guide cue when you want to repeat a section and use a talkback mic to let the band know you want to repeat.

You can also jump ahead to any section of your song by using the Next Locator button on your MIDI controller. Similar to above, you can jump anywhere in your song while within the last measure of the section. This could allow you to quickly jump to a bridge or skip a section when you need to cut a song short.
Making good use of the Previous and Next Locator buttons can really provide you tons of flexibility. But, with a little bit of planning, you can do even more.
Planning on Spontaneity
It sounds ironic, but often you can be most spontaneous when you have a great game plan. For example, let’s examine one of the most common places people want to be spontaneous — at the end of a song.
- After your song has ended, keep the click going. This is as simple as dragging your click clip a little longer or copying and pasting additional measures of click, after the song ends.
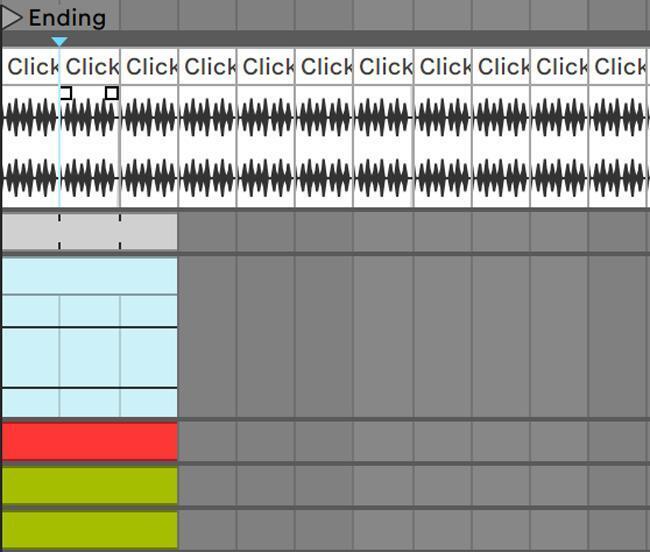
- This can allow you to “flow” and sing the chorus again or play instrumentally, and when you’re ready to get back into the song, use your Previous Locator button to jump back to the section you want to sing. If you already know you want to go back to a specific section of your song, then you can MIDI map directly to that locator and trigger it when it’s time.
Using tracks doesn’t mean you’re stuck playing to tracks. With the proper setup, you can play with tracks instead. With a little bit of prep work and using a MIDI controller live, you can easily have as much flexibility as you want and allow for spontaneity while using tracks.