
You wouldn’t mic an amp by just pointing a mic at it and hoping for the best — we all know it’s not that simple to get great tone. (Or at least we do if we saw the tutorials “The Importance of Mic Placement for Guitar Amps” and “Miking Guitar Amps: Finding the Sweet Spot“.)
Similarly, you can’t necessarily get good amp sim (simulation) tone by inserting a plug-in, dialing up a preset, and hoping for the best — it takes some signal processing before and after the amp sim to bring out its best. For this example, I’ll use Guitar Rig’s Van 51 amp sim which is a part of Native Instruments Komplete 11, but the same principles apply to other amp sims (especially amp models with moderate to high gain).
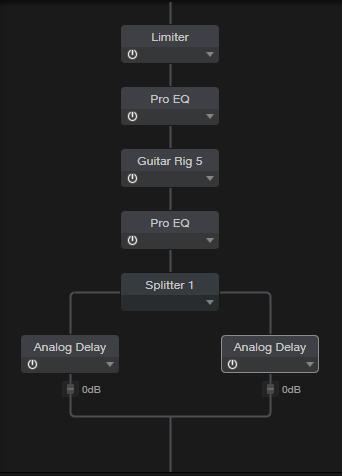
Here’s the roster of processors, shown as a PreSonus Studio One FX Chain.
1. Add a Limiter
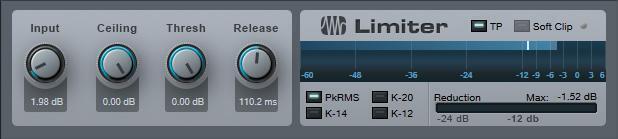
A limiter is optional, but I like to bite off the top 2dB from peaks to get just a little more sustain and average signal level. On the other hand, for a more dynamic response, leave the limiter off. Or for the best of both worlds, use a “mechanical limiter” — move your pickups a little further from your strings! You’ll reduce the nasty pick transients and have a more uniform decay. Compensate for the slight loss in level by turning up your interface’s input level or the amp sim’s drive parameter.
2. “Focus” the Pre-sim Signal with EQ
Cutting the highest and lowest frequencies prior to distortion can make a major difference with some amp sims — restricting audio to the guitar’s fundamental frequencies helps minimize “brittleness” because the sim doesn’t distort the harmonics as much. You do lose some treble, but I’ll make up for that later in a better way. Tightening up the low end a bit by reducing the low frequencies doesn’t hurt either.
3. Oversample Your Amp
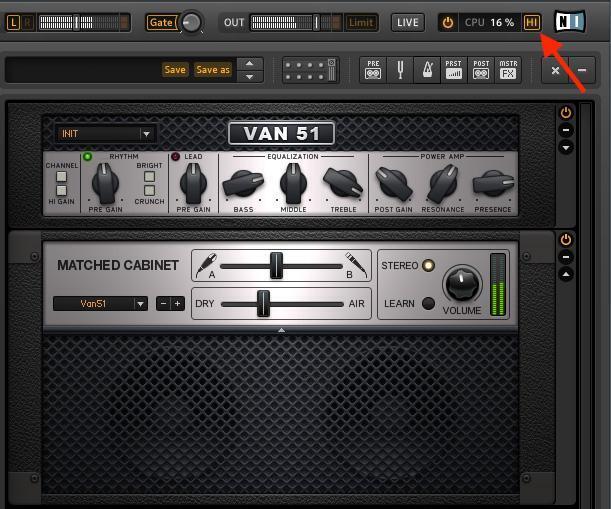
Many amp sims include the option to oversample, with the tradeoff being more CPU power consumption. Oversampling raises the plug-in’s internal sample rate to help prevent foldover distortion with high-gain amps, which is caused by high-frequency harmonics interfering with the project sample rate clock. In Guitar Rig, clicking the HI button to the left of the NI logo in the upper right corner enables the high-quality mode. In AmpliTube, you can set oversampling in Preferences. Some amp sims oversample natively, so they don’t include the option to turn it on because it’s always on.
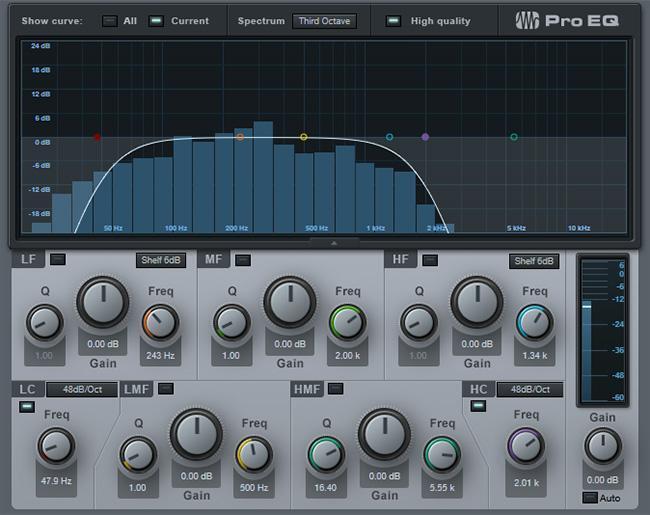
4. Remove “Annoying Frequencies” and Add Highs with Post-sim EQ
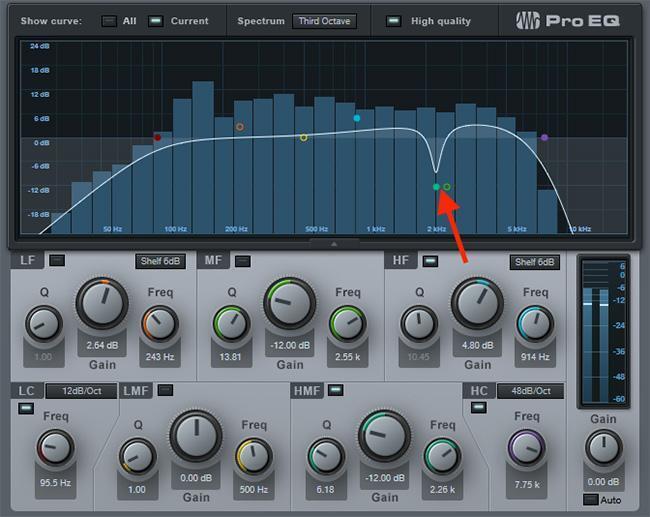
Listen carefully to the audio samples included below, and you’ll hear that the non-optimized amp sim has a sort of resonance around 2kHz that “clouds” the sound. Many amp sims exhibit a similar type of resonance, but you don’t have to tolerate it.
To find the frequency, insert a parametric EQ with a narrow-bandwidth boost set to maximum gain. Turn down your monitors (it might get loud), then slowly sweep the EQ frequency from 3kHz to 20kHz. Listen carefully; if there’s particularly ugly distortion at a particular frequency, turn the gain down so the boost becomes a notch, such as the 12dB notch seen above at 2.26kHz. If the amp sounds more “organic” with the notch, you’ve found the annoying resonance. The more you practice this technique, the more you’ll train your ears to identify frequencies that you need to cut, resulting in a more pleasing amp sim sound.
However, putting a notch in the highs — along with the reduction caused by the pre-sim EQ — gives a duller sound, so adding a final high-frequency shelving boost solves that problem. And because it’s not boosting a bunch of high-frequency garbage, but a more focused range of frequencies, the sound is sweeter as well as brighter.
5. Add a Room
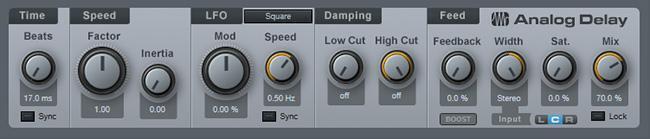
When you play guitar, you don’t have your ear a couple of inches from the speaker; an amp interacts with a room, and you hear those interactions. The Splitter module (the fifth module in the diagram above) sends the left and right channels to individual delays. I use identical settings but different delay times — one has a 17ms delay and the other a 29ms delay (prime numbers help reduce resonance). Mixing the straight and delayed sound in the delay module helps give a room-like stereo image.
Take a Listen
As always, the proof is in the listening. This first sample (below) is a guitar track processed with Guitar Rig 5 and the optimizations described above.
Guitar track processed
The second sample (below) demonstrates Guitar Rig 5 by itself, without the optimizations. I think you’ll hear the annoying resonance clearly. Also note that the sound is less articulated than in the optimized version above.
Guitar track unprocessed