Arpeggio — a big word with a simple meaning, it originates from the Italian word arpeggiare, which literally means “to play on a harp.” An arpeggio is the notes that make up a chord, broken out and played individually in succession, usually in an ascending or descending motion. For this lesson, arpeggios are a way to organize the notes in a chord. Since the notes outline the chord tones, it’s a helpful concept for adding more color and vocabulary to your soloing, because you “hear the chord changes” in your solo. For this example, based in the key of G, I used a standard, 12-bar blues progression and a familiar, pentatonic scale position to build the arpeggios from.

Figure 1 shows the three chords in a basic 12-bar blues: G7, C7, and D7.
Figure 2 shows the notes that make up each of those chords, played as single-octave arpeggios:
G-B-D-F
C-E-G-Bb
D-F#-A-C
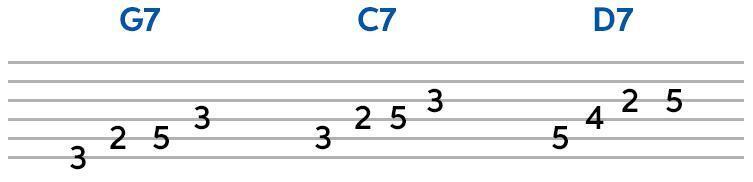
Figure 3 is the minor pentatonic scale form that is the basis for the fretting-hand arpeggio shapes in this lesson. The notes in the scale are G, Bb, C, D, and F.
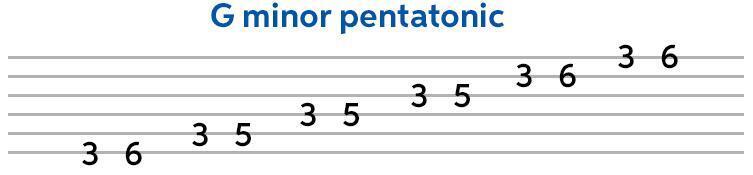
This scale is the universal go-to for blues soloing and something you may already be familiar with, which is why the arpeggio shapes I chose fall in the same basic fret-hand area. This way, it’s not a big leap physically to get to these arpeggios.
Figure 4 outlines each arpeggio, starting on the lowest-available fretted note and ending on the highest-available note within the minor pentatonic shape. I wanted to use fretted notes so the arpeggio shapes would be easy to transpose to different keys.
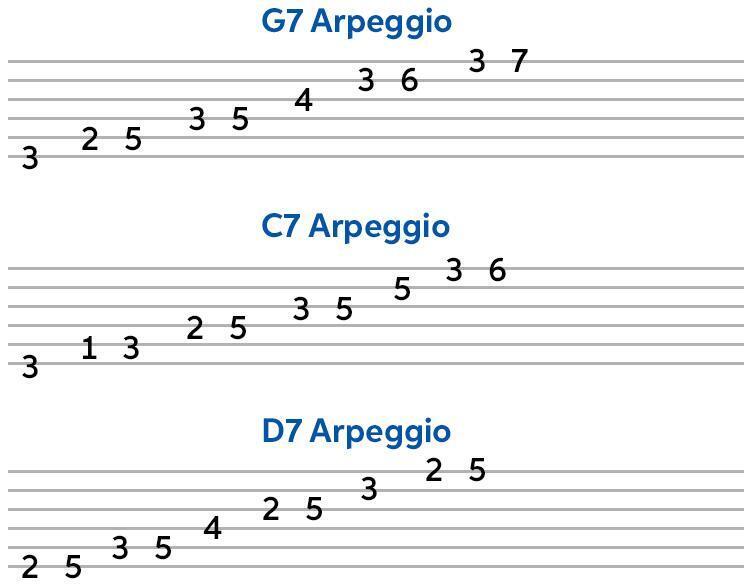
Technically, the G7 arpeggio could’ve started on the 7, a low F, first fret on the E string, but the symmetry feels better to me starting on the G. Call it a quirk. That F is close by, though!
Once you have an idea where these shapes lie, a great way to get them under your fingers so you can use them creatively and spontaneously is to play them in time with a chord progression. You can use a pre-recorded backing track or play a 12-bar blues progression into a loop pedal, which is how I did it in this video. The main thing is to play the correct chord tones over each chord.
Figure 5 is a transcription of how I approached this concept in the video. This is just one example, but you can choose to do this however you want. Try only ascending arpeggios that start on the lowest string, or only descending arpeggios that start on the highest string. Try different rhythms or rhythmic patterns; I’m using quarter-notes in my example. The goal is learning the shapes intuitively, so multiple approaches would be the most beneficial.
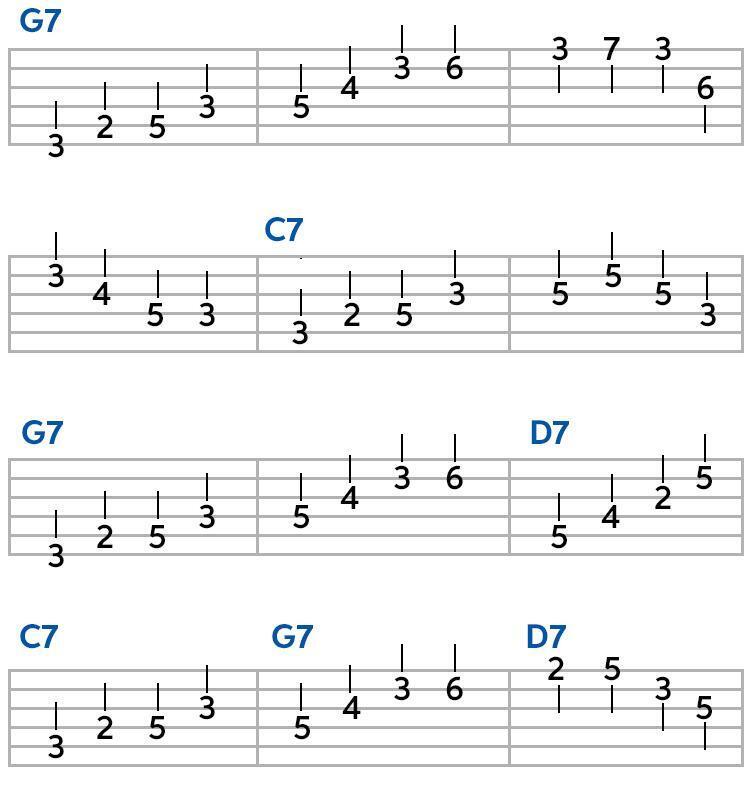
Figure 6 is an example of how you’d use these arpeggio shapes in a solo. It combines blues licks from the pentatonic scale with the arpeggios. There are a couple of bends and a few chromatic moves, but other than that, it’s pretty straightforward.

Any time you start practicing a new concept on guitar, take as much time as you need to wrap your head around it and work as slowly as you need to in order to fully comprehend it. My backing track example is at a brisk 133 bpm to keep the pace of the video moving along, but I’d recommend starting at about half that speed or less, if you need. Consistency is important; start slow, and work your way faster.

Blending the arpeggios with licks you already know is the ultimate goal. Exercises help with the discipline of getting new information into your ears and hands, but it’s a means to an end; that end is making music.