
Optimizing Network Settings for Audio Gear
In this guide, we will show you how to optimize network settings for your music production computer. These tips are great for the studio or live sound, but just as effective for your everyday wireless router. Follow each of the sections below to get started.
- Wireless router location
- Refresh or reset the network
- IP address assignment
- Wi-Fi and network troubleshooting
Wireless router location
Wireless routers maintain a wireless access point to a network. All-in-one wireless routers are common and need to be positioned so that all necessary devices can easily connect. For instance, a three-story house may benefit from a single wireless router positioned on the first floor, center of the house as possible. This will distribute the wireless router’s range equally throughout the house.
Walls, ceilings, and floors will impede the wireless access point because of their reflective surface area and mass. If you have a poor Wi-Fi connection, first assess that the computer is operating in a viable wireless access point area. If not, you may need to adjust the location of the wireless router. Moving the computer is typically not an option, so connecting to the router with a hard-wired Ethernet connection may be necessary for ideal results.
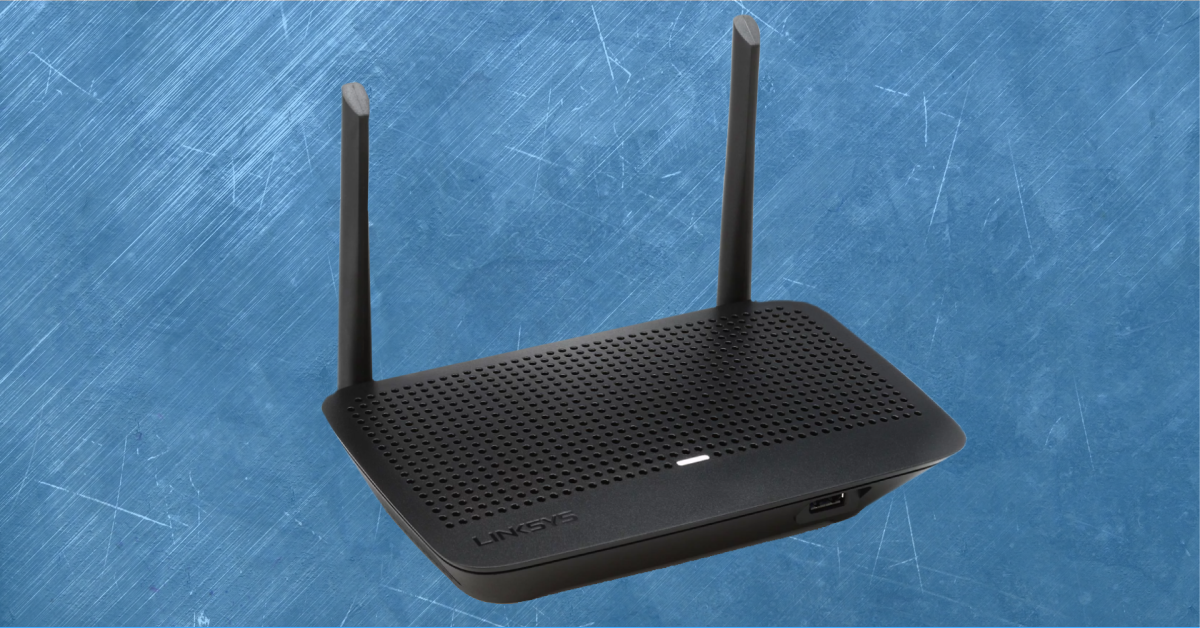
Antenna position
Many, but not all, wireless routers and Wi-Fi cards have external antennas. In addition to its location, each antenna needs to be positioned in a V shape pointing upward (not outward). This helps the transmission of its radio frequencies (aka Wi-Fi). Keep the antenna away from enclosed or reflective surfaces for best results.
2.4Ghz vs. 5Ghz wireless access points
- 2.4GHz wireless access points have less bandwidth for multiple devices but require greater range for maintaining a connection.
- 5Ghz wireless access points have less range, but greater bandwidth for connecting more devices and maintaining high connection speeds. Some devices may not be able to connect to 5GHz wireless networks.
Refresh or reset the network
Networks are hosted over a server and usually connected by switches or routers. Networks prefer to be started first, and then have the interconnected devices powered on once the network is running. So if you have multiple devices connected to a network, try powering on the network before anything else, letting it first configure itself. Once ready, power on and connect with the other devices. If you’re having issues with your network, try refreshing or resetting the router/network.
Refreshing a network is essentially restarting it. We recommend doing both when troubleshooting network connections, but beware that resetting the network will require all prior connected devices to reconnect. You may also need to rename or reconfigure the network name, password, or other settings.
Turn the device’s Wi-Fi off and on
Your wireless router/network can be refreshed, but so can your connecting device. Another way to reset the connection is to power off Wi-Fi on your device and then power it back on. Allow a pause before reconnecting so that the network has enough time to detect the changes.
Disable Wi-Fi on the computer
Having an active Wi-Fi connection creates a load for the computer’s processor. This typically is not an issue but can be problematic when the Wi-Fi connection starts to interfere with your music production software. This can happen with CPU demanding software, like DAW or virtual instruments.
Disabling Wi-Fi or using a wired connection may help. Connecting to the Ethernet port provides greater data bandwidth and is less taxing on the CPU. That doesn’t mean to stream 1,000 HD movies simultaneously while recording in your DAW, rather an alternate network option if the Wi-Fi connection negatively affects CPU performance.
IP address assignment
In order for devices on a network to identify and communicate with each other, they need to receive IP addresses. It’s like giving a number (IP address) to each house (device) on the street (Wi-Fi network). If you connect devices, like a digital mixer or audio interface with network features, these IP addresses must be correctly assigned to each device to work.
Most Wi-Fi routers are preconfigured for automatic IP address assignment, called DHCP (Dynamic Host Communication Protocol). A device must be configured for DHCP to connect to the wireless router and receive an IP address. While DHCP can make things easier by automatically assigning IP addresses, you may prefer to assign them manually. Manual IP assignment (or static) uses manually selected (fixed) IP addresses and can help resolve network communication issues.
Wi-Fi and network troubleshooting
Sometimes the network doesn’t connect right and might need troubleshooting. Find more solutions below for PC and Mac.
PC Wi-Fi troubleshooting
Launch the Network troubleshooter
- Right-click the Start button and click Network Connections.
- Click Status, select Network troubleshooter and follow the on-screen prompts.
Repair and reset Windows network settings
- Click the Start button on the taskbar, type cmd and select Run as Administrator.
- Type the following commands in order:
netsh winsock resetand press Enter.netsh int ip resetand press Enter.ipconfig /releaseand press Enter.ipconfig /renewand press Enter.ipconfig /flushdnsand press Enter.
Reinstall network adapter driver
- Right-click the Start button on the taskbar and select Device Manager.
- Go to the Network adapters section, and expand the menu.
- Locate your network adapter, and then right-click to select Update driver.
- Click Search automatically for updated driver software, and follow the on-screen instructions.
- Once the driver is installed, restart your PC and go to the Wi-Fi network settings to see if the network appears.
- If Windows can’t find a new network adapter driver, visit the computer manufacturer’s website and download the latest driver from there.
Uninstall network adapter driver and restart
- Right-click the Start button on the taskbar and select Device Manager.
- Go to the Network adapters section, and expand the menu.
- Locate your network adapter, and then right-click to select Uninstall device.
- Restart your computer. Windows will automatically reinstall the latest driver.
Reset the network
IMPORTANT! Resetting the network adapter should only be performed if the steps above didn’t work. After performing the Network reset, you will need to re-enter the Wi-Fi password and also reinstall any additional networking software you may have, such as VPN’s.
- Click the Start button on the taskbar, begin typing Network and select Network status.
- Click Network reset and follow the on-screen prompts.
Mac Wi-Fi troubleshooting
- How to troubleshoot Wi-Fi connectivity
- Check for Wi-Fi issues using your Mac
- Recommended settings for Wi-Fi routers and access points
- Wireless diagnostics
Wi-Fi icon does not show up
The network, or Wi-Fi icon, shows up on your menu bar, usually the top right. If the icon is not displayed, that doesn’t necessarily mean you’re not connected to the network, it just means the “display icon” checkbox isn’t checked.
- Open the Network settings.
- Select the Wi-Fi service.
- Click the Show Wi-Fi status in the menu bar checkbox.
Set service order
Changing the port priority determines the default network your apps use. This will impact web browsers the most, and usually happens when you need to connect to a wireless network and wired network at the same time. The key is to set the one with an internet connection as the first service. This allows standard apps to access the web features, while your other app can still access the wireless network for synchronization, remote control, or file sharing.
- Open the Network settings.
- Click the gear icon and select Set Service Order….
- Click and drag services in priority from top (first) to bottom (last).
Disable Thunderbolt networking
If you are not using a Thunderbolt connection but not using it’s networking feature, you can disable that feature in the Network settings. This helps prevent intermittent issues that may occur with multiple active network services. Do not disable this feature if you are actively using the Thunderbolt connection for networking purposes.
Make service inactive
- Open the Network settings.
- Select the Thunderbolt network.
- Click the gear icon and select Make Service Inactive.
Remove service
- Open the Network settings.
- Select the Thunderbolt network.
- Click the – icon to remove the service.
Location
Your Mac’s Network settings can be recalled as Locations. This is useful when you use the Ethernet port to connect at different locations, but they have different configuration settings (Manual vs. DHCP). If you have a similar need, use this feature to create Network “presets” so that you don’t need to reconfigure each time.
- Open the Network settings.
- Click the Location drop-down menu and select Edit Locations….
- Create a new location and click Done.
- Click Apply to apply the settings.
When you need help, Sweetwater has the answers!
Our knowledge base contains over 28,000 expertly written tech articles that will give you answers and help you get the most out of your gear. Our pro musicians and gear experts update content daily to keep you informed and on your way. Best of all, it’s totally FREE, and it’s just another reason that you get more at Sweetwater.com.


Offer applies only to single-receipt qualifying purchases. Select manufacturers may require that only the manufacturer’s products qualify towards the minimum purchase amount needed to be eligible for promotional financing. Otherwise, an invoice that meets the minimum purchase amount and contains at least one qualifying manufacturer product is eligible for promotional financing. No interest will be charged on promo purchase balance, and equal monthly payments are required on promo purchase until it is paid in full. The payments equal the amount financed divided by the number of months in the promo period, rounded up to the next whole dollar. These payments may be higher than the payments that would be required if this purchase was a non-promo purchase. During the last month(s) of the promo period the required monthly payment may be reduced due to the prior months’ rounding. Regular account terms apply to non-promo purchases. New Accounts as of 07/31/2025: Purchase APR is 34.99%. Penalty APR is 39.99%. Min Interest Charge is $2. Existing cardholders: See your credit card agreement terms. Subject to credit approval.
Offer applies only to single-receipt qualifying purchases. No interest will be charged on the promo balance if you pay it off, in full, within the promo period. If you do not, interest will be charged on the promo balance from the purchase date. The required minimum monthly payments may or may not pay off the promo balance before the end of the promo period, depending on purchase amount, promo length and payment allocation. Regular account terms apply to non-promo purchases and, after promo period ends, to the promo balance. New Accounts as of 07/31/2025: Purchase APR is 34.99%. Penalty APR is 39.99%. Min Interest Charge is $2. Existing cardholders: See your credit card agreement terms. Subject to credit approval.
The estimated required monthly payment shown which excludes taxes and delivery equals the amount financed divided by the number of months in the promo period, rounded up to the next cent. During the last month(s) of the promo period the required monthly payment may be reduced due to this rounding. These payments apply only with the financing offer shown. If you make these payments by the due date each month, you should pay off this amount financed within the promo period, if it is the only balance you are paying off. If you have other balances on your account, this payment will be added to any other minimum monthly payments.
Applies only to select items from this manufacturer. Ask your Sweetwater Sales Engineer for more details.