
Korg MPS-10 Setup Guide

The Korg MPS-10 is the perfect multipad for any drummer or percussionist out there. In this guide, we will show you how to register, set up, and use it for the first time. Let’s get started.
Register the Korg MPS-10
While it’s always exciting to take new gear out of the box and start playing it, you first must register the MPS-10 with Korg. Upon registration, Korg will extend the manufacturer’s warranty by one year!
- Go to the Korg product registration page, click Today I’m registering another Korg Product, and create or log in to your Korg account.
- On your account page, click Register a Product, fill out the required information, and click Save.
- Keep your Sweetwater invoice handy, as you’ll need to enter your purchase date.
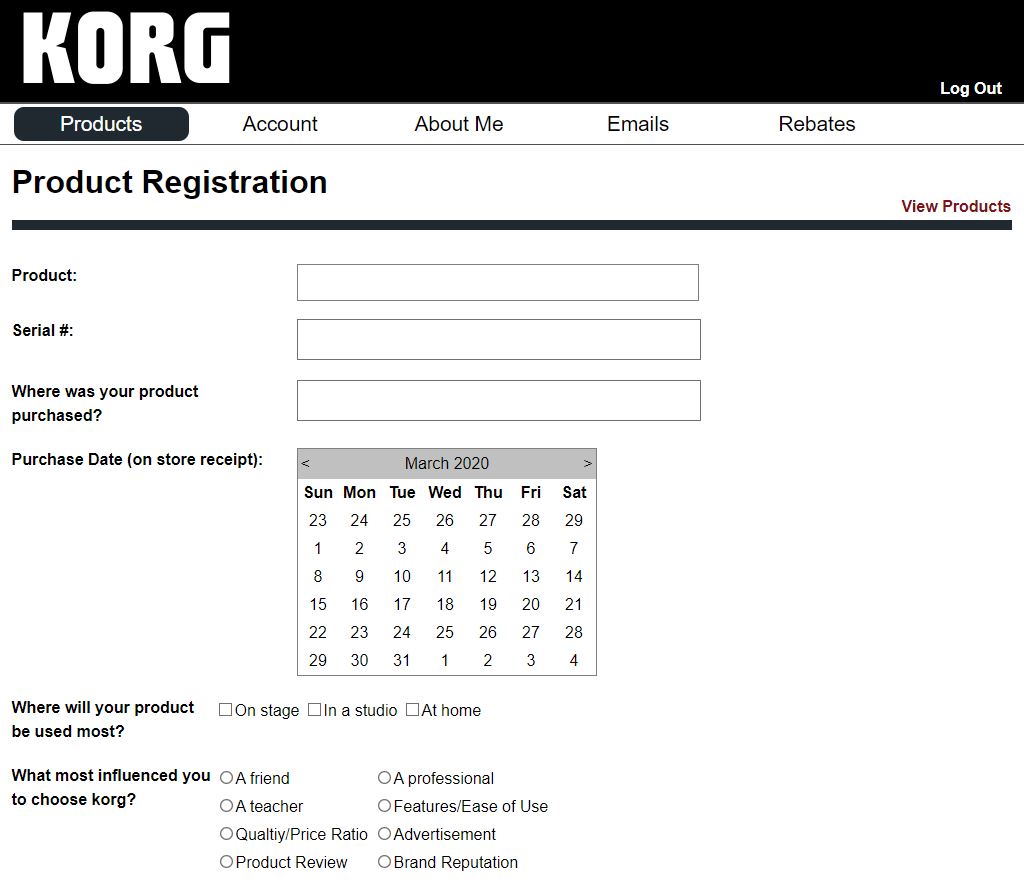
Click the image to register your Korg MPS-10.
Update the MPS-10 Firmware
IMPORTANT! Formatting the USB drive will erase any data stored on it, so be sure to back up any important files beforehand.
Korg periodically releases firmware updates that add additional features or address current bugs. Check out our Korg MPS-10 Firmware Update Guide to learn how to update the firmware!
Korg MPS-10 Setup and Connections
The Korg MPS-10 has many connections, making it an integral part of your setup. From audio functions to digital applications, the possibilities are endless. Let’s cover essential tips to get you up and running.
- You can connect any external drum pad to the TRIGGER IN jacks. You can separate the channels using a TRS splitter cable and connect two single-zone pads.
- The SUB OUT jacks only output audio routed to the sub out. Any audio signal sent to the SUB OUT jack will not be sent to the main out.
- If your headphone output seems quieter than usual, it is likely because you use headphones with 80-ohm impedance or more.
- You cannot use the LINE IN and MIC IN jacks simultaneously.
- Connect any footswitch to the FOOT SW 1 or 2 jack to assign various functions, such as start, stop, and looper triggering.
- Power the MPS-10 off and turn the volume all the way down before connecting the speakers.
- You can use USB flash drives with up to 2TB of capacity. Anything above that, and the drive will not be read correctly.
Calibrating the Expression Pedal
If you plan on using an expression pedal with your MPS-10, you must first calibrate it so it works correctly.
- Press the Utility button, then navigate to and select Function Assign.
- Choose Foot SW & Pedal … to enter the Footswitch/pedal edit menu.
- Press the Metronome button, push the pedal all the way down, and press the Enter button.
- Push the pedal down with your heel (so the toe is pointing all the way up), then press the Enter button.
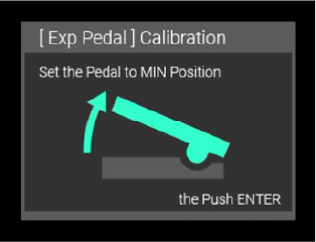
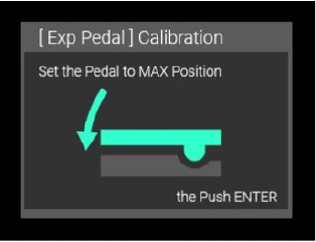
MPS-10 Expression pedal calibration
Setting Up External Pads
If you connect external pads to the MPS-10 and want to use it to control various settings like switching kits, triggering effects, and starting and stopping the looper, you must configure them in the Utility settings.
- Press Utility, scroll down, and select Function Assign.
- Select PAD Function, use the encoder to highlight the function you wish to assign, and press the encoder to select it.
- Use the encoder to select the pad (TRG A, B, C, D), then press it to assign the pad.

Function Assign screen
Computer
The Korg MPS-10 is class-compliant (meaning no additional drivers are necessary), so you just need to connect it to your computer, and you’re good to go! Korg has created an online editor that allows you to do almost everything without navigating through menus on the unit itself.
Check out our guide below to learn more!
When you need help, Sweetwater has the answers!
Our knowledge base contains over 28,000 expertly written tech articles that will give you answers and help you get the most out of your gear. Our pro musicians and gear experts update content daily to keep you informed and on your way. Best of all, it’s totally FREE, and it’s just another reason that you get more at Sweetwater.com.

