
DMX Troubleshooting Guide
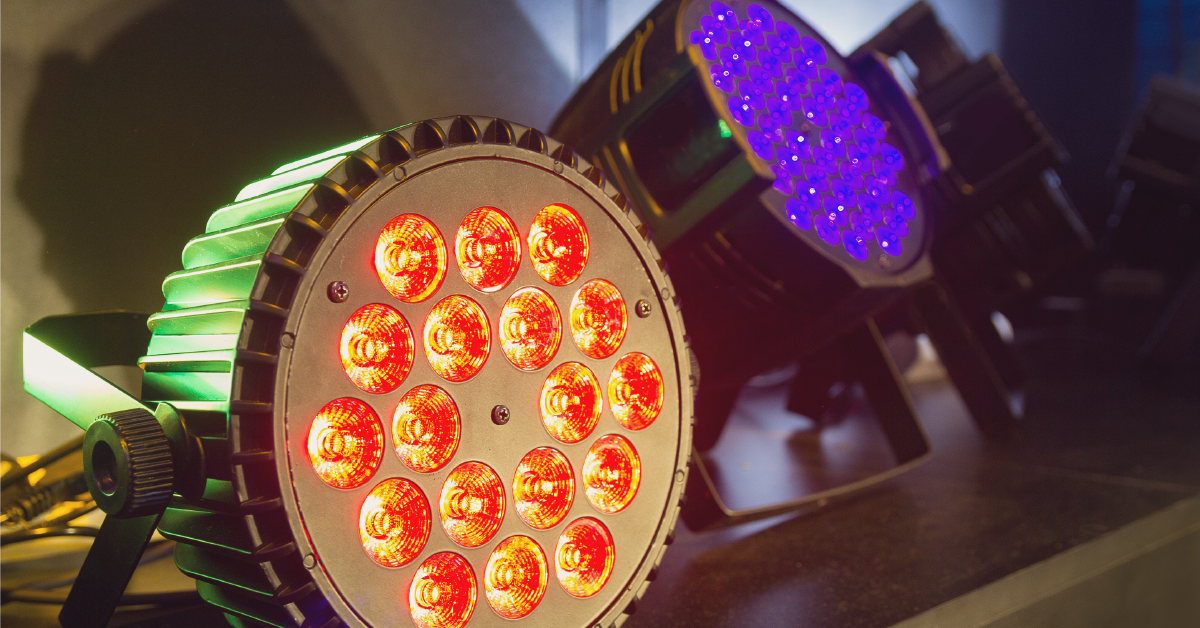
In this guide, we will show you how to resolve issues with a DMX lighting setup. Whether a fixture isn’t working properly, or if your DMX console isn’t controlling the lights, we’ll walk you through some troubleshooting steps to get you up and running in no time. Follow the sections below to get started.
Cabling
If you’re running into issues where the fixture either flickers or becomes unresponsive, the first and simplest thing to do is to check the cabling. More often than not, many lighting and connectivity issues are caused by using incorrect or faulty cables. It could be that it’s actually an XLR audio cable, it was stored improperly, or even a faulty pin.
Use the correct cables
TIP: When purchasing 3-pin DMX cables, label them to help you distinguish which are audio cables, and which are DMX cables.
- DMX is a unidirectional digital signal which sends electrical pulses (specifically a square wave) to send channel and value numbers through the cable. They have a specific electrical standard and require between 110 to 120 ohms to function correctly.
- Audio cables use a different electrical standard and have a lower impedance and different capacitance. This means that the impedance mismatch will degrade the DMX signal and transform the square wave to a sawtooth wave.
- While XLR microphone cables can technically be used in emergency situations, the system will likely be unresponsive, lights can begin to flicker or strobe, and you can also potentially damage the fixtures. Using quality DMX cables is always recommended.
Test the cables individually
A faulty cable could be caused by a few things; a cable that has been wrapped improperly, or even a loose pin. Here are a few easy ways to test if a cable is faulty.
Connect it to a working fixture
The easiest way to test is by connecting the cable to a known, working fixture. If the problem follows the cable, you can determine that the cable itself is faulty and you’ll need to replace it. Follow these steps to connect it to a working fixture.
- Disconnect the cable from the fixture which has issues, and also disconnect the cable from a working fixture.
- Connect the cable from the trouble fixture to the DMX OUT from one working fixture to the DMX IN of another working fixture. If the issue still occurs, you can determine that the cable is bad, and needs replacing.
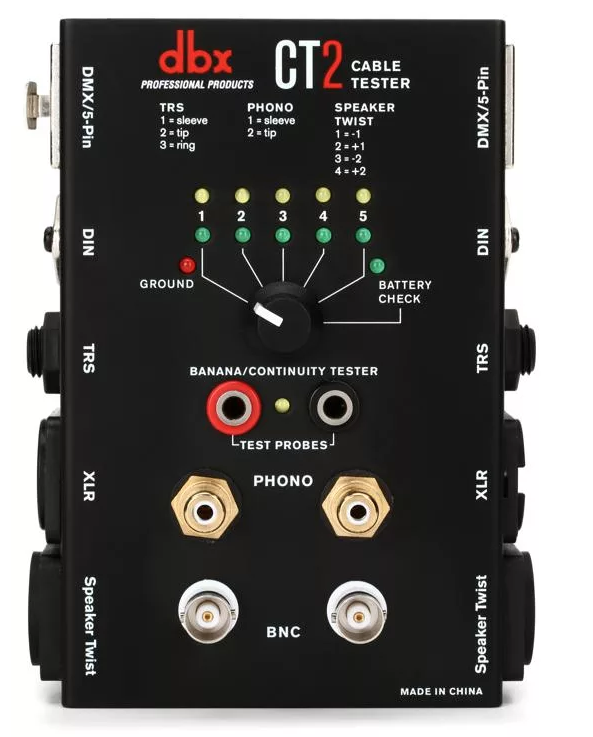
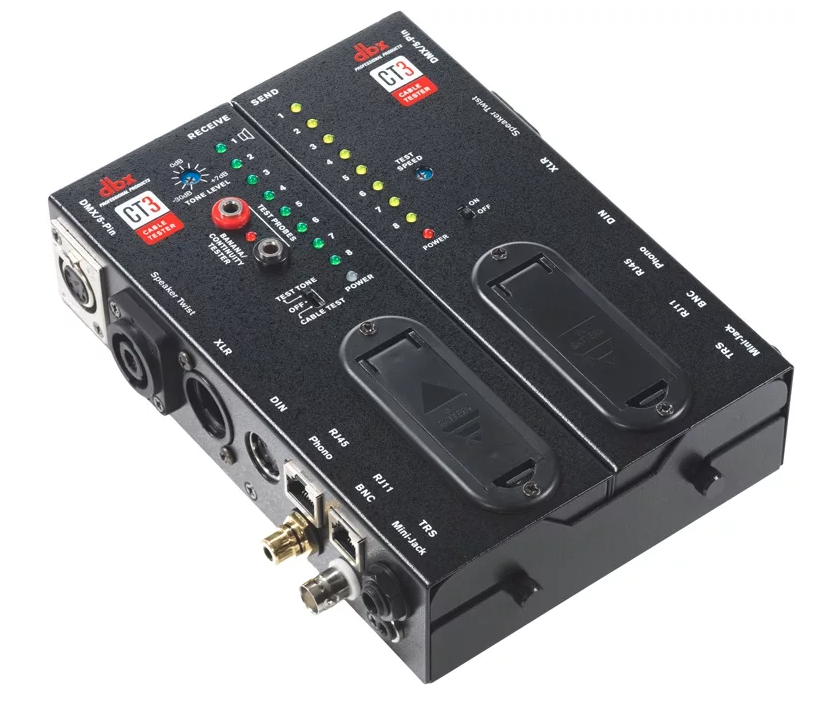
Using a cable tester
Another quick way to test the DMX cable is by using a cable tester. Testers work by sending current down the cable testing for continuity. If current passes through both ends, the cable tester will light up or produce a tone depending on the model.
Fixtures
Once you’ve confirmed that all of your cables are working as they should, the next step is to troubleshoot the fixtures. It could be as simple as too many lights in a single DMX run, or it could be that the light itself is faulty. Here are a few things to check when troubleshooting DMX lighting fixtures.
Use a terminator
TIP: Only one terminator is necessary for a single DMX run, but it always good to have a backup.
A DMX terminator is a 120-ohm resistor that connects to the DMX OUT at the very last fixture in the chain which terminates the signal. If the DMX signal reaches the end of the lighting run and isn’t terminated, the signal can bounce back which will cause interference and lead to flickering lights and loss of control. This is especially true in larger setups. Even if it’s a smaller setup, it’s always good practice to terminate the signal.
Test the fixtures individually
If a fixture isn’t functioning as it should, there are a few things to check. First and most importantly, you want to make sure that the run isn’t too long. While DMX is capable of accepting up to 32 fixtures in a single chain, the DMX signal will begin to degrade.
- Break up the chain into small, simple groups to see if the problem persists, and then slowly bring everything back together piece by piece. If the issue arises again, the chain is likely too long.
- Use a DMX-specific splitter with a setup of more than 32 fixtures. They work by isolating and splitting the DMX signal into multiple outputs allowing you to have multiple groups of 32 fixtures.
Power linking
Many modern fixtures have a power link feature, meaning you can daisy chain power from one fixture to another. Some fixtures, like multi-effects lights, draw more power than a standard PAR Can light. Be sure to check the user manual to see the power draw and how many fixtures you will be able to power link together.
DMX addressing and modes
One common thing that may get overlooked is what mode and what starting address each fixture is set to. If a lighting fixture is unresponsive or can’t be controlled independently when using your controller, it is likely that the fixture is set to the incorrect starting address or is set to a different mode, such as preset or automatic mode.
- Check that the light is set to DMX channel mode, and not automatic, sound activation, or preset.
- If multiple fixtures are being controlled by one fader but different functions are being triggered, this means that they are in the same group.
- For example, two fixtures that are set to 4-channel mode. If one light is set to DMX channel 1, and the other is set to DMX channel 2, faders 2-4 on the controller will operate both lights at the same time, but different functions will be triggered.
- If the fixture has a dip switch for DMX addressing, be sure the switches are in the correct position. Use this Dip Switch calculator to determine the correct position for each DMX channel.

DMX Controller
The last item in your DMX lighting rig to check is the DMX controller. When troubleshooting controllers, it’s much easier to break it down into parts. Here are a few things to check on your controller.
Blackout mode
Many controllers have a feature called Blackout Mode. While in this mode, it temporarily disables the DMX output on the controller. This means that all of the fixtures will turn off. When exiting a programming mode, controllers often automatically go into Blackout mode, so be sure to turn it off before troubleshooting further.
Check the polarity
If your DMX controller has a polarity switch, which most modern controllers do, be sure that it’s in the correct position. If a light is polarity-reversed, More often than not flipping the switch can fix this issue. Most modern lights are not polarity reversed, but be sure to check both the controller and fixture’s owner’s manuals for details.
Update the firmware
Some DMX controllers may have firmware, which sometimes needs updating. These firmware updates often include optimizations of the device’s internal software which can fix many connectivity issues. Refer to your DMX controller’s user manual to see if it has included firmware.
Factory reset
Factory resets should be the last thing to attempt when troubleshooting a DMX controller. Performing one will erase all data, including user-created chases, scenes, and options. While not an ideal solution, it can be the one way to get your controller back up and running.
When you need help, Sweetwater has the answers!
Our knowledge base contains over 28,000 expertly written tech articles that will give you answers and help you get the most out of your gear. Our pro musicians and gear experts update content daily to keep you informed and on your way. Best of all, it’s totally FREE, and it’s just another reason that you get more at Sweetwater.com.


Offer applies only to single-receipt qualifying purchases. Select manufacturers may require that only the manufacturer’s products qualify towards the minimum purchase amount needed to be eligible for promotional financing. Otherwise, an invoice that meets the minimum purchase amount and contains at least one qualifying manufacturer product is eligible for promotional financing. No interest will be charged on promo purchase balance, and equal monthly payments are required on promo purchase until it is paid in full. The payments equal the amount financed divided by the number of months in the promo period, rounded up to the next whole dollar. These payments may be higher than the payments that would be required if this purchase was a non-promo purchase. During the last month(s) of the promo period the required monthly payment may be reduced due to the prior months’ rounding. Regular account terms apply to non-promo purchases. New Accounts as of 07/31/2025: Purchase APR is 34.99%. Penalty APR is 39.99%. Min Interest Charge is $2. Existing cardholders: See your credit card agreement terms. Subject to credit approval.
Offer applies only to single-receipt qualifying purchases. No interest will be charged on the promo balance if you pay it off, in full, within the promo period. If you do not, interest will be charged on the promo balance from the purchase date. The required minimum monthly payments may or may not pay off the promo balance before the end of the promo period, depending on purchase amount, promo length and payment allocation. Regular account terms apply to non-promo purchases and, after promo period ends, to the promo balance. New Accounts as of 07/31/2025: Purchase APR is 34.99%. Penalty APR is 39.99%. Min Interest Charge is $2. Existing cardholders: See your credit card agreement terms. Subject to credit approval.
The estimated required monthly payment shown which excludes taxes and delivery equals the amount financed divided by the number of months in the promo period, rounded up to the next cent. During the last month(s) of the promo period the required monthly payment may be reduced due to this rounding. These payments apply only with the financing offer shown. If you make these payments by the due date each month, you should pay off this amount financed within the promo period, if it is the only balance you are paying off. If you have other balances on your account, this payment will be added to any other minimum monthly payments.
Applies only to select items from this manufacturer. Ask your Sweetwater Sales Engineer for more details.