
Audio Sprockets ToneDexter II Firmware Update Guide

When you take your Audio Sprockets ToneDexter II out of the box, the first thing you should do is connect it to your computer and upgrade the firmware. The Audio Sprockets company has provided frequent updates that fix bugs and add important new features. Follow this procedure.
- Overview
- ToneDexter II Software Update V4.0
- Firmware (Software) Update Procedure
- Audio Sprockets ToneDexter II Quickstart Guide
Overview
Audio Sprockets refers to their firmware as “software.”
You update the software by connecting your ToneDexter to your Mac or Windows computer with the supplied USB cable. You then control your ToneDexter through a page in your computer’s web browser. The browser page is a live link to your ToneDexter’s software over the USB cable, not a site on the Internet.
The first time you update the software, you’ll need to open a second browser window, go to the Audio Sprockets website, and download a software update file to your computer.
Then you use the ToneDexter browser page to upload the software update file from your computer’s hard drive and transfer it to the ToneDexter, where the update process will take place. The ToneDexter will reboot.
Depending on what version of the ToneDexter software was on your unit to begin with, it may be necessary to run the procedure a second time to install yet another software update. Now your unit will be up to date with the latest features.
ToneDexter II Software Update V4.0
On December 21, 2025, Audio Sprockets released Software Update V4.0. This update adds:
- An intelligent one-knob compressor
- A higher-resolution training algorithm for improved, more authentic WaveMap IRs
- An increased range for the anti-feedback control
- Improved navigation in the user interface and other quality-of-life improvements.
Read the release notes at the ToneDexter II Support Software Updates page.
After you install V4.0, download the newest version of the owner’s manual, which explains the new features.
Firmware (Software) Update Procedure
Connect Your ToneDexter to Your Computer
TIP: Many USB Micro-B cables are charging cables and not data cables. A charging cable can’t be used to connect your ToneDexter to your computer.
The ToneDexter II comes with a USB Micro-B data cable with a USB-A connector on the other end. Connect the Micro-B end to the port on the back of your ToneDexter II, then connect the other end to your Mac or your Windows PC. If your computer has USB-C ports, you will also need a USB-A-to-USB-C adapter, which is not included.
- Turn on the power to your ToneDexter.
- Open your web browser. If you are on a Windows computer, use any browser. On a Mac, Apple Safari may not work; try Google Chrome instead.
- In your browser’s URL bar at the top of the window, type in this local IP address: 192.168.7.1
- Hit the Enter key.
TIP: If your browser’s home page has a search field, such as for Google or Bing, this is not where you type in the IP address. You must use the URL bar at the top of the window, above the home page.
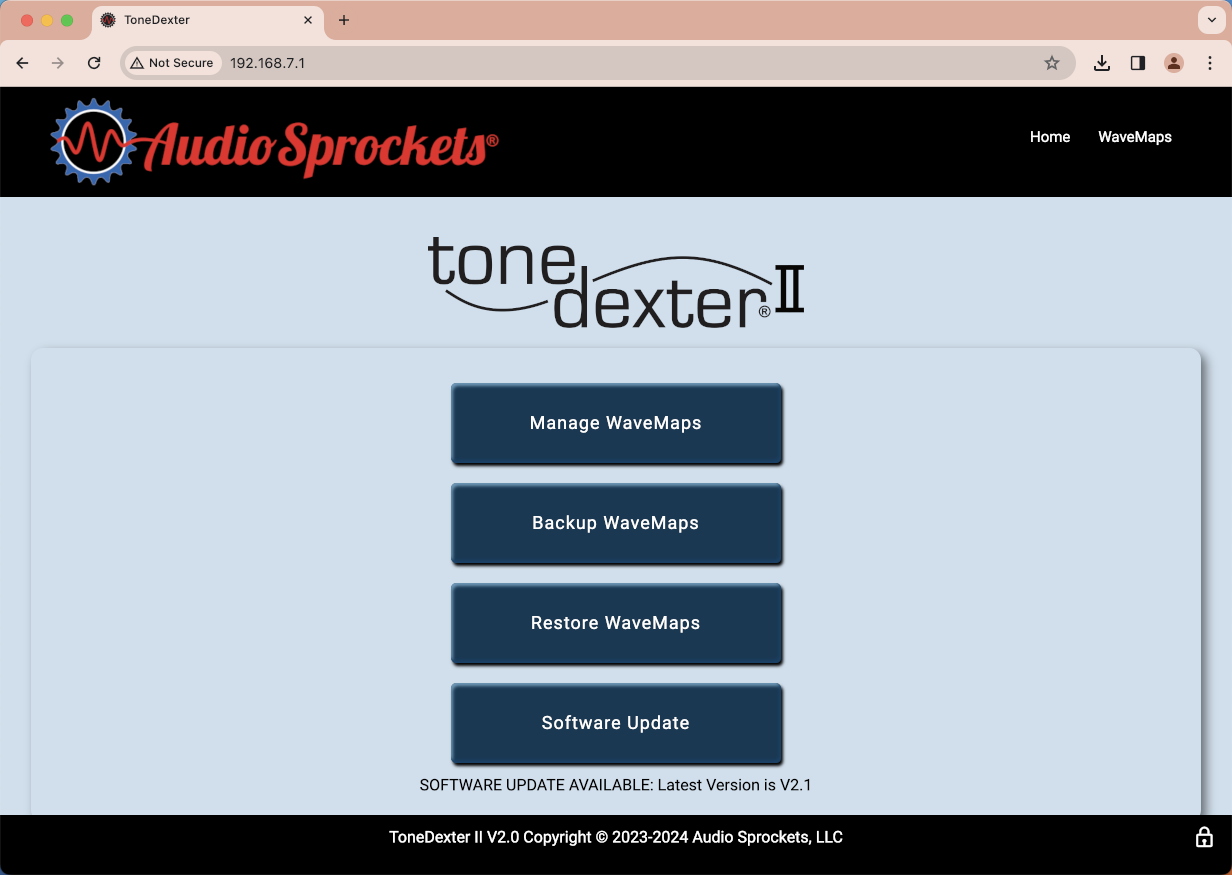
Here is what you should see:
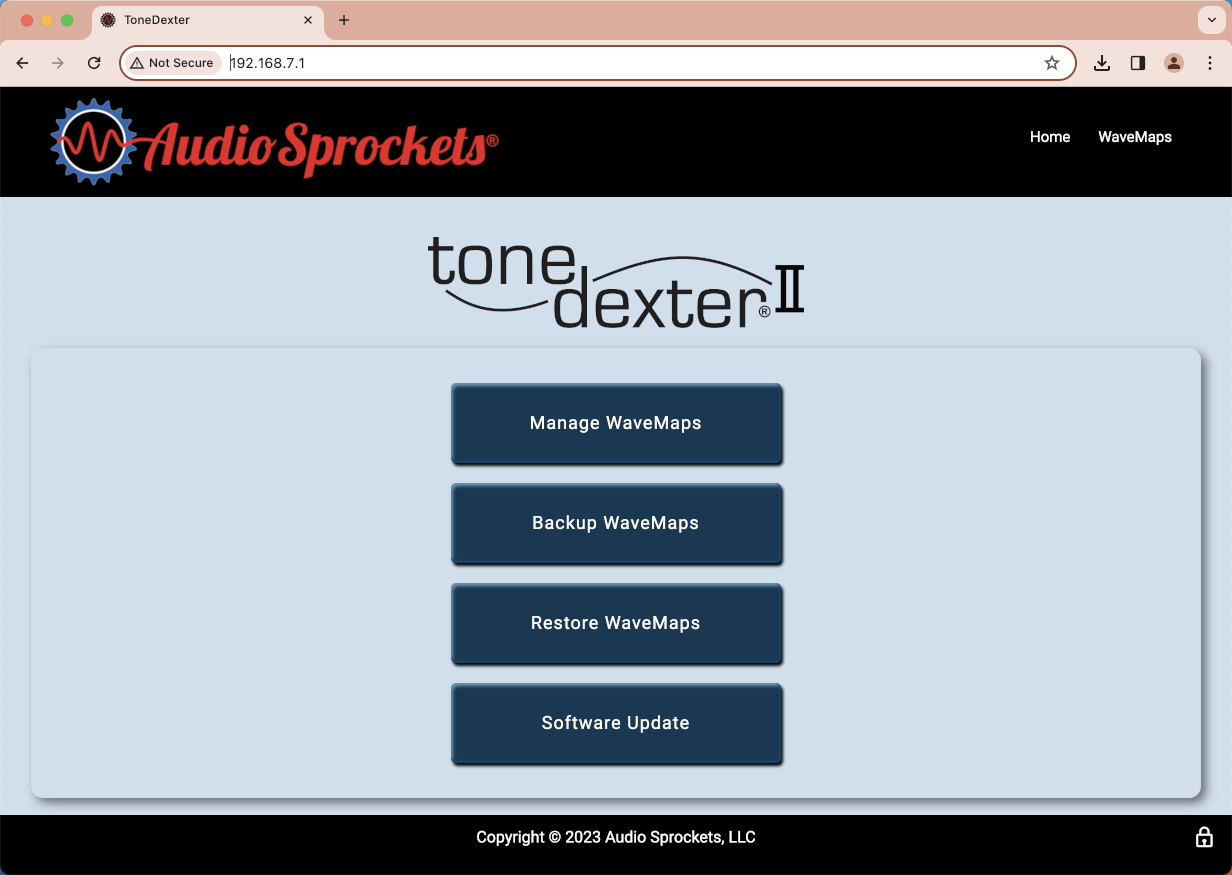
The ToneDexter II browser page
If your browser does not connect, use the power switch to shut down your ToneDexter, wait a moment, and boot it back up. Then, on your computer, refresh the browser window.
Click the Software Update button.
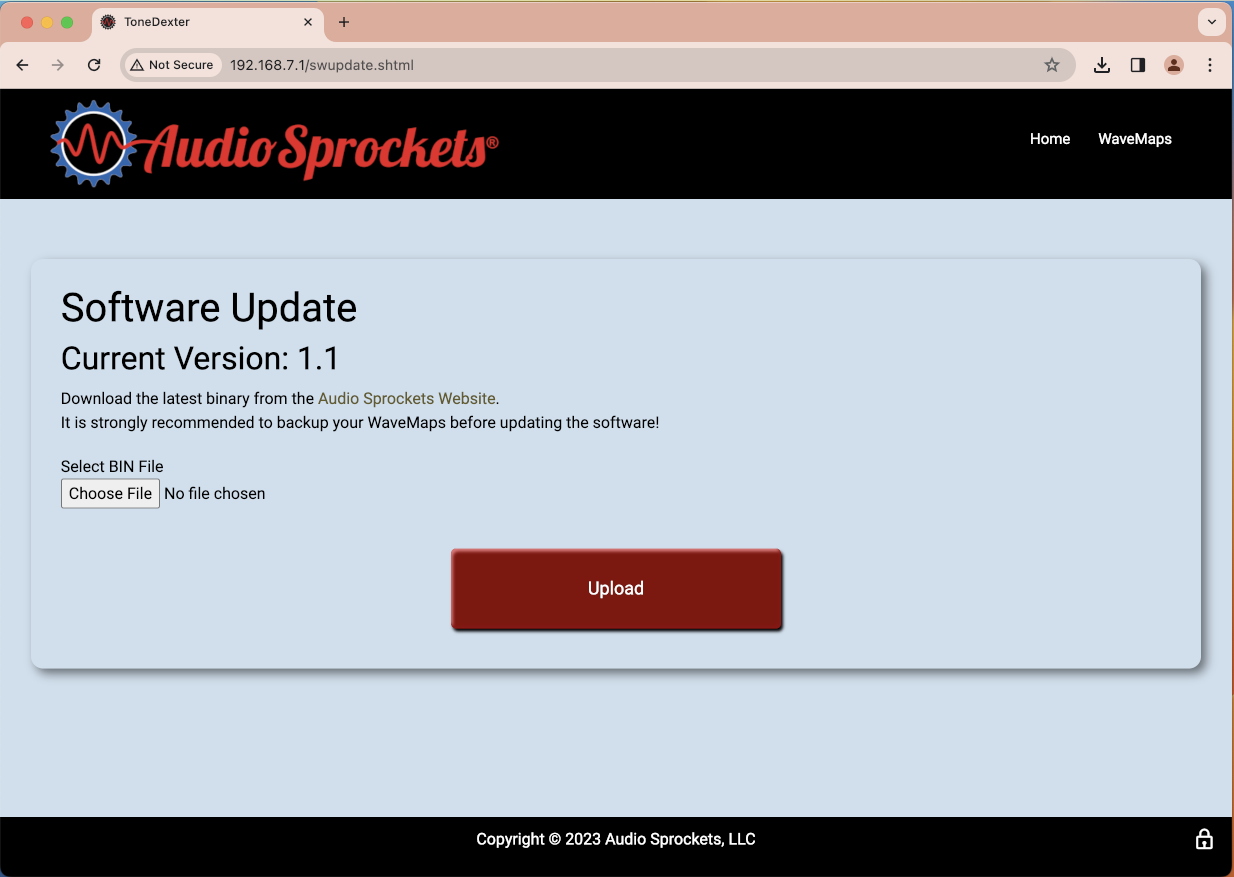
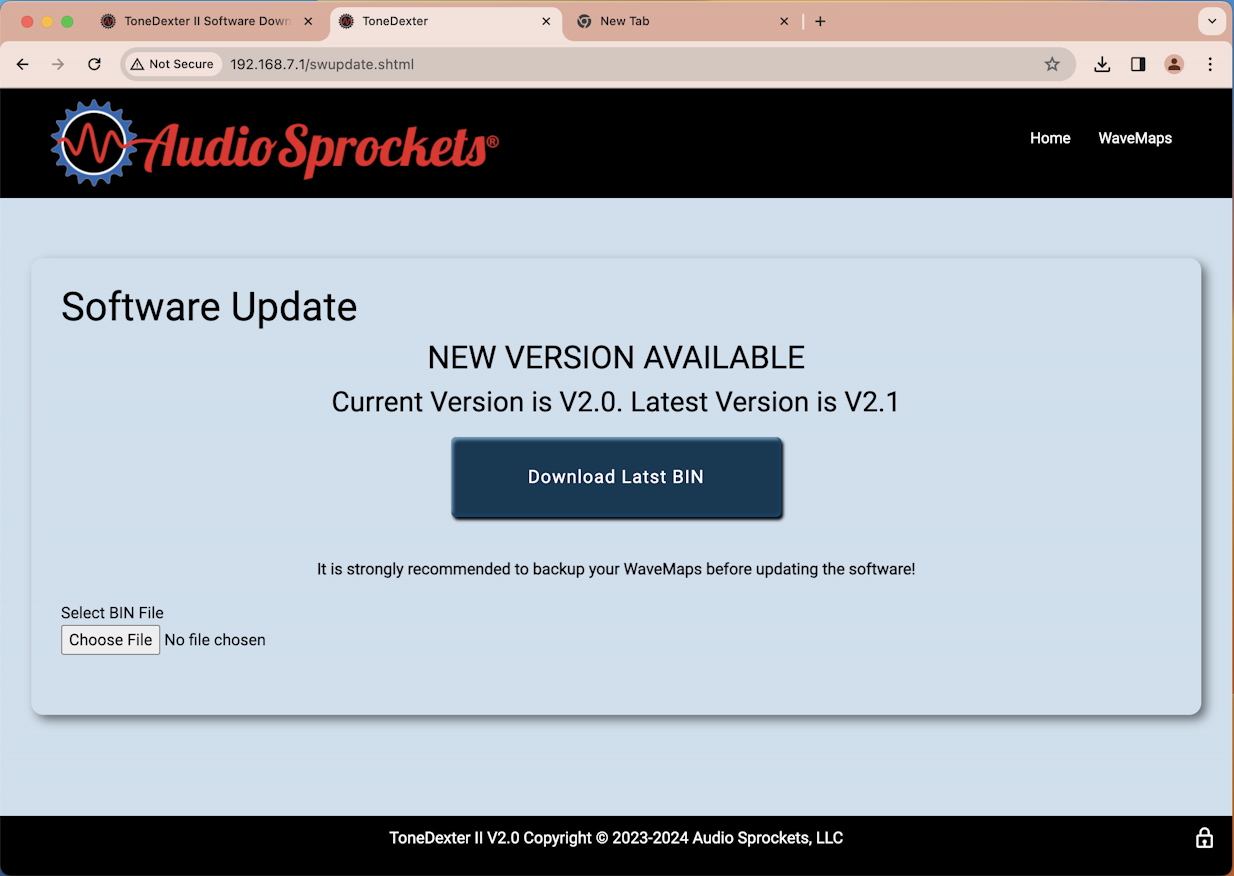
The ToneDexter II browser Software Update page
A new Software Update page will open and display the current version of your ToneDexter’s software. Take note of it.
IMPORTANT: If you have already used your ToneDexter to create custom WaveMaps (presets), you will need to back them up to your computer’s hard drive before you go any further. Learn more in the ToneDexter II User Guide > WaveMap Management. If you have not yet created any WaveMaps, go on to the next step.
Download the Software Update from the Audio Sprockets Website
Open up a second window in your browser. Go to the Audio Sprockets website Software Download page.
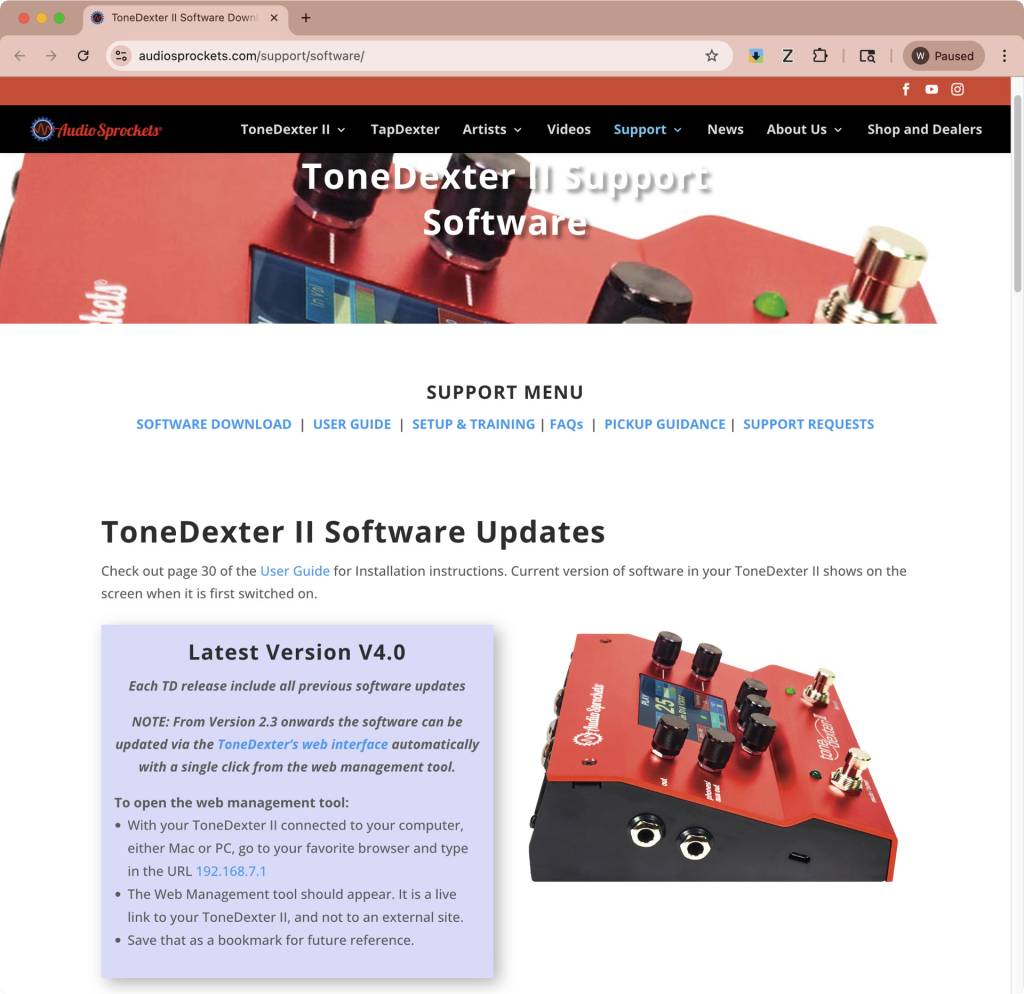
The Audio Sprockets website’s Software Download page
Under Latest Version, take note of the version number. If it is higher than the version number currently running on your ToneDexter, you’ll need to download the file, which ends in “.bin.”
TIP: This .bin file is not a document you can open on your computer. If your computer gives you an error message saying that the file is in an unsupported format or that it cannot be opened, don’t worry. Its purpose is to upload to your ToneDexter.
Now go back to the open ToneDexter browser window.
Under Select BIN file, click Choose File.
An Open dialog box will appear. Select the .bin file in your Downloads folder, then click Open.

Uploading the Software Update to the ToneDexter
The browser page indicates that you have chosen the .bin file. Click Upload.
You will see a progress bar in the browser window indicating that the software update file is being loaded to the ToneDexter.
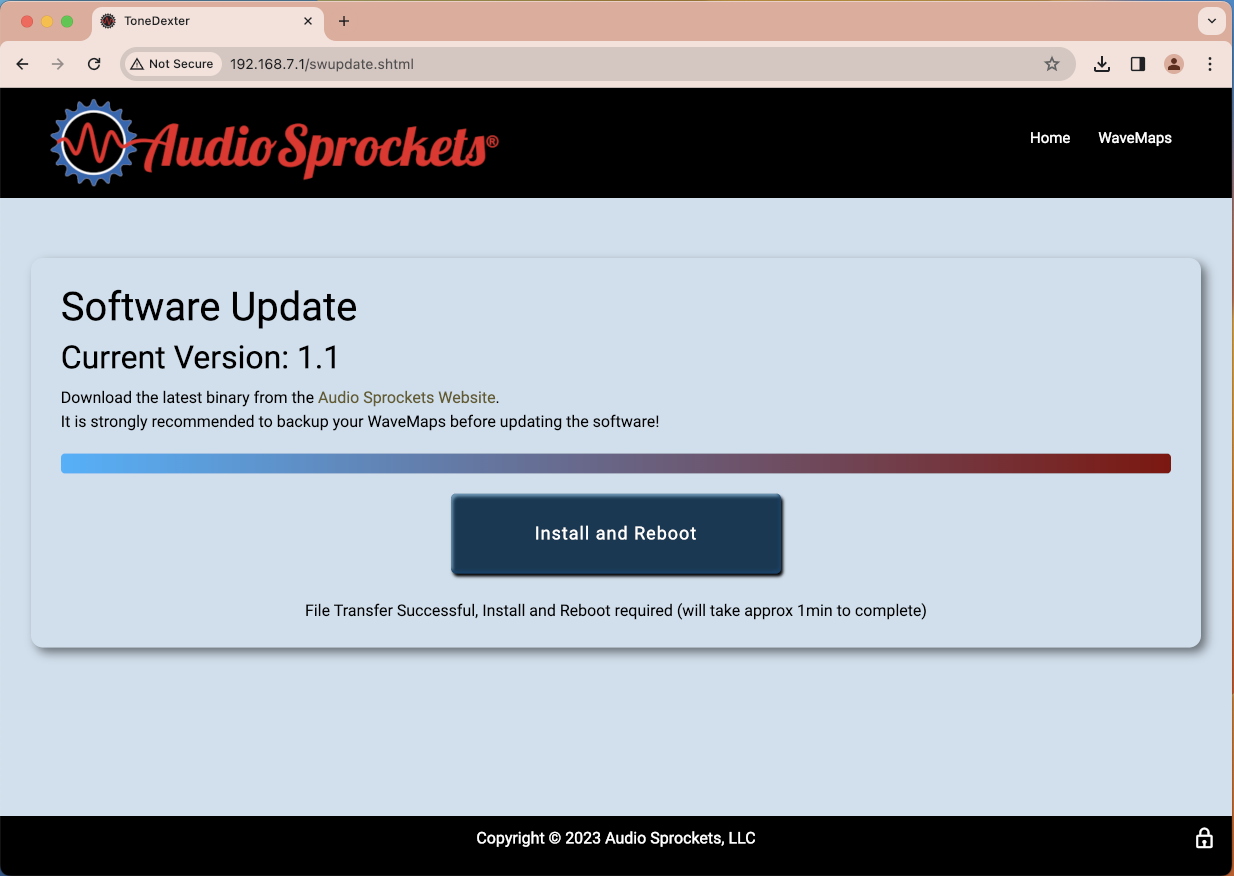
The Install and Reboot button
When the upload is finished, you will see a new dialog in the browser page. Click Install and Reboot to begin the installation.
CAUTION: While the installation is taking place, do not disconnect the USB cable. Do not shut down your ToneDexter, and do not shut down your computer. Doing so could cause an error leading to a more difficult restoration process that is explained in ToneDexter II User Guide > WaveMap Management > Updating Software > Back door method.
When the ToneDexter reboots, your web browser will go blank and display a message such as “Your connection was interrupted” or “404: The requested file cannot be found.” Wait a few seconds and refresh your browser. The Audio Sprockets page should return. If not, reboot your ToneDexter, then refresh the browser.
Installation Phase Two
The Software Update Available message
When the browser page appears again, look below the Software Update button. If it says, “Software is up to date,” then you are done for now.
However, if it says, “SOFTWARE UPDATE AVAILABLE,” you need to click Software Update and go to the next phase.
The second phase of the software update
Click Download Latest BIN. This time the local browser will download the next software update file for you without your having to go to the Audio Sprockets website.
When the download is complete, click Choose File. Locate the new .bin file in your Downloads folder.
Follow the prompts to complete the installation. Again, during the installation, do not disconnect the USB cable, do not shut down your ToneDexter, and do not shut down your computer.
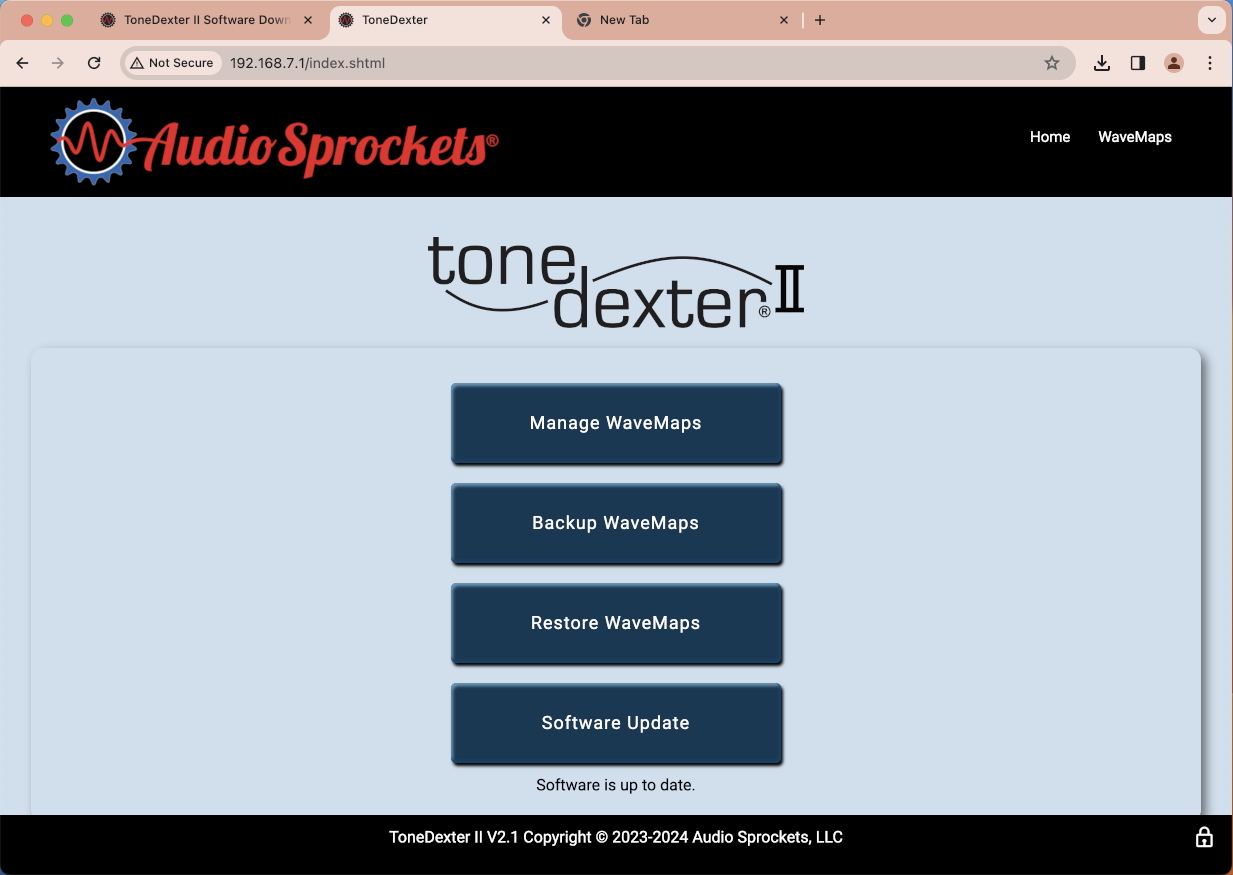
The browser page reports, “Software is up to date.”
Your firmware update is finished when the Audio Sprockets browser page says, “Software is up to date.”
However, in the future, there are likely to be further software updates from Audio Sprockets which will fix bugs and provide more new features. Run this procedure from time to time to check and see if there is yet another new software version for you to install.
Learn more in the ToneDexter II User Guide > WaveMap Management > Updating Software.
Audio Sprockets ToneDexter II Quickstart Guide
Now that you have updated the firmware, head on over to our SweetCare Audio Sprockets ToneDexter II Quickstart Guide to get started working with your acoustic guitar or other instrument.
When you need help, Sweetwater has the answers!
Our knowledge base contains over 28,000 expertly written tech articles that will give you answers and help you get the most out of your gear. Our pro musicians and gear experts update content daily to keep you informed and on your way. Best of all, it’s totally FREE, and it’s just another reason that you get more at Sweetwater.com.

