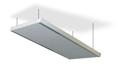
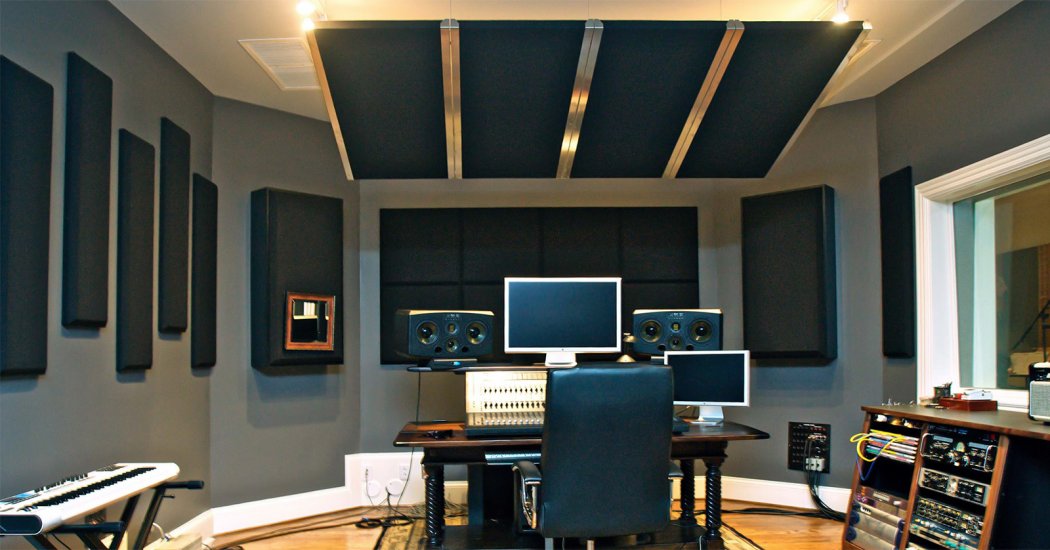
If you’re serious about improving the acoustics in your room, then your ceiling is just as important as your walls and flooring. Even if you’ve already treated all of the walls around your mixing space to control first reflections, you’ll notice a significant improvement by treating the ceiling above your mix position, too.
If you’ve read Sweetwater’s helpful articles on acoustic treatment — like “Acoustic Treatment Buying Guide” and “Fix Your Room, Fix Your Mix” — then you realize that adding acoustic treatment above your mix position can yield sonic benefits. While installing acoustic treatment panels on your walls can be as simple as hanging picture frames, we’re often asked here at Sweetwater about the best way to hang treatment from the ceiling. Controlling reflections above your mix position is crucial to accurate studio monitoring, so let’s take a look at simple DIY methods you can use in your home studio. But first, here’s a list of tools and supplies that you should have on hand before you start.
Tools you’ll need:
- Picture-hook drywall anchors with suitable weight ratings
- D-ring small picture hangers
- Picture-hanging wire
- Cordless drill with drill bit and Phillips-head bit
- Step stool or ladder
- Safety glasses to keep drywall dust out of your eyes
- Plastic sheeting to protect your gear
- A pencil
Note: Drilling into walls or ceilings could damage electrical wiring, gas lines, water pipes, etc. Falling from a ladder is also a risk. If you don’t feel comfortable with the tools or methods involved in this installation, then contact a qualified contractor for help — Sweetwater is not responsible for any damage or injury resulting from this installation procedure.
- Foam Tiles Are Easy
- Installing Mounting Points on Your Ceiling for Heavier Panels
- Installing Attachment Points on Your Acoustic Treatment
- Hanging Your Acoustic Treatment
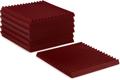
Foam Tiles Are Easy
If you’re only using a few foam tiles, like these Auralex Studiofoam Wedges, for absorption above your mix space, then you probably don’t even need any hardware. Acquire some T-shaped carpet pins (sometimes called “upholstery pins”), and you’ll be able to push them through your foam directly into your ceiling. The T-shaped end is enough to hold the panel, and because these foam panels are so lightweight, you won’t have to worry about them falling out. Note that using simple pushpins won’t allow you to create much space behind the panel (creating an air gap behind the tiles will improve the performance of your treatment), but it will still give you a good amount of control over high-frequency reflections at your mix position.
Installing Mounting Points on Your Ceiling for Heavier Panels
Mark with the pencil where you intend to install your picture-hook drywall anchors — you only need two mounting points per treatment panel.
Drill holes using an appropriately sized drill bit for the drywall anchors — the drywall anchor packaging should provide guidance on the best bit size to use. Make sure to use drywall anchors that are rated for the weight of the panels you’ll be installing.
Follow the instructions for installing the drywall anchors — usually, you’ll just compress the anchor, put it in the hole you drilled, use a small plastic plunger to engage the anchor, and then secure it with a Phillips-head screw. Wear safety glasses, as dust will be coming down as you drill. It’s also a good idea to cover any electronic gear and instruments with plastic sheeting. Drywall dust will get everywhere.
Installing Attachment Points on Your Acoustic Treatment
Different types of acoustic treatment will require different attachment methods.
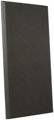
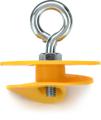
For fiberglass absorption panels, like these Auralex ProPanel panels, the simplest attachment solution is the Auralex ProPanel Cloud ceiling anchor. This anchor screws directly into your fiberglass panel, giving you a sturdy metal ring as an attachment point. If you attach one at each corner and run picture-hanging wire between the corners on each end (making sure they’re the same length so the panel hangs evenly), then you’ll only need to use two drywall anchors to hang the panel instead of four.
For DIY absorption panels made with a lightweight wood frame and filled with insulation material, you can simply use a picture-hanging kit that includes small D-ring attachments. Screw these into the corners of your DIY panels. Then, run picture-hanging wire between the D rings at each end.
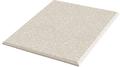
For acoustic diffusers, such as this Auralex T’Fusor 4-pack, you can use the same method as for DIY absorption panels — install D-ring picture hangers at each corner and add picture-hanging wire between the corners at each end.
Hanging Your Acoustic Treatment
Whatever type of acoustic treatment solution you’re hanging from the ceiling, our use of picture-hook drywall anchors and picture-hanging wire makes it simple. Note that you can determine how far your treatment will be spaced from the ceiling by adjusting how much picture-hanging wire you use — even an air gap of only an inch or two will improve the performance of your panels. Place each picture-hanging wire into the picture-hook drywall anchors you’ve installed, and adjust the panel until it hangs straight. Once it’s in the desired position, you can press down a little on the picture-hanging wire to give it a bit of memory so that it seats itself in the picture hook better.
Need More Help? Give Us a Call
If you’d like some specific, personal advice for your acoustic treatment project, then the experts at Sweetwater are always happy to give some advice. Call your Sweetwater Sales Engineer at (800) 222-4700.