You’re finally happy with the sound coming from your guitar amp, now it’s time to mic it up and send it back through your in-ear monitors so you can hear it onstage. Somehow, though, from your amp to your in-ears your tone has morphed from perfection to a jar full of bees.
Capturing the sound and feel of your guitar amp through a microphone and making it work with in-ear monitors has a particular set of challenges. A microphone has its own sonic imprint and it’s placed fairly close to the speaker, where you’d never physically put your ear. Then the sound the microphone interprets goes through cables, connectors, components, and finally comes through a tiny set of speakers — with their own flavor — placed right next to your eardrums.
Compare that with experience of standing a few feet back and up from your amp, especially if your amp is not at eye level. You hear not only the sound from the front of the speaker, but the sound from the back as well. Add to that the cabinet resonance; the room’s own tone and reverb; and the slight softening and delay of the amp’s initial attack caused simply by the distance of the amp to your ears. Physics can be your friend – or your enemy.
Here are seven tips to help you bridge the gap between in-room and in-ear listening experiences.
1) Mic Choice
Think of mics like any other part of your guitar rig; tone tools that can enhance the sound you’re trying to achieve. Since every mic has its own sound, each one will perceive and translate the sound of your amp differently. Experimenting with and understanding those differences will open up a lot of options.
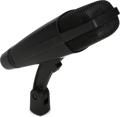
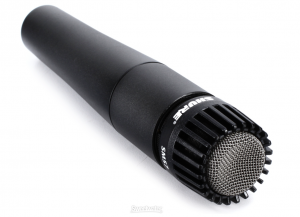
Dynamic mics are the most obvious choice for guitar amps because they’re durable and can handle high SPLs. The Shure SM57, Telefunken M81, Sennheiser MD 421, and e609 are go-to dynamics.
The AKG C414 and the Audio-Technica AT4047/SV are great condenser mic choices. The Royer R-121 is an example of a ribbon mic that’s perfect for guitar amps. Using more than one mic can yield great results, too. My favorite live combination is the M81 and AT4047. The 4047 has crisp, clear top-end and huge low-end, and the M81 smoothly fills in the mid punch.
2) Mic Placement
A good starting place with a dynamic mic is to place it halfway between the cone and the edge of the speaker, almost touching the grille, directly on axis. Experiment with that idea by moving the mic fractions of an inch in any direction and really listening to how the sound changes. Although distance miking isn’t really practical in a live setting, even backing the mic off an inch or so will make a difference in the depth of the tone you capture. Since in-ear monitors reside so close to your eardrums, every detail is that much more apparent.
If you’re using more than one mic on the same source, get the phase correct between the mics by making sure their capsules are exactly the same distance from the speaker. That way, the mics “hear” the speaker at the same time and all frequencies are reinforced rather than canceled. The other option is to use the delay compensation feature on your mixing console to time align your mics. If you choose this option, play your guitar and listen on your in-ears while someone else is sweeping the delay time slowly. You’ll know the sweet spot when you hear it.

In the above photo, I used console delay-compensation to time align the 4047 and 421. That was after I plugged in the 421, of course!
3) Isolation
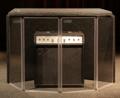
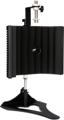
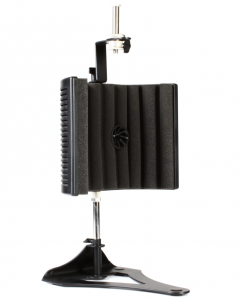
Unintentional bleed into your guitar mic from other instruments can definitely be a problem. If you’re on a tight stage, try close miking with a cardioid or hypercardioid-pattern mic. You may also find that some sort of isolation tool is helpful. The sE electronics guitarF, Auralex MudGuard, and ClearSonic AmpPac 11 offer different ways to isolate and help control the amount of bleed that gets into the mic.
You can also work with what you have available. Recently on tour, I borrowed a large, 20-space, amp-rack lid from the sound company, flipped it on its side and put my 2×12″, closed-back speaker cabinet in it. I placed it at the back of the lid with the speakers facing in, creating a small isolation chamber lined with foam. I leaned a flat lid from another rack on the back of the cabinet and used black stage draping to cover it all. The height of the lid was perfect and the three feet or so of space in front of the speakers let them breathe but kept the sound contained. This is good not only for keeping the guitar sound isolated from other instruments — and vice-versa — but it also puts a tiny bit of reflected sound back into the mic, which creates ambience and depth.
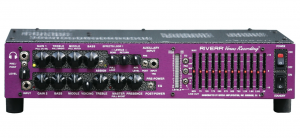
If you need total silence from your amp, using a dummy load and a speaker simulator will allow you to use your regular rig, minus the mic and speaker cabinet. The Mesa/Boogie Cabclone, Rivera RockCrusher, and Radial Headload are three different ways to accomplish this. There are also amplifiers with built-in direct outputs that can plug straight into a live sound console — no speaker required — such as the Rivera Venus Recording and the Hughes & Kettner Tubemeister family.
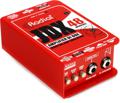
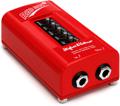
I’ve also used a direct, cabinet-simulated sound mixed along with my miked guitar sound. This technique adds depth, plus the direct sound has more immediate attack, which allows the guitar to cut through the mix better. Try either the Radial JDX 48 or H&K Redbox, both of which are time-tested and will give excellent results.
4) Signal Path
Always start with flat EQ (no boost or cut) on the console and no plug-ins or effects. Also, make sure your gain staging is correct through the entire signal path. Over or under driving the input of the console, in-ears transmitter or receiver, outboard effects, or anything else will most likely give you a sound you don’t want. Do as little as possible at the console to create your guitar sound; get it right before it gets there by fixing it at the source. The integrity of every connection and cable makes a huge difference as well. Signal won’t flow cleanly through corroded or half-soldered connectors. Also, make sure any faders and knobs are clean and properly functioning, free of weird crackles, hum, and hiss. Any of these anomalies will be magnified under the microscope of your in-ears.
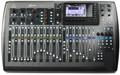
5) Quality Gear
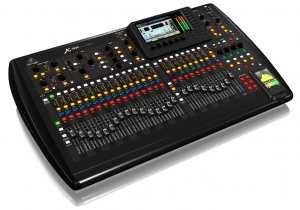
Use the best quality gear you can afford. Cables, snakes, and connectors are the easiest upgrades and definitely can make a difference. However, from my own personal experience, I can tell you that the mixing console makes a huge difference. When the group I toured with first made the switch from monitor wedges to in-ears, we had a monitor console that was just fine for wedges but awful for in-ears. The pronounced upper-mids that made the wedges cut through was very unpleasant with in-ears. This was nothing that could be EQed out, it was simply the inherent sound of the channel strips in the console. Every console upgrade we did made the entire sound exponentially better, from the individual sound of each instrument and voice to the imaging and separation of the whole mix. Whether you have a separate monitor console or not, a better console will give a better in-ear experience. The Avid Venue D-Show Profile has a ton of features and is definitely road-tested, lots of pro sound companies use it. The Behringer X-32 is a new-comer with rave reviews that falls into a different price range.
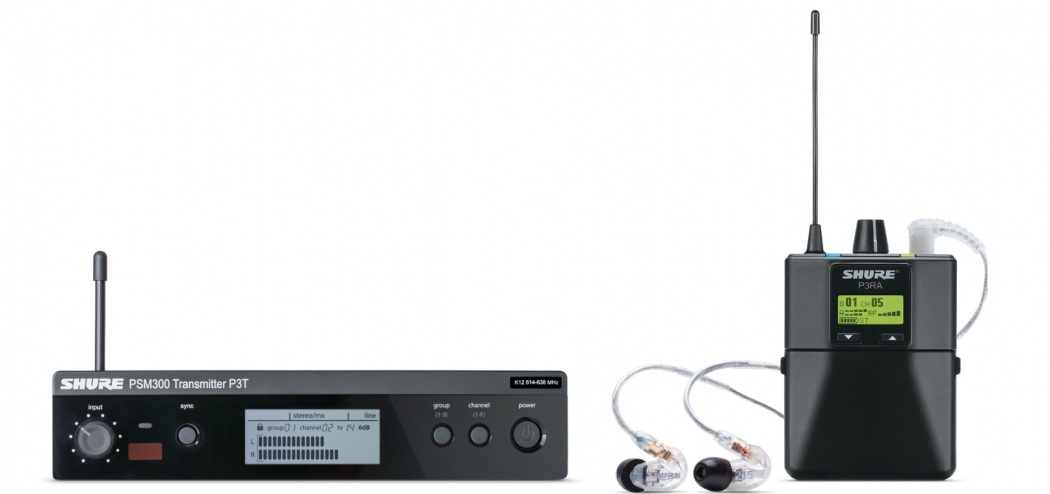
In-ear transmitters and receivers are a crucial element in the signal path as well. Just like the console, they inform the sound so quality is critical. I’ve had great luck on tour with the Sennheiser 2000-series transmitters and receivers. They provide transparent sound, consistent performance, and clean wireless signal. Depending on the city you’re in you may have to search for open wireless channels, but even in my extensive travels there was always wireless bandwidth available.
6) Multi-Driver Monitors
I got my first set of custom in-ears in 1997 when the technology was still in its infancy; my original pair featured single drivers. As the designs and technology advanced to dual- and triple-driver systems, the sound improved immensely. The electric guitar lives in the midrange frequency spectrum and having an driver (or multiple extra drivers in 4- and 5-way in-ears) specifically dedicated to mids made the guitar come to life. My personal in-ear experience was instantly upgraded!
We’re in a Golden Age for in-ears. The technology keeps improving the sound quality and performance, and the price continues to drop. Take advantage of this and get the best monitors you can afford. Especially as a guitarist, a multi-driver monitor will make your in-ear life much easier. I prefer custom-fitted molds because they offer the best isolation but standard molds work very well. Some performers prefer sound leakage because it allows them to hear the stage, PA, and audience; it feels closer to performing with monitor wedges since sound is coming from multiple sources at different distances.
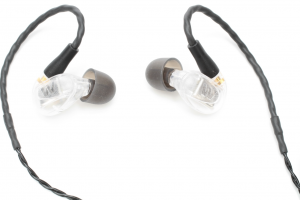
I’ve always used and loved Westone products. In their current line-up, the UM Pro 50s have five drivers and the UM Pro 30 and UM Pro 20 are triple- and dual-driver monitors respectively. There are lots of other great monitors available, such as the four-driver Shure SE846, and more.
7) Amp Tone
If you’ve tried the previous suggestions and your in-ear guitar sound still isn’t right, you might want to take a step back. Take a critical listen to your guitar sound in the context of the other instruments and voices. Consider the style of music and the role the guitar plays; listen to your band as a whole and think big picture. Going from monitor wedges to in-ears helps you listen more objectively because you can manage the volume levels and instrument blend easier. When you feel confident about the way you fit in with the rest of the band sonically, the other steps I’ve outlined will fall into place easier.
As a guitarist, using in-ears can help you play better and groove tighter. You can control how much you hear of yourself and everyone else instead of trying to manage your mix while searching for the sweet spot of your amp. Not to mention, if you watch the volume levels, in-ears can save your hearing. That in turn can help you make better music over a longer period of time, which is more fun for you and everyone else. I hope these tips help you achieve a great in-ear experience so you can get in the zone and make great music!